
Related Manuals for Pulsar PTG12205BM


Summary of Contents for Pulsar PTG12205BM
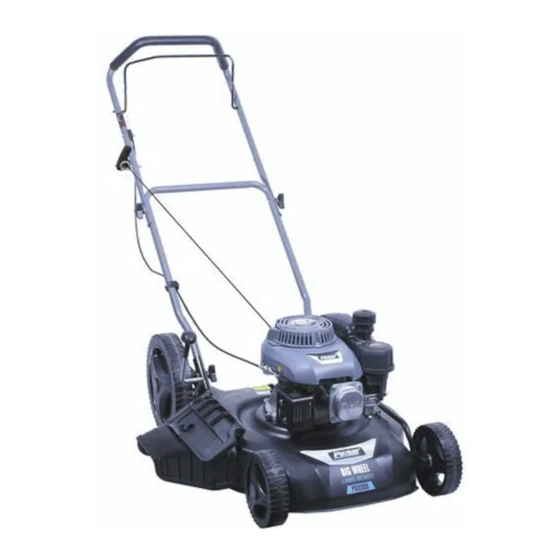
- Page 1 Model: PTG12205BM Gasoline Powered Lawn Mower OPERATOR’S MANUAL support@pulsar-products.com...
- Page 2 You may contact Pulsar directly at 1-866-591-8921 for product and accessory information and help finding a dealer. To register your product please register online at: pulsar-products.com Imp- ortant Warning WARNING Propsition 65 Warning The engine exhaust from this product contains chemicals known to the State of California to cause cancer, birth defects, or other reproductive harm.
- Page 3 • Do not operate this machine while under the influence of alcohol or drugs. gasoline-powered WARNING Uneven terrain could cause a slip or fall resulting in severe injury. Poor footing could cause a slip or fall. help ensure the engine Disconnect the spark plug wire and ground the center electrode to a metal part of the engine.
-
Page 4: Product Specification
Product Specification Component Specification Rated Speed 2800RPM Displacement 150cc Cutting Width 20" Height Adjustment 1"- 3" Wheels 7" Front 11" Rear 50.9 lbs Weight Figure 1 Safety & Instruction Decals 2.Attaching Wheels (See Figure 2) Important: Safety & instruction decals are Parts needed - 2 front wheels (7"), 2 rear •... -
Page 5: Product Overview
Operation the dipstick. (Figure 6) Attachments/Accessories A selection of Pulsar approved attachments and accessories are available for use with the machine to Enhance and expand its capabilities. Contact your Authorized Service Center or Distributor 1-866-591-8921. -
Page 6: Cutting Height Adjustment
2. Hold the blade control bar (Figure 8) against the Cutting Height Adjustment handle. WARNING Adjusting the cutting height may bring you into contact with the moving blade, causing serious injury. • Stop the engine and wait for all the moving parts to stop. -
Page 7: Mulching The Clippings
Mulching the Clippings • Alternate the mowing direction. This helps disperse Your mower comes mulch ready. If you have a grass the clippings over the lawn for even fertilization. catcher please remove it before mulching. • If the finished lawn is unsatisfactory, try one or more of the following. - Page 8 Spark Plug Maintenance 1. Once the engine has cooled, remove the spark plug wire. 2. Remove the spark plug using a spark plug wrench. 3. Clean the spark plug with a wire brush (not supplied). 4. Using a feeler gauge set the gap to 0.75mm. 5.
-
Page 9: Replacing The Air Filter
Replacing the Air Filter Service Interval: Every 50 Hours 1.Unlock the latch (1) and pull upward to open the air filter compartment (2). (Fig.12) (Figure 15) 3. Tip the mower onto its side, with the dipstick down, to drain the used oil out through the oil fill tube.(Figure 16) (Figure 12) 2. - Page 10 7. Install new blade with all mounting hardware; tighten blade bolt by turning clockwise. WARNING Always add fuel atabilizer to the fuel as directed by the fuel stabilizer manufacturer. Remove spark plug and spray a light fog of penetrating oil, such as WD-40 into the spark plug hole; Then pull the starter rope……..
-
Page 11: Manual Del Operador
Modelo: PTG12205BM Cortacésped Propulsado por Gasolina MANUAL DEL OPERADOR support@pulsar-products.com... -
Page 12: Símbolo De Alerta De Seguridad
Leer y comprender el contenido de este manual antes de Arrancar el motor. Puede ponerse en contacto con Pulsar directamente en 866-591-8921 para obtener información sobre productos y El símbolo de alerta de seguridad (Figura 1) se usa para accesorios, ayudar a encontrar un distribuidor o para registrar alertarle a posibles peligros de lesiones personales. - Page 13 • Nunca guarde la máquina o el bote de combustible donde • No opere esta máquina mientras esté bajo la influencia haya una llama abierta, una chispa o una luz del piloto como de alcohol o drogas. en los calentadores de agua o en los otros aparatos. •...
-
Page 14: Especificación Del Producto
Especificación del Producto Componente Especificación Velocidad Nominal 2800RPM Desplazamiento 150cc Recorte de Anchura 20" Ajuste de Altura 1"- 3" Ruedas 7" Delanteras 11" Traseras Peso 50.9 lbs Figura 1 Calcomanías de Seguridad y Instrucciones 2. Instalación de Ruedas (Figura 2) Importante: Las calcomanías Piezas necesarias: 2 Ruedas delanteras (7 "), 2... -
Page 15: Descripción Del Producto
1.Quite la varilla de aceite, límpiela, y instale la varilla Funcionamiento de aceite. (Figura 6) Aditamentos y Accesorios Una selección de aditamentos aprobados por Pulsar y accesorios están disponibles para su uso con la máquina para mejorar y expandir sus capacidades. Comuníquese con su centro de servicio autorizado de o con el distribuidor 1-866-591-8921. -
Page 16: Ajuste De La Altura De Corte
Ajuste de la Altura de Corte 2. Sostenga la barra de control de la lámina (Figura 8) contra el mango. ADVERTENCIA El ajuste de la altura cortante le puede traer en el contacto con la lámina móvil, causando lesiones graves •... -
Page 17: Consejos De Funcionamiento
• Alterne la dirección de segado. Esto ayuda a dispersar ADVERTENCIA los recortes sobre el césped para incluso la fertilización. Un colector de pasto usado podría permitir que • Si el césped acabado no es satisfactorio, pruebe uno o pequeñas piedras y otros desechos similares sean más de lo siguiente. -
Page 18: Mantenimiento De La Bujía
Mantenimiento de la Bujía 1. Espere que el motor se haya enfriado, despues retire la bujia. 2. Retire la bujía con una llave de bujías. 3. Limpie la bujía con un cepillo de alambre (no incluido). 4. Usando un calibre, ajuste el espacio a 0.75mm. 5. -
Page 19: Sustitución Del Filtro De Aire
Sustitución del Filtro de Aire Intervalo de Servicio: Cada 50 horas 1. Abre el compartimento del filtro de aire (1) y estirelo hacia arriba para abrir (2). (Fig. 12). (Figure 15) 3. Incline la podadora de costado, con la varilla de medición hacia abajo, para drenar el aceite usado a (Figure 12) través del tubo de llenado de aceite. -
Page 20: Limpieza Del Motor
7. Instale la nueva navaja (girar el perno de la navaja en el 2. Cuando no salgan más recortes, apague la agua y sentido de las agujas del reloj) mueve el cortacésped a un área seca. Y toda la tornillería de montaje. (Figura16). 3.
Need help?
Do you have a question about the PTG12205BM and is the answer not in the manual?
Questions and answers