
Related Manuals for Quincy QSV 2200

Summary of Contents for Quincy QSV 2200
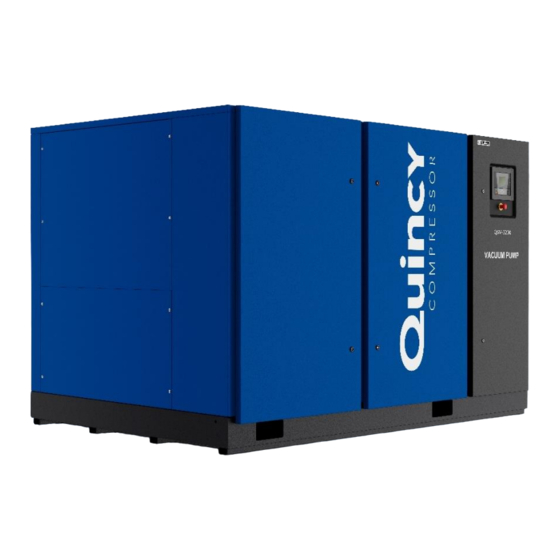
- Page 1 Quincy Oil-sealed rotary screw vacuum pumps QSV 2200, QSV 2700, QSV 3200 Instruction Manual...
- Page 3 Quincy Oil-sealed rotary screw vacuum pumps QSV 2200, QSV 2700, QSV 3200 Original instructions Instruction Book Original instructions • Copyright, Quincy Compressors, USA. Any unauthorized use or copying of the contents or any part thereof is prohibited. This applies in particular to trademarks, model denominations, part numbers and drawings.
- Page 4 This page intentionally left blank...
-
Page 5: Table Of Contents
Programmable settings ..........................59 Installation ..............................61 Dimension drawings ..........................61 Installation proposal ..........................62 Electrical connections ..........................66 Pictographs .............................. 69 Options ............................... 70 Energy recovery unit ..........................70 Energy recovery systems ......................... 71 Operation ..............................72 Quincy Vacuum Pump-QSV Series... - Page 6 Electrical cable size ..........................107 Reference condition and limitations ....................... 112 Vacuum pump data ..........................112 Technical data Airlogic controller ......................116 Instructions for use ..........................117 Guidelines for inspection ........................118 Declaration of conformity ........................119 Quincy Vacuum Pump-QSV Series...
-
Page 7: Safety Precautions
If the machine is equipped with an automatic restart after voltage failure function and if this function is active, be aware that the machine will restart automatically when the power is restored if it was running when the power was interrupted! Quincy Vacuum Pump-QSV Series... -
Page 8: Safety Precautions During Installation
A lockable power isolating switch must be installed near the pump. 11. On machines with automatic start/stop system or if the automatic restart function after voltage failure is Quincy Vacuum Pump-QSV Series... -
Page 9: Safety Precautions During Operation
16. Any vacuum pump placed in an application with inlet gas stream temperatures above the published maximum temperature should be approved by Quincy prior to start-up. 17. For water-cooled machines, the cooling water system installed outside the machine has to be protected by a safety device with set pressure according to the maximum cooling water inlet pressure. -
Page 10: Safety Precautions During Maintenance Or Repair
To this end, a suitable notice shall be affixed to the remote start equipment. 7. Before removing any component, effectively isolate the machine from all sources of under- and/or Quincy Vacuum Pump-QSV Series... - Page 11 These precautions apply to machinery processing or consuming air or inert gas. Processing of any other gas requires additional safety precautions typical to the application which are not included herein. Some precautions are general and cover several machine types and equipment; hence some statements may not apply to your machine. Quincy Vacuum Pump-QSV Series...
-
Page 12: General Description
There are 2 common but different ways to denote flow rate in vacuum. The first one is based on the displacement or volumetric flow rate and the second one is based on the throughput or mass flow rate. Quincy vacuum pumps use volumetric flow rate to denote performance, the unit being Am³/hr. Displacement/volumetric flow rate... -
Page 13: Introduction
Introduction The QSV 2200 up to QSV 3200 are single-stage, oil-sealed screw vacuum pumps driven by an electric motor. The vacuum pumps are controlled by the Quincy Airlogic Graphic regulator (C). - Page 14 Section II - General description Open view front Open view back Quincy Vacuum Pump-QSV Series...
- Page 15 Name Oil cooler Element Airlogic Graphic controller Drive motor Oil separator tank Emergency stop button Electric cabinet Vacuum control valve Inlet connection Discharge connection Cable entry Air intake filter Oil filter Electronic thermostatic valve Cooling fan Quincy Vacuum Pump-QSV Series...
-
Page 16: Flow Diagram
Section II - General description Flow diagram Flow diagram of air cooler version Flow diagram of water cooler version Quincy Vacuum Pump-QSV Series... - Page 17 (Cw). The filtered oil flows into the vacuum pump element. Cooling The cooling system has an oil cooler (Co). The variable speed fan sucks air over the cooler. The rotational speed of the fan is depending on the operating conditions according to a specific algorithm. Quincy Vacuum Pump-QSV Series...
-
Page 18: Condensate System
If the vacuum pressure decreases and the motor operates at minimum speed, the regulator stops the motor. When the motor is stopped automatically and the vacuum pressure comes to the set-point, the regulator starts the motor again. Quincy Vacuum Pump-QSV Series... -
Page 19: Electrical System
Electrical system Electric components The electrical system has following components: Electrical cabinet (typical example) Reference Description Transformer Circuit breaker Contactor Circuit breaker Frequency converter Electrical diagrams You can find the complete electrical diagram inside the electric cabinet. Quincy Vacuum Pump-QSV Series... -
Page 20: Airlogic Graphic Controller
Several sensors are provided on the vacuum pump. If one of the measurement succeeds the programmed shut down level, the vacuum pump will be stopped. This will be indicated on display (1) and general alarm LED(2)will blink. Remedy the trouble and reset the message. See also the Inputs menu. Quincy Vacuum Pump-QSV Series... -
Page 21: Control Panel
Consult the supplier Customer Center. CAUTION! If activated and provided the controller was in the automatic operation mode, the vacuum pump will automatically restart if the supply voltage to the module is restored. Control panel Airlogic controller Quincy Vacuum Pump-QSV Series... -
Page 22: Icons Used
When the vacuum pump is stopped, the icon stands still. Stopped/Running When the vacuum pump is running, the icon is rotating. Motor stopped Running Purge and Intermediate states Vacuum pump status Running Vacuum Control Local start/stop Remote start/stop Machine control mode Network control Quincy Vacuum Pump-QSV Series... - Page 23 Active protection functions Warning Service required Service Value lines display icon Main screen display Chart display icon No communication / network problem General icons Not valid Menu icons Icon Description Inputs Outputs Alarms (Warnings, shutdowns) Counters Quincy Vacuum Pump-QSV Series...
- Page 24 Section III - Airlogic Graphic controller Test Settings Converter(s) Service Saved data Access key / User password Input icons Icon Description Pressure Temperature Digital input Special protection Quincy Vacuum Pump-QSV Series...
-
Page 25: Main Screen
Section III - Airlogic Graphic controller System icons Icon Description Vacuum pump element Frequency converter Motor Network problem General alarm Navigation arrow Icon Description Down Main screen Control panel Quincy Vacuum Pump-QSV Series... - Page 26 Vacuum control, shutdown,... (text varies upon the vacuum pumps actual (iii) condition) (iv) Menu ES,...(text varies upon the vacuum pumps actual condition) Typical Main screen (4 value lines) Inlet pressure (ii) Flow (iii) Off, Shutdown,... (text varies upon the vacuum pumps actual condition) Quincy Vacuum Pump-QSV Series...
- Page 27 Escape key. Chart views Instead of viewing values, it is also possible to view a graph of one of the input signals (see section Inputs menu) in function of the time. Quincy Vacuum Pump-QSV Series...
-
Page 28: Calling Up Menus
Icons used) and press the Enter key. A screen similar to the one below opens: Select the layout required and press the Enter key. See also section Inputs menu. Calling up menus Control panel Scroll keys Enter key Escape key Quincy Vacuum Pump-QSV Series... - Page 29 (Regulation) icon is selected. The status bar shows the name of the menu that corresponds with the selected icon. Use the Scroll keys to select an icon. Press the Escape key to return to the Main screen. Quincy Vacuum Pump-QSV Series...
-
Page 30: Inputs Menu
Move the cursor to the action button Menu and press the enter key, following screen appears: Menu (ii) Regulation Using the scroll keys, move the cursor to the inputs icon (see above, section Menu icon) Press the enter key, a screen similar to the one below appears: Quincy Vacuum Pump-QSV Series... - Page 31 Any analog input can be selected. Selecting another input signal as main chart signal With the Modify button active (light grey background in above screen), press the Enter button on the controller. A screen similar to the one below appears: Quincy Vacuum Pump-QSV Series...
- Page 32 Press Enter again to remove this input from the chart. Another confirmation pop-up opens: Select Yes to remove or No to quit the current action. In a similar way, another input signal can be highlighted and selected as Main Chart signal: Quincy Vacuum Pump-QSV Series...
-
Page 33: Outputs Menu
To call up information regarding the actually measured data and the status of some inputs such as the motor over load protection. Procedure Starting from the Main screen (see Main screen): Move the cursor to the action button Menu and press the enter key (2),following screen appears: Quincy Vacuum Pump-QSV Series... - Page 34 The screen shows a list of all out put switch their corresponding icons and readings. If an input is in warning or shut down, the original icon is replaced by the warning or shut down icon respectively. Quincy Vacuum Pump-QSV Series...
-
Page 35: Counters
The number of hours that the controller has been powered up Fan starts Emergency stops Procedure Starting from the Main screen (see Main screen): Move the cursor to the action button Menu and press the enter key (2),following screen appears: Quincy Vacuum Pump-QSV Series... -
Page 36: Control Mode Selection
VSD 1-20 % rpm in % (the percentage of the time during which the motor speed was between 1 and 20 %) The screen shows a list of all counters with their actual readings. Control mode selection Scroll keys Enter key Escape key Quincy Vacuum Pump-QSV Series... - Page 37 After selecting the required regulation mode, press the enter button on the controller to confirm your selection. The new setting is now visible on the main screen. See section Icons used for the meaning of the icons. Quincy Vacuum Pump-QSV Series...
-
Page 38: Service Menu
Move the cursor to the action button Menu and press the Enter key. Following screen appears: Using the Scroll keys, move the cursor to the Service icon (see above, section Menu icon). Press the Enter key. Following screen appears: Quincy Vacuum Pump-QSV Series... - Page 39 This means that the controller will launch a service warning when either 4000 running hours or 8760 real hours are reached, whichever comes first. Note that the real time hours counter keeps counting, also when the controller is not powered. Quincy Vacuum Pump-QSV Series...
- Page 40 Airlogic controller is for normal application and needs to be changed when running in medium or harsh applications). To do so, use the Scroll keys to select the value to be modified. A screen similar to the one below appears: Press the Enter key. Following screen appears: Quincy Vacuum Pump-QSV Series...
- Page 41 The date at the top is the most recent service action. To see the details of a completed service action (e.g. Service level, Running hours or Real time hours), use the Scroll keys to select the desired action and press the Enter key. Quincy Vacuum Pump-QSV Series...
-
Page 42: Modifying The Setpoint
On vacuum pumps with a frequency converter driven main motor, it is possible to program two different setpoints. This menu is also used to select the active setpoint. Procedure Starting from the Main screen, Highlight the action key Menu using the Scroll keys and press the Enter key. Following screen appears: Quincy Vacuum Pump-QSV Series... - Page 43 To modify the settings, move the cursor to the action button Modify and press the Enter key. Following screen appears: The first line of the screen is highlighted. Use the Scroll keys (1) to highlight the setting to be modified and press the Enter key (2). Following screen appears: Quincy Vacuum Pump-QSV Series...
-
Page 44: Event History Menu
Both settings (Indirect stop level and direct stop level) are programmable, see section Programmable settings. 3.12 Event history menu Control panel Scroll keys Enter key Escape key Menu icon, Event History Function To call up the last shut-down and last emergency stop data. Quincy Vacuum Pump-QSV Series... -
Page 45: Modifying General Settings
Scroll through the items to select the desired shut-down or emergency stop event. Press the Enter key to find the date, time and other data reflecting the status of the vacuum pump when that shut-down or emergency stop occurred. 3.13 Modifying general settings Control panel Quincy Vacuum Pump-QSV Series... - Page 46 Each icon covers one or more items, such as Access level Elements Converter(s) Motor/Starter General Automatic restart after voltage failure (ARAVF) Quincy Vacuum Pump-QSV Series...
- Page 47 In the setting menu, it is possible to adjust: Runtime at minimum pressure Gas Ballast (Automatic - Manual) For Humid version pumps: Maximum Pre Purge Time Maximum Pre Purge Time during Operation Post Purge Time Manual Purge Time Quincy Vacuum Pump-QSV Series...
-
Page 48: Info Menu
Move the cursor to the action button Menu and press the Enter key. Following screen appears: Using the Scroll keys, move the cursor to the Info icon (see above, section Menu icon). Press the Enter key. The Supplier internet address appears on the screen. Quincy Vacuum Pump-QSV Series... -
Page 49: Week Timer Menu
Example: Start Vacuum pump: 5.00 AM, Pressure setpoint 2: 5.01 AM (or later). Procedure Starting from the Main screen (see Main screen), Move the cursor to the action button Menu and press the Enter key. Use the Scroll buttons to select the Timer icon. Quincy Vacuum Pump-QSV Series... - Page 50 Programming week schemes Select Week action schemes and press Enter. A new window opens. The first item in the list is highlighted in red. Press the Enter key on the controller to modify Week Action Scheme 1. Quincy Vacuum Pump-QSV Series...
- Page 51 A new window opens. The Modify action button is selected. Press the enter button on the controller to create an action. Monday Modify A new pop-up window opens. Select an action from this list by using the Scroll keys on the controller. When ready press the Enter key to confirm. Quincy Vacuum Pump-QSV Series...
- Page 52 Start Save Modify A pop-up window opens. Use the ↓ or ↑ key of Scroll keys to modify the values of the hours. Use the ← or → Scroll keys to go to the minutes. Quincy Vacuum Pump-QSV Series...
- Page 53 A new pop-up window opens. Use the Scroll keys on the controller to select the correct actions. Press the Enter key to confirm. Monday Are you sure? Save Modify Press the Escape key to leave this window. The action is shown below the day the action is planned. Quincy Vacuum Pump-QSV Series...
- Page 54 A week cycle is a sequence of 10 weeks. For each week in the cycle, one of the four programmed week schemes can be chosen. Select Week Cycle from the main Week Timer menu list. Week timer Week action schemes Week cycle Status Week timer inactive Remaining running time Quincy Vacuum Pump-QSV Series...
- Page 55 Week Action scheme 2 Week Action scheme 3 Modify Check the status of the Week Timer Use the Escape key on the controller to go back to the main Week Timer menu.Select the status of the Week Timer. Quincy Vacuum Pump-QSV Series...
- Page 56 A new window opens. Select Week 1 to set the Week Timer active. Week timer Week Week timer inactive Week 1 Press the Escape key on the controller to leave this window. The status shows that week 1 is active. Quincy Vacuum Pump-QSV Series...
- Page 57 This timer is used when the week timer is set and for certain reasons the Vacuum pump must continue working, for example, 1 hour, it can be set in this screen. This timer is prior to the Week Timer action. Week timer Week action schemes Remaining running time Quincy Vacuum Pump-QSV Series...
-
Page 58: User Password Menu
Move the cursor to Menu and press the Enter key (2). Following screen appears: Using the Scroll keys, select the Settings icon (see section Modifying general settings). Press the Enter key. Following screen appears: Quincy Vacuum Pump-QSV Series... -
Page 59: Programmable Settings
For specific data, see section Preventive Maintenance. Consult Supplier if a timer setting needs to be changed. The intervals must not exceed the nominal intervals and must coincide logically. See section Modifying general settings. Quincy Vacuum Pump-QSV Series... - Page 60 The settings for the Proportional band and integration time are determined by Proportional band and experiment. Altering these settings may damage the Vacuum pump. Consult integration time Supplier. Quincy Vacuum Pump-QSV Series...
-
Page 61: Installation
Section IV - Installation Installation Dimension drawings Quincy Vacuum Pump-QSV Series... -
Page 62: Installation Proposal
Section IV - Installation Installation proposal Quincy Vacuum Pump-QSV Series... - Page 63 Ventilation alternative : The fan capacity should match the vacuum pump- fan capacity at a pressure head equal to the pressure drop caused by cooling air ducts. Maximum allowable pressure drop in ducting before or after the vacuum pump = 30 Pa Quincy Vacuum Pump-QSV Series...
- Page 64 Instruction for inlet control valve pressure setting: When the inlet control valve is connected to the compressed air supply, the pressure on the manometer (1) shall be adjusted to 2bar(g) (29psi) via the pressure regulator of the inlet control valve. Quincy Vacuum Pump-QSV Series...
- Page 65 In this case, consult Quincy. Also, if operating above 1000 m (3300 ft), consult Quincy. Moving/lifting The vacuum pumps can be moved by a lift truck using the slots in the frame. Take care not to damage the bodywork during lifting or transport.
-
Page 66: Electrical Connections
WARNING! Working with machinery controlled by a frequency converter requires special safety precautions. These safety precautions depend on the kind of network used (TN, TT, IT system). Consult Quincy. NOTICE! Most vacuum pump are designed for use in TT/TN networks and are intended for industrial environments where the electrical supply is separated from the residential/commercial supply network. - Page 67 Section IV - Installation Service diagram Reference Designation Customer’s installation Vacuum pump motor Quincy Vacuum Pump-QSV Series...
- Page 68 Manual or automatic operation (K07) Warning condition (K08) Shut-down condition (K09) Maximum contact load: 10 A / 250 V AC. Stop the vacuum pump and switch off the voltage before connecting external equipment. Consult Quincy. Quincy Vacuum Pump-QSV Series...
-
Page 69: Pictographs
If the rotation direction is wrong, open the isolating switch in the voltage supply line and reverse two incoming electric lines Motor regreasing instruction Lifting instruction Warning, loaded spring Manual drain Water in Water out Motor rotation arrow Quincy Vacuum Pump-QSV Series... -
Page 70: Options
The Quincy energy recovery (ER) systems are designed to recover most of the above-mentioned heat by transforming it into warm or hot water without any adverse influence on the vacuum performance. The water can be used for diverse applications. -
Page 71: Energy Recovery Systems
For open, non-recirculation water circuits, the major problems usually encountered are related to deposit control, corrosion control and microbiological growth control. To minimize these problems, the water should meet a number of requirements. See section Cooling water requirements. If in any doubt, consult Quincy. Quincy Vacuum Pump-QSV Series... -
Page 72: Operation
The oil flows from the oil separator vessel (OT) via internal bypass, through the oil filter(s) (OF) back to vacuum pump element (E). All energy input is used to rapidly warm up the vacuum pump oil. No energy is recovered. Maximum energy recovery Quincy Vacuum Pump-QSV Series... -
Page 73: Maintenance
To clean the oil side, soak the heat exchanger in a degreasing solution. To remove scale formation in the water compartment, a proper descaling process should be applied. Consult Quincy. Quincy Vacuum Pump-QSV Series... -
Page 74: Cooling Water Requirement
Stainless steel with carbon steel Closed loop 7.5 - 9.3 7.5 - 9.3 and / or cast iron Stainless steel only 6 - 9.3 6 - 9.3 When the system contains Zn or Al, the pH must be < 8.5. Quincy Vacuum Pump-QSV Series... - Page 75 A : depends on the total solids concentration B : depends on the water temperature at the outlet of the heat exchanger C : depends on the calcium hardness (CaCO3) D : depends on the HCO3 concentration or M-alkalinity Quincy Vacuum Pump-QSV Series...
- Page 76 Disinfecting with chlorine is not done in closed systems, neither in energy recovery systems. A continuous level of 0.5 ppm should not be exceeded. For shock treatments, a maximum limit of 2 ppm for maximum 30 minutes/day applies. Quincy Vacuum Pump-QSV Series...
- Page 77 Large particles (size > 10 μm) should not be present as they can be filtered out. Small particles (< 0.5 μm) are not taken into account. For particles between 0.5 μm and 10 μm, the following limits apply: Quincy Vacuum Pump-QSV Series...
-
Page 78: Energy Recovery Data
Water side 15 bar (217 psi) Recoverable energy The recoverable energy can be calculated from: RECOVERED ENERGY (kW) = 4.2 x water flow (l/s) x water temperature rise (ºC) In the tables below, typical examples are given. Quincy Vacuum Pump-QSV Series... - Page 79 Section V - Options Recovery energy graph RECOVERED ENERGY in kW Delta T Water flow (I/min) in ºC Quincy Vacuum Pump-QSV Series...
-
Page 80: Operating Instructions
It is advised to install an isolating switch near the vacuum pump. • Check the process lines for the correct size to prevent high pressure drop and for cleanliness to protect the vacuum pump. Also check for leaks. Quincy Vacuum Pump-QSV Series... -
Page 81: Starting
• Take care that no dirt drops into the oil system. • Provide labels, warning the operator that: • The vacuum pump may automatically restart after voltage failure (if activated, consult Quincy). • The vacuum pump is automatically controlled and may be restarted automatically. -
Page 82: During Operation
Remove the oil filler plug (FC) and add oil until the level reaches the top of the oil sight glass. Fit and tighten the plug (FC). Unlock the emergency stop button (S3), select the STOP icon on the display and press reset before restarting. Quincy Vacuum Pump-QSV Series... -
Page 83: Taking Out Of Operation
Navigate to the Stop icon on the display by means of the navigation keys or scroll keys (12) and press the Select key. Press Reset. Do not use emergency stop button (S3) for normal stopping! Close the air inlet valve. Switch off the voltage. Quincy Vacuum Pump-QSV Series... -
Page 84: Maintenance
Service kits For overhauling or carrying out preventive maintenance, service kits are available (see section Service kits). Service contracts Quincy offers several types of service contracts, relieving you of all preventive maintenance work. Consult your Quincy Customer Center. General When servicing, replace all removed O-rings and washers. - Page 85 Check the silencer of the blow off valve, clean if necessary. (1) Depending on type of application (normal, medium, harsh) this needs to be done more frequently.Consult your Quincy Customer Center. Preventive Maintenance schedule programmed in the Airlogic for normal applications...
- Page 86 (see section Vacuum pump data). Exposure of the vacuum pump to external pollutants, operation at high humidity combined with low duty cycles or operation at higher temperatures may require a shorter service exchange interval. Contact Quincy if in doubt. NOTICE! Vacuum pumps with optional high water handling capability (humid version) are recommended for use with Quincy vacuum Synthetic fluid only.
-
Page 87: Oil Specification
Oil specification It is strongly recommended to use genuine Quincy vacuum Lubricants. They are the result of years of field experience and research. See section Preventive maintenance schedule for the advised replacement intervals and consult your Spare Parts list for part number information.. -
Page 88: Drive Motor
Quincy vacuum foodgrade Fluid Special oil, delivered as an option. Quincy’s vacuum Foodgrade Fluid is a unique high quality synthetic lubricant, specially created for oil sealed screw vacuum pumps that provide vacuum for the food industry. This lubricant keeps the vacuum pump in excellent condition. -
Page 89: Oil And Oil Filter Change
2. Take the free end of the oil drain tube and secure it into an oil waste can. 3. Turn the thermostatic valve to the correct position to drain the oil from the oil cooler by pressing down the button of the actuator and rotate the marker halfway the range. Quincy Vacuum Pump-QSV Series... - Page 90 6. Close the oil drain valve (Do1). 7. Open the drain valve (Do2). • Activate the hand drill to drain the element and outlet housing. • Collect all the oil in an oil waste can. • Close the drain valve (Do2). Quincy Vacuum Pump-QSV Series...
- Page 91 10. Drain the oil from water cooler if a water cooler is installed. 11. The oil collected in an oil waste can, deliver it to the local collection service. 12. Refit the vent plug after draining. Quincy Vacuum Pump-QSV Series...
-
Page 92: Coolers
Remove dirt from the coolers with a fibre brush. Brush in the direction of the cooling fins. Clean with an air jet in the reverse direction to normal flow. If it is necessary to wash the coolers with a cleaning agent, consult Quincy. Quincy Vacuum Pump-QSV Series... -
Page 93: Oil Separator Change
Make sure all separator elements are assembled in the correct position. An arrow is printed on the cover of the separator elements and the bottom of the shield; all arrows should be pointing in the same direction after assembly. Quincy Vacuum Pump-QSV Series... -
Page 94: Pressure Switch
Service kits For overhauling and for preventive maintenance, a wide range of service kits is available. Service kits comprise all parts required for servicing the component and offer the benefits of genuine Quincy parts while keeping the maintenance budget low. -
Page 95: Storage After Installation
7.11 Disposal of used material Used filters or any other used material (e.g., cleaning rags, machine parts, etc.) must be disposed of in an environmentally friendly and safe manner, and in line with the local recommendations and environmental legislation. Quincy Vacuum Pump-QSV Series... -
Page 96: Problem Solving
Air leakage in the inlet piping assembly and piping. Check sealing connections between components Low oil level Top-up oil The pump cannot reach ultimate pressure Oil contaminated Replace oil Solenoid-valve malfunctioning Replace valve Vacuum pump element out of Consult Quincy order Quincy Vacuum Pump-QSV Series... - Page 97 Vacuum pump element out of Consult Quincy order Converter fault codes If a problem is detected by the converter, a specific code (Main motor converter alarm) will appear on the graphic regulator display, together with a fault code. Quincy Vacuum Pump-QSV Series...
- Page 98 Typical display when the vacuum pump is stopped by a shutdown Shutdown Navigate to the Stop icon or to the Protections icon and press Enter. Protection General The display shows the problem (Main Motor Converter Alarm) and a fault code (31 in this case). Quincy Vacuum Pump-QSV Series...
- Page 99 Typical display, Main Motor Converter Alarm (1), Fault (2) Code (0x7130) and description (Motor over temperature (3)) in this case. Below table lists the most important error codes. If another code appears, please contact Quincy. Fault code Fault...
- Page 100 Drive Overload (oL2) Check inlet valve Check back pressure oil separator vessel Check drive train Check oil injection Overtorque Detection 1 (oL3) Check inlet valve Check back pressure oil separator vessel Check drive train Check oil injection Quincy Vacuum Pump-QSV Series...
- Page 101 Contact Quincy Control Fault (CF) Contact Quincy Zero-Servo Fault (SvE) Contact Quincy Option External Fault (EF0) Contact Quincy PID Feedback Loss (FbL) Contact Quincy Undertorque Detection 1 (UL3) Contact Quincy Undertorque Detection 2 (UL4) Contact Quincy Quincy Vacuum Pump-QSV Series...
- Page 102 Contact Quincy PLC Detection Error 2 (PE2) Contact Quincy DriveWorksEZ Fault (dWFL) Contact Quincy EEPROM Memory DriveWorksEZ Data Er (dWF1) Contact Quincy Output Voltage Detection Fault (voF) Contact Quincy Braking Resistor Transistor Fault (rF) Contact Quincy Braking Transistor Overload Fault (boL)
- Page 103 Contact Quincy Option Response Error (oFA06) Contact Quincy Option RAM Fault (oFA10) Contact Quincy Option Operation Mode Fault (SLMOD) (oFA11) Contact Quincy Drive Receive CRC Error (oFA12) Contact Quincy Drive Receive Frame Error (oFA13) Contact Quincy Quincy Vacuum Pump-QSV Series...
- Page 104 Comm. ID Error (oFb30) Contact Quincy Model Code Error (oFb31) Contact Quincy Sumcheck Error (oFb32) Contact Quincy Comm. option Timeout Waiting for Response Contact Quincy (oFb33) MEMOBUS Timeout (oFb34) Contact Quincy Drive Timeout Waiting for Response (oFb35) Contact Quincy Quincy Vacuum Pump-QSV Series...
- Page 105 Encoder Option AD Conversion Error (oFC50) Contact Quincy Encoder Option Analog Circuit Error (oFC51) Contact Quincy Encoder Communication Timeout (oFC52) Contact Quincy Encoder Communication Data Error (oFC53) Contact Quincy Encoder Error (oFC54) Contact Quincy Resolver Error (oFC55) Contact Quincy Quincy Vacuum Pump-QSV Series...
-
Page 106: Technical Data
The readings mentioned below are valid under the reference conditions (see section Reference conditions and limitations). Reference Reading Vacuum pressure Depends on the setpoint (desired net pressure). element outlet Depends on the vacuum pressure setpoint temperature Discharge Approx. 1020mbar(a) pressure Quincy Vacuum Pump-QSV Series... -
Page 107: Electrical Cable Size
118.4 QSV 2200 219.8 106.6 244.2 118.4 QSV 2200 CSA/UL 192.2 93.2 213.6 103.6 QSV 2200 87.9 106.6 97.7 118.4 QSV 2200 CSA/UL 76.9 93.2 85.4 103.6 QSV 2700 150.7 167.4 QSV 2700 IEC/CSA/UL 125.2 139.1 Quincy Vacuum Pump-QSV Series... - Page 108 60364-5-52 - electrical installations of buildings part 5 - selection and erection equipment and section 52 - current carrying capacities in wiring systems. The allowed currents are valid for PVC insulated cables with three loaded copper conductors (maximum conductor temperature 70 °C). Quincy Vacuum Pump-QSV Series...
- Page 109 Maximum allowed current in function of the ambient temperature for installation method B2 Installation method C according to table B.52.1. Single-core or multi-core cable on a wooden wall. Maximum allowed current in function of the ambient temperature for installation method C. Quincy Vacuum Pump-QSV Series...
- Page 110 3 x 70 mm² + 35 mm² cable. If method C is used, 50 mm² is sufficient. (35 mm² for method F) =>cable 3 x 50 mm² + 25 mm². Parallel supply cable (2 x 3 phases + PE - configuration (2)): I = (89 A + 10%)/2 = (89 x 1.1)/2 = 49 A Quincy Vacuum Pump-QSV Series...
- Page 111 Itot= 128 A, maximum ambient temperature is 45 °C, recommended fuse = 150 A. Single supply cables (3 phases + 1 PE - configuration (1)): I = 128 A + 25 % = 128 x 1.25 = 160 A Quincy Vacuum Pump-QSV Series...
-
Page 112: Reference Condition And Limitations
Maximum allowable inlet temperature ºF mbar(a) 1050 Maximum (absolute) inlet pressure 0.73 mbar(a) 1500 Maximum vessel pressure (mbar(g)) Vacuum pump data Reference condition NOTICE! All data specified below apply under reference conditions, see section Reference conditions and limitations. Quincy Vacuum Pump-QSV Series... - Page 113 Imp. GAL 18.7 cu. ft. Sound pressure level (according to ISO 2151 (2004)) dB(A) 83 (+/- 3 ) QSV 2200 (option high water handling capacity) Nominal motor power Maximum motor shaft speed 2900 Minimum motor shaft speed l/min Maximum cooling water flow...
- Page 114 Minimum motor shaft speed l/min Maximum cooling water flow l/min Minimum cooling water flow US GAL Oil capacity Imp. GAL 18.7 cu. ft. Sound pressure level (according to ISO 2151 (2004)) dB(A) 85 (+/- 3 ) Quincy Vacuum Pump-QSV Series...
- Page 115 Minimum motor shaft speed l/min Maximum cooling water flow l/min Minimum cooling water flow US GAL Oil capacity Imp. GAL 18.7 cu. ft. Sound pressure level (according to ISO 2151 (2004)) dB(A) 85 (+/- 3 ) Quincy Vacuum Pump-QSV Series...
-
Page 116: Technical Data Airlogic Controller
Short circuit protected to ground Input protection Not isolated Analog inputs 2(Graphic Regulator - p.n. 1900 5200 15..1900 Number of pressure inputs 5200 17) 5(Graphic Regulator - p.n. 1900 5200 15..1900 Number of temperature inputs 5200 17) Quincy Vacuum Pump-QSV Series... -
Page 117: Instructions For Use
Use only oil as specified by the manufacturer. This vessel has been designed and built to guarantee an operational lifetime in excess of 20 years. The vessel needs a yearly visual inspection. Quincy Vacuum Pump-QSV Series... -
Page 118: Guidelines For Inspection
The Declaration of Conformity / Declaration by the Manufacturer is part of the documentation that is supplied with this vacuum pump. Local legal requirements and/or use outside the limits and/or conditions as specified by the manufacturer may require other inspection periods as mentioned below. Quincy Vacuum Pump-QSV Series... -
Page 119: Declaration Of Conformity
Section XII – Declaration of conformity Declaration of conformity Quincy Vacuum Pump-QSV Series... - Page 120 Standard Terms and Conditions Quincy Compressor and Ortman Fluid Power Divisions LEGAL EFFECT: Except as expressly otherwise agreed to in writing by an authorized representative of Seller, the following terms and conditions shall apply to and form a part of this order and any additional and/or different terms of Buyer’s purchase order or other form of acceptance are rejected in advance and shall not become a part of this...
- Page 121 ENVIRONMENTAL AND OSHA REQUIREMENTS: At the time of shipment of the equipment from the factory, Quincy Compressor / Ortman Fluid Power will comply with the various Federal, State and local laws and regulations concerning occupational health and safety and pollution. However, in the installation and operation of the equipment and other matters over which the seller has no control, the Seller assumes no responsibility for compliance with those laws and regulations, whether by the way of indemnity, warranty or otherwise.
- Page 122 Notes Quincy Vacuum Pump-QSV Series...
- Page 124 www.quincycompressor.com...
Need help?
Do you have a question about the QSV 2200 and is the answer not in the manual?
Questions and answers