Purmo Unisenza Installation And User Manual
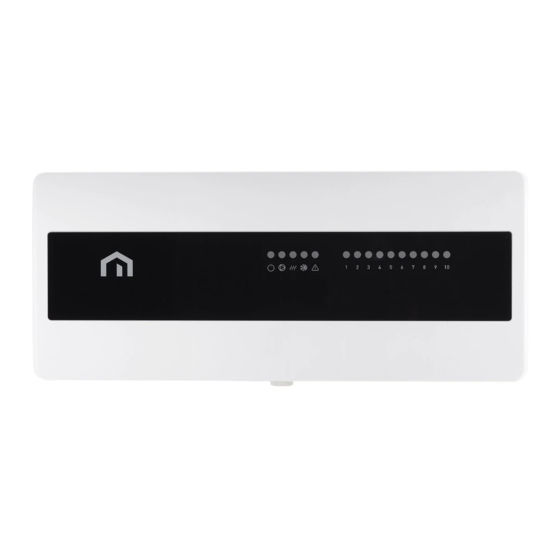
Wiring centre
Hide thumbs
Also See for Unisenza:
- Installation and user manual (28 pages) ,
- Installation and user manual (8 pages)
Table of Contents

Related Manuals for Purmo Unisenza


Summary of Contents for Purmo Unisenza
- Page 1 Installation and user manual Riscal./raffred. Boiler or HP Pump exercise Alarm function Heating and Boiler or HP Pump exercise Alarm Heat /Cool compatibility function Cooling compatibility function function Unisenza - Wiring Centre...
-
Page 3: Table Of Contents
Unisenza - Wiring Centre Installation and user manual Index SAFETY WARNING ........................................4 TECHNICAL SPECIFICATIONS .....................................4 REFERENCE STANDARDS ....................................4 LIST OF CONTENTS .........................................5 Wiring Center with DIN rail - (230 V) ................................5 Wiring Center with DIN rail - (24 V) ...................................5 Wiring Center without DIN rail - (230 V / 24 V) ............................6... -
Page 4: Safety Warning
Unisenza - Wiring Centre Installation and user manual SAFETY WARNING 3 REFERENCE STANDARDS During installation and operation of the device, it is neces- Conformity with EU directives: sary to comply with the following instructions: 2014/35/EU (LVD) 1) The device must be installed by a skilled person, in strict 2014/30/EU (EMCD) compliance with the connection diagrams. -
Page 5: List Of Contents
Unisenza - Wiring Centre Installation and user manual 4 LIST OF CONTENTS Wiring Center with DIN rail - (230 V) Wiring Centre - 1 Pcs DIN rail - 1 Pcs Grommet plug - 13 Pcs Cable (1.5 m) with Schuko plug - 1 Pcs... -
Page 6: Wiring Center Without Din Rail - (230 V / 24 V)
Unisenza - Wiring Centre Installation and user manual 4.3 Wiring Center without DIN rail - (230 V / 24 V) Wiring Centre - 1 Pcs Cable clamps - 2 Pcs Screws -18 Pcs Grommet plug - 13 Pcs 5 DIMENSIONS... -
Page 7: Installation
6 INSTALLATION Remove the protective film from the cover. To remove the front cover of the Purmo Unisenza Wiring Centre, turn the white screw (not remove it) on the bottom counter clockwise and pull the cover off. Remove only the plastic covers for the cables that are necessary for the installation. - Page 8 Unisenza - Wiring Centre Installation and user manual CLIK 1 2 3 4 5 Cut the grommet plug. Plug the cable in the grommet plug. 1 2 3 4 5 CLIK CLIK Use cable size 0,75 - 1,5 mm for solid core cable. For the cable supply cable use cable type H05VV-F 3x0,75mm The wires lenghtsshould be measured according to the distance of the terminals from the cable clamp.
-
Page 9: Main Wiring Diagram
Unisenza - Wiring Centre Installation and user manual 7 MAIN WIRING DIAGRAM 1 2 3 4 5 A = Fuse B = earth connector C = power supply terminal D = Pump terminal E = Generator terminal F = Changeover output terminal G = Changeover input terminal H = alarm input terminal... -
Page 10: Pump Terminals
Unisenza - Wiring Centre Installation and user manual Pump terminals Power supply terminals for the pump (D.): One Pump < 100 W 230 Vac Wiring Centre version 24 Vac Wiring Centre version 230 V 24V~ L N PE L: Live 230 Vac 50/60 Hz... - Page 11 Unisenza - Wiring Centre Installation and user manual More than one Pump > 100 W 230 Vac Wiring Centre version 230 V L N PE Live, Neutral and Earth supply (230 Vac 50/60 Hz) external from the wiring centre. Use a suitable relays and connect them as shown in the example of three pumps according to the version of the wiring center.
-
Page 12: Generator Terminals
Unisenza - Wiring Centre Installation and user manual Generator terminals Free contact terminals (E.: COM, NO) for the interlock of the generator (Boiler, heat pump…). Boiler - only heating Heat pump - only heating Changeover output terminals Free of voltage terminals (F.: COM, NO) digital output for the change over. -
Page 13: Alarm Terminals
Unisenza - Wiring Centre Installation and user manual Alarm terminals On the alarm terminals it is possible connect a safety thermostat and/or a dew point sensor: Safety thermostat In compliance with the UNI EN 1264-4 standard, a safety device (safety thermostat - ST) must be provided to disconnect the power supply to the low temperature area, above the intended limits. -
Page 14: Thermostat + Actuator Zone Terminals
Unisenza - Wiring Centre Installation and user manual Thermostat + actuator zone terminals 01 to 05 - WC 5 Zones version 01 to 10 - WC 10 Zones version Night set back input/output (Live 230 Vac) Night set back input/output (Live 24 Vac) -
Page 15: Dip Switch
Unisenza - Wiring Centre Installation and user manual Dip Switch 1 Change Over 2 Pump Delay 3 Pump Exercise Function Signal coming Pump start after 5 Pump run at least 5 min 1 2 3 4 5 from Zone 1... -
Page 16: User's Guide
Set the UNISENZA digital thermostat in program mode and are: UNISENZA digital thermostat, UNISENZA WiFi ther- the UNISENZA dial thermostat jumper (P5) in off (only if the mostat and UNISENZA Wiring Centre via the COin digital system works in heating mode only). -
Page 17: Wiring Diagrams
Unisenza - Wiring Centre Installation and user manual 8.2 Wiring diagrams Examples of installation: diagrams according to the system (only heating or heating and cooling), UNISENZA thermostats (dial and/or digital and/or WiFi) and functions (NSB and/or change over9 Description Heating only... -
Page 18: Diagram 1: Heating Only
Wiring Centre terminal. Set the UNISENZA WiFi thermostat and digital thermostat in program mode, set the UNISENZA dial thermostat jumper in OFF. In this way when the WiFi thermostat is in comfort mode the other thermostats also will be in comfort mode (the dial thermostat works with temperature setpoint setted by the knob) and when the WiFi thermostat is in eco mode the other thermostats also will be in eco mode (the dial thermostat works with 2°... -
Page 19: Diagram 3: Heating Only With Nsb By External Clock
NSB terminal of wiring centre thermostat terminal to the com terminal of external clock. Set the UNISENZA dial thermostat jumper in OFF. In this way when the contact of the external clock is opened (no live on NSB) the dial thermostats work with temperature setpoint setted by the knob, when the contact of the external clock is closed (live on NSB) the dial thermostats work with 2°... -
Page 20: Diagram 5: Heating And Cooling With Change Over By Thermostats
The system works in heating and in cooling, so you have to connect L, N, CO and SWL terminals of each tehrmostat to the corrispective Wiring Centre terminal. Set the UNISENZA dial thermostat jumper in ON and the dip switch 1 of the wiring centre in ON. -
Page 21: Diagram 6: Heating And Cooling With Nsb By Wifi Thermostat And Change Over By Thermostats
Wiring Centre terminal. Set the UNISENZA WiFi thermostat and digital thermostat in program mode and the dip switch 1 of the wiring centre in ON. In this way when one thermostat change from heating to cooling, all the other thermostats and the wiring centre switch in cooling mode. -
Page 22: Diagram 7: Heating And Cooling With Change Over By Thermostats Or By Wiring Centre Coin
The system works in heating and in cooling, so you have to connect L, N, CO and SWL terminals of each tehrmostat to the corrispective Wiring Centre terminal. Set the UNISENZA dial thermostat jumper in ON and the dip switch 1 of the wiring centre in OFF. -
Page 23: Diagram 8: Heating And Cooling With Nsb By Wifi Thermostat And Change Over By Thermostats Or By Wiring Centre Coin
So you have to connect L, N, NSB, CO and SWL terminals of each tehrmostat to the corrispective Wiring Centre terminal. Set the UNISENZA WiFi thermostat and digital thermostat in program mode, the dip switch 1 of the wiring centre in ON and for the thermostat* which must work only in heating disable the cool function. -
Page 24: Diagram 9: Heating And Cooling With All Wifi Thermostat And Change Over By Thermostats
230 V L N PE Only UNISENZA WiFi thermostat connected to the UNISENZA Wiring Centre. The system works in heating and in cooling without NSB function (each thermostat can be programmed by itself) and one WiFi thermostat* that works only in heating. So you have to connect L, N, CO and SWL terminals of each tehrmostat to the corrispective Wiring Centre terminal. -
Page 25: Diagram 10: Heating And Cooling With All Dial Thermostat And Change Over Only By Wiring Centre Coin
The system works in heating and in cooling, so you have to connect L, N, CO and SWL terminals of each tehrmostat to the corrispective Wiring Centre terminal. Set the UNISENZA dial thermostat jumper in ON and the dip switch 1 of the wiring centre in OFF. -
Page 26: Weee Directive Application
Unisenza - Wiring Centre Installation and user manual 9 WEEE DIRECTIVE APPLICATION - DIRECTIVE 2012/19 / EU The crossed-out wheeled bin symbol indicates that within the European Union all electrical and electronic products at the end of their useful life must be collected separately from other waste. - Page 28 Every care has been taken in the creation of this document. No part of this document may be reproduced without the express written consent of Purmo Group. Purmo Group accepts no responsibility for any inaccuracies or consequences arising from the use or...
Need help?
Do you have a question about the Unisenza and is the answer not in the manual?
Questions and answers