Table of Contents
Advertisement
Quick Links
Activforce 2
User Guide
Product User Guide
Activforce 2 provides real-time strength and range of motion measurements to quantify client
progress. Activforce 2 functions as a handheld device to provide force and angle measurement
when connected to an easy-to-use mobile companion application. When combined with
consistent testing techniques and methodologies, Activforce 2 provides accurate, repeatable
force and range of motion measurements.
Sections
●
Activforce 2 Components
●
Activforce 2 Walkthrough Video
●
Connecting the Device to the Mobile Application
●
Using the Activforce 2 Mobile Application
●
Using the Activforce 2 Reports Dashboard
●
Attaching a Pad To The Device
●
Proper Usage of the Activforce 2 Device
●
Cleaning and Disinfecting the Device
●
Replacing the Battery
●
Warnings and Contraindications
●
Troubleshooting
●
Additional Information
●
Activforce 2 Device Specifications
●
Contact
Activforce 2 Components
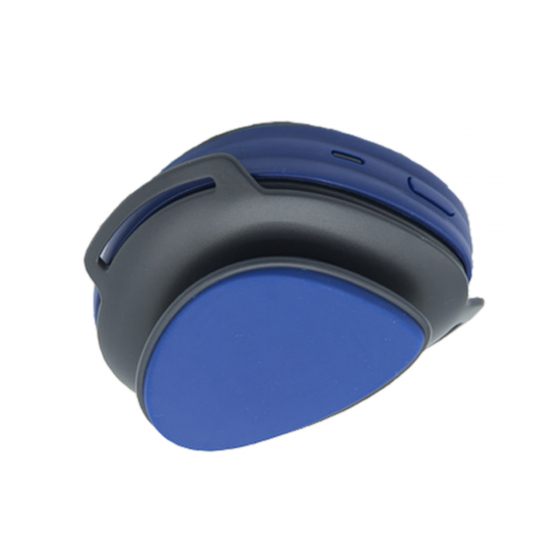
● Activforce 2 Device
● Activforce 2 Mobile Application
● Activforce 2 Dashboard
● Rounded Pad
Advertisement
Table of Contents

Summary of Contents for ActivBody Activforce 2
- Page 1 Product User Guide Activforce 2 provides real-time strength and range of motion measurements to quantify client progress. Activforce 2 functions as a handheld device to provide force and angle measurement when connected to an easy-to-use mobile companion application. When combined with consistent testing techniques and methodologies, Activforce 2 provides accurate, repeatable force and range of motion measurements.
- Page 2 ● Arched Pad ● Foam Insert ● Silicone Cover ● Hand Strap ● Leg Strap ● Belt ● Belt Loop Plate ● Custom Carrying Case Activforce 2 Walkthrough Video [Click to Watch] https://youtu.be/MkWWzkP3_sM...
- Page 3 When the Bluetooth connection is established, the device LED will flash green periodically. A GREEN flashing light indicates the Activforce 2 device is connected to the companion mobile application. 5. The app offers two main types of tests and associated reports: ○...
-
Page 4: Downloading The Application
Google Play Store: Activforce 2 on Google Play Creating an Account If you’re using Activforce 2 for the first time and don’t have an account, press Create Account and on the next screen enter your email address and create a password. - Page 5 An Activforce 2 device is required for this step. When you connect the Activforce 2 via Bluetooth from the Activforce 2 app and not from your mobile device Bluetooth settings , your account will be activated. This step requires your mobile device’s Bluetooth to be on and may require Location services to be on.
- Page 6 First-time Tutorial The next three screens will walk you through the use of the main features of the app (angle measurement, strength measurement, summary screen). The fourth screen concludes the tutorial and prompts you to select your default settings for the app.
-
Page 8: Selecting Default Settings
Selecting Default Settings If it is your first time using the app, you will be prompted to select default settings for the app. These can be updated any time in the Settings menu. First, set your Country or Region. Second, set your preferred unit of measurement: Imperial (lb), Metric (kg), Newton (N). Next, set the number of strength tests you want to do for each motion. - Page 9 Next, set the duration of time (in seconds) for each strength test.
- Page 10 Finally, the app will ask you if you would like to allow the sharing of anonymous data to help improve Activforce 2.
- Page 11 Signing In If you already have an Activforce 2 account, enter your email address and password to sign in. If you don’t remember your password, click on the “Forgot Password?” link.
-
Page 13: Home Screen
Home Screen Upon signing in, you will see the Activforce 2 home screen. Choose the type of measurement you want to perform: Range of Motion or Strength. Range of Motion Measurements The Activforce 2 app can obtain angle measurements in 3D space from a starting position that is established during the calibration phase. - Page 14 The app allows you to customize your test by selecting which side(s) to test - Right, Left, Both or N/A (if no side is applicable).
- Page 15 If “Both” is selected, you will be asked to select which side to test first. This selection will be applied to all test types previously selected.
- Page 16 Before the test is started, the test can be named either manually or by selecting suggested joints, movements and positions. The test naming can also be skipped by tapping the “Skip” button at the top right corner. Upon reaching the test screen, you can start the ROM measurement by tapping the “Start Test” button.
- Page 17 The Activforce 2 device is capable of measuring angles in any of the three axes, but only one angle, in a single plane of motion, should be measured for each test. If more types of measurements or sides are selected, the app will display instructions to prepare for the next test in the sequence (Switch the side or Continue with the position).
- Page 19 Tapping the "Save and Exit" button will save the report to the signed in account to be accessed from the Activforce 2 Dashboard. Taping the "X" close button will not save the report and it will not be accessible from this account's Activforce 2 Dashboard.
- Page 21 Strength measurements To perform a strength test, select the “Strength” button on the home screen. On the next screen, select which side to test first - Right, Left or N/A (if no side is applicable). Before the test is started, the test can be named either manually or by selecting suggested joints, movements and positions.
- Page 22 Once you reach the test screen, you can start the Strength measurement by tapping the “Start” button. A three second calibration phase will commence. Do not press or move the device during calibration.
- Page 23 After calibration, a “Go!” label will be shown, indicating that the test can be started by applying force to the device.
- Page 24 Once the test is started, force applied to the device will be displayed in the app. The duration of the test depends on the predefined settings set in the “Settings” screen (defaulted to six seconds). After the test is completed, the app will present a choice: continue with the test and switch to the next side by tapping “Next Side”...
- Page 25 When the “Next Side” button is pressed, the app will display instructions to prepare for the next test and side in the sequence (Switch the side).
-
Page 26: Settings Screen
When the last test in the sequence has been completed, you will have two options - see the test results by tapping on the “View Summary” button or perform the last measurement again by tapping “Redo Test” which will discard the previous result and restart the measurement process. Settings screen The “Settings”... - Page 27 Reports are saved to the dashboard when you use the “Save and Exit” button. Sign in to the Activforce 2 dashboard with the same email and password used in the Activforce 2 mobile app.to view the summary reports.
-
Page 28: Full Report
Full Report... - Page 29 The locking mechanism is a circle with four wide gaps that securely hold attachments in place through a twist lock mechanism. To secure an attachment to the Activforce 2 device: (1) Align the attachment teeth with the locking mechanism gaps...
- Page 30 Proper Usage of the Activforce 2 Device Measuring Force The Activforce 2 device measures accurately when force is applied in a perpendicular direction to the large surface areas of the device or an attached pad. Application of the force should be in the center of the surface as much as possible.
- Page 31 ● Do not rotate the Activforce 2 device in multiple axes during a measurement. ● Do not move the Activforce 2 device in multiple planes of motion during a measurement. ● Do not rotate the device during the brief calibration period before the application starts...
- Page 32 Place the device and/or subject into the starting position for test measurement and press the “Start Test” button. After calibration, move the device from the starting position (Position 1) to ending position (Position 2) through ONE plane of movement only (frontal, horizontal, or sagittal).
- Page 33 Do NOT move the arm back to the starting position while the app is still measuring range of motion. Returning to the starting position before pressing “End Test” will result in an inaccurate reading.
-
Page 34: Using The Hand Strap
App Security Sign in and out of the app or use the security features on your mobile device to ensure data privacy. Your data within the app is encrypted and accessible only with your username and password. Do NOT share your username or password with others. Always comply with local regulations on data privacy. - Page 35 Place the device so that the locking mechanism fits into the hole in the plate. Slide your hand between the device and the strap. Pull the non-logo side across your hand. Pull the logo side over and secure the velcro. Use with desired attachment. Using the Arched Pad When using the Arched Pad attachment, ensure the attachment is securely attached in the locking mechanism.
- Page 36 Use of the Foam Insert and Silicone Cover is optional. For additional subject comfort. The Silicone Cover can be secured in place using the grooves in the silicone to fit around the Arched Pad, providing a non-porous surface which can be easily cleaned and disinfected between uses.
- Page 37 Using the Rounded Pad When using the Rounded Pad attachment, ensure it is securely attached in the locking mechanism. Use this pad for all grip strength measurements and when bracing a test position against an immovable object. Using the Belt Loop Plate...
- Page 38 When using the Belt Loop Plate attachment, keep the belt positioned perpendicular through the loops to reduce strain on the belt loops. The plate is designed to hold the belt in position during a test and it is not designed to withstand force from a test.
- Page 39 The Round Pad with the Belt Loop Plate is recommended when the device is being pressed into the inanimate object.
-
Page 40: Replacing The Battery
Cleaning and Disinfecting the Device To prevent the spread of infection and diseases, the Activforce 2 device and pad should be disinfected between each use. The Activforce 2 device external surfaces, including the rounded pad and the soft, arched pad silicon sleeve, can be hand wiped at room temperature with a soft cloth and a cleaning solution consisting of 70% isopropyl alcohol and water. - Page 41 Hold Activforce 2 device and the screwdriver with the pad attachment mechanism facing upwards. The Activforce logo should NOT be visible. Insert the tip of the screwdriver in the small opening near the power button and gently turn the screwdriver until a CLICK sound is heard and the bottom shell lid pops slightly open. This opens...
- Page 42 Gently slide the screwdriver clockwise along the edge of the Activforce 2 device, keeping the tip inside the gap between the lid and the device, until it is about an inch and a half away from the original opening near the power button.
-
Page 44: Warnings And Contraindications
Warnings and Contraindications The Activforce 2 device should NOT BE USED when: ● The user and/or subject has a known allergy to silicon or plastic materials. ● The skin contacting the device or pad is damaged, irritated or otherwise not healthy. -
Page 45: Troubleshooting
This includes these standards: Safety IEC 60601-1 and EMC EN 60601-1-2. The Activforce 2 device is not waterproof and should not be immersed in water or other liquids. Similar to many electronic devices, the Activforce 2 device contains flammable materials and should not be exposed to flames or other excessive heat sources. - Page 46 ● Height: 1.3 in / 3.3 cm ● Volume: (approximate) 8.5 in³ / 139 cm³ Activforce 2 Device Functional Specifications ● Force Measurement Range: 0 to 200 lb / 0 to 90 kg ● Force Measurement Accuracy: ± (1.4 lb + 5% of the applied force) ●...
- Page 47 Activforce 2 Accessories Dimensions ● Hand Strap Length: 13.5 in / 34.3 cm ● Hand Strap Width: 1.5 in / 3.8 cm ● Leg Strap Length: 31.5 in / 80.0 cm ● Leg Strap Width: 1.5 in / 3.8 cm ●...
Need help?
Do you have a question about the Activforce 2 and is the answer not in the manual?
Questions and answers