
Related Manuals for Sierra Video Pro XL Series


Summary of Contents for Sierra Video Pro XL Series
- Page 1 SIERRA VIDEO Sierra Pro XL Series 32 Routing Switchers Models: 3232V5, 3232V4, 3232V3, 3232V2, 3216V5, 3216V4, 3216V3, 3216V2, 3232S, 3216S User’s Manual...
- Page 3 P R O X L S E R I E S 3 2 R O U T I N G S W I T C H E R S User’s Manual Sierra Video P.O. Box 2462 Grass Valley, CA 95945 Tel: (530) 478-1000 Fax: (530) 478-1105 Email: info@sierravideo.com Version 11.0 Publication Date: September 2014 The information contained in this manual is subject to change by Sierra Video...
-
Page 5: Table Of Contents
Table of Contents Introduction Before You Begin Operation Warnings & Safety Regulations Power Supply Cords Introduction North American Power Supply Cords Local Control Panel Operation International Power Supply Cords Switcher Operation EMC Regulatory Notices Button and Display Definitions Delivery Damage Inspection Menu Pro Series 32 Overview MENU TREE... -
Page 7: Introduction
SIERRA VIDEO Chapter Introduction Before You Begin There are several terms and acronyms that you should become familiar with before reading this manual. They are shown below. Term/Acronym Definition Crosspoint The electronic switch that assigns one of the inputs on the matrix crosspoint modules to an output. -
Page 8: Warnings & Safety Regulations
SIERRA VIDEO Warnings & Safety Regulations The information in the following section provides important warnings and safety guidelines for both the operator and service personnel. Specific warnings and cautions may be found throughout this manual. Please read and follow the important safety precautions noting especially those instructions relating to risk of fire, electrical shock and injury to persons. -
Page 9: Power Supply Cords
Slot and openings in the frame are provided for ventilation and should not be blocked. Only an authorized Sierra Video technician should service the switchers. Any user who makes changes or modifications to the unit without the expressed approval of Sierra Video will void the warranty. -
Page 10: Pro Series 32 Overview
SIERRA VIDEO Pro Series 32 Overview Introduction The SV Pro series Family of component analog routing switchers offers high-bandwidth 2, 3, 4, or 5 channel (RGB + HV) in a single frame. With stereo audio (S) matrix routing capability in a separate frame. -
Page 11: Pro Series 32 System Components
Pro Series 32 XL Pro Series 32 System Components This User’s Manual provides installation and operation information for the Pro Series 32 Routing Switchers. Front and Rear panel illustrations are provided in the following subsections for each switcher model. Take time to familiarize yourself with the location of your switcher model features. Component Pro Series 32 Switchers 3232V5... -
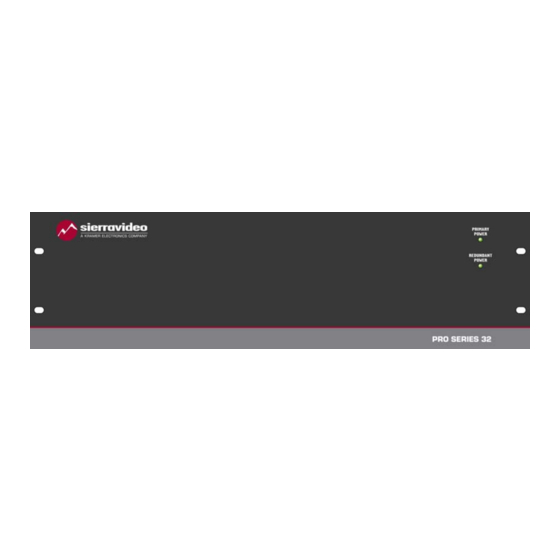
Page 12: Series 32
SIERRA VIDEO Series 32 Video Frame Front Panel Video Frame Back Panel... -
Page 13: Series 32S
Pro Series 32 XL Series 32S Audio Frame Front Panel Audio Frame Back Panel Earth Ground Connection Ground Connection 8-32 Thread Note The models shown are fully populated video and audio matrices. In some cases frames may be configured with fewer or no video and audio channels i.e. -
Page 14: Factors Affecting Quality Of Results
CAUTION! Only an authorized Sierra Video technician can service the switchers. Any user who makes changes or modifications to the unit without the expressed approval of the manufacturer will void the warranty Use the proper AC voltage to supply power to the switcher. -
Page 15: Installation
SIERRA VIDEO Chapter Installation Introduction Installation procedures are similar for all frames covered under this manual. Exceptions, if any, have been noted in each of the following paragraphs. Rack Mounting Carefully inspect the frame to ensure that there has been no shipping damage. Make sure all shipping material is removed from the router frame. -
Page 16: Connecting To Video Devices
SIERRA VIDEO Connecting To Video Devices Video sources and output devices (such as monitors, or recorders) may be connected to the routing switchers through the BNC type connectors located on the back of the unit. Keep in mind that the output signal format will be that of the input signal format. -
Page 17: Connecting H/V Sync
INSTALLATION Connecting H/V Sync There are two types of sync signals supported in the SV system. The most common type is 300mv to 5v p-p. The factory default is set to accept this type of sync. The second sync setting allows for high frequency TTL sync signals. If you are experiencing jitter, move the jumper on the Horizontal sync module to this setting. -
Page 18: Balanced/Unbalanced Audio Connections
SIERRA VIDEO Connecting To Audio Devices Video Frame 25 Pin- J1 frame interconnect cable Optional Audio Frame Audio sources and output devices (such as amplifiers or recorders) are connected to the switchers through the terminal block connectors located at, and marked, on the rear of the switcher. -
Page 19: Audio Follow Video And Breakaway Audio Configurations
INSTALLATION TyLinx Pro Software program (refer to the TyLinx Pro manual), or using Host protocol (see Communication protocol Ch. 4). Audio Follow Video and Breakaway Audio Configurations Component video channel (YC, RGB etc.) signals are switched by separate crosspoint modules. All crosspoint modules will be switched at the same time. -
Page 20: Connecting Peripherals
SIERRA VIDEO Connecting Peripherals Control panels, sync inputs, and power are all connected to the rear of the frame. The peripherals area may vary depending on the model size and type. SV Pro series 32 routing switchers offer redundant power supplies. -
Page 21: Ac Power Connections
INSTALLATION AC Power Connections SV routing switchers offer redundant power supplies but must be specified prior to order. The power supplies are universal AC inputs. Voltage selection is not necessary because the power supply senses the correct AC input automatically. The Series 32 models use a power switch located on the rear of the frame. -
Page 22: Serial Port Wiring
SIERRA VIDEO Serial port wiring RS-232 2 RX 2 TX 3 TX 3 RX 5 GND 1 & 9 GND... -
Page 23: Ethernet Setup
Gateway IP Address- 0.0.0.0 Telnet Port- 10001 The IP port accepts all Sierra Video HOST protocol commands. To configure the IP port the router must first be connected to your computer. This can either be done using a crossover cable to connect your PC to the routing switcher directly, or the routing switcher may be added to your existing network. - Page 24 SIERRA VIDEO To setup IP address parameters, select “Setup”. Enter the new IP address information. Device Name, Company Name, and Location Names are user definable. Click on “Update Configuration” to make changes. The Ethernet connection only supports the following Subnet Mask addresses;...
-
Page 25: Ethernet Control
INSTALLATION Ethernet Control There are two screens for switching the router. Selecting “I/O” displays the following screen; To switch the router, select (left mouse click) on a destination, the button will turn red. The current status will be indicated by the current source button will turn red. Status can also be checked by hovering the mouse pointer over a destination. - Page 26 SIERRA VIDEO Another method of switching is by selecting “TL Control”. This screen displays a “grid” of sources and destinations. Left click on the I/O grid lines that intersect the source and destination to switch. Status is indicated by a blue dot at the I/O grid line.
-
Page 27: Names
256 Salvos to be named and stored in the routing switcher. The salvo name will be displayed in the Salvo register. Salvos are made and stored in the router using the Sierra Video Software program TyLinx Pro. See the TyLinx Pro manual for details on creating and storing salvos. -
Page 28: Sync Rate Reporting
SIERRA VIDEO Unless otherwise specified at the time of order, the V5S series of routing switchers are configured at the factory with 7 levels of control as indicated by the chart below. Level # Type H Sync V Sync Audio 1... -
Page 29: Operation
SIERRA VIDEO Chapter Operation Introduction The purpose of a routing switcher is to switch any of the inputs (source) to any one of the outputs (destination). Any input can be connected to any or all outputs but each output can only be connected to a single input. -
Page 30: Switcher Operation
SIERRA VIDEO Switcher Operation Button and Display Definitions Term Definition Select Button Selects which list the rotary knob changes. Navigates within a mode. Rotary Knob Use this buttons scroll through menu tree and select desired options. V / A Button Use this button to toggle between AFV, Video and Audio operation. -
Page 31: Menu Tree
LOCAL CONTROL PANEL OPERATION MENU TREE Vertical Select Value Termination Adjust Input Termination Horizontal Select Value Termination Disable Front Panel Ctrl Disable Front Select system Continue Front Panel Ctrl * panel parameters Configuration System MENU Information Software Version Adjust input Select Value level... -
Page 32: Switching The Router
SIERRA VIDEO Adjust Input Termination – Input termination for each H and V input can be adjusted to 75 or 510ohm. Factory default is 510ohm Select System Parameters – Selecting system parameters allows access to disable the front control panel and view the system information- configuration and software version. -
Page 33: Split Switching (Break-Away)
LOCAL CONTROL PANEL OPERATION Split Switching (break-away); A “split” (break-away) switch is when the video and audio of a single source is sent to different outputs. Press V/A until screen displays “Preset V/A”. Press [Select] until “Out” is flashing. ... -
Page 34: Control Via 9-Pin Connectors
10001. A communications program such as Hyper Access can be used to establish this connection. Once the connection is established, sending the command **!! should cause the routing matrix to return ** OK !!. This connection supports the entire Sierra Video Host protocol command set. -
Page 35: Power Up
POWER UP Power Up Once all signal and control connections have been made, turn on the power switch. AC to the router is indicated by an illuminated power switch button. If you have power up problems ensure that the AC fuse on the back of the switcher is seated properly. On power up, the controller will restore the routing switcher to the last state it was in before the power was turned off including all configuration settings as well as crosspoint switcher status. -
Page 37: Communication Protocol
SIERRA VIDEO Chapter Communication Protocol Introduction The protocol uses the 7-bit ASCII character set, usually sent over an RS232-C or RS422 serial link — 9600 bps is recommended with 8 data bits and no parity. The protocol is compact, with few characters required to cause switch changes to occur. - Page 38 SIERRA VIDEO Generic Protocol Commands are sent to a routing switcher in a group called a command string. A command string can contain zero or more commands, limited only by the size of the receive buffer of the router, whose size depends on the particular router model.
- Page 39 GENERIC PROTOCOL This can be useful for verifying that the serial link to the router is operational. In routers requiring only one leader/trailer character, the simplest command string would be: *! Which would generate the response: OK !<CR> (To determine whether a particular router uses one or two leader/trailer characters, send it “!!**” and check the response to see which of the above two responses it is.
- Page 40 SIERRA VIDEO Syntax Example Description Router Reset Capabilities Inquiry Model Name and Software Version Inquiry Matrix Size and Level Names Inquiry Output Status inquiry Input Status inquiry Status inquiry Clear matrix K9999 Set Password to Change Protected Settings M139 Set Remote Address...
- Page 41 GENERIC PROTOCOL “I”: Capabilities Inquiry The command “I” requests that command capability information be returned to the host. The information is sent as a string of characters. The first characters are a space followed by “I”, the next characters are the letters of the commands that are implemented and available in this router, and the last character is “~”...
- Page 42 SIERRA VIDEO Note the dash, indicating that on level 2, output 65 is not connected to an input. Also note the 0, indicating that the connection on level 3 is either unknown or that output 65 doesn’t exist or isn’t mapped on level 3.
- Page 43 GENERIC PROTOCOL two digits for the input number, and a switcher with less than 10 levels would use one digit for the level number. “C”: Clear Matrix Use command C to request that the switcher matrix be cleared so that all outputs are disconnected from inputs (in switchers where this is possible) or else all outputs at all levels have input 1 as their source.
- Page 44 SIERRA VIDEO and modification of protected resources. The “M” command will typically work in conjunction with the “K” command, which allows a password to be sent to the router. Some commands, such as those that allow modification of router configuration settings, might require entry of an administrator password before allowing the router configuration to be modified.
- Page 45 GENERIC PROTOCOL ** Y5,17 !!<CR> indicating that output 5 is now connected to input 17. Alternatively, newer routers might use the “V” command instead of “X” commands to report a change: ** V5,17,12,0 !!<CR> indicating that output 5 is now connected to input 17 on level 1, to input 12 on level 2, and does not exist or is not available on level 3.
- Page 46 SIERRA VIDEO Says that connections are to be made on all levels: from input 8 to output 1, input 3 to output 2, and input 7 to output 3. An input number of 0 means the output connection is to be left unchanged.
- Page 47 GENERIC PROTOCOL If “U2” is in effect (see “U” command), the response will include one or more V, Y, or X commands to report the new status of the outputs. The response will be the same as if “O” commands were issued for the outputs immediately following the “Z” command. No response is generated if this command is being used to define a salvo.
- Page 48 SIERRA VIDEO says that one connect command (output 5 to input 7 AFV) is to be stored in salvo register 239. Only supported connect commands (those connect commands whose command letters appear in the “I” command response) may follow the register letter up to the tilde character. The connect commands do not take effect until the register is triggered using the “T”...
- Page 49 GENERIC PROTOCOL As with all router configuration parameters, the output lockout data is stored in non-volatile storage and thus is retained across router power-ups. When a router is first initialized at the factory, all outputs are set to be unlocked. This command provides the same functionality as the “G OUTPUT_LOCK”...
- Page 50 SIERRA VIDEO value is specified. A delayfields value of 2, however, will add one more field to the minimum possible delay. Thus, delayfields specifies the number of full fields of delay between end-of- crosspoint-command-string-received and crosspoint-switch-occurs. Note that the actual minimum value of delayfields depends on the particular router model.
- Page 51 GENERIC PROTOCOL Basic “G” Command Action From Syntax Modify Host G command_name { arguments… } ~ Query Host G command_name { arguments… } ~ Query Response Router G command_name { arguments… } ~ Modify is Protected: Report Changes: The command “G” is used to query or modify a router configuration parameter or parameters. Summary lines at the start of each command section describe, for each type of command action (Modify, Query, or Query Response), whether the command is sent to the router or from the router and what the syntax of the command is.
- Page 52 SIERRA VIDEO A router may be sent “G” commands that it doesn’t understand. It will simply ignore them and generate an ERROR response. VAR: Modify or query system variables Action From Syntax Modify Host G VAR,<varname>,<value>[,<value>…]~ Query Host G VAR,<varname>~...
- Page 53 GENERIC PROTOCOL The Modify command has three or more arguments, the name of the array variable to be changed, the index within the array of the variable to be changed, and the new value of that variable. Most variables have only a single value associated with them, but it is possible for a variable to be multi-valued, in which case the number of <value>...
- Page 54 SIERRA VIDEO A variable value is typically an unsigned decimal number, but may also be a signed decimal number. The “G VAR2QRY” command can be used to determine the allowed range of values. For example, to query for the value of the (3,87) the element of an array variable named “GAIN”:...
- Page 55 GENERIC PROTOCOL AUDOUT_GAINS: Audio Output Gain Varname: AUDOUT_GAINS Use: Modify and query output audio gain values for SPII and VS type routers. Syntax: G VAR1,AUDOUT_GAINS,output_num [,value] ~ Values: The ‘index’ field is the output number, which can range from 1 to 64. The ‘value’...
- Page 56 SIERRA VIDEO SYNC_REPORT: Query for sync rate info for sources connected to pulse boards Action From Syntax Modify Host (none) Query Host G SYNC_REPORT,<level num>,<src_num>~ Query Router G SYNC_REPORT,< level num >,< input num >,<frequency>~ Response Modify is Protected: Report Changes: Some routers include ‘pulse’...
-
Page 57: Commonly Used Switching Commands
GENERIC PROTOCOL Commonly Used Switching Commands This section contains the most commonly used switching commands. These commands are explained in detail in the proceeding section and are merely meant as a “short cut” for programmers. “Y” Command- All Levels The “Y” command switches all levels (i.e. video and audio). For example;... -
Page 59: Troubleshooting
If not, turn the power switch off and on again to reset the switcher. If the following recommended actions still do not result in satisfactory operation, please consult your Sierra Video Dealer. Power and Indicators Problem Remedy ... - Page 60 SIERRA VIDEO Video Signal Problem Remedy No video at the Confirm that your sources and destination device are powered on and output device, connected properly. Video signals connected to the input of the switcher regardless of input should be of an identical signal format as the output of your source.
- Page 61 AUDIO SIGNAL Audio Signal Problem Remedy No audio at the Confirm that your sources and destination device are powered on and destination device, connected properly. Audio signals connected to the input of your regardless of source switcher should be properly wired from the output of your source. Audio selected signals connected to the output of your switcher should be properly wired to the input of your destination device.
- Page 62 SIERRA VIDEO Switching Malfunctions Problem Remedy The switcher Malfunction in the particular source or cable assembly. succeeds in NOTE: switching a number The most common failure mode in transferring the signal of an audio source is a of sources then fails break in the connecting wire.
-
Page 63: Specifications
SIERRA VIDEO Chapter Specifications Audio Specifications Audio Maximum source output +24 dBm Balanced level 18 dBu Un-balanced >20K Ohm Load Input impedance Differential Mode: 20K ohm Single Ended Mode: 10K ohm Output Impedance Differential Mode: <100 ohm Single Ended Mode: <50 ohm Frequency response 20 to 20KHz +/- 0.1 dB, -3 dB @ 100KHz... - Page 64 SIERRA VIDEO Video Specifications Video Input impedance 75 ohm nominal (510 ohm pulse inputs) Input connector type Video input level 300mV to 2.5V P-P Pulse input level .2 – 5V P-P Video bandwidth (-3dB) >450MHz @ -3dB Pulse rate Up to 200KHz...
-
Page 65: Warranty
Warranty A. General Buyer assumes all responsibility for ascertaining the suitability of Sierra Video (hereinafter "SVS") products for Buyer's intended use. No product sold by SVS is designed or manufactured for use in any manner or under any conditions other than those described in SVS's instruction manuals and other printed material for each particular product. - Page 66 SIERRA VIDEO THIS LIMITED WARRANTY IS EXPRESSED IN LIEU OF ALL OTHER WARRANTIES, EXPRESS, IMPLIED OR STATUTORY, INCLUDING WITHOUT LIMITATION THE IMPLIED WARRANTIES OF MERCHANTABILITY AND OF FITNESS FOR A PARTICULAR PURPOSE, AND ALL OTHER OBLIGATIONS OR LIABILITIES ON SVS'S PART.
Need help?
Do you have a question about the Pro XL Series and is the answer not in the manual?
Questions and answers