
Related Manuals for Sierra Video 7272HD-3G


Summary of Contents for Sierra Video 7272HD-3G
- Page 1 SIERRA VIDEO Aspen 7272 HD/SDI 3G Routing Switcher Models: 7272HD-3G User’s Manual...
- Page 3 A S P E N 7 2 7 2 H D / S D I 3 G R O U T I N G S W I T C H E R User’s Manual Sierra Video P.O. Box 2462 Grass Valley, CA 95945 Tel: (530) 478-1000 Fax: (530) 478-1105 Email: info@sierravideo.com Version 2.0 Publication Date: September 2014 The information contained in this manual is subject to change by Sierra Video...
- Page 5 Regulatory Warnings & Safety Information The information in the following section provides important warnings and safety guidelines for both the operator and service personnel. Specific warnings and cautions may be found throughout this manual. Please read and follow the important safety precautions noting especially those instructions relating to risk of fire, electrical shock and injury to persons.
-
Page 6: Fcc Notice
Slot and openings in the frame are provided for ventilation and should not be blocked. Only an authorized Sierra Video technician should service the switchers. Any user who makes changes or modifications to the unit without the expressed approval of Sierra Video will void the warranty. -
Page 7: Power Supply Cords
SIERRA VIDEO Power Supply Cords Use only power cord(s) supplied with the unit. If power cord(s) were not supplied with the unit, select as follows: For units installed in the USA and Canada: select a flexible, three-conductor power cord that is UL listed and CSA certified, with individual conductor wire size of #18 AWG, and a maximum length of 4.5 meters. -
Page 9: Table Of Contents
Table of Contents Overview Operation Aspen 7272 HD/SDI 3G Introduction Introduction Web Page Model Suffix Designations Button Colors Model 7272 HD-3G Switching the Routing switcher V and A Buttons Destination based Switching Installation Break-away Switching Introduction Destination based Status Rack Mounting Source based Switching Dimensions... -
Page 11: Overview
Aspen 7272 HD/SDI 3G Introduction The Sierra Video Aspen 7272 HD-3G routing switchers are compact units offering digital video boards that work with SDI video SMPTE 259M-C, HD SMPTE 292M, and 3G SMPTE 424M. These unique routing switchers can also route DVB-ASI signals. -
Page 12: Model 7272 Hd-3G
SIERRA VIDEO Model 7272 HD-3G Frame Front Panel Frame Back Panel Side... -
Page 13: Installation
SIERRA VIDEO Chapter Installation Introduction Installation procedures are similar for all frames covered under this manual. Exceptions, if any, have been noted in each of the following paragraphs. Rack Mounting Carefully inspect the frame to ensure that there has been no shipping damage. Make sure all shipping material is removed from the routing switcher frame. -
Page 14: Connecting To Video Devices
SIERRA VIDEO Connecting To Video Devices Video sources and output devices (such as monitors, or recorders) may be connected to the routing switchers through the BNC type connectors located on the back of the unit. Keep in mind that the output signal format will be that of the input signal format. -
Page 15: Reference Connector
CAUTION! Only an authorized Sierra Video technician can service the switchers. Any user who makes changes or modifications to the unit without the expressed approval of the manufacturer will void the warranty Use the proper AC voltage to supply power to the switcher. -
Page 17: Configuration
SIERRA VIDEO Chapter Configuration Ethernet Setup Default IP settings; IP Address- 192.168.1.200 Subnet mask- 255.255.255.0 Gateway IP Address- 0.0.0.0 To configure the IP port, the routing switcher must first be connected to your PC. This can be done by connecting cable to your PC and the routing switcher directly, or the routing switcher may be added to your existing network. - Page 18 SIERRA VIDEO Note: The “Operate” tab is discussed in Chapter 4 “Operation”. You must login to set or modify Routing switcher parameters. To login, select the login button. Enter the password and select “Login”. Note: The factory default password is “password”. To change the password see the section “Changing Password”...
-
Page 19: Change Network Parameters
ASPEN HD/SDI 3G ROUTING SWITCHER Change Network Parameters To make changes to the network communications (i.e. IP address), select the “Network” tab. The “refresh” button will re-read the current settings in the routing switcher. Make any changes necessary and press “Save” to implement changes. Note: Changing any parameters in this window will cause your browser to lose communication with the routing switcher. -
Page 20: Change Serial Port Settings
(layers). In the “Slave” mode the routing switcher can be controlled via the serial port by an external device (i.e. automation) and set to respond to either Sierra Video or Kramer 2000 protocol. -
Page 21: Names
ASPEN HD/SDI 3G ROUTING SWITCHER Names To change names of the routing switcher, any of the sources, destinations, or layers, select the “Names” tab. Click on the cell you want to change and type in a new name. Make any changes necessary and press “Save” to implement changes. Note: The routing switcher’s name is limited to 20 characters, other names are limited to 8 characters. -
Page 22: Salvos
SIERRA VIDEO Salvos Overview A Salvo is a list of crosspoint switches that are saved in the routing switcher and switched by a single “Salvo Take” command or from a salvo button on the front panel. Up to 72 Salvos are stored in the routing switcher. -
Page 23: Advanced
ASPEN HD/SDI 3G ROUTING SWITCHER Advanced The “Advanced” tab allows access to “engineering” settings such as input EQ, output reclockers, routing switcher expansion, etc. Clicking on the bars on the lefthand side of the screen gives access to adjustments and status. -
Page 24: Inputs
SIERRA VIDEO Inputs Select “Inputs” for access to cable equalizer adjustments and input signal status. This screen will status input signal presence and signal type. Input Equalizers To set or change a single input equalizer, enter the input number, select the equalizer mode from the drop down menu and press “Apply to Input”. - Page 25 ASPEN HD/SDI 3G ROUTING SWITCHER If a valid input signal is detected, it will be indicated as “Present”. The “Rate” column indicates the signal type detected at the input. If the input is missing, the rate will be “Unknown”. Note: If the signals you are connecting to the Aspen routing switcher inputs have a bit rate <...
-
Page 26: Output Reclockers
SIERRA VIDEO Output Reclockers Select “Output Reclockers” for access to reclocker adjustments and status. This screen will report the reclocker status and allow you to set the reclocker mode. To set the reclocker mode of a single output, enter the output number, select the reclocker mode from the dropdown list and press “Apply to Output”. - Page 27 ASPEN HD/SDI 3G ROUTING SWITCHER The “Reclocker State” column indicates if the output reclockers are locked. When locked it will specify if it is SD, HD, or 3G. Warning! Changes to this screen could effect operation of the routing switcher.
-
Page 28: Reference Settings
SIERRA VIDEO Reference Settings This screen is for reporting status and setting the video reference input parameters allowing the video to switch at the correct point for “seamless” switching per SMPTE RP- 168. If no reference signal is available or the “Redundant References” box is not checked, the routing switcher will switch at a random point rather than during the correct line (vertical interval) of the SDI input signal. -
Page 29: Reference Formats
ASPEN HD/SDI 3G ROUTING SWITCHER Reference Formats Supported Video Reference Comments video formats SD-SDI at 59.94Hz frame rate per SMPTE 259M-C (270Mbps) SD@59.94Hz 1080i@59.94Hz HD-SDI @1080i5994 NTSC (59.94Hz) 720p@59.94Hz HD-SDI @720p5994 1080p@59.94Hz 3G-SDI @1080p5994 SD-SDI at 50Hz frame rate per SMPTE 259M-C (270Mbps) SD@50Hz 1080i@50Hz HD-SDI @1080i50... -
Page 30: Layers
SIERRA VIDEO Layers The “Layers” screen is used for adding external devices (Layers) to the existing routing switcher. The “refresh” button will re-read the current settings in the routing switcher. Make any changes necessary and press “Save” to implement changes. -
Page 31: Multi-Frame Systems
ASPEN HD/SDI 3G ROUTING SWITCHER Enter the number of external layers you want to add and press “Apply”. Select the correct layer type from the dropdown list. The “Video/Audio” selection determines whether the “A” or “V” button on the front panel will control the level. -
Page 32: Dual Link Mode
SIERRA VIDEO Dual Link Mode To set the routing switcher in the Dual Link mode, place a check in the “Dual Link Mode” box. When the Aspen 7272 is set in the dual link mode, it becomes a 36x36 with 2 BNC connectors per input and output. - Page 33 ASPEN HD/SDI 3G ROUTING SWITCHER Output Button #s Output Connector #s 9-10 11-12 13-14 15-16 17-18 19-20 21-22 23-24 25-26 27-28 29-30 31-32 33-34 35-36 37-38 39-40 41-42 43-44 45-46 47-48 49-50 51-52 53-54 55-56 57-58 59-60 61-62 63-64 65-66 67-68 69-70 71-72...
-
Page 34: Gui Panel
SIERRA VIDEO GUI Panel The GUI Panel is the switching panel that appears when the “Operate” tab is selected (see operation details in the next chapter). The GUI switching panel can be enabled or disabled by placing a check in the box or not. - Page 35 ASPEN HD/SDI 3G ROUTING SWITCHER The GUI switching panel can be set for “Auto Take” mode. In the “Auto Take” mode, the routing switcher switches as soon a destination and source are selected (or a source and destination are selected if “Enable Source Based Switching” is selected (see below). Source based switching allows for a source to be selected first followed by selecting a destination.
-
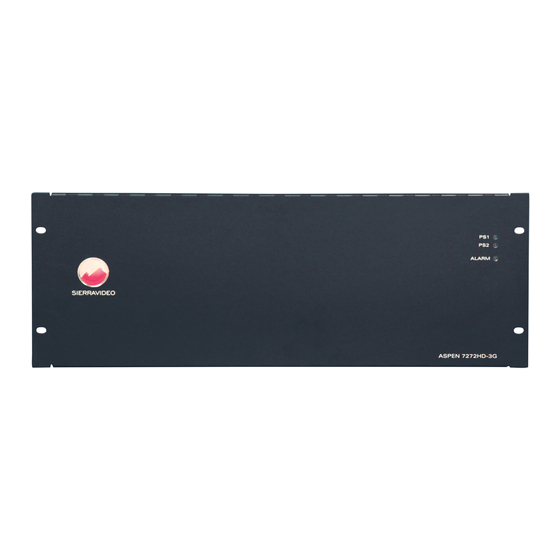
Page 36: Alerts
SIERRA VIDEO Alerts The front panel has 3 LEDs labeled PS 1, PS 2, and Alarm. The PS 1 and PS 2 LEDs are green when power is present and off when not present. The RED Alarm LED has 4 states;... -
Page 37: Changing Password
ASPEN HD/SDI 3G ROUTING SWITCHER Changing Password To change the password, or if you forgot your password, select “reset it” from the login screen. Enter the new password, serial number of the unit and press “Save”. The password can also be changed from the “Advanced” tab (without entering the serial number). -
Page 38: Software Updates
SIERRA VIDEO Software Updates From time to time software upgrades may be available from Sierra Video. Check our web site sierravideo.com for available downloads, or contact the factory. Place the software update file on your computer and select browse to locate the file. -
Page 39: Factory Defaults
ASPEN HD/SDI 3G ROUTING SWITCHER Factory Defaults This screen allows you to reset the routing switcher to the factory default settings. All routing switcher parameters are reset including the IP address. CAUTION! If you restore factory defaults, you will lose all configuration changes that you have made. -
Page 41: Operation
SIERRA VIDEO Chapter Operation Introduction The purpose of a routing switcher is to switch any of the inputs (sources) to any of the outputs (destinations). Any input can be connected to any or all outputs but each output can only be connected to a single input. Control remains the most important component of your new system. -
Page 42: Switching The Routing Switcher
SIERRA VIDEO Switching the Routing switcher V and A Buttons V (Video levels) button will enable the video level(s) to switch. A (Audio levels) button will enable the Audio level(s) to switch. In normal operation with at least one audio level configured: •... -
Page 43: Source Based Switching
ASPEN HD/SDI 3G ROUTING SWITCHER Source based Switching 1. Select an input 2. Select (enable level) to be switched by toggling the “A” and “V” button. 3. Select an output (. In auto take mode, the switch will occur immediately) 4. -
Page 44: Control Via 9-Pin Connectors
Once the connection is established, sending the command **!! should cause the routing switcher to return ** OK !!. This connection supports the entire Sierra Video Host protocol command set supported by this model. -
Page 45: Host Protocol
This section of this manual contains the most common Host Protocol commands. For a more detailed list of Protocol commands contact the Sierra Video factory. The protocol uses the 7-bit ASCII character set. The protocol is compact, with few characters required to cause switch changes to occur. - Page 46 SIERRA VIDEO The simplest possible command string would be:**!! which consists of the leader and trailer characters. This command string would generate the response: ** OK !! This can be useful for verifying that the communication to the routing switcher is operational.
-
Page 47: Command Summary
ASPEN HD/SDI 3G ROUTING SWITCHER Command Summary The following is the set of commands available for sending to the routing switcher. Syntax Example Description Capabilities Inquiry Model Name and Software Version Inquiry Routing Switcher Size and Level Names Inquiry Source Status Output Status inquiry Status inquiry U {0 1}... - Page 48 SIERRA VIDEO “Q”: Model Name and Software Version Inquiry The command "Q" requests that the routing switcher model name and software version number string be returned to the host. The information is sent as a string of characters. The first characters are a space followed by "Q", the next characters are the routing switcher model name, terminated by a "~"...
- Page 49 ASPEN HD/SDI 3G ROUTING SWITCHER “O”: Output Status Inquiry The command "O" requests that the status information for a single output be returned to the host. The status information is sent as a “Y” command or a “V” command or as a sequence of L “X”...
- Page 50 SIERRA VIDEO 3: Same as mode 1 except the Aspen will send V commands when crosspoints change. 4: Same as mode 2 except the Aspen will send V commands when crosspoints change. Output change reports are automatic messages sent to the host whenever an output is crosspoint status (i.e.
- Page 51 ASPEN HD/SDI 3G ROUTING SWITCHER “Y”: Connect AFV Use command Y to request that a connection be made on all levels (AFV). It must be followed by an output number, a comma, and an input number. For example, the command: **Y2, 8!! This string says that input 8 is to be connected to output 2 on all levels.
-
Page 52: Commonly Used Switching Commands
SIERRA VIDEO Commonly Used Switching Commands This section contains the most commonly used switching commands. These commands are explained in detail in the proceeding. “Y” Command- All Levels The “Y” command switches all levels (i.e. video and audio). For example;... -
Page 53: Troubleshooting
SIERRA VIDEO Chapter Troubleshooting Front Panel Error Indications Alarm LED Error Conditions For these errors list below, the error LED will be on or blinking if any one of these errors is present. The error LED will be off only if none of these error conditions are present. -
Page 54: Power And Indicators
If not, disconnect the AC power cord and reconnect it again to reset the switcher. If the following recommended actions still do not result in satisfactory operation, please consult your Sierra Video Dealer. Power and Indicators Problem... -
Page 55: Video Signal
ASPEN HD/SDI 3G ROUTING SWITCHER Video Signal Problem Remedy No video at the Confirm that your source and destination devices are powered on and output device, connected properly. Video signals connected to the routing switcher regardless of input should have a video supported format supported by your video monitor selected. -
Page 56: Control
Technical Support Sierra Video has made every effort to insure that your unit has been fully tested and is configured to your order specifications. If problems arise that can not be resolved, please contact the Sierra Video technical support department. -
Page 57: Specifications
SIERRA VIDEO Chapter Specifications Video Data rates 19Mbps to 2.97 Gbps Data types SMPTE 259M-C, SMPTE 292, SMPTE 424M, DVB-ASI Input cable equalization range 3G, 0 – 155 meters (Belden 1694A) HD, 0 – 200 meters SD, 0 – 400 meters ≥15db@ 1.485Gps,... -
Page 59: Warranty
Warranty A. General Buyer assumes all responsibility for ascertaining the suitability of Sierra Video (hereinafter "SVS") products for Buyer's intended use. No product sold by SVS is designed or manufactured for use in any manner or under any conditions other than those described in SVS's instruction manuals and other printed material for each particular product. - Page 60 THIS LIMITED WARRANTY IS EXPRESSED IN LIEU OF ALL OTHER WARRANTIES, EXPRESS, IMPLIED OR STATUTORY, INCLUDING WITHOUT LIMITATION THE IMPLIED WARRANTIES OF MERCHANTABILITY AND OF FITNESS FOR A PARTICULAR PURPOSE, AND ALL OTHER OBLIGATIONS OR LIABILITIES ON SVS'S PART. SVS neither assumes nor authorizes any other person to assume for SVS any other liabilities in connection with the sale of products of its own manufacture.
Need help?
Do you have a question about the 7272HD-3G and is the answer not in the manual?
Questions and answers