
Related Manuals for Ankom FLEX

Summary of Contents for Ankom FLEX
- Page 1 Operator’s Manual Rev 3/2/2023 2052 O’Neil Rd, Macedon NY 14502 Telephone: (315) 986-8090 Fax: (315) 986-8091 www.ankom.com...
- Page 2 This page intentionally left blank...
-
Page 3: Table Of Contents
Methods ............................22 Diagnostics ............................23 Records and Updates ........................25 Training and Maintenance ......................26 ANKOM Products ..........................26 Who we are ............................ 26 Starting an Assay ............................27 Confirm Nitrogen Pressure ......................27 Fill Solution Reservoir Bottles ......................27 Assemble Digestion Vessels ...................... - Page 4 16. Appendix A – Reagents ..........................52 Best Practices for Solution Preparation: Total and Crude Fat Analysis .......... 52 Best Practices for Solution Preparation: Vitamin & Cholesterol Analysis ........52 17. Appendix B – FLEX Maintenance: Rinsing Slide Valve ................53 pg. 2 Rev 3/2/2023...
-
Page 5: Introduction
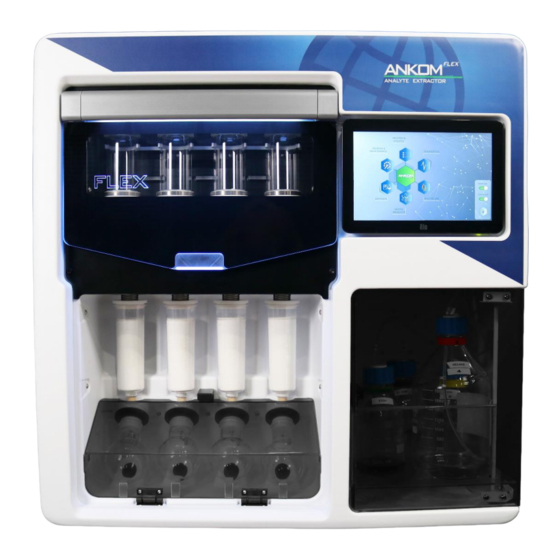
Analyte Extractor (FLEX). We are confident that this product will effectively serve your needs. The FLEX is designed to simplify fat-soluble vitamin, cholesterol, crude fat, and total (hydrolysis) fat determinations. Supporting up to four samples at a time, the system will automatically complete digestion (saponification or hydrolysis), solid phase extraction (SPE), and evaporation of solvent in about two to three hours. -
Page 6: Instrument Description
The system has four solution reservoirs which can be filled with various chemical solutions as defined by method requirements (e.g. ethanol, hexane, HCl, KOH, water). The FLEX’s software allows for method development and customization. -
Page 7: Safety Precautions
WARNING: Attempts to override safety features or to use this instrument in a manner not specified by ANKOM Technology voids the warranty and may result in serious injury or even death. This system is designed to meet and/or exceed the applicable standards of CE and CSA. -
Page 8: Instrument Installation
Supply N2 pressure 5.5-6.9 bar (80-100 psi) • Fitting adapter to connect nitrogen supply to the ¼” (6.35mm) outside diameter • Black polyurethane nitrogen supply tubing that ANKOM supplies • Ambient Temperature Range: 19°−30°C (66°-86°F) Unpack Instrument The instrument shipping container consists of three separate cardboard pieces: a top, a bottom, and a sleeve that forms the body of the container. -
Page 9: Wipe Components
FLEX Maintenance Kit FLEX66 Wipe Components 6.4.1. Wipe the vessel bases, the spray nozzles and O-rings of the digestion vessel tops and the column top adaptors with a towel wetted with water. Refer to FLEX Service Procedure FLS011. pg. 7 Rev 3/2/2023... -
Page 10: Make Connections
Vent the exhaust tubes to an exhaust system. The exhaust system should pull a slight vacuum so that solvent fumes are properly removed from the FLEX during evaporation. These connections must never be closed or restricted during operation of the instrument. - Page 11 - Attach the black nitrogen supply tubing (part # 8216) to a high pressure (>50psi) nitrogen source and then attach to the instrument by pushing the black nitrogen supply tubing into the nitrogen supply port on the back of the instrument. Refer to FLEX Service Procedure FLS002. Nitrogen Supply Port 6.5.3.
-
Page 12: Power On
Power On 6.6.1. Plug the electrical cord into an appropriate power source. 6.6.2. To turn on the FLEX, toggle the power switch that is located on the side of the instrument. The red light indicates that it is on. USB Port... -
Page 13: Setting Nitrogen Pressures
Operator’s Manual Setting Nitrogen Pressures To confirm that the nitrogen levels are set correctly, select “DIAGNOSTICS”, and then select “COMMAND CENTER.” The N high pressure should be between 50-51 psi and the N low pressure should be 2.8 (± 0.2 psi). If the N high pressure or the N low pressure does not fall within the acceptable ranges, follow the instructions below for... - Page 14 Operator’s Manual 6.7.2. Adjusting N Low Pressure To increase: Rotate the lock disc (large disc towards the back) counterclockwise to unlock. Lock Disc Rotate the dial (small knob on the front) clockwise until the pressure increases within the desired range on the HMI touchscreen. Dial In the “Command Center”, open the “Pump Waste.”...
- Page 15 Operator’s Manual To decrease: Rotate the lock disc (large disc towards back) counterclockwise to unlock. Lock Disc Rotate the dial (small knob on the front) one quarter turn counterclockwise. NOTE: The user will not see a change in pressure on the HMI during this step until the residual pressure is released.
-
Page 16: Setting Nitrogen Flow Rate Of Evaporation Chamber
Operator’s Manual Setting Nitrogen Flow Rate of Evaporation Chamber The flow meter should only be adjusted during the initial instrument installation and does not need to be adjusted regularly. Follow the steps below to check and adjust the flow meter. Make sure round bottom flasks are NOT installed in the evaporation chamber when checking the flow meter. -
Page 17: Prime Reservoir And Pump Lines
You must use the correct reservoir position for each solution as some solvents must not be vented. For further details on how to fill the reservoir bottles, refer to FLEX Service Procedure FLS005, found on the ANKOM website. 6.9.2. Assemble Digestion Vessels The following parts are needed when running the line prime method: Digestion vessel glass (with or without port) and vessel bottom assembly. - Page 18 Operator’s Manual 6.9.2.1. Wet the bottom outside edge of the digestion vessel glass with water by wiping it with a wet paper towel. This makes for easier assembly. 6.9.2.2. Place the digestion vessel glass upside-down on the counter. Place the vessel bottom assembly on the digestion vessel glass and press down firmly until the glass seats evenly in the vessel bottom assembly.
- Page 19 Operator’s Manual 6.9.3.5. Enter “Prime” as the sample name for the first position only. 6.9.3.6. Press “SAVE.” NOTE: You will need to still install all four Digestion Vessels for the Line Prime Method. 6.9.4. Install Digestion Vessels 6.9.4.1. Open the digestion oven door by pulling it open.
- Page 20 6.9.6. Install SPE Columns SPE columns must be installed for the line prime method to function correctly. They will not be wetted and can be reused. Any ANKOM SPE column can be used during this step. (e.g., FLEX-SPE-01) To assemble fat SPE columns: 6.9.6.1.
- Page 21 Operator’s Manual 6.9.6.5. Install SPE columns by placing the top of the columns over the column top adapters on the instrument. Push the column upwards and guide the bottom of the column towards the instrument to seat in the column bottom adapter. Twist each column a quarter turn to the left. Fat Columns Column Top Adapter Column Guide...
- Page 22 Turn the large black release ring to the left to release the round bottom flasks. 6.9.10.2. Remove the round bottom flasks. They should still be clean and can be used for the next run. 6.9.10.3. Remove digestion vessels and wash them properly before using for subsequent runs. Refer to FLEX Service Procedure FLS011.
-
Page 23: Hmi Navigation
The home screen allows the user to see all the sections available for navigation. The user can enter a section by pressing one of the blue hexagons. To return to the home screen from any screen, the user can press the green “ANKOM” hexagon. The bar on the right side of the home screen allows the user to open and close vessel tops to gain access to the digestion vessels or to open and close the SPE column lock for access to the SPE columns. -
Page 24: Methods
A,E,D and Cholesterol within a given method. This method is applicable to food and feed samples. Part # #FLEX-M-F: Enables user the ability to run the Total Fat and Crude Fat method. These methods are applicable to oil, food, feed, and liquid samples. -
Page 25: Diagnostics
Operator’s Manual Diagnostics The diagnostics section displays the solution delivery calibration, command center, and settings options. Solution Delivery Calibration This calibration should be done when a new chemical is added or if the user would like to confirm that solution delivery is accurate. - Page 26 To authorize ANKOM’s access to the instrument, the user connects the FLEX instrument to internet through an available network. Once connected to the network the instrument is accessible through the remote software tool Zoho Assist.
-
Page 27: Records And Updates
USB flash drive. Logs are raw data files that can be exported and viewed in excel or another spreadsheet program. NOTE: To export any files from the FLEX, the USB flash drive must contain a folder labeled: ExportFiles Assay Reports & Logs This section contains reports and logs of all assays done on the instrument. -
Page 28: Training And Maintenance
Incubator- In vitro Incubation • ANKOM Gas Production System – Gas/Fermentation Measurement Who we are This section provides a look into ANKOM Technology as a company. Learn more about our American story, our foundation, and our corporate values. Rev 3/2/2023 pg. 26... -
Page 29: Starting An Assay
Be sure to use the correct reservoir position (reservoir #) for each solution because certain solutions must be unvented. For further details on how to fill the reservoir bottles, refer to FLEX Service Procedure FLS005 on the ANKOM website. -
Page 30: Assemble Digestion Vessels
FLEX54), (iii) filter (PART# FLEX-VF, Vitamin and cholesterol analysis; PART# FLEX-FF, Total and crude fat analysis), and (iv) magnetic cross stir bar (PART# 9415). Each FLEX run needs four fully assembled digestion vessels, even if running only one to three samples. -
Page 31: Load Method
NOTE: Method parameters, such as solution volumes, digestion temperature and time, and mixing speed can be adjusted if needed. Please contact ANKOM for more details. 8.4.3. The screen will display the steps required to start a run. Press on step 1 to enter sample details. -
Page 32: Install Digestion Vessels And Weigh Sample
(oil and liquid). For more details on specific sample size and sample preparation, refer to the method SOPs on the ANKOM website. Rev 3/2/2023... - Page 33 Operator’s Manual How to weigh dry and liquid samples for vitamin and cholesterol analysis • Weigh dry or liquid sample directly into the assembled digestion vessel. It is very important to not exceed the specified sample size. Exceeding the sample size could result in the filters plugging.
- Page 34 Operator’s Manual How to weigh dry sample for fat analysis • Tare the weight of an empty weigh tin/boat on an analytical balance. • Weigh sample into the weigh tin/boat • Quantitatively transfer the sample into the assembled digestion vessels. If necessary, use a static free brush to make sure all the sample is transferred.
-
Page 35: Manually Close Digestion Oven Door
Install the SPE Columns The vitamin and cholesterol SPE columns (part# FLEX-SPE-01) can be installed as is onto the instrument, after the shipping packaging is removed. Do not remove the white diffuser disk. SPE columns are a one-time use and must be disposed of after an assay. - Page 36 Operator’s Manual • Install SPE columns onto the instrument by placing the top of the columns over the column top adapters. Push the column upwards and guide the bottom of the column toward the instrument to seat in the column bottom adapter. Twist each column a quarter turn to the left to ensure a good seal.
-
Page 37: Install Round Bottom Flasks
Operator’s Manual Install Round Bottom Flasks 8.8.1. Open the evaporation chamber door manually. 8.8.2. Turn the large black release ring to the right until it tightens. The release ring now is out of the way, ready to receive the round bottom flask. 8.8.3. -
Page 38: Track Progress
Operator’s Manual Track Progress During an assay, the user can track progress and observe dynamic conditions. Once the run has started, the user can toggle between the following three screens to see details such as: which vessels are being filled, whether draining is complete, which reservoir is engaged, and the current step of the method. -
Page 39: Clean Vessel Tops
Operator’s Manual 8.13 Clean Vessel Tops When a run has ended the user has the option to clean the vessel tops and delivery lines through pre-programmed method. This is only required if the last run of the day was a total fat analysis. Total fat methods use hydrochloric acid (HCl) which is a very corrosive chemical. - Page 40 Operator’s Manual 8.13.4. Fill the water reservoir at least half full. 8.13.5. Close the vessel tops by toggling the Vessel Tops tab on the screen. 8.13.6. Close the digestion oven door. 8.13.7. Press “START CLEAN” to start the rinse procedure. The button will flash during the cleaning procedure, which will take approximately 4 minutes.
-
Page 41: End Of Run
8.14.2. Remove the round bottom flasks and immediately cover each flask with a flask stopper or aluminum foil. Further quantitative analysis is described in the relevant standard operating procedures, located on the ANKOM website. 8.14.3. Remove and clean digestion vessel glasses for subsequent use. - Page 42 Dispose according to SDS guidelines and internal SOP. Failure to do this may cause corrosion. If the user plans to not use the FLEX instrument for longer than one week, we recommend that the instrument lines be flushed from all solutions. For more information, see FLS013-Instrument Out-of-Use Procedure located on ankom.com.
-
Page 43: Powering Down Instrument
Operator’s Manual 8.15 Powering Down Instrument If the user would like to turn off the FLEX, press the Power icon located in the lower right corner of the Home screen, and then press “SHUT DOWN.” Once the screen is black, the user can turn off the power switch on the left side of the instrument. -
Page 44: Adjust Method
Operator’s Manual 9. Adjust Method From the Home Screen, select “METHODS.” Select the desired method category. Example: “Vitamin A, E, D.” Select the method of choice. A list of previously used methods will appear on the right side of the screen. Example: “Vit AED 75C 45m”... -
Page 45: Custom Method
This section is only available to users who have purchased an upgrade. For full details on how to create a method refer to the ANKOM website. Custom functionality allows the user to customize an existing method or build a new method from scratch. -
Page 46: Uploading Methods Or Software
Operator’s Manual 11. Uploading Methods or Software This section explains how to upload methods or software onto the FLEX instrument. 11.1 From the Home Screen, press the “Records & Updates” hexagon. 11.2 Press the “Updates” hexagon. 11.3 Select “Update Methods.”... -
Page 47: Faults
The user is alerted, and the instrument automatically aborts the run for safety reasons. The user will be asked whether they want to drain the content of the vessels to waste or not. Refer to the Technical FAQs section on www.ankom.com or call ANKOM Technology (315) 986-8090. -
Page 48: Periodic Maintenance
Wipe down the surface of the instrument whenever spills have occurred. Maintenance Schedule for Parts. For purchasing, all parts are available individually or parts with an asterisk (*) are available in the FLEX Maintenance Kit (part #FLEX66) at www.ankom.com. Service... -
Page 49: Troubleshooting
FLS032 14. Troubleshooting The ANKOM Technology website has the most current frequently asked questions (FAQs) and troubleshooting information. Visit our website to view FAQs or contact us via the links below. For Technical support: www.ankom.com/contact/technical-services For Analytical support: www.ankom.com/contact/analytical-services... -
Page 50: Qc And Calibrations
(2 and 4). For further details on how to fill the reservoir bottles, refer to FLEX Service Procedure FLS005 on the website. 15.1.2. From the Home Screen, press “DIAGNOSTICS.”... - Page 51 Operator’s Manual 15.1.6. Insert the Vessel Bottom Plug (#FLEX72) into the Digestion Vessel Bottom. Press the plug in until it is tight and secure. This will ensure that the cap will not drain fluids. 15.1.7. Install Digestion Vessels into the Digestion Vessel Guide, ensuring that the pour spout is facing towards the user.
- Page 52 This fault is most often caused by an empty reservoir. The user must refill the reservoir and press continue. If the message continues to be displayed, it may be caused by a restriction in the line or a leak in the system. Contact ANKOM Technology for assistance. Full Supply Line This message can occur if the delivery lines are not cleared properly at the end of the solution delivery calibration.
- Page 53 Operator’s Manual 15.1.11. This screen will be displayed when the calibration is successful. The pump configuration settings for that solution are automatically updated and will be used during analytical analysis. Press “OK”. 15.1.12. Remove the Vessel Bottom Plug (#FLEX72) from the Vessel Bottom Assembly and dispose of the plug. Vessel Bottom Plugs are intended for single use.
-
Page 54: Appendix A - Reagents
Operator’s Manual 16. Appendix A – Reagents Best Practices for Solution Preparation: Total and Crude Fat Analysis Solution Reservoir Solution Content Make up Ethanol 1. Green Ethanol Absolute Ethanol 3N HCl 2. Yellow 3N HCl 280 ml concentrated HCl (36-38%) and 720 ml DI water. -
Page 55: Appendix B - Flex Maintenance: Rinsing Slide Valve
Operator’s Manual 17. Appendix B – FLEX Maintenance: Rinsing Slide Valve This maintenance procedure is recommended when any of the following occurred during a run: • MF7 fault (End Drain: Time-out) • MF27 fault (Start Drain: Time-out) • When a run is aborted amid a drain module These three scenarios may cause analyte and/or digestion solutions to remain in the lines and slide valve, which could result in carry-over if not properly cleaned. - Page 56 Automation saves time and money ANKOM Technology’s products include: TDF Dietary Fiber Analyzer • Automates AOAC 991.43, 985.29, 2009.01, 2011.25, and 2017.16 (and associated AACC methods) • IDF/SDF and TDF values • Faster, Technician-free filtering • Computer controlled operation • Reduced per assay costs DELTA Automated Fiber Analyzer with Pump System •...
Need help?
Do you have a question about the FLEX and is the answer not in the manual?
Questions and answers