Table of Contents
Advertisement
Quick Links
Advertisement
Table of Contents

Related Manuals for Panasonic PANASYNC P342i


Summary of Contents for Panasonic PANASYNC P342i
-
Page 2: Table Of Contents
Contents Overview of features ..5 SIM and battery ... . 6 Quick start ....8 Your phone . - Page 3 Contents Index ....125...
-
Page 4: Overview Of Features
Overview of features Your phone has the following features: ® Bluetooth connectivity Use this to make and receive calls using wireless Bluetooth to transfer data to and from PCs, Laptops, other mobile phones and devices that support ® Bluetooth Contacts list Use this to store phone numbers, e-mail addresses and other details about people, so you can call and mail them quickly. -
Page 5: Sim And Battery
SIM and battery SIM and battery Fitting and removing the SIM You insert the SIM into the back of the phone, underneath the battery. If your SIM contains contact details, the first time that you browse your contacts list after fitting a new SIM, you are asked whether you want to transfer the SIM data to your phone. -
Page 6: Charging The Battery
Charging the battery The battery must be fitted in the phone before you connect the charger. Press the button on the top of the connector and insert it into the base of the phone. Connect the charger to the mains power supply. When the phone is charging, the charging indicator lights and a flashing icon appears in the main display and the case screen. -
Page 7: Quick Start
Quick start Quick start Note: Some services are network dependent or may only be available on a subscription basis. Some functions are SIM dependent. For more information contact your service provider. Switching the phone on and off To switch the phone on or off, press and hold c. If you have set an animation and greeting, these are displayed. -
Page 8: Taking A Picture
Taking a picture When you are in camera mode, move the phone around until you can see the image you want on the preview screen. Press Q to capture the image. If you decide that you do not want the image that you have taken, you can press f to delete it. -
Page 9: Using Your Browser
Quick start Using your browser Before you can start using your browser, you need to contact your service provider. When your phone is set up to access the Internet see Internet on page 69 for information about using the browser. Creating a mail message Note: Before you use your mailer, see i-mode™... -
Page 10: Creating A Multimedia Message
Creating a multimedia message Note: Before you use your mailer, see i-mode™ server on page 52 and check that one of the servers has been set. To create a multimedia (MMS) message: Select Menu > i-mode > Mail > Create MMS. From the idle screen, press d >... -
Page 11: Creating A Text Message
Creating a text message To create a text (SMS) message: Select Menu > SMS > Create, or select Menu > i-mode > SMS > Create, or press and hold c then select Create. Enter your text. Press Q. Select Ok or Cancel. Press Q to send the message. -
Page 12: Setting Up Bluetooth
Enter the Bluetooth Passkey provided with the headset. Note: The Passkey for Panasonic EB-BHX70 Bluetooth The Pairing fails if you enter the wrong Passkey. Press Retry to try again. You can select Paired Devices to confirm that the devices are Paired. This lists all the devices that are Paired with the phone. - Page 13 Finally you need to Pair the devices: On the phone select Discover & Pair. As the phone Discovers devices it displays them on the screen. When the car kit name appears in the list you can select Stop to stop the search. If the phone does not Discover your car kit, press d to try again.
-
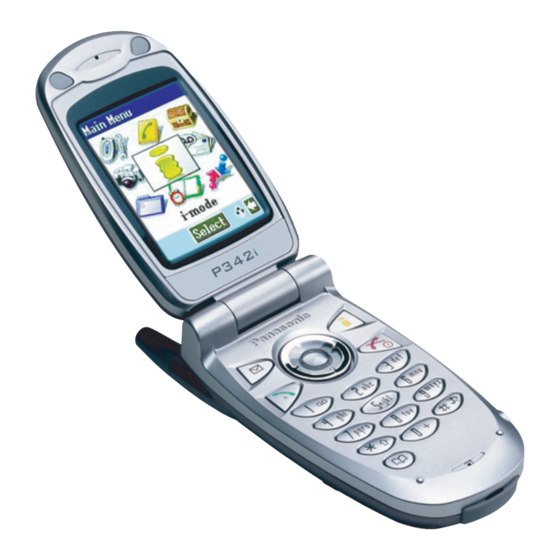
Page 14: Your Phone
Your phone Ear Piece Left Soft Key Use to: ™ Access the i-mode mail menu from idle mode. Switch between text entry types. Select the option in the left hand selection area. Call Key Keypad Use to go to the Contacts List from idle mode. - Page 15 Your phone Camera Lens Memo Key / Self-portrait Mirror Shutter Key Case Screen Infrared Personal Handsfree Connector Camera...
-
Page 16: Display Icons
Display icons After some operations, the display automatically clears after three seconds or when you press any key. Status icons The status icons are displayed according to the currently activated functions. The antenna, GSM signal strength and battery icons are displayed when the phone is switched on and connected to a network. - Page 17 Display icons Registered to a non-home network - Roaming. The selected line number of the current call when using a SIM that has two lines. This is SIM dependent. M The call you are currently listening to when you are connected to more than one call.
- Page 18 mail inbox full mail on server. You may see only one of these icons. Some service providers use all three to indicate the type of mail on the server. SSL page Display icons...
-
Page 19: Menu Structure
Menu structure Menu structure The main menus are as follows: Note: The menus may not display in the same order or with the same icons as listed here. The order and icons vary according to your service provider. Settings Contacts List 1 Display 1 Browse 2 Alerts... -
Page 20: Navigation Key
Navigation key The navigation key is a multi-function key. You use the top, bottom, left and right edges to move around the display. These actions are indicated by b, a, d and c in this user guide. You press the centre of the navigation key Q to: Access the menu system. -
Page 21: Voice Calls
Voice calls Voice calls Making calls Ensure that the phone is switched on, the network operator logo is displayed, and the antenna and signal strength icons (ST) show that network coverage is available in the current area. From idle mode, enter the area code and phone number. Press e. -
Page 22: Making International Calls
Making international calls If you know the international number, you can enter it in the normal way, followed by the area code and phone number. You can use the automatic international access code (+), to dial international numbers without knowing the code for the international exchange. From idle mode, press and hold 0 until + is displayed. -
Page 23: Receiving Calls
Voice calls Voice calls using Bluetooth Making calls You can use voice dial (see Creating a voice dial entry on page 57 for instructions on how to use voice dial) to make voice calls from your Bluetooth pressing any keys on your phone. With some headsets and car kits you can also redial the last number (refer to your headset or car kit instructions for details). -
Page 24: Using Automatic Redial
Rejecting calls To reject an incoming call: Wait until the headset or car kit rings. Press and hold down the main function key on the EB-BHX70 headset until you hear a low tone, or press the red end button on most car kits. Transferring calls from handset to Bluetooth If you make a call using your handset, you can transfer the call to your headset or car kit once the call is connected. -
Page 25: Displaying Caller Id
Displaying caller ID Note: This is network dependent R. If the caller’s number and name are stored in your Contacts List, they can be displayed during an incoming call. Note: Caller ID may not always be available. Setting the ear piece volume During a call press e to adjust the ear piece volume. -
Page 26: Receiving A Second Call
Making a second call Note: This is network dependent R. If Call Waiting is enabled, you can make a second call. You can check your call waiting status from Settings > Call Service > Calls > Call Waiting. Note: You cannot make more than one fax or data call at a time. You must end all voice calls before you can make or receive a fax or data call. -
Page 27: Swapping Between Calls
Operating during two calls Swapping between calls An icon (J) indicates the selected line number of the current call, when connected to two calls. Press Q. Select Swap to change to the other call. Ending current call Press Q. Select End. Ending both calls Press c. -
Page 28: Adding People
Adding people You can add people to the multi-party call (up to a maximum of five), either by making a call or accepting an incoming call. You can then merge the new call into the multi-party. Press Q. Select Merge. Note: When you make a call or accept an incoming call, the multi-party call is placed on hold. -
Page 29: Using The Notepad
Voice calls Using the notepad During a call you can enter numbers that you may want to dial when you have finished the call. You can make a note of these numbers on the notepad. Enter the number. When you have finished your call, press e to dial the number. Press d while the number is displayed to store the number in your Contacts List. -
Page 30: Text Entry
Text entry You use alphanumeric characters to enter details into the Contacts List, to create text and e-mail messages. There are five different text entry modes: normal (ABC or abc), Greek (V), extended alphabet (W), numbers (X) and T9 or select Menu > Input Mode, and select the mode that you want. The icon for the current mode appears in the information area on the display. -
Page 31: Entering Text
Text entry ® ® Using T9 reduces the number of key presses required. ® When in T9 mode: Press a key once for any letter you require on that key. The desired letter may not be displayed. Continue pressing other keys until the end of a word is reached. Check that the word has been typed correctly before continuing to the next word. -
Page 32: Entering Pictographs
Cut, copy and paste You can cut, copy and paste text from other messages or contacts list entries on your phone. To cut text: Select Menu > Cut. Move to the start of the text that you want to cut, and select Start. Use f to highlight the text that you want to cut, and select Stop. -
Page 33: Settings
Settings Settings Use the Settings menu to personalise your phone. Display Wallpaper On/Off Show Setting the wallpaper The wallpaper is a picture that displays when the phone is in idle mode. Select Wallpaper. Select your picture. If your picture is not in the folder press f then select another folder. Changing the start up events The start up events are an animation that you can select and a greeting that you enter. -
Page 34: Setting The Backlight Time
Setting the backlight time The Backlight Time is the time that your screen remains lit when you are not using your phone. Select Backlight Time. Select from 10 seconds, 30 seconds and 60 seconds. Note: Setting the Backlight Time to 60 seconds, can reduce the talk and standby time of your battery. -
Page 35: Operator Notice
Settings Changing the contrast Select Contrast. Use e to move between 0 and 10. Select Ok. Changing the backlight colour You set the backlight colour, to see what type of call you are receiving, or what mode you are in when the phone is closed. You can set the backlight colour for: Alarm/Schedule Voice Calls Fax Calls... -
Page 36: Changing The Ring Volume
Alerts Ring Type Ring Volume Changing the ring volume You can change the ring volume so that you can hear your phone ring. For example, in a noisy environment you may want to set the volume to maximum. Select Ring Volume. Use e to move between 0 and 4 on the volume scale. -
Page 37: Setting Auto Answer
Settings Setting quiet mode In quiet mode the microphone amplifies your voice, so you can whisper and still be heard by the person on the other end of the call. You should use quiet mode in situations where you do not want to disturb the people around you. In quiet mode, the phone does not ring when you receive a call or message, unless you set a ring volume for quiet mode. -
Page 38: Setting The Keyguard
Keys Keyguard Key Volume Setting the keyguard The keyguard stops the keypad being accessed. Note: When the keyguard is on, you must turn it off before you can use the phone. Select Keyguard. You are asked ‘Guard Keypad?’. Press Q. You can also set the keyguard directly from the idle screen: Press and hold down Q. -
Page 39: Changing The Language
Settings Phone settings Language DTMF Length Changing the language You can change the language that the phone uses for display messages and text entry. Select Language. Select DisplayLanguage or Tegic Language. Select the language. Note: Tegic language is the language used by T9 ®... -
Page 40: Setting The Clock
Selecting camera tones The camera tone is the sound the phone makes when you take a picture. Select Camera Tones. Select a tone type. Editing user messages The phone contains some standard user messages that you can send to other people. You can edit these messages to suit you. - Page 41 Settings Auto adjusting the time difference If you are away, in a country with one time zone, then the time difference can be adjusted automatically. Select Clock Set > Auto Adjustment > On. The phone gets your location from the local network provider, and adjusts the clock automatically.
-
Page 42: Call Service
Disabling the power on and off times Select the power on or off time. Select the frequency option. Select Disabled. Press d to save your alarm settings. Highlight the power on or off time. Press d to cycle through Repeat Daily, Once or Disabled. Stop at Disabled. - Page 43 Settings Viewing the combined length of all your outgoing or incoming calls Select Calls > All Calls Timer. Select Incoming or Outgoing. The combined length of all your incoming or outgoing calls since the timer was last reset, is displayed. Once you have seen the total time you can reset the timer: Press Q.
-
Page 44: Service Charges
Viewing the combined details of your previous connections Select Connections > All Connections. The combined length of all your incoming or outgoing calls since the timer was last reset, is displayed. Once you have seen all the details you can reset the total time and data: Press Q. - Page 45 Settings Setting the maximum unit level Use this to set the maximum cost of the calls that you can make. Select Service Charges > Max Cost. Select Menu > Edit. Enter your PIN2. Enter the maximum number of units (the corresponding cost is displayed). Note: The duration of one unit may vary during the day at peak and off-peak times.
-
Page 46: Call Divert
Sending your number Note: This is network dependent R. If your network supports this function, you can decide whether you want your phone number to be sent when you make a call. Note: You must be registered with a service provider before you can choose to send your number. -
Page 47: Changing The Phone Lock Code
Settings Security Phone Lock Call Bar Setting and cancelling the phone lock Note: You can also set the phone lock by holding down Q on the idle screen, then following the instructions below. When the phone lock is set you can only use the phone to receive incoming calls and to make emergency calls. -
Page 48: Changing The Password
Setting and cancelling call bar Call barring restricts certain types of incoming and/or outgoing calls, using a password provided by your service provider. When you check the status of the Call Bar, your phone must be registered with a network. You can set call barring for voice, fax and data calls. Select Call Bar. -
Page 49: Changing The Pin
Settings Enabling and disabling PIN and PIN2 The PIN protects your phone against unauthorised use. If you enable the PIN, you have to enter it every time you turn on the phone. You need PIN2 to set fixed dial numbers. Your PIN and PIN2 are supplied by your service provider. -
Page 50: Changing To A New Network
Enabling and disabling fixed dial Fixed dial is part of the Contacts List, but with added security. When you enable fixed dial: You can only dial numbers that are in the fixed dial store If you manually dial a number, it must match one in the fixed dial store. If you store, edit or delete a phone number, you have to enter your PIN2. -
Page 51: Search Mode
Settings Search mode You can set the Search Mode to Automatic or Manual. When the Search Mode is Manual, the phone only uses the selected network. If coverage is lost, you need to select another network. When the Search Mode is Automatic, the phone automatically reselects a new network to maintain network availability. - Page 52 For GPRS Settings you need to select Set, then select Edit and set the options: Server Setting Settings Profile name What you want to call the server. Defaults are <1>, <2> and <3>. Proxy Port Proxy port setting SSL Port SSL port setting Proxy Host Proxy host setting...
-
Page 53: Contacts List
Contacts list Contacts list Use the Contacts List menu to store a person’s phone numbers, e-mail addresses, company name, picture and other information. You can also set up how your contacts list is organised and displayed. Browse This menu only applies to contacts stored on your phone. For contacts stored on the SIM see SIM on page 60. -
Page 54: Creating A New Contact
Create Note: When you create or edit any entries, you must remember to press d to save your changes, or they will be lost. Creating a new contact Select an item. Enter the data using the keypad, or select an item from the list available. For each contact you can enter: Item Number of characters... - Page 55 Contacts list Note: Location is the location number in your Contacts List. If you put a contact in a group which has a ring type, case screen colour and vibration alert, then these options are not available for the individual contact. Entering DTMF digits in a phone number You can enter DTMF digits at the end of a phone number, so that these numbers are automatically sent after the main phone number.
-
Page 56: Voice Dial
Voice dial With voice dial you can save a number using your voice. You can then dial the number by saying the name that you want to call. Creating a voice dial entry Select Voice Dial. Select Add. Select a contact. Select Recall. -
Page 57: Creating A Group
Contacts list Editing a voice dial entry Select Voice Dial. Select an entry. Select from Add, Play and Delete. Add. Add a new Voice Dial entry. Play. Listen to the recording for the selected entry. Delete. Delete the selected entry. Groups From the Groups menu, you can set up groups of contacts. - Page 58 Adding and removing members Once you have created a group, you can add or remove members. To add a new member: Select the group on the list. Select Members from the menu. Select Add. Select a contact from your list. To remove a member: Select the group on the list.
- Page 59 Contacts list Enabling and disabling hotkey dialling With hotkey dialling, you can press and hold the digit key that relates to a location number to call contacts on your Contacts List. For example, to call the contact in location 3 of your Contacts List, press and hold 3. To enable hotkey dialling, select Hotkey Dialling, then select SIM Phonebook, Mobile Phonebook or Service Dial.
- Page 60 –> Phone. Copies the details of the current entry to the phone. Profile. Displays the entry’s profile. Creating fixed dial number entries Note: Before you can create a fixed dial number entry, you have to enable Fixed Dial (see Enabling and disabling fixed dial on page 51). Fixed dial is part of the Contacts List, but with added security.
-
Page 61: Service Dial
Contacts list Service dial Note: This option is SIM dependent. M Your service provider may provide a telephone number for you to access other services. Info numbers Note: This option is SIM dependent. M Your service provider may provide some useful telephone numbers for you to call for services such as directory enquiries. -
Page 62: Applications
Applications This menu lists the Java™ applications that are available on your phone. To use an application highlight it in the list and press Q. You can have up to 50 Java™ applications on your phone. Note: You download new applications from your service provider’s website, using the i-mode™... -
Page 63: I-Mode
i-mode™ i-mode Use the i-mode™ menu to access on-line services such as site (program) connection, mail and Internet services. The following i-mode™ icons can appear on your phone: i-mode™ connecting, i-mode™ connected b mail inbox full i-Menu This starts the i-mode™ browser. Note: Before you use your browser, see i-mode™... - Page 64 Create Mail To create an e-mail message: Select Mail > Create Mail. From the idle screen press d > Create Mail. Note: Using d as a shortcut to the Mail menu is dependent on your service provider. Press Q. Select Subject, then press Q to enter a subject. Select To:1, then press Q to enter an address.
-
Page 65: Create Mms
i-mode™ User messages You can enter one of the predefined user message in your e-mail message: Select Menu > User Msg. A list of the user defined messages is displayed. Select the message you require. Press Q. To edit a user message, see Editing user messages on page 41. Create MMS Note: Before you use your mailer, see i-mode™... -
Page 66: Mms Options
To save your message, select Save and press Q, or press d, then select Save. Your message is stored in the Draft so you can send or edit it later. Note: Maximum size of a mail is 50kB or 100kB. (Service provider dependent) Use Preview to preview your slide while you are creating it. -
Page 67: Check New Mail
i-mode™ SelectableRcv. Use this to receive or delete a mail or MMS message from the server. Note: SelectableRcv. is dependent on your service provider. Check new mail Use this to check to see if you have any new mail. Mail settings Mail Settings Attachment Back... -
Page 68: Enter Url
This accesses the same options as the SMS menu on the main menu. See SMS on page 77 for information on these options. Bookmarks This lists the bookmarks that you have stored. Select a bookmark from the list to go directly to that page. -
Page 69: Check Settings
i-mode™ Show tables Use this to set whether or not to display tables that are contained in a web page. Load images Use this to set whether or not to display images that are contained in a web page. Word wrap Use this to set whether to display text as it appears on the web page or wrap it to fit your phone’s screen. -
Page 70: Camera
Camera Note: Before you use the camera you should set the date and time. See Setting the clock on page 41. You can take pictures with the built-in camera, and send them in multimedia (MMS) and e-mail messages, or use them as wallpaper. Changing to camera mode To change to camera mode either select Camera from the main menu, or press and hold the memo key/camera shutter key from idle mode when the phone is closed. -
Page 71: Saving A Picture
Camera Taking a self-portrait You can take a self-portrait using the shutter button on the side of the phone. Ensure that the phone is in camera mode. Close the phone. View the image in the self-portrait mirror. Press the shutter button on the side of the phone. You can use this image in the same way as any other picture that you take with the camera. - Page 72 Editing the picture When you have finished editing the picture, you must press Q to save your changes. Select Edit. Press d When you take a picture then select Edit, the editor reduces the picture to 132 x 176. A warning message: This will reduce the picture size.
-
Page 73: Brightness Adjustment
Camera Changing the format Select Format. Choose from JPEG Fine, JPEG Normal and JPEG Economy. JPEG Economy produces a small file but with a low resolution. JPEG Normal produces a file which is acceptable for most uses. JPEG Fine produces a large file with high resolution. Trimming your picture Use this to select and save just a small part of your picture. - Page 74 Changing brightness after taking a picture See Changing the brightness on page 73. Preview screen menu Effect Twilight These are all set up using the same basic method: When the required image is shown in the preview screen, press d. Select the required option.
-
Page 75: Capture Mode
Camera Resolution With Resolution you can choose the resolution for your image. You can choose from 240 x 320 and 480 x 640. The default is 240 x 320. If you select 480 x 640 then the following options are not available: Close-up picture: Zoom in and out in preview;... -
Page 76: User Messages
SMS is usually called text messaging. With text messaging you can send and receive text. You can receive, display, edit and send text messages of up to 459 characters to mobile phones on your service provider’s network or any network that has a roaming agreement. - Page 77 Replying to a message from a fixed line Select Reply. Enter your message text, and include the fixed line number somewhere in the message. The number can be at any point in your message, but you must enter the number with a hash at the beginning and the end, for example #01234 567890#. Select Send.
-
Page 78: Chat Sms
Chat SMS With Chat SMS you can read sent and received messages with another party on one screen. Use this to start a call in chat mode. Enter the phone number you want to chat with. To enter a number using the keypad: Enter the number, then select Menu >... -
Page 79: Message Centre
Settings Recipient Auto Group Delete Message centre You must enter the message centre number before you can send text messages. Note: The message centre number may have been pre-programmed on the SIM. Select Message Centre. Enter the message centre number in international dial format (see Making international calls on page 23). -
Page 80: Auto Delete
Auto delete You can set this to automatically delete messages. You select from: Off. Turns off Auto Delete. Received Read. Overwrites the oldest read message. Received Any. Overwrites the oldest read message or the oldest unread message if there are no read messages. Lifetime This is the time that your message is stored at the message centre. -
Page 81: Message List
Message list The Message List stores the last broadcast messages that you received. You can delete messages from here. Languages You can change the language for your broadcast messages. Select Language. Select the language from the list. -
Page 82: Data Folders
Data Folders Use Data Folders to store your pictures, sounds and themes. There are three predefined folders for My Pictures, My Sounds and My Themes. These may contain preloaded files. There is a folder called Unknown, where files with an unknown format are stored. There are five empty folders. You can customise any of these folders. -
Page 83: Renaming A Picture
Data Folders Editing stored pictures From the Edit menu you can change the Brightness, Effect, Frame, Size, Format and Trim of a stored picture. When you have edited the picture, press Q to save your changes. Select the folder where your pictures are stored. Select the picture that you want to edit. -
Page 84: Deleting A Picture
Copying or moving a picture Select the folder where your pictures are stored. Select the picture that you want to copy or move. Press Q. Select Copy or Move. Select the folder to move or copy to. Note: The default folder is the last one that you copied or moved to. You cannot use this for predefined wallpaper files. -
Page 85: Viewing The Image Properties
Data Folders Sending a picture via Bluetooth Select the folder where your pictures are stored. Select the picture that you want to send. Press Q. Select Bluetooth. Select the Bluetooth Discover another Bluetooth Note: If your phone is not Paired with any other devices, it starts searching for a device automatically. -
Page 86: Renaming A Sound
My sounds Note: The functions available depend on the type of sound file. Play Mail Rename Playing stored sounds Select the folder where your sounds are stored. Select the sound that you want to play. Press d, or press Q and select Play. Sending a sound by mail or MMS Select the folder where your sounds are stored. -
Page 87: Deleting A Sound
Data Folders Copying or moving a sound Select the folder where your sounds are stored. Select the sound that you want to copy or move. Press Q. Select Copy or Move. Select the folder to move or copy to. Note: The default folder is the last one that you copied or moved to. You cannot use this for polyphonic ring types. - Page 88 Sending a sound via Bluetooth Select the folder where your sounds are stored. Select the sound that you want to send. Press Q. Select Bluetooth. ® Select the Bluetooth device from the list of Paired Devices or select Find to Discover another Bluetooth Note: If your phone is not Paired with any other devices, it starts searching for a device automatically.
- Page 89 Data Folders My themes The phone has seven predefined themes. A theme contains a colour scheme. It may also contain a wallpaper and/or a ringtone. You use a theme to change the look and feel of your phone. Note: The seven predefined themes only contain a colour scheme. They set the colours used on your screen.
-
Page 90: Slide Show
Data Folders Manipulating folders From the list of folders available, highlight a folder, and press d. Folder Slide Show Memory Delete All Memory Select Memory to display the percentage of memory used and the number of files currently in the folder. Rename Select Rename to rename the folder. -
Page 91: Organiser
Organiser Organiser The menus are as follows: Synchronization Contacts list 1 Sync Schedule 1 Browse 2 Sync Contacts 2 Create 3 Restore Schedule 3 Voice Dial 4 Restore Contacts 4 Groups 5 Settings 6 SIM 7 Storage 8 Service Dial - 9 Info Numbers 10 Voicemail Calculator... -
Page 92: Advanced Setting
Synchronizing your schedule Before you can synchronize your schedule, you have to set up a connection to the external database. Highlight Sync Schedule. Select Edit. Select a connection. Select Menu > Set. You can just send changes to the external database, or send all your records to the external database. - Page 93 Organiser Enter the following information: Item Length Profile Name Bearer Select not applicable Server Database Server User ID 32 Server Password Note: If you set Authentication information or change the Bearer setting you also need to change the setting on your computer software. See your software instructions for more information.
- Page 94 To send all your records to the external database: Select Restore Contacts. Select Sync. Note: If you are synchronizing your contacts list for the first time, or there are a large number of changes, then the synchronization may take several minutes. If the message Synchronize all data? is displayed, you need to confirm the synchronization operation.
-
Page 95: Converting A Value
Organiser Contacts list This accesses the same options as the Contacts List menu on the main menu. See Contacts list on page 54 for information on these options. Converter Use the converter to convert from/to a home currency using a conversion rate that you enter. -
Page 96: Number Of Characters
You can enter the following information: Item Number of characters First name Last name Home number Work number Mobile number Other number Home mail Work mail Other mail Title Company Note Photo Select a picture from the list or take a picture with the camera. Send your details to a Bluetooth Select Bluetooth. -
Page 97: Creating A Reminder
Organiser Schedule Use the schedule to register reminders for events and for planning holiday periods. Caution: You need to ensure that any settings made in the schedule do not automatically power on the phone when you are in an aircraft, medical facility etc. Creating a reminder Select Menu >... -
Page 98: Deleting Holiday Reminders
Viewing a reminder Highlight a date. Select View or select Menu > View. Select the reminder. Select Detail. Setting a holiday reminder Select Menu > Options. Select Holiday Set. Select Day or Day of the week. Press and hold f to remove the current date. Enter the new date. -
Page 99: Setting An Alarm
Organiser Calculator The four function calculator performs simple calculations - addition, subtraction, multiplication and division. Select Calculator. Enter a number (maximum 10 digits). Use g to select the arithmetic operator. Enter another number (maximum 10 digits). If the calculation is complete press d to get the result. If the calculation is not complete, enter numbers and arithmetic operators, until the calculation is complete, then press d to get the result. -
Page 100: Recording A Conversation
Disabling an alarm Select an existing alarm time. Select the frequency option. Select Disabled. Press d to save your alarm settings. Highlight an existing alarm time. Press d to cycle through Repeat Daily, Once or Disabled. Stop at Disabled. Press Q then d to save your alarm settings. Memo Use the Memo to record a two-way conversation during a call, and to use the phone as a voice recorder. -
Page 101: Deleting A Recording
Organiser Playing back a recording Select Playback. Select a recording. To stop playing press Q twice. Note: You can use the notepad during play back, see Using the notepad on page 30. Volume control during play back While playing back a recording, use e to adjust the volume. Deleting a recording Select Delete. -
Page 102: Connect
This is SIM dependent. Your phone can be used as a modem to connect a laptop or desktop PC to the ® Internet via Bluetooth please refer to the documentation on the CD-ROM, or to the Panasonic website www.panasonicmobile.com/support_software/e_eng/index.html. Bluetooth ®... - Page 103 The Pairing fails if you enter the wrong Passkey. Most Bluetooth use a fixed 4 digit Passkey, e.g. the Passkey for the Panasonic EB-BHX70 Headset is 0000. For other devices such as a PC, laptop or another mobile phone that don’t use a fixed Passkey enter the same Passkey on both devices.
- Page 104 Note: Some manufacturers may use the term PIN, Password or Passcode instead of Passkey. Your phone only supports Passkeys that use numbers not letters. Making the phone Discoverable You can also Pair with another Bluetooth and letting the other Bluetooth Discoverable: Select Make D’coverable.
- Page 105 ® Your Bluetooth name is the name reported to other Bluetooth or exchange data with your phone. By default the name is Panasonic P342i but we recommend that you change it. To view your Bluetooth To edit the name select Menu > Edit.
- Page 106 Set up a dial up connection on your computer to access the Internet via your phone. Note: Installation instructions for your computer may vary depending on your computer’s operating system, web browser, Bluetooth information please refer to the documentation on the CD-ROM, or to the Panasonic website www.panasonicmobile.com/support_software/e_eng/ index.html. ® Installing Bluetooth...
- Page 107 Once the Data Connection Assistant is installed you need to set up a connection to your ® Bluetooth modem: Select Start > Programs > Panasonic Data Connection Assistant > Data Connections. If you are using a circuit switched connection: Select Make New Connection. Select Modem - (Panasonic P342i or Bluetooth window).
- Page 108 Setting your computer’s dial up connection From your web browser: Select Start > Program > Panasonic Data Connection Assistant Select the previously created data connection, then select the Connect option from the File menu. Enter your user name and password and select Connect.
-
Page 109: Infrared Dialup
Connect Infrared dialup You can use the Infrared connection to transfer information between your phone and another device with an Infrared port. You can also use GSM fax and data services, and you can access the Internet and e-mail via other devices. Preparing for Infrared connection Place your phone and the other device within the effective range of the Infrared connection. - Page 110 Install the Data Connection Assistant software on your computer (See Installing the Data Connection Assistant software on page 108.) Set up your computer's Fax application software to send/receive faxes via your phone. Ensure that you select the Panasonic P342i Infrared modem port in your Fax application. Connect...
-
Page 111: Stk
Note: This option is SIM dependent. M This is the SIM Toolkit menu. If you have this option on your phone, then you need to use the Organiser menu to access the Connect options. -
Page 112: Accessories
Accessories Bluetooth headset (EB-BHX70) ® You can use a Bluetooth within approximately 10 metres of your phone. Car charger (EB-CDX70) Top up your battery in your vehicle by attaching this to your cigarette lighter socket. Car holder (EB-KAX70) This can be mounted in your vehicle to store your phone. Can be used with car charger and personal handsfree to provide basic in-car handsfree operation. - Page 113 Accessories Fast travel charger (EB-CAX70UK) Fast travel charger (EB-CAX70EU) Li-Ion battery (EB-BSX73D) Personal handsfree (EB-EMD87) USB and charging data cable (EB-UCX70) Carry this wherever you go so you can always recharge your battery. Double your talk time by having a spare battery. Talk and move while keeping your hands free, by using a personal handsfree.
-
Page 114: Troubleshooting
Troubleshooting Please contact your dealer, if any problem persists, or if your problem is not dealt with here. Problem Phone will not switch on. Short battery life for a new battery. Short battery life for an old battery. The charging indicator does not light, the battery level indicator does not appear and the phone... - Page 115 Troubleshooting Problem Calls cannot be made. Calls cannot be made from Fixed Dial Store. Calls cannot be received. Emergency calls cannot be made. Phone numbers cannot be recalled from Contacts List P342i does not Discover ® another Bluetooth device. P342i fails to Pair with ®...
-
Page 116: Important Error Messages
Problem P342i is not Discovered ® by other Bluetooth devices Call is terminated when closing the phone Important error messages These are some of the important error messages which may be displayed. Area Not Allowed. Network Not Allowed. Security Failure. SIM Blocked/Contact service provider. - Page 117 Troubleshooting Verification Failure. Incorrect Lock Code. Incorrect PIN/PIN2/PUK/ PUK2. Auto Redial List Full. On changing the phone lock code, verification of the new code is incorrect – retry changing the lock code with correct verification. Disabling or enabling the lock code has failed due to incorrect entry of the lock code –...
-
Page 118: Glossary
Glossary Access Point Name. Gateway from GRPS network to other networks, e.g. Internet. Short range wireless connection for voice and data transfer. ® Bluetooth CHAP Challenge Handshake Authentication Protocol. A security feature for the GPRS network. Circuit Switched Data. Connection method used by your phone for data services such as web browsing, e-mail and fax. - Page 119 Glossary Passkey Password PIN2 PUK/PUK2 Registration Roaming Service Provider Password Authentication Protocol. A security feature for the GPRS network. A one to sixteen digit number entered when Pairing Bluetooth devices. Used as a security measure to prevent unauthorised Pairing. Also known as PIN, Password or Passcode by other manufacturers.
-
Page 120: Personal Settings And Notes
Personal settings and notes Use the table below to record your i-mode™ server settings. Item Provisioning Information Setting No 2 (if customizable) Profile Name Proxy Port SSL Port Proxy Host Portal URL Mail URL MMS URL GPRS Settings Access Point Name User ID User Password Normal (PAP)/ Encrypted... - Page 121 Personal settings and notes Notes...
- Page 122 The Serial Number can be found on the outside of the phone under the battery. For your convenience we recommend that you note the following details as a record of your purchase. Part Number Serial Number Dealer Name Purchase Date Personal settings and notes...
- Page 123 Personal settings and notes...
- Page 124 Index Active flip ....40 Adjusting the time difference Automatically ... 42 Manually ....42 Alarm Disabling .
- Page 125 Index Format ....75 Frame ....75 Resolution ....76 Twilight .
- Page 126 Handsfree to handheld ..26 Holding a call ....26 Hotkey dialling ..25, 60 Icons .
- Page 127 Index Phone lock Cancelling ....48 Changing the code ..48 Setting ....48 Phone off .
- Page 128 Sound As a ring type ... 89 Properties ....89 Speed dialling ....60 Start up animation .
Need help?
Do you have a question about the PANASYNC P342i and is the answer not in the manual?
Questions and answers