Table of Contents
Advertisement
Quick Links
Advertisement
Table of Contents

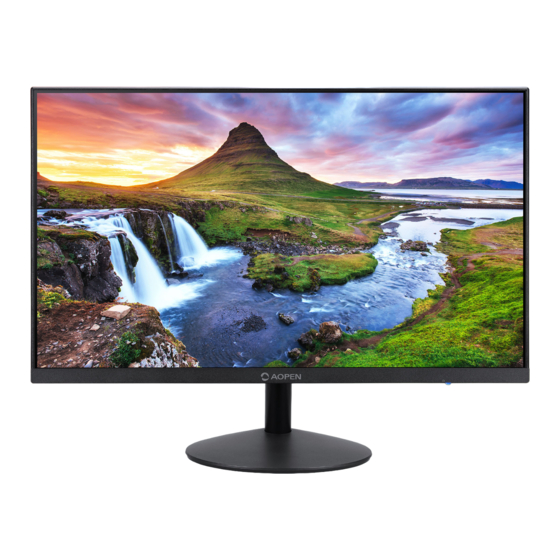
Related Manuals for AOpen 27E1


Summary of Contents for AOpen 27E1
- Page 1 AOPEN LCD Monitor User Guide...
- Page 2 AOPEN Smartview Incorporated. Copyright © 2021. All Rights Reserved. AOPEN LCD Monitor User Guide Original Issue: 08/2021 Changes may be made periodically to the information in this publication without obligation to notify any person of such revisions or changes. Such changes will be incorporated in new editions of this manual or supplementary documents and publications.
-
Page 3: Information For Your Safety And Comfort
Special notes on LCD monitors The following are normal with the LCD monitor and do not indicate a problem. use. Turn off the power switch and then turn it on again to make sure the flicker disappears. pattern you use. remain after switching the image, when the same image is displayed for hours. -
Page 4: Accessibility
Accessibility Make sure that the power outlet is close to the device operator and convenient for plugging and pulling of the power adapter (power cord). Make sure to unplug the power adapter (power cord) from the power outlet when disconnection of power is necessary. Safe listening To protect your hearing, follow these instructions. - Page 5 Warning! The grounding pin is a safety feature. Using a power outlet that is not properly grounded may result in electric shock and/or injury. Note:...
-
Page 6: Potentially Explosive Environments
We at AOPEN are very conscious of the environmental effects of our business and strive to identify and provide the best working procedures to reduce the environmental impact of our products. -
Page 7: Lcd Pixel Statement
LCD pixel statement The LCD unit is produced with high-precision manufacturing techniques. Nevertheless, some pixels may occasionally misfire or appear as black or red dots. This has no effect on the recorded image and does not constitute a malfunction. Built-in power management of the device: The LCD monitor enters "sleep"... -
Page 8: Taking Care Of Your Vision
Taking care of your vision Long viewing hours, wearing incorrect glasses or contact lenses, glare, excessive room lighting, poorly focused screens, very small typefaces and low-contrast displays could stress your eyes. The following sections provide suggestions on how to reduce eyestrain. Eyes •... -
Page 9: Declaration Of Conformity
27E1 (“x” = 0~9, a ~ z, A ~ Z, or blank) We, AOPEN Smartview Incorporated., hereby declare under our sole responsibility that the product We, AOPEN Smartview Incorporated., hereby declare under our sole responsibility that the product described above is in conformity with the relevant Union harmonization legislations as below Directive and... - Page 10 AOPEN 27E1 27E1 (“x” = 0~9, a ~ z, A ~ Z, or blank)
-
Page 11: Table Of Contents
Special notes on LCD monitors Information for your safety and comfort Safety instructions Cleaning your monitor Connecting/disconnecting the device Accessibility Safe listening Warnings Using electrical power Product servicing Potentially explosive environments Additional safety information IT Equipment Recycling Information Disposal instructions LCD pixel statement Tips and information for comfortable use Finding your comfort zone... -
Page 12: Unpacking
Unpacking Please check that the following items are present when you unpack the box, and save the packing materials in case you need to ship or transport the monitor in the future. LCD monitor Quick start guide Power line HDMI cable VGA cable Power adapter (Optional) -
Page 13: Installation Instructions
Installation instructions Stand cover Screw Stand Screw Stand Base Pivot Pivot Fit the stand and base assembled as shown in the illustration and lock the stand with screws. Take out the stand cover and insert it into the stand as shown in the illustration. Disassembly Screw Stand... -
Page 14: Screen Position Adjustment
Screen position adjustment -5° 15° To optimize the viewing position, you can adjust the monitor tilt, using both of your hands to hold the edges of the monitor.The screen can be adjust by inclining with both hands to optimize the view as shown below. Generally, it can be adjusted up to 15 degrees backward and up to 5 degrees forward. -
Page 15: Display Data Channel (Ddc)
Display Data Channel (DDC) To make installation easier, so long as your system supports the DDC protocol, the monitor is able to plug-and-play. The DDC is a communication protocol through which the monitor automatically informs the host system about its capabilities; for example, supported resolutions and corresponding timing. -
Page 16: Standard Timing Table
Standard timing table Mode Resolution 640x480 60Hz 640x480 72Hz 75Hz 66.66Hz VESA 70Hz 56Hz 60Hz SVGA 72Hz 75Hz 832x624 74.55Hz 60Hz 70Hz 75Hz 60Hz SXGA 75Hz 60Hz VESA 60Hz WXGA+ 60Hz WSXGA+ 60Hz 60Hz 75Hz * HDMI1.4: 1920x1080/75Hz... -
Page 17: Installation
Connect the LCD monitor to PC 1. Power off the monitor and unplug the power source of the PC. 2. Connect the VGA cable: a. Make sure the monitor and PC are powered off; b. Connect the VGA cable to the PC. 3. -
Page 18: Users Controls
Icon Item Description a. Press to view Main page. Press again to enter mode select Mode/Exit function. b. When the Function Menu is active. Press to return previous Menu or exit current Menu. a. Press to view Main page. Press again to enter brightness Brightness/ adjustment function. -
Page 19: Using The Shortcut Menu
Mode adjustment open the mode adjustment hotkey to set the display scene mode, after completion, use to go back previous menu. sRGB Reading Darkroom Movie Brightness... - Page 20 Select input Open the Input control and select VGA or HDMI input source, When you are done, to go back one level. Input Input HDMI Auto Source The Function page Open the Function page to adjust picture, color, OSD, system and information, and use the arrows to set the desired settings.
- Page 21 Color Mode - Standard Picture Gamma Color Color Temp. Warm R Gain G Gain System B Gain R Bias G Bias B Bias Mode - Standard Picture Modes sRGB Mode Color Grayscale Mode System 6-axis Hue 6-axis Saturate Move Enter Quick Start Mode color 6.
- Page 22 7. SRGB: default is off. You can turn sRGB on or off for better color matching with peripherals (eg.Printers and digital cameras) 8. Grayscale Mode: Turn grayscale mode On or Off. The default is off. 9. 6-axis Hue: Adjust the red, green, blue, yellow, magenta and cyan hue. 10.
- Page 23 System 1. Press the MENU key to open the OSD. 2. Using the keys, select Setting from the OSD. Then navigate to the system element you wish to adjust. 3. Use the keys to select the setting. 4. Input: Select the source from VGA or HDMI. 5.
-
Page 24: Troubleshooting
Save Setting to...(User mode only) Save the settings to sRGB/reading/darkroom mode. Troubleshooting Before sending your LCD monitor for servicing, please check the troubleshooting list HDMI Mode (Optional) Problem LED status Remedy No picture visible Remain on Using the OSD menu, adjust brightness and contrast to maximum or reset to their default settings. -
Page 25: Vga Mode (Optional)
VGA Mode (Optional) Problem LED status Remedy No picture visible Remain on Using the OSD menu, adjust brightness and contrast to maximum or reset to their default settings. Light off Check the power switch. Check if the power cord is properly connected to the monitor.
Need help?
Do you have a question about the 27E1 and is the answer not in the manual?
Questions and answers