Advertisement
Quick Links
A PERSONAL MESSAGE FROM TEAM SKYBOUND
When I shop, I am not just buying a product or
service. I purchase why that brand focuses on
what they do, what their corporate philosophy is,
the quality of their products, and whether or not
my personal core values align with that brand's
vision. When I don't feel great about a company's
brand, products, or how I'm being treated as a
customer, then I know they are not delivering on
what matters most: exceeding the customer
expectation by delivering happiness with their
products, quality, and service.
This primary focus is what drives our culture at
Team Skybound. For supporting our vision, we
would like to personally thank you for trusting us
to deliver happiness to you and your family!
Team SkyBound
"Nurturing the inner-child in all of us by
uniting communities worldwide and
promoting an active lifestyle."
For customer service, please contact:
888-891-4689
Monday through Friday
8:00 am to 5:00 pm PST
or visit www.SkyBoundUSA.com
or www.TrampolinePartsCenter.com
help@skyboundusa.com
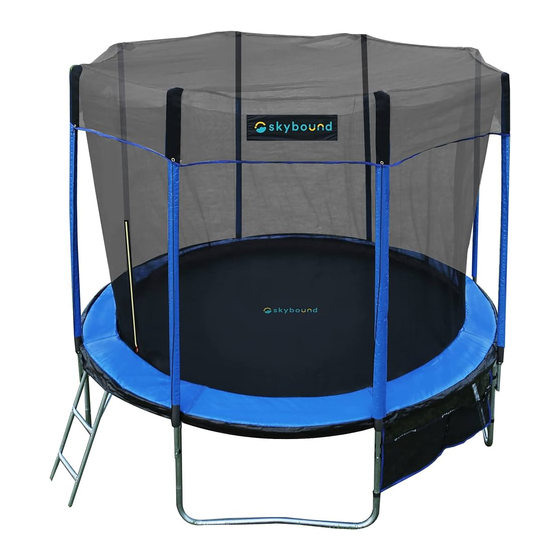
10ft/12ft/14ft Trampoline
with Enclosure Net
(Straight Pole Style)
ASSEMBLY AND INSTALLATION MANUAL
www.SkyBoundUSA.com
www.TrampolinePartsCenter.com
2023 BX International Inc – ALL RIGHTS RESERVED
Advertisement

Related Manuals for SkyBound 10ft Trampoline with Enclosure Net


Summary of Contents for SkyBound 10ft Trampoline with Enclosure Net
- Page 1 This primary focus is what drives our culture at Team Skybound. For supporting our vision, we would like to personally thank you for trusting us to deliver happiness to you and your family! Team SkyBound “Nurturing the inner-child in all of us by...
-
Page 2: Warning - General
WARNING - USAGE IMPORTANT INFORMATION • For additional information concerning trampoline equipment, contact SkyBound (www.SkyBoundUSA.com); help@skyboundusa.com trampoline instructor. Prior to using the trampoline, you must read all the instructions contained in this manual. • Bounce only when the surface of the bed is dry. Wind or air movement should be calm to gentle. - Page 3 10FT ASSEMBLY PARTS 10FT ASSEMBLY PARTS A C CE SS O R IE S LIST 1 A CCES SO RI ES L I ST 2 This object is subject to wear and tear. No warranties whether expressed or implied are provided. Part Name Pictures Quantity...
- Page 4 10FT ASSEMBLY INSTRUCTIONS 10FT ASSEMBLY INSTRUCTIONS STEP It is highly recommended for two or more people to assemble the trampoline. This package contains small parts which are a choking hazard and may have Install Part C along with Part D sharp edges and points.
- Page 5 10FT ASSEMBLY INSTRUCTIONS 10FT ASSEMBLY INSTRUCTIONS STEP Install Part W using Part J. Please follow installation diagram to install springs properly to frame of trampoline. Complete installation drawing of spring #1-56 It is highly recommended for two or more people to assemble the trampoline. This package contains small parts which are a choking hazard and may have sharp edges and points.
- Page 6 10FT ASSEMBLY INSTRUCTIONS 10FT ASSEMBLY INSTRUCTIONS It is highly recommended for two or more people to assemble the trampoline. STEP This package contains small parts which are a choking hazard and may have sharp edges and points. Keep all parts away from children until fully assembled. Install Spring Pad Cover as shown in the figure STEP...
- Page 7 10FT ASSEMBLY INSTRUCTIONS 10FT ASSEMBLY INSTRUCTIONS STEP STEP Install shoe bag as shown below. Install Net and secure Net with rope as shown in the figure below. (Steps 9 & 10 same for curved trampoline) It is highly recommended for two or more people to assemble the trampoline. This package contains small parts which are a choking hazard and may have sharp edges and points.
- Page 8 SkyBound Customer Service help@skyboundusa.com SkyBound, a BX International Inc Company. SkyBound is a registered trademark of BX International Inc. in the U.S. and other countries. All logos, names, characters, likenesses, images, slogans and packaging appearance are the property of SkyBound.
- Page 9 12FT ASSEMBLY PARTS 12FT ASSEMBLY PARTS A CCE SSORI E S LIS T 1 ACCESSORI ES L IST 2 This object is subject to wear and tear. No warranties whether expressed or implied are provided. Part Name Pictures Quantity Injury will likely occur with the use of a trampoline or any associated product. Use with supervision.Use at your own risk.
- Page 10 12FT ASSEMBLY INSTRUCTIONS 12FT ASSEMBLY INSTRUCTIONS STEP It is highly recommended for two or more people to assemble the trampoline. This package contains small parts which are a choking hazard and may have Install Part C along with Part D sharp edges and points.
- Page 11 12FT ASSEMBLY INSTRUCTIONS 12FT ASSEMBLY INSTRUCTIONS STEP Install Part W using Part J. Please follow installation diagram to install springs properly to frame of trampoline. Complete installation drawing of spring #1-70 It is highly recommended for two or more people to assemble the trampoline. This package contains small parts which are a choking hazard and may have sharp edges and points.
- Page 12 12FT ASSEMBLY INSTRUCTIONS 12FT ASSEMBLY INSTRUCTIONS STEP STEP Install Part U onto Parts A & B of trampoline. Install Spring Pad Cover as shown in the figure below. STEP Install and secure the trampoline Poles as shown in the figure below.
- Page 13 12FT ASSEMBLY INSTRUCTIONS 12FT ASSEMBLY INSTRUCTIONS STEP STEP Install Net and secure Net with Install shoe bag as shown below. rope as shown in the figure below. (Steps 9 & 10 same for curved trampoline) It is highly recommended for two or more people to assemble the trampoline. This package contains small parts which are a choking hazard and may have sharp edges and points.
- Page 14 SkyBound Customer Service help@skyboundusa.com SkyBound, a BX International Inc Company. SkyBound is a registered trademark of BX International Inc. in the U.S. and other countries. All logos, names, characters, likenesses, images, slogans and packaging appearance are the property of SkyBound.
- Page 15 14FT ASSEMBLY PARTS 14FT ASSEMBLY PARTS A C C E S S OR I E S LIST 1 A CCES SO RI ES L I ST 2 This object is subject to wear and tear. No warranties whether expressed or implied are provided. Part Name Pictures Quantity...
- Page 16 14FT ASSEMBLY INSTRUCTIONS 14FT ASSEMBLY INSTRUCTIONS STEP It is highly recommended for two or more people to assemble the trampoline. This package contains small parts which are a choking hazard and may have sharp edges and points. Keep all parts away from children until fully assembled. Install Part C along with Part D to part I as shown in the figure below.
- Page 17 14FT ASSEMBLY INSTRUCTIONS 14FT ASSEMBLY INSTRUCTIONS STEP Install Part W using Part J. Please follow installation diagram to install springs properly to frame of trampoline. Complete installation drawing of spring #1-72 It is highly recommended for two or more people to assemble the trampoline. This package contains small parts which are a choking hazard and may have sharp edges and points.
- Page 18 14FT ASSEMBLY INSTRUCTIONS 14FT ASSEMBLY INSTRUCTIONS STEP STEP Install Part U onto Parts A & B of trampoline. Install Spring Pad Cover as shown in the figure below. STEP Install and secure the trampoline Poles as shown in the figure below.
- Page 19 14FT ASSEMBLY INSTRUCTIONS 14FT ASSEMBLY INSTRUCTIONS STEP STEP Install Net and secure Net with Install shoe bag as shown below. rope as shown in the figure below. (Steps 9 & 10 same for curved trampoline) It is highly recommended for two or more people to assemble the trampoline. This package contains small parts which are a choking hazard and may have sharp edges and points.
- Page 20 SkyBound Customer Service help@skyboundusa.com SkyBound, a BX International Inc Company. SkyBound is a registered trademark of BX International Inc. in the U.S. and other countries. All logos, names, characters, likenesses, images, slogans and packaging appearance are the property of SkyBound.
- Page 21 3. Push yourself back into a Standard Jump the trampoline. using your hands. 13. For additional information concerning the trampoline equipment, contact SkyBound (www.SkyBoundUSA.com). 1. Start with a low 14. For information concerning skill training, contact a certified trampoline instructor.
Need help?
Do you have a question about the 10ft Trampoline with Enclosure Net and is the answer not in the manual?
Questions and answers