Panasonic EB-G60 Operating Instructions Manual
Panasonic eb-g60: operating instruction
Hide thumbs
Also See for EB-G60:
- Operating instructions manual (117 pages) ,
- Service manual (90 pages)
Table of Contents
Advertisement
Quick Links
Download this manual
See also:
Service Manual
Advertisement
Table of Contents

Related Manuals for Panasonic EB-G60


Summary of Contents for Panasonic EB-G60
- Page 1 EB-G60 Operating Instructions Digital Cellular Phone Before operating this equipment please read these instructions completely.
-
Page 3: Important Information
Important Information Important Information Thank you for purchasing this Panasonic digital cellular phone. This phone is designed to operate on GSM networks – GSM900 or GSM1800. It also supports GPRS for packet data connections. Ensure the battery is fully charged before use. -
Page 4: Safety Considerations
Important Information Safety Considerations The following information should be read and understood as it provides details which will enable you to operate your phone in a manner which is both safe to you and your environment, and conforms to any legal requirements regarding the use of cellular phones. - Page 5 (See “SAR Statement”) This equipment should only be used with Panasonic approved accessories to ensure optimum performance and avoid damage to your phone. Panasonic is not responsible for damages caused by using non-Panasonic approved accessories. Unauthorized modifications or attachments may damage the phone and violate applicable regulations.
- Page 6 Panasonic accepts no liability for any and all losses howsoever arising from any loss of data, including but not limited to direct and indirect losses (to include, but not limited to con- sequential loss, anticipated savings, loss of revenue).
-
Page 7: Sar Statement
SAR Statement European union – RTTE THIS PANASONIC PHONE (MODEL EB-G60) MEETS THE EU REQUIRE- MENTS FOR EXPOSURE TO RADIO WAVES. Your mobile phone is a radio transmitter and receiver. It is designed and man- ufactured not to exceed the limits for exposure to radio frequency (RF) energy recommended by The Council of the European Union. -
Page 8: Care And Maintenance
Care and Maintenance Care and Maintenance Pressing any of the keys may produce a loud tone. Avoid holding the phone close to the ear while pressing the keys. Extreme temperatures may have a temporary effect on the opera- tion of your phone. This is normal and does not indicate a fault. If you use the phone for a long time in temperature over 40°C, the display quality may deteriorate. -
Page 9: Quick Reference
Quick Reference Press centre of the Navigation Key to select or < enter the menu options 5 1 7 3 Direction which the user can move around the display screen using the Navigation Key Secondary Softkey Primary Softkey/Back-Key – Numeric key pads Press to answer a call or call a dialled number Press to end a call or return to Idle screen Press and hold to switch the phone on or off... -
Page 10: Table Of Contents
Contents Important Information ... i Safety Considerations ... ii SAR Statement ... v International – ICNIRP ... v Care and Maintenance ...vi Quick Reference ...vii Contents ...viii Getting to Know Your Phone ... xii Location of Controls ... xii Getting Started ... 1 Fitting the SIM ... -
Page 11: Contents
Personalising Your Phone ...24 Changing the Language ... 24 Adding a Start-up Greeting ... 24 Idle Screen Image (Wallpaper) ... 25 Changing Screen Saver Image ... 26 Turning Screen Saver On & Off ... 26 Colour Themes ... 27 Changing Sound Profiles ... 27 Editing Sound Profiles ... - Page 12 Contents Advanced Operation ... 59 Diverting Calls ... 59 Holding Calls ... 60 Making a Second Call ... 60 Receiving a Second Call (Call Waiting) ... 61 Accepting a Second Call ... 61 Rejecting a Second Call ... 61 Ending Current Call to Receive Another ... 61 Operation During Two Calls ...
- Page 13 Troubleshooting ...87 Important Error Messages ... 89 Glossary of Terms ...91 Specifications ...93 Phone (Including Battery) ... 93 Personal Settings ...94 Menu Structure ...95 Accessories ...96 Identify a Genuine Panasonic Accessory ... 97 Index ...98 Licensing ...104 Contents...
-
Page 14: Getting To Know Your Phone
Getting to Know Your Phone Location of Controls Earpiece Display Secondary Softkey Call Key Navigation Key Personal Handsfree Socket Primary Softkey/ Back-Key Power On/Off and End Call Key Keypad Keypad Microphone... -
Page 15: Getting Started
Getting Started Before operating this phone please read the Important Information sec- tion – see page i. These operating instructions detail use of the equipment contained in the Main Kit. Some services detailed are network dependent (F) or may only be available on a subscription basis. -
Page 16: Removing The Sim
Getting Started Removing the SIM Unlock the SIM retainer by gently pushing towards the top of the phone (N). Gently raise the SIM retainer (O) and remove the SIM (P). Return the SIM retainer to its flat position (Q) and ensure it is correctly locked (R) before refitting the battery and battery cover. -
Page 17: Removing The Battery
Removing the Battery Ensure the phone is switched off and the charger is disconnected from the phone before removing the battery. Press top part of the cover (N) and remove (O). Press the battery gently downwards (P) and remove from the top (Q). Getting Started... -
Page 18: Charging The Battery
Getting Started Charging the Battery Connecting the Fast Travel Charger The battery must be fitted in the phone before the charger is con- nected. Insert the connector into the base of the phone, ensuring the arrow on the connector is to the front of the phone. Note: DO NOT force the connector as this may damage the phone and/ or the charger. -
Page 19: Operation Of Battery Level Indicator
Operation of Battery Level Indicator Phone on Phone off It is recommended that the battery is fully discharged between charges to maintain optimum battery life and performance. Low Battery Warning When the battery power is low, the battery indicator will be coloured red. If battery power is critically low, a warning tone will sound. -
Page 20: The Display
Getting Started The Display Status Icons The status icons are displayed according to the currently activated functions. The Antenna, Signal and Battery icons are displayed when the handset is switched on and connected to a network. Indicates Battery Level: Displayed when you are registered to a non-home network – Roaming White icon indicates a new message has been received. -
Page 21: Menu System Overview
Menu System Overview The menu system provides the means for accessing all the functions that do not have their own dedicated buttons on the keypad. Each menu contains a list of options. Some menus have further submenus. The submenus and functions are selected using the five-way Navigation key (0). -
Page 22: Selecting A Function
Getting Started Selecting a Function Use < and 0 to move between the icons on the screen. When a particular menu is highlighted, pressing < displays a submenu. From any submenu, use 4 until the required item is highlighted. Press < to select. For example, to change Sound Settings (to switch ringtone): From Idle press <, select My Phone >... -
Page 23: Basic Operation
Basic Operation This section contains the information you need for the most essential phone operations, including: How to switch on and off How to make and end a call How to answer a call How to change earpiece volume How to lock the phone How to protect the phone using a PIN How to change ring volume Switching On &... -
Page 24: International Dialling
Basic Operation International Dialling The international access code (+) and the destination country/region code should be entered, followed by the area code and phone number. From Idle press and hold # until “+” is displayed Enter country/region code (e.g. 44 for the UK; 81 for Japan) Enter area code and phone number Press C Note: Many countries/regions include an initial “0”... -
Page 25: Answering A Call
Answering a Call To receive a call, the phone must be switched on and the signal strength meter ( displayed. Press any key except D to answer a call Press D to reject a call Note: If a call is not answered or is rejected, the number of incoming calls missed will be displayed. -
Page 26: Locking The Phone
Basic Operation Locking the Phone With the Phone Lock enabled you will be restricted to answer incoming calls and make emergency calls. The Phone Lock Code is factory set to 0000. From Idle press < and select (Applications >) Phone Setting > Security >... -
Page 27: Enabling/Disabling The Pin
Using the PIN The PIN protects your SIM against unauthorized use. If you enable the PIN, every time the phone is turned on you will be prompted to enter the PIN. PIN2 controls security for the Fixed Dial Store, Call Charge metering and Barred Dial. -
Page 28: Setting Ring Volume
Basic Operation Setting Ring Volume With the G60, you can set up your phone in different modes depending on your environment, allowing different ring tones and volumes in different situa- tions. To change ring volume for any sound profile: From Idle press <, select My Phone > Sound Settings. Press < Select the profile you wish to adjust, press <, then select Edit >... -
Page 29: Phonebook
Phone numbers can be stored in two locations: In the SIM Phonebook (E), where the number of entries and lengths of names and numbers are SIM dependent. In the Mobile Phonebook, where phonebook entries can be grouped together and additional data can be stored with numbers. This phone- book is retained even if you change your SIM. -
Page 30: Browsing Phonebook
Phonebook To Store a Number in the Mobile Phonebook From Idle enter the phone number and press A Select Mobile Phonebook and press < Select Name, press < and enter identi- fying name. Press < Select No. and confirm the phone num- ber. -
Page 31: Speed Dialling
Speed Dialling Last Number Called From Idle press C twice Hot Key Dialling (Mobile Phonebook Only) From Idle press and hold the appropriate hot key number To view your hot key dial list, from Idle press <, select Phonebook > Hot Key Dial List, press <. -
Page 32: Entry Details
Phonebook Editing Phonebook Entries It is possible to view Entry Details, Edit, Delete, Create or Copy Entry information from the Phonebooks. To access any of these functions: With a phone number or name highlighted: Press < to select the submenu Use 4 to cycle through Entry Details, Edit, Delete, Create or Copy Entry Press <... -
Page 33: Synchronizing Phonebooks
Synchronizing Phonebooks Keep your SIM and Mobile Phonebooks in step by synchronizing their con- tents regularly. You can copy individual entries between phonebooks (see Editing Phonebook Entries, page 18) or simply copy the entire contents of one phonebook into the other. To do this: From Idle, press <... -
Page 34: Grouping Phonebook Entries (Mobile Phonebook Only)
Phonebook Grouping Phonebook Entries (Mobile Phonebook Only) Groups are used to collect together types of Phonebook entries, for example business and personal. Each group can be suitably titled for quick access to the entries contained within. An alert profile can be attributed to groups (or individual phone numbers) allowing incoming call alerts to be tailored to indicate the type of caller. - Page 35 Retrieving a Number from a Group From Idle press <, select Phonebook > Group Setting. Press < Use 4 to select the group Press <. Press < again to View the contents of the group Use 4 to select the desired entry Press C to dial the number or <...
- Page 36 Phonebook Setting Group Call Icons You can also attach to a group an image that will display when a call is received. To add an image: From Idle press <, select Phonebook > Group Setting. Press < Use 4 to select the group, press < Select Edit and press <...
-
Page 37: Adding Numbers
My Numbers is a convenient part of the Phonebook where your own voice, fax and data phone numbers can be stored and viewed (E). Adding Numbers From Idle press < and select Phonebook > My Numbers. Press < Use 4 to select an empty entry from the list of numbers. Press < Use 4 to select Edit and press <... -
Page 38: Personalising Your Phone
Personalising Your Phone Personalising Your Phone This section contains all the information you need to adapt your phone to your needs and personality. You can: Change the menu language Add a message to show at start-up Try a new idle screen image Change your screen saver image Use a different colour theme Switch between and edit different user profiles... -
Page 39: Idle Screen Image (Wallpaper)
Idle Screen Image (Wallpaper) The idle screen can be changed to a preinstalled or downloaded image. To choose an image for the Idle screen: From Idle press <, select My Phone > Display Settings > Idle Screen. Press < Several images are preinstalled on your phone in the Fixed Data folder. -
Page 40: Changing Screen Saver Image
Personalising Your Phone Changing Screen Saver Image The screen saver can also be changed to a preinstalled or downloaded image. To choose an image for the screen saver: From Idle press <, select My Phone > Display Settings > Screen Saver. -
Page 41: Colour Themes
Colour Themes Colour Themes provide alternative combinations of colours for the back- ground and text. To use or change a Colour Theme: From Idle press < and select My Phone > Display Settings > Colour Themes. Press < Use 4 to select the required Colour Theme. Press < Changing Sound Profiles You can switch between six sound profiles on your phone each with a distinct combination of alert method, ring tone and type etc. -
Page 42: Editing Sound Profiles
Personalising Your Phone Editing Sound Profiles To edit a Profile: From Idle press < and select My Phone > Sound Settings. Press < Select the profile you wish to edit from the list. Press < Use 4 to select Edit. Press < For each profile, you can set and edit the following: Ring Type Select a ring tone from the lists of preinstalled melodies... -
Page 43: Download Data (F)
Download Data ( The Panasonic G60 is able to use various downloaded data. The down-loaded data is stored in the Media Folder and can be acquired via MMS, EMS, SMS or WAP . Details of this service are available on our website. -
Page 44: Composing A Melody
Personalising Your Phone Composing a Melody From Idle, press <, select Applications > Edit Ringtone. Press < Press < to select Notes: Using the table below as reference, enter the notes, set the rhythm and octave for each and add rests to generate your composition. Note Note Rest... -
Page 45: Setting The Backlight Time
Note: At any time during composing press A to play back the current melody. When the composition is complete, press < twice and enter the title. Press < to save the name and A to save the composition Setting the Backlight Time The Backlight is illuminated when a key is pressed to make using your phone easier. -
Page 46: Operator Notice
Personalising Your Phone Operator Notice Operator notices appear if the phone has been left idle to remind users how to operate selected features. To enable and disable operator notices go to My Phone > Display Settings > Operator Notice and press < to select On/ Off. -
Page 47: Phone Security
Phone Security Your phone has a number of security features that protect against unautho- rized use and enable the user to restrict access to certain functions. These include: Phone Lock PIN Protection Key Guard Call Barring Fixed Dial Note: – For full details of the Phone Lock feature, turn to Locking the Phone, page 12. -
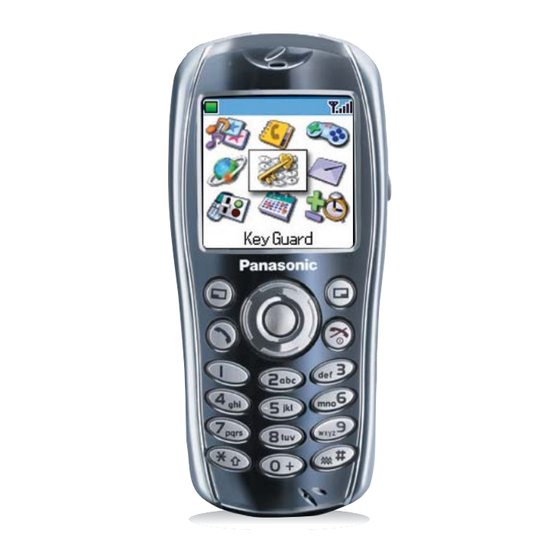
Page 48: Enabling Key Guard
Phone Security Enabling Key Guard The Key Guard function is used to prevent any keys from being accidentally pressed, for instance when the phone is being carried. From Idle press < twice to bring up the Guard Keypad? message and a third time to confirm. -
Page 49: Changing The Security Codes
Changing the Security Codes From Idle press < and select (Applications >) Phone Setting > Security. Press < Use 4 to select Phone Lock, PIN or PIN2. Press < Use 4 to select Change (Code) and press < (for PIN2, skip to step 4) Enter the current code and press <... -
Page 50: Fixed Dial
Phone Security Outgoing Calls (Bar Voice) Select from All Calls/International Calls/International Calls Except Home/Off Incoming Calls (Bar Voice) Select from Off/When Roaming/All Calls Bar Data Select from All Calls/International Calls/International Calls Except Home/Off Press < Select On/Off and press < Enter Call Bar password and press <... -
Page 51: Applications
This section introduces some of the applications you’ll find installed on your phone. These include: The clock Alarms Automated power on and power off The calculator Clock Your phone incorporates a clock with date/time, an alarm and an automatic power on/off feature. Setting the Time From Idle... -
Page 52: Setting The Alarm
Applications Setting the Alarm Up to three separate alarms can be set. For each alarm, you can set different schedules (e.g. daily/weekdays only) and alarm tones as well as times. If the clock hasn’t been set, the user will be prompted to set it prior to setting the alarm. -
Page 53: Adjusting The Alarm Time
Muting the Alarm When an alarm goes off, the chosen melody will sound and the display will flash with an alarm message. The alarm will sound for 55 seconds. To End the Alarm Press any key Adjusting the Alarm Time To adjust an alarm time follow the steps in Setting the Alarm, page 38. -
Page 54: Calculator
Applications Calculator The four function calculator will enable the user to perform simple arithmetic calculations (addition/subtraction/multiplication and division). From Idle press < and select Applica- tions > Calculator. Press < Enter a number (maximum 8 digits) and it will be displayed on the upper right of the display. -
Page 55: Currency Converter
Currency Converter The currency converter enables the user to convert prices using a conversion rate that you enter. Access the calculator, see page 40, then press A (Menu) to open the currency converter menu Use 4 and press < to select Currency Rate then enter the appropriate conver- sion rate to six decimal places. -
Page 56: Messaging
Messaging Your phone has various messaging features including SMS, MMS and EMS. SMS/EMS – Enter the recipient’s phone number to send text and images. – Attach images and music to text messages. This chapter is a full introduction to messaging including: Setting up your phone to enable SMS/EMS and MMS messaging Writing text messages Sending User Messages... -
Page 57: Delivery Confirmation Setting
Life Time The lifetime is the duration that your messages are stored at the Message Centre. Delivery attempts will be repeated until the message has been delivered or the Life Time expires. From Idle press <, select Messages > Setting > SMS/EMS > Life Time. -
Page 58: Creating A Text Message
Messaging Creating a Text Message From Idle press <, select Messages > Create > SMS/EMS. Press < Write text message. To change text input method (displayed in lower left corner of display), press A. See Text Entry, page 85, for details. Use 0 to navigate through the message and position the cursor to add text Use @ to delete the character to the left... - Page 59 As the message is sent the sending mes- sage animation will display If Delivery Confirmation is enabled (see previous section) and the message is transmitted successfully, Send message success! will appear Sending User Messages Your phone comes with several common message expressions preinstalled. To send a user message: From Idle press <, select Messages >...
-
Page 60: Concatenated Messages
Messaging Text Attachments When creating a text message, it is possible to include attachments (copyright permitting). To include an attachment: Follow the instructions on page 44 to write the text message then press <. When the OK/Insert Media/User Msgs./Add Sig./Select submenu appears (see step 4 page 44), select Insert Media. -
Page 61: Responding To Text Messages
Reading Immediately When Read is displayed press < to read the message immediately. Use 4 to navigate through the message and to identify the sender and the time the mes- sage was sent. With the phone number shown in the Sender field, press C to dial the phone number. -
Page 62: Chat Sms
Messaging Chat SMS The Chat feature enables you to read sent and received messages on one screen when in Chat SMS mode with another party. Either: When reading a previously sent or received message, press < and select Chat, press < and/or enter your Nick- name (up to 10 characters) –... -
Page 63: Mms: Setting Up The Phone
MMS: Setting Up the Phone Multimedia Messaging Service (MMS) Configuration must be performed before you can send or receive an MMS message. You can create up to three server profiles on the phone. From Idle press <, select Messages > Setting >... -
Page 64: Creating An Mms Message
Messaging Creating an MMS Message Your phone supports MMS (Multimedia Messaging Service), which means you can send digital pictures to an MMS-enabled mobile or to an email address. Wherever you are, attach a photo, audio message or text, and send it immedi- ately to your friends. -
Page 65: Attaching Media Files
When the To: field has been filled and any required Cc or Bcc entries have been added, add the message subject heading. Use 4 to select Subj:, press < and enter the subject heading. Press < to confirm, then press A Use 4 to select Send or Save as appro- priate. -
Page 66: Managing Message Lists
Messaging Managing Message Lists Selecting a stored message allows it to be read, replied to, edited or deleted. Inbox Messages received are stored in the Inbox and tagged with icons: indicates an unread SMS/EMS mes- sage indicates an unread MMS message From the Inbox, select a message. -
Page 67: Cell Broadcasts
Cell Broadcasts You need to specify the topic(s) of information you wish to receive as broad- casts before they can be received. From Idle press <, select Messages > Broadcasts > Topics and press < Select [New Channel] and press < twice to insert a new topic Enter Channel No. -
Page 68: Call Information
Call Information Call Information This section explains how you can obtain more information about your calls, including: Recent calls made, received and missed Call duration Call charges Recent Numbers Recently dialled phone numbers are stored in Last Call. If Caller Identification is available, the caller’s phone number for an answered call will be stored in the Answered Call menu and an unanswered call will be stored in the Unanswered Call menu. -
Page 69: Call Duration
Calling the Last Dialled Number To redial your last called phone number press C twice. Returning an Unanswered Call When the display shows that you have received calls but not answered them. Press < The last caller’s phone number will be displayed if it is available. Use 4 to select the phone number you wish to dial Press C Call Duration... -
Page 70: Gprs Call Duration
Call Information GPRS Call Duration From Idle press < and select (Applications >) Phone Setting > Call Services > Connections. Press < Note: The Connections function is SIM dependent (E). Use 4 to select one of the features described below, and press < Last Connection displays the amount of data transferred during the last call. -
Page 71: Setting The Unit Price
Setting the Unit Price Firstly, a price per unit must be entered. This is the cost that the Service Provider charges for one unit of call time (E). From Idle press <, select (Applications >) Phone Setting > Call Services > Service Charges >... -
Page 72: Call Identification
Call Information Note: The duration of one unit may vary during the day, peak and off-peak times. Therefore, the call charge can be calculated accordingly. However, call charge information may not give an accurate reflection of the tariffs charged by your Service Provider. Call Identification In the Call Services >... -
Page 73: Advanced Operation
Advanced Operation This section contains detailed information on call management including: Call diversion Call holding Call waiting Making and receiving a second call Transferring calls Multi-party calls Changing network Diverting Calls Voice, fax and data calls can be diverted according to different conditions and to different numbers. -
Page 74: Holding Calls
Advanced Operation Note: – To edit a call diversion setting, follow the steps on page 59 and reset according to the new settings. – To cancel a diversion setting, select Off in step 4 on page 59. To cancel all diversion settings, go to (Applications >) Phone Setting > Call Divert >... -
Page 75: Receiving A Second Call (Call Waiting)
Receiving a Second Call (Call Waiting) A second call can be received, if Call Waiting is switched on. This is enabled from the (Applications >) Phone Setting > Call Services > Calls menu. It is not possible to have more than one fax or data call. All voice calls must be ended before you can make or receive a fax or data call (E). -
Page 76: Enabling Multi-Party
Advanced Operation Call Transfer With two calls connected, Call Transfer enables the user to connect them together ending your connection, leaving the other parties to talk together (E). When two calls are connected to your phone: Press < Use 4 to select Call Transfer. Press < The two calls will be connected to each other and your call will be ended. -
Page 77: Ending Multi-Party Calls
Splitting a Multi-party Call The user can select an individual from the Multi-party and remove their con- nection. This enables you to talk privately without the participation of the rest of the Multi-party. Press < Use 4 to select Private call. Press < Use 4 to select a caller in the Multi-party Press <... -
Page 78: Changing To A New Network
Advanced Operation Changing to a New Network When not in your home country/region, the user may use a network that is not directly subscribed to. This is called ROAMING. Legal restrictions may not permit roaming in your home region. The New Network function is used to manually select a network that is avail- able in your current location. -
Page 79: Scheduler
The Scheduler can be used to register reminders for personal events as well as planning holiday periods. Creating a Reminder From Idle, press <, select Scheduler and press < again. Select [New Event] and press < to cre- ate a new schedule event First move the cursor to the year entry by using 1 then use 4 to adjust the entry if necessary... -
Page 80: Games
Games Embedded Games ( To enter the Games menu: From Idle, press < and select Games. Press < Select a game and press < Select Start to start playing the game, press < Select Help/Instructions to read the instruction on how to play the selected game Downloadable Games ( The Downloadable Games menu enables you to use one factory embedded... -
Page 81: Managing Multimedia Files
Managing Multimedia Files The multimedia files saved in G60 are located in the Media Folder (My Phone > Media Folder). There are four predefined folders (Picture, Animation, Melody and Memory Status). Note: Changing SIM does not affect the contents of stored data. Displaying Pictures and Animations From Idle, press <, select My Phone >... -
Page 82: Playing Melodies
Managing Multimedia Files Playing Melodies From Idle, press < and select My Phone > Media Folder > Melody. Press < Use 4 to select a file. Press A to play Note: – You can compose your own melodies and ringtones. Turn to Composing a Melody, page 30, for full instructions. -
Page 83: Creating Mail From Files
Creating Mail from Files You can jump in one step from a file to the create mail screen with the file as an attachment. The phone will display the Create MMS Msg screen. Note: You cannot copy a file that cannot be forwarded or saved. You can press <... -
Page 84: Wap Browser
WAP Browser Your phone’s WAP (Wireless Application Protocol) Browser enables the user to access Internet services supported by the network, such as news, weather reports and sport. Browser Settings Before Internet services can be accessed, the SIM must be data enabled and the relevant configuration information, entered into the phone. - Page 85 WAP Browser A list of configuration parameters will be displayed. Select each parameter in turn and enter the appropriate values (contact your service provider for details if necessary). For each browser profile, set also the Bearer Type. Go to Browser > Browser Setting >...
- Page 86 WAP Browser Record your WAP settings in the table at the rear of this booklet for easy ref- erence. When you have entered settings for a browser profile, you may wish to rename the profile to make it easier to remember. To rename a profile, go to Browser >...
-
Page 87: Activating The Browser
Activating the Browser To activate the Browser, either: From Idle, press < and select Browser > Start Browser. Press < The first time that the browser is activated there will be no content. Each time the browser is activated, the last page viewed from the pre- vious WAP session will be recalled. -
Page 88: Browser Menu
WAP Browser Browser Menu The Browser contains its own menu which is applicable when content is currently being dis- played (either on-line or off-line). This menu is used as follows: Back Returns the user to the previous page Go To URL Enter URL Home Displays the Home URL content as defined by the network operator... - Page 89 Settings Allows the user to select and set: Homepage URL Download parameters (enable or disable the downloading of multimedia files) Restart Browser Security submenu About Provides information about the type of browser and security options WAP Browser...
-
Page 90: Deleting Bookmarks
WAP Browser Using Bookmarks Frequently accessed pages may be bookmarked to save time – you won’t have to enter the URL each time you want to visit the page. Adding a Bookmark While viewing the page, press A Use 4 to select Bookmark Use 4 to select either Title or URL as the Bookmark name Recalling Pages Using Bookmarks Select Bookmarks from the Browser menu. -
Page 91: Deactivating The Browser
Deactivating the Browser The Browser can be deactivated as follows: When browsing on-line, press D to return to Idle mode. When browsing off-line, press D to return to Idle mode. WAP Push Message WAP Push Message Icon This icon indicates a new WAP Push message has been received. Reading a WAP Push Message When the icon is displayed, press and hold # then inbox for WAP Push message is displayed. -
Page 92: Additional Features
Additional Features Additional Features Voice Memo You can record a two-way conversation during a call. The maximum length of a recording is 16 seconds. Old recordings are overwritten; only one recording can be stored. Note: If a different SIM is installed any voice memos will be lost. Caution: Security of a recorded message is your responsibility. -
Page 93: Voice Recorder
Voice Recorder You can use this phone as a Voice Recorder. Record a Voice Recorder From Idle, press < and select Applications > Record. Press <. The recording will stop automatically after 10 seconds. Play Back a Voice Recorder From Idle, press < and select My Phone > Media Folder > Melody, press <... -
Page 94: Dtmf Tones
Additional Features DTMF Tones Dual Tone Multi-Frequency Tones (DTMF) tones can be sent during conversa- tion. These are often used to access voice mail, paging and computerised home banking services. For example, you may need to input a number to remotely access voice mail messages. -
Page 95: Desktop Handsfree
Desktop Handsfree Desktop Handsfree enables you to hold a conversation without having to hold the phone to your ear. Note: DO NOT hold the phone to your ear in Handsfree mode. Swapping Between Handsfree and Handheld Calls During a Handheld call: Press <... -
Page 96: Plug-In Camera
Plug-in Camera Plug-in Camera With the Panasonic Plug-in Camera attached to your phone, you can take pho- tos then save them or send them immediately in a MMS message. The camera accessory slots onto the accessory connector on the base of your phone. This Camera is sold as an Accessory depending on your region. -
Page 97: Taking A Picture
Taking a Picture To take a picture, first ensure the camera accessory is plugged in. Then: From Idle, press < and select Camera. Press < Position the camera to frame the desired photo in preview screen Use 1 to zoom in, 5 to zoom out when you are ready, press <... -
Page 98: Camera Options
Plug-in Camera Camera Options First ensure the camera accessory is plugged in. Then: From Idle, press < and select Camera. Press < Press A to open the Set menu. Select from the following options: Photo Resolution Choose from VGA (640 × 480), QVGA (320 × 240), QQVGA (160 ×... -
Page 99: Text Entry
The phone provides a means for entering alphanumeric characters to enter details into the Phonebook, to create text etc. This section details the charac- ters that can be entered and the relevant keys to press. ® Alternatives Punctuation .@/:;*#+-”,!¡?¿_()[]{}’&%\^~|<>=€£$¥¤§ & MNOmno pqrs PQRSpqrs... -
Page 100: T9® Text Input
Text Entry ® Text Input Using this mode of text entry dramatically reduces the number of key presses required: Press a key once for any letter you require on that key. The desired letter may not be displayed. Continue pressing other keys until the end of a word is reached;... -
Page 101: Troubleshooting
Troubleshooting Should any problem persist contact your dealer. Problem Phone will not switch on Extremely short using and the condition of battery life for a new battery Short battery life The battery has worn out for an old battery The battery level indicator does not appear and the phone cannot be... - Page 102 Troubleshooting Outgoing calls are barred Calls cannot be made Calls cannot be made from Fixed Dial Store The phone is not switched Calls cannot be received Emergency calls cannot be made Phone numbers cannot be recalled from Phonebook The phone is locked The phone is not registered to a network Incoming calls are barred...
-
Page 103: Important Error Messages
Important Error Messages These are some of the most important error messages which may be dis- played: The network has detected an authentication failure Unregistered because your SIM is not registered with that network – contact your service provider The SIM is blocked because one of the PIN/PIN2 Invalid SIM unblocking keys (PUK/PUK2) has been entered incor- rectly ten times –... - Page 104 Troubleshooting On changing the phone lock code, verification of the new code is incorrect – retry changing the lock code Unlock Code with correct verification Incorrect. Try Again Disabling or enabling the lock code has failed due to incorrect entry of the lock code – re-enter lock code Incorrect: xx The entered code is incorrect –...
-
Page 105: Glossary Of Terms
Glossary of Terms Access Point Name. Directs the user to the gateway or the required service CHAP Challenge Handshake Authentication Protocol. A secu- rity feature for the GPRS network Copy Copies selected text from short text message without removing it from the original message Permanently removes selected text from short text message DTMF Tones... - Page 106 Glossary of Terms PIN2 Personal Identification Number used for the control of Fixed Dial Store and Call Charge metering. Supplied by your Service Provider. If the PIN2 is entered incorrectly 3 times, the PIN2 will be blocked PUK/PUK2 PIN/PIN2 Unblocking Key. Used to unblock the PIN/ PIN2.
-
Page 107: Specifications
Phone (Including Battery) Type Temperature Range Charging Storage Weight Dimensions (mm) Height x Width x Depth Supply Voltage Standby Time (hrs) Talk Time (hrs) Charge Time (Phone off) Antenna SIM Type Phonebook Memory Memory Storage Note: Charge time will be longer when the phone is turned on. Battery life is affected by the network being used and the condition of the battery. -
Page 108: Personal Settings
GSM European Service Guarantee only applies while traveling in countries other than where the product was purchased. Your local guarantee is applicable in all other cases. If your Panasonic GSM telephone requires service while abroad, please contact the local service com- pany shown on this document. - Page 109 Service Centres in England Tel. +44 (0) 8705 159159 Service Centres in Ireland Tel: +353 (0) 1 2898333 Panasonic Service Center Dresden SERKO GmbH Großenhainer Straße 163 01129 Dresden Tel. +49 (0)351/ 85 88 477 Panasonic Service Center Cottbus Petsch Kundendienst GmbH...
- Page 110 EU Warranty Panasonic Service Center Reutlingen Herbert Geissler Lichtensteinstraße 75 72770 Reutlingen Tel. +49 (0)7072 / 92 96-0 Panasonic Service Center München G.Berghofer & W.Kaller GmbH Helene-Wessel-Bogen 7 80939 München Tel. +49 (0)89/ 318 907-0 Panasonic Service Center Augsburg Klaus Bienek Affinger Straße 4...
- Page 111 For nærmeste servicecenter ring Panasonic Danmark Tel. +45 43 20 08 50 Firmor I Sverige Komrep Rosenlundsgatan 4 411 20 Göteborg Tel. +46 031-173354 Signalstrykan Kungsholmstorg 4 104 22 Stockholm Tel. +46 08-6542500 CR Service Industribyn 3 232 37 Malmö...
- Page 112 EU Warranty PIXEL VIDEOTECH Rue St Remy 7 4000 LIEGE Tel. +32 041/23 46 26 DELTA ELECTRONICS Rue P .d’Alouette 39 5100 NANINNE Tel. +32 081/40 21 67 ELEKSERVICE FEYS Houthulstseweg 56 8920 POELKAPELLE Tel. + 32 057/48 96 37 AVS WAASLAND Lavendelstraat 113 9100 ST NIKLAAS...
- Page 113 EU/EEA – Wide Guarantee: Conditions applicable in any country other than the country of original purchase. When the purchaser finds the appliance to be defective, he should promptly contact the proper sales company or national distributor in the EU/EEA country where this guarantee is claimed, as indicated in the “Product Service Guide”...
- Page 114 EU Warranty This guarantee shall not cover the cost of any adjustments or adaptations to meet local voltage requirements and safety or other technical standards. The sales company or national distributor may be in a position to make the necessary adjustments or adaptations to certain product models at the cost of the purchaser.
-
Page 115: Personal Settings
Personal Settings Personal Settings Use the table below to record your GSM/GPRS WAP settings. Item Hint Current Setting WAP Setting Primary IP Primary Port Secondary IP Secondary Port Timer Homepage Bearer Type GPRS User Name Password Access Point Name (APN) Authentication None/PAP User Name... -
Page 116: Menu Structure
Menu Structure Menu Structure... -
Page 117: Accessories
Li-Ion Battery (EB-BSG60) Double your talk time by having a spare battery. Personal Handsfree (EB-EMD35) Talk and move while keeping your hands free by using this accessory. Just place the earpiece in your ear and the adaptor in the side of the handset – and talk. Car Charger (EB-CDG60) Top up your battery in your vehicle by attaching this acces- sory to your phone and to the cigarette lighter socket. -
Page 118: Camera Adaptor (Eb-Mcg)
MMS message. Identify a Genuine Panasonic Accessory Panasonic produces some of the most advanced mobile phones available. So, as you’d expect from this class leader, the range of accessories are second to none. -
Page 119: Index
Index Index Accepting a Second Call ... 61 Accessories ... 103 Activating the Browser ... 73 Adding a Bookmark ... 76 Adding a Number to a Group ... 20 Adding a Start-up Greeting ... 24 Adding Numbers ... 23 Adding to Multi-party ... 62 Additional Features ... - Page 120 Index Checking Folder Properties ...69 Clock ...37 Colour Themes ...27 Composing a Melody ...30 Concatenated Messages ...46 Connecting the Fast Travel Charger ...4 Contrast ...31 Copy Entry ...18 Creating a Reminder ...65 Creating a Text Message ...44 Creating an MMS Message ...50 Creating Mail from Files ...69 Currency Converter ...41 Data Cable (EB-RSG60) ...104...
- Page 121 Grouping Phonebook Entries (Mobile Phonebook Only) ... 20 Holding Calls ... 60 Hot Key Dialling (Mobile Phonebook Only) ... 17 Identify a Genuine Panasonic Accessory ... 104 Idle Screen Image (Wallpaper) ... 25 Important Error Messages ... 89 Important Information ... i Inbox ...
- Page 122 Index Managing Multimedia Files ...67 Media Folders ...29 Menu Structure ...102 Menu System Overview ...7 Messages ...7 Messaging ...42 Messaging Protocol ...43 MMS: Setting Up the Phone ...49 Multi-party Calls ...62 Muting the Alarm ...39 My Numbers ...23 My Phone ...7 Navigating Content ...73 OpenWave ...111 Operation During Two Calls ...61...
- Page 123 Index Reload ... 74 Removing the Battery ... 3 Removing the SIM ... 2 Renaming a Bookmark ... 76 Renaming Files ... 68 Responding to Text Messages ... 47 Restoring the Default Phone Settings ... 32 Restricting Calls ... 35 Resuming a Call ...
- Page 124 Index Taking a picture ...83 Tegic ...111 Text Attachments ...46 Text Entry ...85 To End the Alarm ...39 To Store a Number in the Mobile Phonebook ...16 To Store a Number in the SIM Phonebook ...15 Troubleshooting ...87 Turning Screen Saver On & Off ...26 ®...
-
Page 125: Licensing
© Panasonic Mobile Communications Co., Ltd. 2003 Information in this document is subject to change without notice. No part of these instructions may be reproduced or transmitted in any form or by any means without obtaining express permission from Panasonic Mobile Commu- nications Co., Ltd. Licensing Licensing ®... - Page 126 The Serial Number can be found on the outside of the phone under the battery. For your convenience we recommend that you note the following details as a record of your purchase Part Number Serial Number Dealer Name Purchase Date...
Need help?
Do you have a question about the EB-G60 and is the answer not in the manual?
Questions and answers