Advertisement
Available languages
Available languages
Quick Links
SS-SB-0001
EN
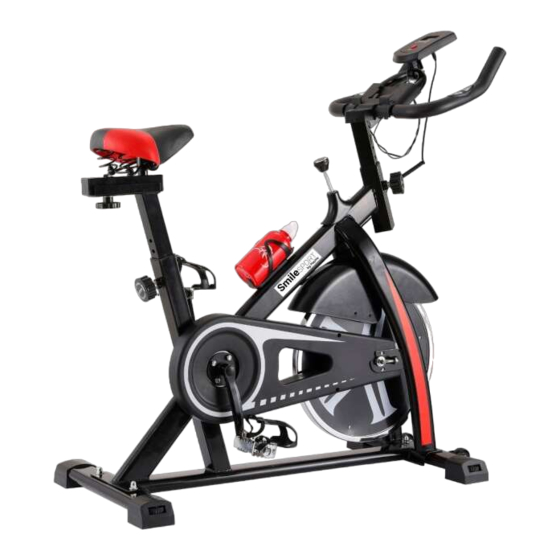
DYNAMIC 600 Spinning Bicycle - User manual
HU
DYNAMIC 600 Spinning Kerékpár - Használati utasítás
SK
DYNAMIC 600 Spinningový bicykel - Návod na použitie
RO
Bicicleta de spinning DYNAMIC 600 - Instrucțiuni de utilizare
DE
DYNAMIC 600 Spinning-Fahrrad - Anweisungen für den Gebrauch
Advertisement

Subscribe to Our Youtube Channel
Related Manuals for Pepita SmileSPORT DYNAMIC 600


Summary of Contents for Pepita SmileSPORT DYNAMIC 600
- Page 1 SS-SB-0001 DYNAMIC 600 Spinning Bicycle - User manual DYNAMIC 600 Spinning Kerékpár - Használati utasítás DYNAMIC 600 Spinningový bicykel - Návod na použitie Bicicleta de spinning DYNAMIC 600 - Instrucțiuni de utilizare DYNAMIC 600 Spinning-Fahrrad - Anweisungen für den Gebrauch...
- Page 3 Thank you for choosing our product! SmileSPORT sports equipment is made to the highest quality standards and with the latest technology. Please read the following information carefully before assembly and keep the instructions for future reference. The safe operation of the equipment can only be guaranteed if the general safety and accident prevention warnings and safety instructions are observed.
- Page 4 PACKAGE CONTENTS -------------------------------------------------------------------------------------------------------------------------- Handle Tube x1 Seat Tube x1 Seat Base x1 Seat x1 Left Pedal x1 Right Pedal x1 Main Frame x1 Front Leg x1 Back Leg x1 Knob x2 Flat-head Knob x1 Bolt x4 Panel Base x1 Operation Panel x1 Spanner x1 Allen Key x1 Handle Bar x1...
- Page 5 ASSEMBLY INSTRUCTIONS ----------------------------------------------------------------------------------------------------------- Front Leg Install the front leg with the bolts as shown.
- Page 6 Back Leg Install the back leg with the bolts as shown.
- Page 7 Handle Tube Knob Insert the handle tube into the main frame. After the height is decided, secure it with a knob.
- Page 8 Install the handle bar on the handle tube with screws, washers and nuts. (The screws, washers and nuts are preinstalled on the handle tube. You need to loosen them first.)
- Page 9 2 AAA Batteries 1. Install two AAA batteries (not included) into the operation panel. 2. Slide the panel base into the bottom of panel. 3. Install the panel base onto the handle bar.
- Page 10 L-shape connector Connect the wires of the operation panel to the wires of the handle bar and the main fame. (The L-shape connector should connect to the pulse socket.)
- Page 11 Seat Tube Knob Insert the seat tube into the main frame. After the height is decided, secure it with a knob.
- Page 12 Seat Base Plastic Nut Install the seat base on the seat tube with the plastic nut (The plastic nut is preinstalled on the seat base, please loosen it out first)
- Page 13 Seat Install the seat on the seat base. After that, fasten the bolt under the seat to secure the installation.
- Page 14 Install the left and right pedals on the main frame.
- Page 15 Install the flat-head knob as shown above.
- Page 16 OPERATION INSTRUCTIONS --------------------------------------------------------------------------------------------------------- Operation Panel Function Key Operation Panel 1. Once the function key is pressed down, the display panel will light up. 2. Press the function key consecutively to select mode “SCAN”, “TIME”,”SPD”, “DST”, “CAL”, “ODO” and “PULSE”: “SCAN”: In this mode, the display panel will show up status of other modes consecutively. “TIME”: Display panel shows the total working time.
- Page 17 ADJUSTING THE LEGS ----------------------------------------------------------------------------------------------------------------------- Rotate this gear If the bike does not stand steadily, rotate the gears on the four legs to adjust the levelness of the legs.
- Page 18 NOTE -------------------------------------------------------------------------------------------------------------------------------------------------------------- Always use the bike on the carpet ( not included accessories) to avoid the risk of slipping. When use the bike, ensure your hand hold on to the sensing area of the handle bar. If not, the pulse could not be detected.
- Page 19 Köszönjük, hogy termékünket választotta! A SmileSPORT sporteszközei a legmagasabb minőségben és a legkorszerűbb technológiával készülnek. Kérjük olvassa el figyelmesen az alábbi információkat az összeszerelés előtt, majd tartsa meg az útmutatót későbbi referenciaként. A készülék biztonságos működése csak akkor garantálható, ha az általános biztonságra és baleset megelőzésre vonatkozó...
- Page 20 MŰSZAKI ADATOK -------------------------------------------------------------------------------------------------------------------------------- Állítható nyeregmagasság: 84-91 cm A termék nettó / bruttó súlya: 23,5/27 kg Lendkerék: 8 kg Max felhasználói súly: 110 kg Monitor funkciók: Scan, idő, sebesség, távolság, Tartozék: Vizes palack kalória, pulzus A termék megfelel EN ISO 20957-1:2013; Anyag: PP+acél EN-957-6:2010 szabványnak.
- Page 21 ÖSSZESZERELÉSI ÚTMUTATÓ ------------------------------------------------------------------------------------------------------ Első stabilizáló talp Szerelje fel az első stabilizáló talpat a csavarokkal a képen látható módon.
- Page 22 Hátsó stabilizáló talp Szerelje fel a hátsó stabilizáló talpat a csavarokkal a képen látható módon.
- Page 23 Kormánytartó Gomb Helyezze be a kormánytartót a fővázba. A magasság beállítása után rögzítse.
- Page 24 Szerelje fel a kormányt a kormánytartóra csavarokkal, alátétekkel és anyákkal. (A csavarok, alátétek és anyák előzetesen fel vannak szerelve a kormányra, lazítsa meg őket az összeszereléshez!)
- Page 25 2 AAA elem 1. Helyezzen be két AAA elemet (nem tartozék) a kijelzőbe. 2. Csúsztassa a kijelzőt a kijelzőtartóba. 3. Szerelje fel a kijelzőt a kormányra.
- Page 26 L-alakú csatlakozó Csatlakoztassa a kijelző vezetékeit a kormány vezetékeihez és a fővázhoz. (Az L-alakú csatlakozónak kell csatlakoznia a impulzus aljzathoz.)
- Page 27 Vízszintes nyeregcső Gomb Helyezze be a nyeregcsövet a fő vázba. A magasság beállítása után rögzítse a gombbal.
- Page 28 Nyeregtartó Műanyag anya Szerelje össze a vizszintes nyeregcsövet a függőlegessel, a műanyag anya segítségével. (Az anyát előre felszerelték, kérjük, először lazítsa ki.)
- Page 29 Nyereg Helyezze az nyerget a nyeregcsőre. Ezután rögzítse a csavart a nyereg alatt.
- Page 30 Szerelje fel a bal és a jobb pedált a fővázra.
- Page 31 Szerelje be a lapos beállítócsavart a fenti ábrának megfelelően.
- Page 32 HASZNÁLATI UTASÍTÁS -------------------------------------------------------------------------------------------------------------------- Kijelzőpanel Funkciógombok Működési panel 1. A funkcióbillentyű lenyomása után a kijelzőpanel világít. 2. Nyomja meg egymás után a funkcióbillentyűt a “SCAN”, “TIME”,”SPD”, “DST”, “CAL”, “ODO” és “PULSE”: “SCAN”: Ebben az üzemmódban a kijelzőpanelen megjelenik a többi üzemmód állapota egymás után “TIME”: A kijelzőpanel az időt mutatja.
- Page 33 A LÁBAK BEÁLLÍTÁSA ----------------------------------------------------------------------------------------------------------------------- Forgassa el a fogaskereket Ha a kerékpár nem áll stabilan, forgassa el a négy lábon lévő fogaskerekeket a lábak vízszintességének beállításához.
- Page 34 MEGJEGYZÉS ------------------------------------------------------------------------------------------------------------------------------------------- A kerékpárt mindig szőnyegen (nem tartozék) használja, hogy elkerülje a csúszásveszélyt. A kerékpár használatakor ügyeljen arra, hogy kezével a kormány érzékelő területét fogja. Ellenkező esetben a pulzus nem mérhető.
- Page 35 Vážený používateľ! Sme veľmi radi, že ste si vybrali výrobok SmileSPORT. Športové vybavenie SmileSPORT je vyrobené podľa najvyšších štandardov kvality a s využitím najnovších technológií. Pred začatím tréningu si pozorne prečítajte tieto pokyny a používajte zariadenie podľa nich, aby ste svoj výrobok využili čo najlepšie a mohli si ho užívať...
- Page 36 TECHNICKÉ ÚDAJE ------------------------------------------------------------------------------------------------------------------------------- Nastaviteľná výška sedla: 84-91 cm Čistá/hrubá hmotnosť výrobku: 23,5/27 kg Výkyvné koleso: 8 kg Maximálna hmotnosť používateľa: 110 kg Funkcie monitora: skenovanie, čas, rýchlosť, vzdialenosť, Príslušenstvo: fľaša na vodu kalórie, srdcová frekvencia Typ počítača: HL-JS001, CE, RoHS Materiál: PP + oceľ...
- Page 37 POKYNY NA MONTÁŽ ------------------------------------------------------------------------------------------------------------------------- Predná noha Prednú nohu namontujte pomocou skrutiek, ako je znázornené na obrázku.
- Page 38 Zadná noha Namontujte zadnú nohu pomocou skrutiek, ako je znázornené na obrázku.
- Page 39 Rúrka rukoväte Tlačidlo Vložte rúrku rukoväte do hlavného rámu. Po nastavení výšky ju zaistite pomocou gombíka.
- Page 40 Namontujte riadidlá na riadidlá pomocou skrutiek, podložiek a matíc. (Skrutky, podložky a matice sú na riadidlách vopred namontované, len ich musíte najprv uvoľniť.)
- Page 41 2 batérie AAA 1. Vložte dve batérie AAA (nie sú súčasťou dodávky) do ovládacieho panela. 2. Základňu panela zasuňte do spodnej časti panela. 3. Namontujte základňu panela na rukoväť.
- Page 42 Konektor v tvare písmena L Pripojte kabeláž ovládacieho panela ku kabeláži rukoväte a k hlavnému rámu. (Konektor v tvare L musí byť pripojený k impulznej zásuvke.)
- Page 43 Hadica Tlačidlo Vložte sedlovú trubku do hlavného rámu. Po určení výšky ju zaistite pomocou gombíka.
- Page 44 Doska sedla Plastová matica Dosku sedla namontujte na sedlovú trubku pomocou plastovej matice (Plastová matica musí byť namontovaná na sedlovej trubke. Matica je vopred namontovaná na základni sedadla, najprv ju uvoľnite)
- Page 45 Sedadlo Umiestnite sedadlo na dosku sedadla. Potom pripevnite skrutku pod sedadlom k sedadlu, aby ste zabezpečili inštaláciu.
- Page 46 Namontujte ľavý a pravý pedál na hlavný rám.
- Page 47 Nainštalujte gombík s plochou hlavou, ako je znázornené na obrázku vyššie.
- Page 48 NÁVOD NA POUŽITIE ------------------------------------------------------------------------------------------------------------------------- Panel displeja Funkčné tlačidlá Panel funkcií 1. Po stlačení funkčného tlačidla sa rozsvieti panel displeja. 2. Postupným stláčaním funkčných tlačidiel vyberte režimy “SCAN”, “TIME”,”SPD”, “DST”, “CAL”, “ODO” a “PULSE”: “SCAN”: V tomto režime sa na paneli displeja postupne zobrazuje stav ostatných režimov. “TIME”: Na paneli displeja sa zobrazuje celkový...
- Page 49 NASTAVENIE NÔH -------------------------------------------------------------------------------------------------------------------------------- Otočte týmto prevodom Ak bicykel nie je stabilný, otočte prevodmi na štyroch nohách, aby ste nastavili vodorovnosť nôh.
- Page 50 POZNÁMKA ---------------------------------------------------------------------------------------------------------------------------------------------- Bicykel vždy používajte na podložke (nie je súčasťou balenia), aby ste predišli riziku pošmyknutia. Pri používaní bicykla dbajte na to, aby ste mali ruky na senzorovej časti riadidiel. V opačnom prípade sa impulz nedá zmerať.
- Page 51 Stimate utilizator! Suntem foarte încântați că ați ales un produs SmileSPORT. Echipamentele sportive SmileSPORT sunt fabricate la cea mai înaltă calitate și cu cea mai recentă tehnologie. Vă rugăm să citiți cu atenție aceste instrucțiuni înainte de a începe antrenamentul și să folosiți echipamentul în confor- mitate cu aceste instrucțiuni pentru a profita la maximum de produsul dvs.
- Page 52 DATE TEHNICE ----------------------------------------------------------------------------------------------------------------------------------------- Înălțime reglabilă a șeii: 84-91 cm Greutatea netă/brută a produsului: 23,5/27 kg Roata de balansare: 8 kg Greutatea maximă a utilizatorului: 110 kg Funcții de monitorizare: scanare, timp, viteză, distanță, Accesorii: sticlă de apă calorii, ritm cardiac Tip de calculator: HL-JS001, CE, RoHS Material: PP + oțel Produsul este în conformitate cu...
- Page 53 INSTRUCȚIUNI DE ASAMBLARE ------------------------------------------------------------------------------------------------ Piciorul din față Montați piciorul din față cu ajutorul șuruburilor, așa cum se arată în imagine.
- Page 54 Piciorul din spate Montați piciorul din spate cu ajutorul șuruburilor, așa cum se arată în imagine.
- Page 55 Tubul mânerului Buton Introduceți tubul mânerului în cadrul principal. După reglarea înălțimii, blocați-o cu ajutorul butonului.
- Page 56 Montați ghidonul pe ghidon cu șuruburi, șaibe și piulițe. (Șuruburile, șaibele și piulițele sunt premontate pe ghidon, trebuie doar să le slăbiți mai întâi.)
- Page 57 2 baterii AAA 1. Introduceți două baterii AAA (neincluse) în panoul de control. 2. Glisați baza panoului în partea de jos a panoului. 3. Montați baza panoului pe mâner.
- Page 58 Conector în formă de L Conectați cablajul panoului de comandă la cablajul mânerului și la cadrul principal. (Conectorul în formă de L trebuie să fie conectat la priza de impulsuri.)
- Page 59 Furtun Buton Introduceți tubul scaunului în cadrul principal. După ce ați stabilit înălțimea, blocați-o cu ajutorul butonului.
- Page 60 Placă de șezut Piuliță de plastic Montați placa de șezut pe tubul de șezut cu ajutorul piuliței de plastic (Piulița de plastic trebuie montată pe tubul de șezut. Piulița este premontată pe baza scaunului, vă rugăm să o slăbiți mai întâi.)
- Page 61 Scaun Așezați scaunul pe placa de scaun. Apoi fixați șurubul de sub scaun pe scaun pentru a asigura instalarea.
- Page 62 Montați pedalele din stânga și din dreapta pe cadrul principal.
- Page 63 Instalați butonul cu cap plat așa cum se arată în diagrama de mai sus.
- Page 64 INSTRUCȚIUNI DE UTILIZARE ---------------------------------------------------------------------------------------------------- Panoul de afișare Tastele de funcție Panoul de funcții 1. După ce apăsați tasta de funcție, panoul de afișare se aprinde. 2. Apăsați succesiv tastele funcționale pentru a selecta modurile “SCAN”, “TIME”,”SPD”, “DST”, “CAL”, “ODO” și “PULSE”: “SCAN”: În acest mod, panoul de afișaj afișează...
- Page 65 REGLAREA PICIOARELOR --------------------------------------------------------------------------------------------------------------- Rotiți acest angrenaj Dacă bicicleta nu este stabilă, rotiți angrenajele de pe cele patru picioare pentru a regla planeitatea picioarelor.
- Page 66 NOTĂ -------------------------------------------------------------------------------------------------------------------------------------------------------------- Folosiți întotdeauna pe un covor (nu este inclus) pentru a evita riscurile de alunecare. Când utilizați bicicleta, asigurați-vă că mâinile se află pe zona senzorilor de pe ghidon. În caz contrar, pulsul nu poate fi măsurat.
- Page 67 Lieber Benutzer! Wir freuen uns sehr, dass Sie sich für ein Produkt von SmileSPORT entschieden haben. SmileSPORT-Sportgeräte werden in höchster Qualität und mit modernster Technologie hergestellt. Bitte lesen Sie diese Anleitung sorgfältig durch, bevor Sie mit dem Training beginnen, und benutzen Sie Ihr Gerät in Über- einstimmung mit dieser Anleitung, damit Sie den größtmöglichen Nutzen aus Ihrem Produkt ziehen und viele Jahre lang Freude daran haben.
- Page 68 TECHNISCHE DATEN --------------------------------------------------------------------------------------------------------------------------- Einstellbare Sattelhöhe: 84-91 cm Netto-/Bruttogewicht des Produkts: 23,5/27 kg Schwenkrad: 8 kg Max. Benutzergewicht: 110 kg Überwachungsfunktionen: Scan, Zeit, Geschwindigkeit, Zubehör: Wasserflasche Entfernung, Kalorien, Herzfrequenz Computertyp: HL-JS001, CE, RoHS Material: PP+Stahl Das Produkt entspricht der Norm Zusammengebaute Größe: 78 x 41 x 113 cm EN ISO 20957-1:2013;...
- Page 69 MONTAGEANLEITUNG ---------------------------------------------------------------------------------------------------------------------- Vorderes Bein Montieren Sie das vordere Bein mit den Schrauben wie in der Abbildung gezeigt.
- Page 70 Hinteres Bein Montieren Sie das hintere Bein mit den Schrauben wie in der Abbildung gezeigt.
- Page 71 Griffrohr Taste Setzen Sie das Griffrohr in den Hauptrahmen ein. Verriegeln Sie die Höhe nach der Einstellung mit dem Drehknopf.
- Page 72 Montieren Sie den Lenker mit Schrauben, Unterlegscheiben und Muttern am Lenker (die Schrauben, Unterlegscheiben und Muttern sind am Lenker vormontiert, Sie müssen sie nur noch lösen).
- Page 73 2 AAA-Batterien 1. Legen Sie zwei AAA-Batterien (nicht im Lieferumfang enthalten) in das Bedienfeld ein. 2. schieben Sie den Sockel in die Unterseite des Paneels. 3. den Sockel der Platte auf den Griff montieren.
- Page 74 L-förmiger Stecker Verbinden Sie die Verkabelung des Bedienfelds mit der Verkabelung des Griffs und des Hauptrahmens. (Der L-förmige Stecker muss mit der Impulsbuchse verbunden werden).
- Page 75 Schlauch Taste Setzen Sie das Sitzrohr in den Hauptrahmen ein. Nachdem Sie die Höhe bestimmt haben, arretieren Sie sie mit dem Drehknopf.
- Page 76 Sitzplatte Kunststoffmutter Montieren Sie die Sitzplatte mit der Kunststoffmutter auf dem Sitzrohr. (Die Kunststoffmutter muss auf dem Sitzrohr montiert werden. Die Mutter ist an der Sitzfläche vormontiert, bitte lösen Sie diese zuerst.)
- Page 77 Sitz Setzen Sie den Sitz auf die Sitzplatte. Befestigen Sie dann die Schraube unter dem Sitz am Sitz, um den Einbau zu sichern.
- Page 78 Montieren Sie das linke und rechte Pedal am Hauptrahmen.
- Page 79 Bringen Sie den Flachkopfknopf wie in der Abbildung oben gezeigt an.
- Page 80 GEBRAUCHSANWEISUNG -------------------------------------------------------------------------------------------------------------- Anzeigefeld Funktionstasten Funktionsfeld 1. Nach dem Drücken der Funktionstaste leuchtet das Anzeigefeld auf. 2. Drücken Sie nacheinander die Funktionstasten, um die Modi “SCAN”, “TIME”, ”SPD”, “DST”, “CAL”, “ODO” und “PULSE” auszuwählen: “SCAN”: In diesem Modus zeigt das Anzeigefeld nacheinander den Status der anderen Modi an. “TIME”: Das Anzeigefeld zeigt die Gesamtarbeitszeit an.
- Page 81 EINSTELLEN DER BEINE ------------------------------------------------------------------------------------------------------------------ Drehen Sie dieses Zahnrad Wenn das Fahrrad nicht stabil ist, drehen Sie die Zahnräder an den vier Beinen, um die Nivellierung der Beine einzustellen.
- Page 82 HINWEIS ----------------------------------------------------------------------------------------------------------------------------------------------------- Benutzen Sie das Fahrrad immer auf einer Matte (nicht im Lieferumfang enthalten), um die Gefahr des Ausrutschens zu vermeiden. Achten Sie bei der Benutzung des Fahrrads darauf, dass sich Ihre Hände auf dem Sensorbereich des Lenkers befinden. Andernfalls kann der Impuls nicht gemessen werden.
- Page 84 EU Importer / EU Importőr / EU-Importeur / Distributor / Forgalmazó / Vertriebshändler / Dovozca z EÚ /Importator UE: Distribútor /Distribuitor: Corner Services Kft. Pepita.hu Zrt. 1031 Budapest, Saroglya u.9. 5520 Szeghalom, Kinizsi u. 78. E-mail: hello@proda.hu E-mail: segitunk@pepita.hu Made in China...
Need help?
Do you have a question about the SmileSPORT DYNAMIC 600 and is the answer not in the manual?
Questions and answers