SOMFY SOLIRIS SMOOVE IB+ - Thermostat Installation Guide
- Operating instructions manual (40 pages) ,
- Installation manual (17 pages)
Advertisement
Safety and liability
Liability
Before installing and using this product, please read these instructions carefully. This Somfy product must be installed by a home drive and automation professional. Moreover, the installer must comply with standards and legislation in the country in which the product is being installed, and inform his customers of the operating and maintenance conditions for the product. He must give them these instructions. Any use outside the sphere of application defined by Somfy is prohibited. This invalidates the warranty and discharges Somfy of all liability, as does any failure to comply with the instructions given herein. Never begin installing without first checking the compatibility of this product with the associated equipment and accessories.
Safety instructions
- Keep out of reach of children.
- Never drop, knock, drill or submerge.
- Do not use abrasive products or solvents to clean it.
Product description
Solaris Smoove IB+ is a timer that can automatically and manually control a roller shutter, awning or external venetian blind type motor via an IB+ bus. Soliris Smoove IB+ is pre-set to open at 7:30 am in the morning from Monday to Friday and 8:30 at weekends and to close at 8.00 pm. Using the QuickCopy appliance and PC software, up to 3 zones can be controlled independently (only with IB+ motor electronic modules). Soliris Smoove IB + also enables applications to be controlled automatically depending on the brightness using an optional sunlight, wind or rain sensor. The product parameters can be modified from the backlit screen.
Description of the control buttons

Arrow  :
:
- Manual raising and lowering control in normal operation.
- Navigation or changing the value in the settings menu.
 Brief press (less than 2 seconds):
- When moving: stop function
- When stationary: switch to
![]() position
position
 Brief press (less than 2 seconds):
- Return to the upper part of the menu or to the main screen.
- On the main screen, the functions used are displayed.

- Brief press (less than 2 seconds) from the main screen: access to the quick menu.
- Press and hold down (longer than 2 seconds) from the main screen: direct access to the settings menu.
- Activation in the settings menu: confirms an entry.
After 3 minutes, the appliance will enter standby mode and the display will switch off. Stand-by mode ends once a key is activated.
Connection

 The installation, testing and commissioning of the appliance must be carried out by qualified personnel.
Switch off all the connecting cables. Ensure that they cannot be accidentally switched on.
- Observe the wiring of Neutral and Live.
- Keep the "up" wiring and "down" wiring in the rightdirections.
- Refer to the sensor instructions for informationabout their connection.
| Connection | Line | Max. distance |
| 230 V AC | 1.5 mm² | - |
| IB+ bus | 0.6 - 1.5 mm² (twisted pairs recommended) | 1000 m max. 100 IB/IB+ motor controllers |
| Sensors | 0.6 - 0.75 mm² | 50 m |
The wires (L, N) and the IB+ bus wires (common, upwards, downwards, IB+) must be attached separately with the 2 cable clamps attached.
Installation
Dimensions and parts

- Electronic module
- Cover frame
- Power supply module
Installation
- Connect up the connection cables and secure the power supply module in the flush mounted box.

- Position the electronic module with its cover frame in the power supply module. Switch on the power supply.


Initial commissioning

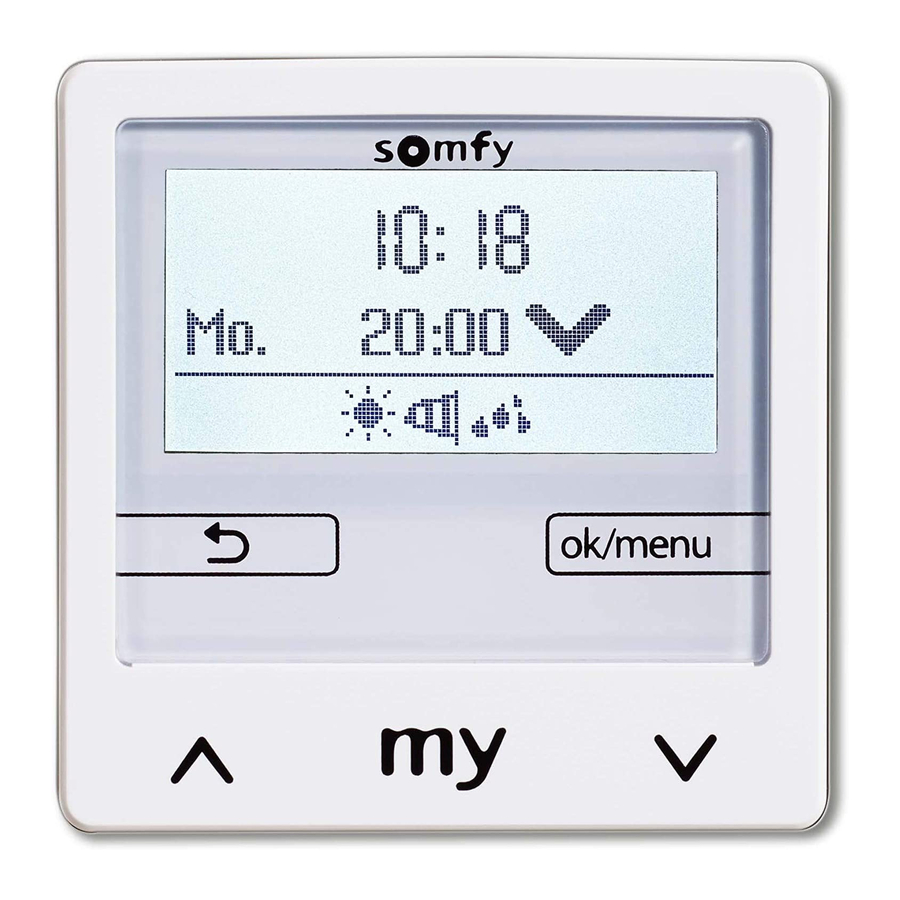
If the appliance has already been commissioned, the main screen displays (image  ).
).
If the appliance is in its original configuration, carry out the settings  ,
,  and
and  step by step.
Each setting must be confirmed with the "ok" button in order to access the next step: language, time, date (dd/mm/yy), type of equipment, linear travel (*1) and using the sensors.
When setting is complete, the appliance operates and the main screen is displayed (image ).
(*1) The linear travel time is the time required for a roller shutter, an external venetian blind or an awning to move from the open position to the fully closed position.
Setting the travel in automatic mode:
To raise the product, select "Start". To stop it, select "Stop" as soon as the product is at the end of the upper end limit. Press the button  .
.
To lower the product, select "Start". To stop it, select "Stop" as soon as the product reaches the lower end limit. Press the button .
The travel time is set.
All information on the basic settings are in the online manual.
The motor end limits must be set in advance.
 Advice for operating the external venetian blind: if the product does not move or barely moves after jogging, adjust the maximum tilting time of the slats or the start-up delay time (see the online manual).
Quick menu
On the main screen, briefly press the button .
Several operating modes will appear:
- Automatic mode: all the automatic functions are activated. Manual control is possible.

- Automatic mode stand-by: the automatic functions are deactivated for 6, 12 or 18 hours. The automatic functions then automatically re-activate.

- Holiday mode: a presence is simulated if the clock function with fixed times is activated (see online manual).

- Manual mode: automatic mode is deactivated.

- Settings: access to the settings menu (see the instructions).


If more than one zone is configured using Quick Copy, a new function appears. It enables the controlled zone to be selected.
Saving and deleting the favourite position
Prerequisite: the travel time should be accurately set (see the commissioning section).

Saving the favourite position
Position the product in the required position and stop it by briefly pressing the button  .
.
Press button again for at least 5 sec.
The position is saved.
Deleting the favourite position
Position the product in position  .
.
Press button for at least 5 sec.
The position has been deleted.
Restoring the original configuration
- Set the user profile in professional mode in "Configuration menu" / "Configuration" / "User mode set-up".
Confirm the "Professional" option by pressing button![]() .
.

- In the "Configuration" sub-menu chose the "Service" option.
Confirm "Factory reset".
Press the down button and select "Yes".
Confirm by pressing button![]() .
.


 .
.


The basic settings must be carried out again.
Optional
QuickCopy setting tool
Using this setting tool and the corresponding PC software (available free-of-charge to download), the settings can be configured very easily and transferred to other products. (See the QuickCopy™ instructions)

Sunis Wirefree io radio-controlled sunlight sensor
This sensor enables the twilight and sunlight functions to be used. (See the Sunis Wirefree io™ instructions)

Wired sensor (wind, rain, sunlight)
These sensors enable the wind, rain and sunlight functions to be used with the Soliris Smoove IB+ (see the sensor instructions).

Technical data
| Operating voltage: | 230 V AC ~ 50/60 Hz |
| Output voltage: | IB+/IB Bus |
| Motor travel time: | Max. 6 min. |
| Protection rating: | IP 20 |
| Protection class: | II |
| Operating temperature: | 0°C to + 40°C |
SOMFY ACTIVITES SA
50 avenue du Nouveau Monde
F - 74300 Cluses

Documents / Resources
References
Download manual
Here you can download full pdf version of manual, it may contain additional safety instructions, warranty information, FCC rules, etc.
Download SOMFY SOLIRIS SMOOVE IB+ - Thermostat Installation Guide
Advertisement


Need help?
Do you have a question about the SOLIRIS SMOOVE IB+ and is the answer not in the manual?
Questions and answers