Advertisement
Quick Links
Advertisement

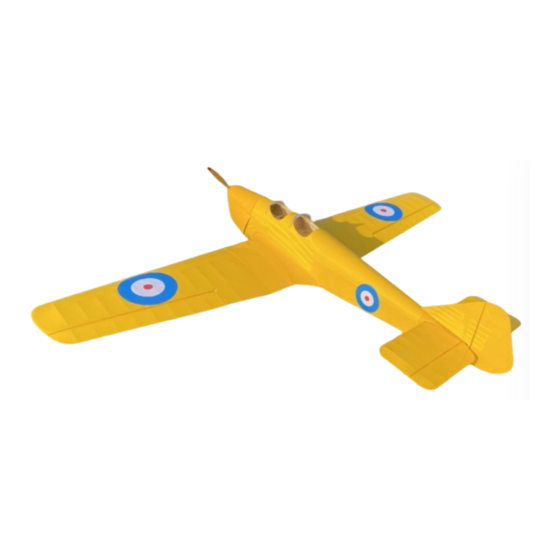
Summary of Contents for VALUEPLANES MILES M.2H HAWK MAJOR
- Page 1 MILES M.2H HAWK MAJOR (1/4 SCALE) LASER-CUTTING KIT BUILDING INSTRUCTION...
- Page 2 CATALOG INTRODUCTION----------------------------------------------------------------------------------------P1 PRODUCT LIST& KIT FEATURES -----------------------------------------------------------------P1 GERNERAL INFORMATION-------------------------------------------------------------------------P2 BUILDING INSTRUCTION---------------------------------------------------------------------------P3 1) FUSELAGE FRAME ASSEMBLY---------------------------------------------------------------P3 2) WING CONSTRUCTION-------------------------------------------------------------------------P11 3) TAIL---------------------------------------------------------------------------------------------------P14 PECIFICATIONS Wingspan : 2480mm Length : 1820mm Servos:≥8kg Flywing Weight : 9300g Suggested engine : OS 40cc 4 strokes...
- Page 3 INTRODUCTION M.2 H F.G. M AJOR WAS A VARIANT OF THE ILES DEVELOPED BY ILES TO TAKE ADVANTAGE OF THE NEW INVERTED DE AVILLAND IPSY AJOR ENGINE THER CHANGES INCLUDED METAL INSTEAD OF WOOD ENGINE MOUNTS AND STREAMLINED UNDERCARRIAGE HE PRODUCTION AJOR HAD THE HP DE AVILLAND...
- Page 4 GERNERAL INFORMATION E SURE TO READ THE SAFETY INSTRUCTIONS CAREFULLY BEFORE OPERATING YOUR MODEL • Always follow the procedures and settings recommended in the instructions. • If you are using remote-controlled model aircraft, helicopters, cars or ships for the first time, we recommend that you ask an experienced model pilot for help.
- Page 5 BUILDING INSTRUCTION 1 FUSELAGE FRAME ASSEMBLY 1) Glue the engine mount (Drill mounting holes according to the different engines). 2) Glue the bulkhead. 3) Glue 2pcs of A17 together to A16, and glue 8X8MM pine sticks.
- Page 6 4) Combine the left and right panels with the bulkhead, and glue 8X8MM pine stick to the bottom. 5) Smooth the plywood of the bulkhead, and glue 1MM plywood sheet at the bottom, and strengthen the bulkhead with pine wood sticks. 6) Build fuselage according to the drawing, and make the left and right framessymmetrical.
- Page 7 8) Glue the pine block to reinforce the tail and glue the horizontal tail wing table. 9) Glue the engine mount and use triangular wood strips for internal reinforcement. 10) Install the fuselage bulkhead. 11) Glue the 1mm plywood fuselage cover.
- Page 8 12) Glue pull-pull rods fixing seat. 13) Glue scabbards, taking care to maintain the verticality of the scabbards.
- Page 9 14) Glue the wing bolts with 8MM balsa in the middle, and fit the made latch to the wing scabbards. 15) Glue the wing scabbards to the fuselage, keeping both sides the same length. 16) Assemble the wing ribs and glue the undercart stiffeners. 17) Mark the opening positions of the undercart for later installation.
- Page 10 19) Glue the upper and lower 1mm plywood cover. 20) Cut and sand the leading edge of the wing according to the wing section mould. 21) Glue the wheel cowlings.
- Page 11 22) Use the wheel cowling as a template to mark and glue two pine strips to secure it. 23) Fix the wing cowlings wih self-tapping screws. 24) Use fiberglass cloth to reinforce the nose position. (Glass fiber cloth and resin materials need to be prepared by yourselves).
- Page 12 2 WINGS ASSEMBLY 1) Build the wings according to the ribs numbering position. 2) Glue balsa strips and trailing edge plywood on the wings. 3) Glue the wing tip plywood. 4) Glue the made wing scabbard and wing sternum together.
- Page 13 5) Glue the upper and lower wing cover. 6) Glue 2 layers of 8MM balsa sheets on the leading edge of the wing and polish it into the shape according to the airfoil mould. 7) Glue aileron servo mount. 8) Fill the wing ribs with balsa strips and polish them flat.
- Page 14 9) Fixing of aileron servos. 10) Assemble ailerons according to the plan, and attach pine blocks to the fixed position of the horns for reinforcement. 11) Glue 8MM balsa wood on the leading edge of the ailerons and sand it into the triangle shape.
- Page 15 3 TAIL ASSEMBLY DETAILS 1) Use A34 as a template to mark the 8X16MM pine strip and trim the excess. 2) Glue the pine sticks according to the plan, and strengthen the connecting part. 3) Glue A24.A25.A26 plywood and reinforce them with triangular wood blocks. 4) Assemble the rudder according to the plan.
- Page 16 5) Glue 8MM balsa sheet on the leading edge of the rudder and sand it into the triangle shape. 6) Glue pine blocks for horns installation. 7) Assemble the horizontal tail according to the plan, reinforced with balsa blocks in the middle.
- Page 17 8) Assemble the elevator according to the plan. 9) Attach plywood reinforcement under fuselage A23 and install claws nuts to hold horizontal stabilizer. 10) Fix the vertical tail with the metal part. Notice: Before flying, you need to put a little tape on the bottom of the wing and center wing joint to prevent the wing from falling off.
- Page 18 4 FINISHED THANKS FOR YOUR SUPPORT TO VALUEPLANES!


Need help?
Do you have a question about the MILES M.2H HAWK MAJOR and is the answer not in the manual?
Questions and answers