Advertisement
Quick Links
www.tbsiptv.com
TBS5930 DVB-S2X/S2 TV Tuner USB Card User Manual
TBS5930 DVB-S2X/S2 TV Tuner USB card is an USB interface digital satellite external TV Tuner box for watching
and recording Free to Air satellite TV on both desktop and laptop PC. It supports both DVB-S2 and DVB-S
programs receiving. It's ready with Windows BDA driver and Linux driver. It's compatible with Windows7
Media Center, MediaPortal, DVBlink, DVBDream, DVBViewer, ProgDVB, Skynet, TSreader, XBMC, MythTV, VDR
and many other popular DVB softwares.
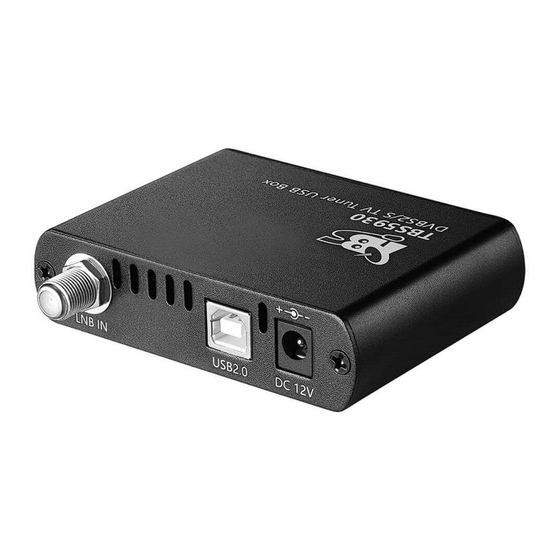
Appearance:
1 / 19
Advertisement

Related Manuals for tbs electronics TBS5930


Summary of Contents for tbs electronics TBS5930
- Page 1 TBS5930 DVB-S2X/S2 TV Tuner USB Card User Manual TBS5930 DVB-S2X/S2 TV Tuner USB card is an USB interface digital satellite external TV Tuner box for watching and recording Free to Air satellite TV on both desktop and laptop PC. It supports both DVB-S2 and DVB-S programs receiving.
- Page 2 3. DVB software Tune channel 5. Watch Tv program or do streaming Hardware Installation 1. Connect TBS5930 to your PC/Laptop USB 2.0 port 2. Connect Power Adapter DC 12V/2A for TBS5930 3. Connect satellite signal to TBS5930 The setup of Windows Platform Windows driver: https://www.tbsiptv.com/download/tbs5930/tbs5930_release_v1005_20230105.zip...
- Page 3 www.tbsiptv.com Driver install finished, you’ll see tuner device in “Computer—Device Manager: Sound, video and game controller”. Like this: DVB software install: For windows system, we recommend DVBdream, DVBviewer and ect. Let’s take DVBdream as example. DVBdream download: https://www.tbsiptv.com/download/common/dvbdream_oem_version_setup_v297.zip Tune channels: 1.
- Page 4 www.tbsiptv.com 2. DVBdream LNB setup DVBdream---Options---Diseqc For example, now I’m using LNB Ku-Circular, band frequency is 11300. The LN B setting is: 4 / 19...
- Page 5 www.tbsiptv.com Diseqc Switch: If signal is connected to Tuner card directly, just pick Port 1 to set LNB. If it’s using a Diseqc or Multiswitch, please check which Switch port you use, then set the LNB. 3. DVBdream: Tune channels DVBdream---Channels: Manual scan 5 / 19...
- Page 6 www.tbsiptv.com Fill in “Frequency”, “Pol.”, “Symbol rate”, “Modulation” information, Click “Scan” Locked and save channels: 6 / 19...
- Page 7 www.tbsiptv.com Also, when tuner card locked, Green LED lights up. This LED is to indicate the “lock” status. The Blue LED is Power LED. Channel list: 7 / 19...
- Page 8 www.tbsiptv.com Do recording: type: DVBdream---Channels: Record On/Off This is to record a single channel. Record path: located in where’s DVBdream installed and the folder “Record”. 8 / 19...
- Page 9 www.tbsiptv.com type: DVBdream---Modules:TsWriter2 ’ This type is to record the entire ts. Note: In any case, please do not plug USB cable out directly while tuner card is running. For example, tuner card is taken by DVBdream software, and it’s playing Tv program. The correct approach should be: turn app (DVB software) off first , and then go to plug USB cable out.
- Page 10 www.tbsiptv.com 2. Linux driver: https://github.com/tbsdtv/linux_media/wiki Build errors and rebuild: We have listed these frequently seen errors and the corresponding solutions: https://github.com/tbsdtv/linux_media/wiki/Prerequisites,-Build-errors-and-Rebuilding build finished, requires to reboot Server to load the driver. 3. If Linux driver is installed successfully, you’ll see tuner device under “/dev/dvb” # ls /dev/dvb 4.
- Page 11 www.tbsiptv.com -v 13, -v 18: LNB voltage -m psk_8: modulation. The default is QPSK. -a 0: adapter number 3. do streaming DVBlast requires to create a file which contains output and the specified channel to stream out. Configuration file # vi dvb1.conf Do streaming dvblast –f 12660000 –s 45000000 –v 18 –m psk_8 –a 0 –c dvb1.conf More detailed about the configuration of DVBlast, please refer to the above site.
- Page 12 www.tbsiptv.com # astra -c /etc /astra/astra.conf -p 8060 --daemon -c: specify the path -p: webUI port --daemon: start as a daemon Configure: 1. Login to webUI http://ip:8060 the default username/pwd is “admin/admin” 2. About the web UI configuration, please refer to these sites. Astra cesbo provides a very detailed explanation: https://cesbo.com/en/latest/astra/web-interface https://cesbo.com/en/latest/astra/web-interface/adapter...
- Page 13 www.tbsiptv.com or install using “snap”. # snap install tvheadend 2. Start Tvheadend: # tvheadend –C 3. Login to web GUI http://ip:9981 the default port is 9981, to change port is: # tvheadend -C --http_port 29088 New web GUI should be: http://ip:29088 13 / 19...
- Page 14 www.tbsiptv.com 4. Configure: 1>Create a “DVBS” network 14 / 19...
- Page 15 www.tbsiptv.com Do not forget to turn “Network discovery” off: 15 / 19...
- Page 16 www.tbsiptv.com 2> Configure “Network” to tuner device (adapter) 3> Go to “Muxes” to configure transponder parameters 16 / 19...
- Page 17 www.tbsiptv.com 4> Click “Create” and wait some seconds. If it’s locked, you’ll see “Services”, like this: 17 / 19...
- Page 18 www.tbsiptv.com 5> Services Pick favorite channels and map them out. For example, P19 to P23: 6> Go to “Channels/EPG---Channels”, give each channel a number 18 / 19...
- Page 19 This is one URL one channel. For example, channel “P22”, the URL is http://ip:9981/stream/channelnumber/3 type is to download “m3u” URL, like this: Any question about the Setup of TBS5930, please write to us: support@tbsdtv.com 19 / 19...
Need help?
Do you have a question about the TBS5930 and is the answer not in the manual?
Questions and answers