Table of Contents
Advertisement
Quick Links
AERIUM 4DRC F3
drone
instructions for use
For models:
4DRC F3 4K (without GPS) - the GPS features listed in the
manual are not valid for this model
4DRC F3 GPS 1080P
4DRC F3 GPS 4K
For users over 14 years of age
Registration is compulsory for all drones with a camera, more
at:
https://www.letejtezodpovedne.cz/
It is prohibited to use any model of drone within a 10
km radius on the sides of the airport and within 20 km
of either end of the runway and on civil air routes to
meet the electromagnetic environment requirements
for aeronautical communications.
No model of drone is allowed in the no-fly zones
Advertisement
Table of Contents

Related Manuals for 4DRC AERIUM F3


Summary of Contents for 4DRC AERIUM F3
- Page 1 AERIUM 4DRC F3 drone instructions for use For models: 4DRC F3 4K (without GPS) - the GPS features listed in the manual are not valid for this model 4DRC F3 GPS 1080P 4DRC F3 GPS 4K For users over 14 years of age Registration is compulsory for all drones with a camera, more https://www.letejtezodpovedne.cz/...
- Page 2 established by the relevant state authorities.
- Page 3 The packaging and instructions for use provide important information and should be kept for future reference. You are responsible for ensuring that this drone does not cause any personal injury or property damage. The commissioning and assembly of the drone must be strictly in accordance with the operating instructions.
- Page 4 Only the original USB charging cable may be used.
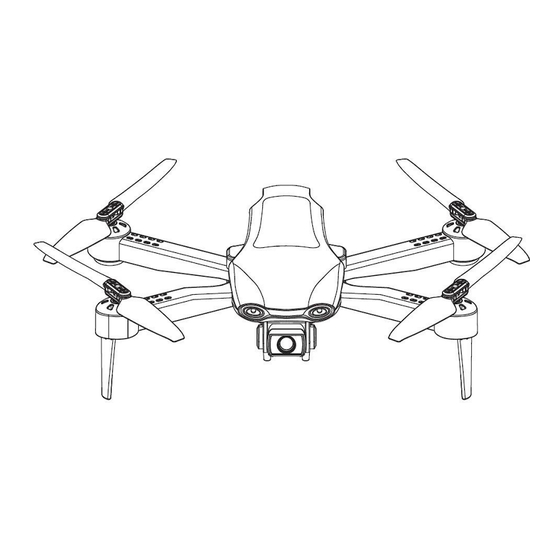
- Page 5 1. Accessories Drone 1xcharger 1xreplacement propeller blades 4xbatteries 3x (2x) according to model screwdriver instructions 2. Drone component names: Engin Propel blade Batteri holder Drone clip body Propeller LED lights blades Camera 3. Propeller blade installation and replacement 3.1 Unscrew the screw and 3.2 Unscrew the screw to remove the propeller blades.
- Page 6 4.1 Press the drone battery lock 4.2 Remove the battery 4.3 Charging: insert the USB interface of the charging cable into the USB ports of the computer (or use the output: 5V = 2A power adapter) and connect the other side of the USB interface to the battery socket.
-
Page 7: Installing The Remote Control Battery
WiFi wireless network, find the device "4DRC-4K-GPS *****" in the wireless network search list and connect the device, exit Settings when connected. Open the "4DRC PRO" icon on your mobile phone and enter the control interface (stay ● away from other signal sources when controlling the drone). - Page 8 8. Introduction to the functions of the application control interface: WiFi signal Connection Battery status status More functions More settings Return / Photo/Vide Back o Switch Take- Media Library off/landing Immediate Flight records return Zoom Unlocking Filters Radar, direction Informatio about the distance Multi-seat flight Next Circular...
- Page 9 Note: Turn off Beginner mode with advanced flight operations, then adjust the flight distance and altitude to allow the drone to fly further!
-
Page 10: Preparation For Flight
Note: Adjust the direction of the drone so that the front of the drone is facing forward and the drone is positioned horizontally. 10.2 Open the WiFi function on your mobile phone and select "4DRC-4K- GPS*****" in the WiFi list, connect the device and then open the app. -
Page 11: Horizontal Calibration
10.4 Horizontal calibration: Press the left and right control stick on the remote control to the bottom left corner, the white and red lights on the drone will flash rapidly. When the white and red indicator lights on the drone light up, horizontal calibration is complete, the remote control will beep (Figure 1). - Page 12 To operate the application: enter the "Other Settings" interface, complete the compass calibration according to the text prompt and the operating steps (Figure 4). Once the compass calibration is complete, automatically enter the flight operations interface. Figure 4 10.6 Satellite search status (default GPS mode) When the remote control is in GPS mode, the GPS light is on, indicating that the GPS is entering the satellite search state.
- Page 13 10.8 Immediate take-off/landing After unlocking the drone, lightly press the "Instant Takeoff/Landing" button on the remote control (Fig. 8) until the drone automatically flies up to a height of about 1 m, maintain a stable flight at this height; press this button again, the drone will automatically land slowly on the ground.
- Page 14 Note: Before taking off, perform the following actions with the drone. Frequency tuning (see 10.1) → WIFI connection(see 10.2) → remote control start frequency (see 10.3) → horizontal calibration (see 10.4) → geomagnetic calibration (see 10.5) → satellite search status (default GPS mode) → (see 10. 6) → Start/Stop (GPS mode) (see 10.7) → Start/Stop (normal mode) (see 10.8) →...
- Page 15 12. Operation of the application and introduction of the remote control functions: 12.1 Free mode The front of the drone during frequency matching is the main part in free mode; if you want to adjust the default direction, restart the frequency matching drone and press the "free mode"...
- Page 16 Return out of control When the remote control signal is interrupted for approximately 4 seconds, the drone will automatically fly back to the location with the appropriate signal. Return when the battery is low If the battery is low, the drone will be forced to return to a position about 20 m above the take- off point.
- Page 17 12.5 Flight mode in the circle In GPS mode, click on the "More Settings" icon (Figure 25) in the APP control interface and enter the circle flight (Figure 26), the drone will automatically create a radius (Figure 27) that can be adjusted in the APP (Figure 28). At this point, press the right rudder left or right to make the drone fly left or right (Figure 29) to achieve a circle flight, and the flight speed is adjustable.
-
Page 18: Gesture Recognition
12.7 Gesture recognition In GPS mode, you can enable the timer or auto-resume drone recording by looking at the front camera lens using the following gestures. Special tip: To perform gesture recognition operations, stay about 3 m away from the lens and face the lens in a well-lit location. -
Page 19: Solving Common Problems
13. Solving common problems: The drone light is blinking, but the drone is not working. Problem: 1. Unsuccessful satellite search for a drone using GPS 2. Low drone battery Solution: 1. Place the drone in an open area and locate the satellite again. 2.
Need help?
Do you have a question about the AERIUM F3 and is the answer not in the manual?
Questions and answers