Table of Contents
Advertisement
Quick Links
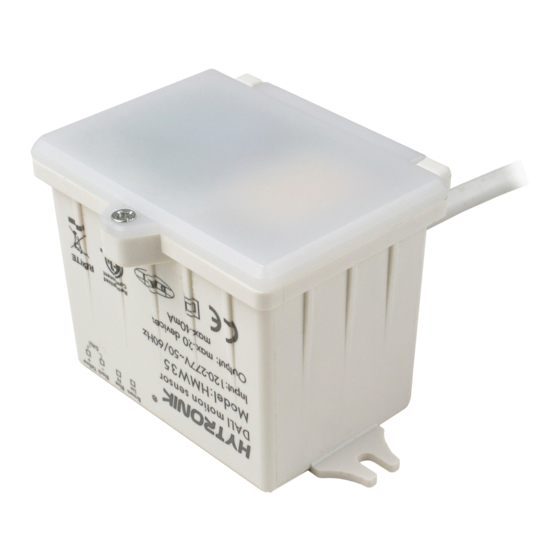
DAYLIGHT HARVEST SENSOR 1-10V, SURFACE MOUNTED
RDLHRV-HMW32S
PLEASE READ INSTRUCTION BEFORE COMMENCING INSTALLATION AND RETAIN FOR FUTURE REFERENCES. ! Electrical products can
cause death or injury, or damage to property. If in any doubt about the installation or use of this product, consult a competent electrician
Product technical information and specification may change over time without prior notification. For the latest technical information please
visit our web site www.ledgrouprobus.com or robusdirect.com
-20°C < Ta < +40°C, 120V – 277V ~ 50/60Hz, IP65,
Rated load: Capacitive: 400W - 120V; 800W - 220-270V
Resistive: 800W - 120V; 1600W - 220-270V
Mounting Height (Max.): 15m
Detection Range (Max.): 10m
Installation
1. Ensure mains supply is switched off before commencing work.
2. Select suitable location for mounting the sensor.
3. Connect cable in suitable junction box (flex 700mm).
4. Connect wires as per wiring diagram.
5. Remove screw and open sensor.
6. Adjust the settings as per table.
7. Alternatively use remote control HRC-11.
8. Close sensor and insert screw.
8 hours Manual on mode: Turn off/on the power supply three
times within 3 seconds, the light will be turned on for 8 hours,
even if there is no motion detected, then go back to sensor mode
automatically. This 8 hours manual on mode can be cancelled by
turning off/on the power supply one time within 1 second.
Rotary Switch Settings
A rotary switch is built inside the sensor.
Total 16 channels available:
Detection
Hold
Stand-by
Stand-by
Channel
range
time
time
dimming level
0
100%
5s
10s
10%
1
100%
1min
5min
10%
2
100%
5min
10min
10%
3
100%
5min
+∞
10%
4
100%
5min
+∞
10%
5
100%
5min
+∞
30%
6
100%
10min
30min
10%
7
100%
10min
+∞
10%
8
100%
10min
+∞
10%
9
100%
10min
+∞
30%
A
100%
20min
1h
10%
B
100%
20min
+∞
30%
C
100%
30min
+∞
10%
D
100%
30min
+∞
30%
E
100%
30min
+∞
50%
F
100%
5s
10s
10%
Note: settings can also be changed by remote control. The last action controls.
Information for the Product user:
1. Please note the requirement to dispose of Waste Electrical & Electronic Equipment separately from household waste (WEEE marked with crossed out wheelie bin
symbol).
2. Please consider your role in contributing to re-use and recycling by returning this product at end of life to a collection centre for waste electrical equipment or a
Civic Amenity site, or to a retail outlet from which you are purchasing a replacement.
3. This equipment may contain substances that are hazardous to health and the environment if disposed of carelessly. It is important that it is separated from normal
household waste and recycled in the WEEE chain
4. The "crossed out wheelie bin symbol" on a product indicates this equipment must not be disposed of in normal household waste, but should be disposed of
according to local WEEE regulations
The Installation must be carried out by a qualified electrician
Issue 2 100717
All manuals and user guides at all-guides.com
INSTRUCTION MANUAL
Note:
Wiring Diagram
L
N
Black
Blue
Brown
L
LED
driver
N
Red
1-10V+
Yellow
1-10V-
Sensor
Dimension
59.6
53
4.1
66.6
81.5
Lux off function
Daylight
threshold
The built-in daylight sensor can read ambient natural light and switch
Disable
off the fixture automatically whenever artificial light is unneeded
50Lux
(natural light lux level exceeds daylight threshold).
50Lux
75Lux
Note: If the stand-by time is pre-set at "+∞", the fixture never
100Lux
switches off even when natural light is sufficient.
200Lux
50Lux
75Lux
Ambient Daylight Threshold
100Lux
Switch the power supply to the sensor two times within 2 seconds,
200Lux
100Lux
ambient lux level is sampled and set as the new daylight threshold.
200Lux
Both the settings on rotary switch and the ambient lux level
100Lux
sampled can overwrite each other. This feature enables the
200Lux
daylight sensor to be commissioned to the environment in
400Lux
which it is installed. The last adjustment remains in memory.
100Lux
DAGLICHTREGELINGSSENSOR 1-10V, OPBOUW
EN
RDLHRV-HMW32S
LEES DE INSTRUCTIES VOORDAT U BEGINT MET DE INSTALLATIE EN HOU ZE BIJ VOOR LATER. ! Elektrische producten kunnen de dood
of letsel veroorzaken of eigendommen beschadigen. Als u twijfelt over de installatie of het gebruik van dit product, raadpleeg dan een e
rkende elektricien
Technische gegevens en specificaties van dit product kunnen zonder voorafgaande kennisgeving wijzigen. Ga voor de meest recente
technische gegevens naar onze website www.ledgrouprobus.com of robusdirect.com
-20°C < Ta < +40°C, 120V – 277V ~ 50/60Hz, IP65,
Nominale belasting: Capacitief: 400W - 120V; 800W - 220-270V
Resistief: 800W - 120V; 1600W - 220-270V
Montagehoogte (max.): 15m
Detectiebereik (max.): 10m
Installatie
1. Zorg dat het lichtnet is uitgeschakeld voordat u begint.
2. Kies een geschikte montageplaats voor de sensor.
3. Sluit de kabel aan in een geschikte aansluitdoos (flex 700mm).
4. Sluit de draden aan zoals op het bedradingsschema.
5. Verwijder de schroef en open de sensor.
6. Voer de instellingen uit zoals aangegeven in de tabel.
7. U kunt ook de afstandbediening HRC-11 gebruiken.
8. Sluit de sensor en draai de schroef vast.
Modus 8 u handmatig aan: Zet de voeding binnen de 3
seconden drie keer uit en aan. Het licht blijft 8 uur branden, ook al
wordt er geen beweging gedetecteerd. Daarna schakelt het
systeem automatisch terug op sensormodus. Deze modus voor 8
uur handmatig aan kan worden uitgeschakeld door de voeding
binnen 1 seconden één keer uit en terug aan te zetten.
Instellingen draaischakelaar
In de sensor is een draaischakelaar ingebouwd.
In totaal zijn er 16 kanalen beschikbaar:
Kanaal
Detectiebereik
Wachttijd Waakstandtijd
0
100%
5s
1
100%
1min
2
100%
5min
3
100%
5min
4
100%
5min
5
100%
5min
6
100%
10min
7
100%
10min
8
100%
10min
9
100%
10min
A
100%
20min
B
100%
20min
C
100%
30min
D
100%
30min
E
100%
30min
F
100%
5s
Opmerking: de instellingen kunnen ook worden gewijzigd met de afstandsbediening.
Bediening laatste handelingen.
Informatie voor de gebruiker van het product:
1. Hou bij het verwijderen van afval rekening met de regeling voor afgedankte elektrische en elektronische apparatuur, gescheiden van gewoon huishoudelijk afval
(AEEA, pictogram van een kliko met een kruis erdoorheen).
2. Neem uw verantwoordelijkheid op het vlak van hergebruik en recycling door dit product aan het einde van zijn levenscyclus in te leveren bij een inleverpunt voor
elektronisch afval, een milieupark of een winkel waar u een nieuw product koopt.
3. Deze apparatuur kan stoffen bevatten die gevaarlijk zijn voor de gezondheid en het milieu indien ze onachtzaam wordt weggegooid. Het is belangrijk dat ze
gescheiden gehouden wordt van het normaal huishoudelijk afval en gerecycled wordt in het netwerk voor AEEA.
4. Het pictogram van een kliko met een kruis erdoorheen op een product betekent dat dit apparaat niet samen met het gewone huishoudelijk afval mag worden
weggegooid, maar dat het dient te worden verwijderd in overeenstemming met de lokale regelgeving voor AEEA (afgedankte elektrische en elektronische apparatuur).
De installatie dient te worden uitgevoerd door een elektricien
Opmerkingen:
Bedradingsschema
L
N
Zwart
Blauw
Bruin
Sensor
Afmetingen
Lux-uit functie
Dimniveau
De ingebouwde daglichtsensor kan natuurlijk omgevingslicht
Daglichtdrempel
waakstand
detecteren en het armatuur automatisch uitschakelen wanneer
10s
10%
Disable
kunstmatig licht niet nodig is (het lux-niveau van het natuurlijke
5min
10%
50Lux
licht is hoger dan de daglichtdrempel).
10min
10%
50Lux
Opmerking: Als de waakstandtijd is ingesteld op "+∞", wordt het
+∞
10%
75Lux
armatuur nooit uitgeschakeld, ook al is het natuurlijke licht voldoende.
+∞
10%
100Lux
+∞
30%
200Lux
Omgevingsdaglichtdrempel:
30min
10%
50Lux
+∞
10%
75Lux
Schakel de voeding van de sensor binnen de 2 seconden twee
+∞
10%
100Lux
keer uit en aan, het omgevingslux-niveau wordt vastgesteld en
+∞
30%
200Lux
ingesteld als nieuwe daglichtdrempel. Zowel de instellingen op de
1h
10%
100Lux
draaischakelaar als het vastgestelde omgevingslux-niveau kunnen
+∞
30%
200Lux
+∞
10%
100Lux
elkaar overschrijven. Dankzij deze eigenschap kan de
+∞
30%
200Lux
daglichtsensor worden aangepast aan de omgeving waarin
+∞
50%
400Lux
deze wordt geïnstalleerd. De laatste afstelling blijft in het
10s
10%
100Lux
geheugen bewaard.
NL
L
LED
N
driver
Rood
1-10V+
Geel
1-10V-
59.6
53
4.1
66.6
81.5
Page 1
Advertisement
Table of Contents

Related Manuals for Robus RDLHRV-HMW32S


Summary of Contents for Robus RDLHRV-HMW32S
- Page 1 INSTRUCTION MANUAL DAYLIGHT HARVEST SENSOR 1-10V, SURFACE MOUNTED DAGLICHTREGELINGSSENSOR 1-10V, OPBOUW RDLHRV-HMW32S RDLHRV-HMW32S LEES DE INSTRUCTIES VOORDAT U BEGINT MET DE INSTALLATIE EN HOU ZE BIJ VOOR LATER. ! Elektrische producten kunnen de dood PLEASE READ INSTRUCTION BEFORE COMMENCING INSTALLATION AND RETAIN FOR FUTURE REFERENCES. ! Electrical products can of letsel veroorzaken of eigendommen beschadigen.
- Page 2 All manuals and user guides at all-guides.com SENSOR MIT TAGESLICHTNUTZUNG 1-10 V, OBERFLÄCHENMONTAGE CAPTEUR DE RÉCUPÉRATION DE LA LUMIÈRE DU JOUR 1-10V, DE SURFACE RDLHRV-HMW32S RDLHRV-HMW32S VEUILLEZ LIRE LES INSTRUCTIONS AVANT DE COMMENCER L’INSTALLATION ET CONSERVEZ-LES POUR TOUTES UTILISATIONS FUTURES. Les produits LESEN SIE DIE ANLEITUNG, BEVOR SIE MIT DER INSTALLATION BEGINNEN, UND BEWAHREN SIE SIE FÜR DIE SPÄTERE VERWENDUNG AUF.
Need help?
Do you have a question about the RDLHRV-HMW32S and is the answer not in the manual?
Questions and answers