Table of Contents
Advertisement
Quick Links
R
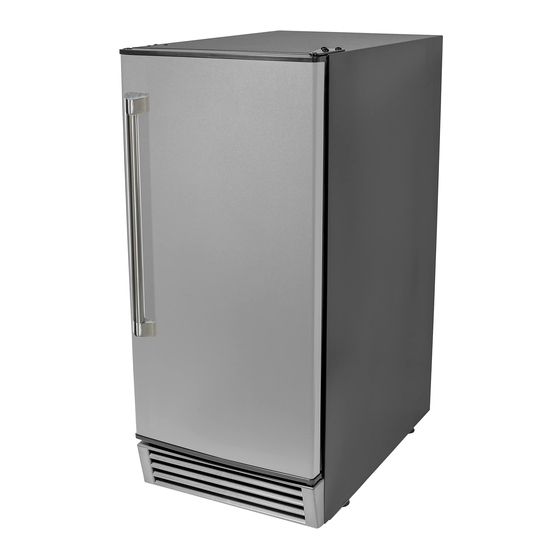
IME49U3S-IS
Model
ICE MAKER
INSTRUCTION MANUAL
BEFORE USE, PLEASE READ AND FOLLOW ALL SAFETY RULES AND OPERATING
INSTRUCTIONS.
Avanti has a policy of continuous improvement on its products and reserves
the right to change materials and specifications without notice.
Avanti Products LLC
3265 Meridian Pkwy Ste. 114
Weston, FL 33331 USA
www.avantiproducts.com
Advertisement
Table of Contents

Subscribe to Our Youtube Channel
Related Manuals for Avanti Elite IME49U3S-IS


Summary of Contents for Avanti Elite IME49U3S-IS
- Page 1 INSTRUCTION MANUAL BEFORE USE, PLEASE READ AND FOLLOW ALL SAFETY RULES AND OPERATING INSTRUCTIONS. Avanti has a policy of continuous improvement on its products and reserves the right to change materials and specifications without notice. Avanti Products LLC 3265 Meridian Pkwy Ste. 114 Weston, FL 33331 USA www.avantiproducts.com...
-
Page 2: Table Of Contents
9 -14 Operating Your Appliance 15 – 17 How Your Appliance Makes Ice Care and Maintenance 19 – 22 Troubleshooting Guide 23 – 24 Service for Your Appliance Wiring Diagram Your Avanti Products Warranty Registration Information and Registration Card Last page... -
Page 3: Appliance Safety
APPLIANCE SAFETY Your safety and the safety of others are very important. We have provided many important safety messages in this manual and on your appliance. Always read and obey all safety messages. This is the Safety Alert Symbol. This symbol alerts you to potential hazards that can kill or injure you and others. -
Page 4: Important Safeguides
IMPORTANT SAFEGUARDS Before the beverage cooler is used, it must be properly positioned and installed as described in this manual, so read the manual carefully. To reduce the risk of fire, electrical shock or injury when using the beverage cooler, follow basic precautions, including the following: •Plug into a grounded 3-prong outlet, do not remove grounding prong, do not use an adapter, and do not use an extension cord... -
Page 5: Electrical Connection
Improper use of the grounded plug can result in the risk of electrical shock. If the power cord is damaged, have it replaced by an authorized Avanti Products service center. This appliance should be properly grounded for your safety. The power cord of this appliance is equipped with a three-prong plug which mates with standard three prong wall outlets to minimize the possibility of electrical shock. -
Page 6: Help Us Help You
Keep it handy to answer your questions. If you don't understand something or you __________________________________ need more help, please call: Date of Purchase Avanti Customer Service 800-220-5570 __________________________________ Model Number Keep proof of original purchase date (such as your sales slip) with this guide to establish the warranty period. -
Page 7: Parts And Features
PARTS AND FEATURES Water Distribution Tube Evaporator (Ice Mold) Door Water Trough Float Ice Storage Bin Control Panel Front Louver Panel Leveling Leg... -
Page 8: Important Safety Instructions
IMPORTANT SAFETY INSTRUCTIONS To reduce the risk of fire, electrical shock, or WARNING injury when using your icemaker, follow these basic precautions: This Unit Is For Indoor Use Only - SAVE THESE INSTRUCTIONS - Read all instructions before using the icemaker. ... -
Page 9: Installation Of Your Appliance
INSTALLATION OF YOUR ICEMAKER THIS ICEMAKER SHOULD BE PROPERLY INSTALLED BY A QUALIFIED PROFESSIONAL • This icemaker MUST be installed with electrical and water connections in accordance with all state and local codes. • When installing the ice maker under a counter, follow the recommended spacing dimensions shown. - Page 10 Installing the stainless steel handle This appliance includes a stainless steel handle. To install the handle please follow the below instructions: Pull away the door gasket in the area where the handle is to be installed on the left side as shown below in Illustration # 1.
- Page 11 Leveling the ice maker It is important for the icemaker to be leveled in order to work properly. It can be raised or lowered by rotating the plastic sheaths around each of the four feet on the bottom of the machine .If you find that the surface is not level, rotate the feet until the ice maker becomes level .You may need to make several adjustments to level it.
- Page 12 Water Supply The water supply should be ready at the point of installation. The water supply pressure should be a minimum of 15 psig with a static pressure not more than 80 psig. (A wall outlet directly behind the ice machine will make installation easier.) IMPORTANT: 1.
- Page 13 Connecting the drain line: NOTE: If there is a drain line near the ice maker, the best choice is to drain water to the drain line through the drain water hose provided with ice maker. 1. Locate the floor drain near the ice maker. The distance should be less than 5 feet since the length of the long drain water hose provided with the ice maker is about 5 feet.
- Page 14 The PC board activates the water drain pump for 20 seconds, pumping out most of the water contained in the water reservoir. The water can be pumped out up a rise of to 1.5m (59”) or WATER VALVE WATER FLTER NOTE:...
-
Page 15: Operating Your Appliance
OPERATING YOUR ICEMAKER Control Panel: Description of buttons and indicator lights: Indicator Lights: 1. BIN FULL (RED): Bin is full When this light is illuminated, the ice storage bin is full of ice or there is something blocking the bin full sensor. The unit will stop the ice making process until the level of ice has reduced or the object blocking the sensor is removed. - Page 16 OPERATING YOUR ICE-MAKER Ice making stage Ice harvest stage Bin full stage Turn on the water tap. Press the ON/OFF button. After 3 minutes, the machine will automatically go to the ice-making stage, and the sound of water flowing will be heard. (The ICE indicator light (GREEN) will blink during this process.) Press the MODE button to quick start the Ice-Making process and allow the water trough to begin to fill automatically.
- Page 17 Ice Size Adjustment Guide: 1. Press and hold the “Adjust” button for approximately 3 seconds. The unit will enter the Ice Size Adjustment mode. The “HARVEST” LED (yellow) will be blinking continuously while the ice size is being selected. Release the button when the LED blinks continuously to adjust the ice size. 2.
-
Page 18: How Your Appliance Makes Ice
HOW THE ICE MAKER PRODUCES ICE Set the ON/OFF button to the ON position. The machine will automatically go in to the ice making stage. The unit will go through two distinct cycles during the production of your ice. The first cycle is the “freeze” where the ice is actually produced and the second is the “harvest”... -
Page 19: Care And Maintenance
CARE AND MAINTENANCE Cleaning The Icemaker If the ice maker is left unused for a long time, before the next use it must If the ice maker is left unused for a long time, before the next use it be thoroughly cleaned. Follow carefully any instructions provided for must be thoroughly cleaned. - Page 20 Cleaning the interior The ice storage bin should be sanitized occasionally. Clean the water trough before the ice maker is used first time and reused after stopping for an extended period of time. It is usually convenient to sanitize the trough after the ice making system has been cleaned, and the ice storage bin is empty. 1.
- Page 21 Ice-making system cleaning (CLEAN BUTTON) The ice machine cleaner contains acids. DO NOT use or mix with any other solvent-based cleaner products. Use rubber gloves to protect hands. Carefully read the material safety instructions on the container of the ice machine cleaner. Discard the first batch of ice produced after cleaning.
- Page 22 Power Failure Most power failures are corrected within a few hours and should not affect the temperature of your icemaker if you minimize the number of times the door is opened. If the power is going to be off for a longer period of time, you need to take the proper steps to protect your food.
-
Page 23: Troubleshooting Guide
TROUBLESHOOTING Before Calling for Service If the unit appears to be malfunctioning, read through the OPERATION section of this manual first. If the problem persists, check the Troubleshooting Guide on the following pages. Some of the problems mentioned in the Guide can be solved easily without a service call. Problem Possible Cause Probable Correction... - Page 24 The electricity is off. Reconnect the power supply line. Cut off the electricity and leave the ice maker The ice maker stops The room temperature is out of disconnected until the temperature returns to suddenly while the stated range. within the stated range. making ice.
-
Page 25: Service For Your Appliance
We are proud of our customer service organization and the network of professional service technicians that provide service on your Avanti appliances. With the purchase of your Avanti appliance, you can have the confidence that if you ever need additional information or assistance the Avanti Products Customer Service team will be here for you. -
Page 26: Your Avanti Products Warranty
For one year from the date of purchase by the original owner, Avanti products will, at its option, repair or replace any part of the product which proves to be defective in material or workmanship under normal use. Avanti Products will provide you with a reasonably similar product that is either new or factory refurbished. - Page 27 Registration Information Thank you for purchasing this fine Avanti product. Please fill out this form and return it to the following address within 100 days from the date of purchase and receive these important benefits: Avanti Products LLC 3265 Meridian Pkwy Ste. 114 Weston, FL 33331 USA ...
- Page 28 IME49U3S-IS 07/05/2022 PRINTED IN CHINA...
Need help?
Do you have a question about the Elite IME49U3S-IS and is the answer not in the manual?
Questions and answers