Table of Contents
Advertisement
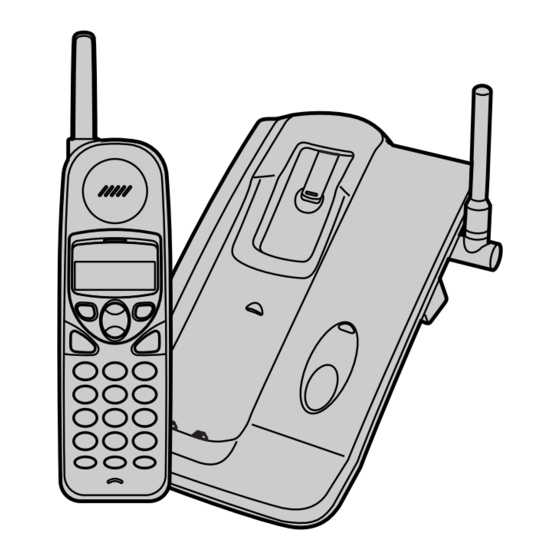
900 MHz Cordless Phone
Operating Instructions
KX-TC1486
Model No.
Pulse-or-tone dialing capability
The unit is Caller ID compatible. To display the caller's name and phone number,
you must subscribe to Caller ID service.
PLEASE READ BEFORE USE AND SAVE.
Charge the battery for 15 hours before initial use.
Panasonic World Wide Web address: http://www.panasonic.com
for customers in the USA or Puerto Rico
Advertisement
Table of Contents

Related Manuals for Panasonic KX-TC1486


Summary of Contents for Panasonic KX-TC1486
-
Page 1: Operating Instructions
The unit is Caller ID compatible. To display the caller’s name and phone number, you must subscribe to Caller ID service. PLEASE READ BEFORE USE AND SAVE. Charge the battery for 15 hours before initial use. Panasonic World Wide Web address: http://www.panasonic.com for customers in the USA or Puerto Rico... -
Page 2: Before Initial Use
Before Initial Use Thank you for purchasing your new Panasonic cordless telephone. Please read IMPORTANT SAFETY INSTRUCTIONS on page 34 before use. Read and understand all instructions. Caller ID and Call Waiting Service, where available, are telephone company services. After subscribing to Caller ID, this phone will display a caller’s name and phone number. -
Page 3: For Best Performance
For Best Performance Battery Charge A rechargeable Ni-Cd battery powers the handset. Charge the battery for 15 hours before initial use (p. 8). Base Unit Location Calls are transmitted between the base unit and the handset using wireless radio waves. For maximum distance and noise-free operation, the recommended base unit location is: Away from electrical appliances such as a TV or personal computer. -
Page 4: Table Of Contents
Contents Preparation Location of Controls ... 5 Settings ... 7 Connections ... 7 Installing the Battery in the Handset... 8 Battery Charge ... 8 Ringer Selector ... 9 Programmable Functions ... 10 Display Language ... 10 Dialing Mode ... 10 Basic Operation Making Calls ... -
Page 5: Location Of Controls
Location of Controls Base unit IN USE/CHARGE Indicator (p. 8, 25) Charge Contacts (p. 9) For assistance, please call: 1-800-211-PANA(7262) Hook (p. 28) [HANDSET LOCATOR] (p. 25) “ Antenna (p. 3) -
Page 6: Location Of Controls
“ Location of Controls Handset [PAUSE/REDIAL] (p. 11, 26) RINGER Selector (p. 9) /FLASH] (p. 11, 12, 26) [ ] (TONE) (p. 25) [MUTE/CLEAR] (p. 12, 19, 24) Microphone How to use the LOUD/SEARCH key This key has two active areas that are indicated by arrows. ≥Pressing the up or down arrow allows you ≥—to enter into the Caller List, ≥—to select the function items,... -
Page 7: Settings
Telephone Jack (RJ11C) Telephone Line Cord ≥USE ONLY WITH Panasonic AC ADAPTOR PQWATC1461M1 (Order No. PQWATC1461M1). ≥The AC adaptor must remain connected at all times. (It is normal for the adaptor to feel warm during use.) ≥To connect a standard telephone on the same line, see page 29. -
Page 8: Installing The Battery In The Handset
“ Settings Installing the Battery in the Handset Install the battery and close the handset cover, locking it into place. Black Lead Lead Battery Charge Place the handset on the base unit and charge for 15 hours before initial use. ≥The IN USE/CHARGE indicator lights and a beep sounds. -
Page 9: For Assistance, Please Call: 1-800-211-Pana(7262
Battery information After your Panasonic battery is fully charged, you can expect the following performance: Operation While in use (TALK) While not in use (Standby) ≥A fully charged battery will give you up to 5 hours of continuous talk time, or keep your handset in standby mode to receive incoming calls for up to 5 days (if no phone calls are made). -
Page 10: Programmable Functions
Programmable Functions You can program the following function items using the handset near the base unit. Make sure the unit is in the standby mode. ≥You can exit the programming mode at any time by pressing [OFF]. ≥If you do not press any buttons for 60 seconds, the unit will return to the standby mode. -
Page 11: Making Calls
/FLASH] Press ≥After a few seconds, the display will show the receiver volume. Dial a telephone number. ≥The dialed number is displayed. To hang up, press [OFF] or place the handset on the base unit. ≥If an alarm tone sounds in step 1, move closer to the base unit or place the handset on the base unit, and try again. -
Page 12: Answering Calls
“ Making calls To select the receiver volume Press while talking. ≥Each time you press will change by 4 levels. To mute your conversation Press [MUTE/CLEAR] while talking. ” and the receiver volume are displayed. MUTE ≥“ ≥The other party cannot hear you but you can hear them. -
Page 13: Caller Id Service
Caller ID Service This unit is compatible with a Caller ID service offered by your telephone company. If you subscribe to a Caller ID, the calling party’s information will be displayed after the first ring. The unit can record information of up to 40 callers, including the date and time received, in the Caller List. -
Page 14: To Check The Number Of New Calls
≥The name display service may not be available in some areas. For further information, please contact your telephone company. To check the number of new calls If you have received 10 new calls, the display will show the following:... -
Page 15: For Assistance, Please Call: 1-800-211-Pana(7262
Using the Caller List Viewing the Caller List To check who has called, follow the steps below. Make sure the unit is in the standby mode. Lift the handset off the base unit and press Caller List. ≥The display will show, for example, the following: SMITH,JACK To search from the most recent call, press To search from the oldest call, press... - Page 16 “ Using the Caller List Ex. When you search from the most recent call: Lift the handset off the base unit and press ROBINSON,TINA Press SMITH,JACK Press BROWN,NANCY Press JONES,TOM Press START/END Press ≥If there is no name information for a caller, the display will only show the phone number.
-
Page 17: For Assistance, Please Call: 1-800-211-Pana(7262
Phone no. – Area code ≥The order in which patterns a–c are displayed depends on how the telephone number is displayed in step 2. After editing the number, you can continue with calling back or storing procedures. To call back, press To store the number in the phone book, press [AUTO/PROGRAM]. -
Page 18: Storing Caller Information In The Phone Book
“ Using the Caller List Storing Caller Information in the Phone Book You can store numbers that are in the Caller List in the phone book. Make sure the unit is in the standby mode. Lift the handset off the base unit and press to enter the Caller List. -
Page 19: For Assistance, Please Call: 1-800-211-Pana(7262
Erasing Caller Information After checking the Caller List, you can erase some or all of the entries. Make sure the unit is in the standby mode. To erase a specific caller from the Caller List Lift the handset off the base unit and press to enter the Caller List. -
Page 20: Phone Book
Phone Book You can store up to 10 names and phone numbers in the phone book. Using the phone book, you can make a call by selecting a name on the handset display. Storing Names and Numbers Make sure the unit is in the standby mode. Press [AUTO/PROGRAM]. -
Page 21: Selecting Characters To Enter Names
Selecting characters to enter names The handset dialing buttons ([1) to [9]), letters and symbols. The letters are printed on the dialing buttons. Pressing each button selects a character as shown below. Number of times key is pressed Keys – Blank ≥To show the cursor, press ≥To enter another character using the same dialing button, press... -
Page 22: Finding Stored Items
“ Phone Book Finding Stored Items Make sure the unit is in the standby mode. Press [AUTO/PROGRAM]. Press ≥The first item or last item is displayed. Scroll to the desired item by using ≥You can find the items using the memory station numbers ([0] to [9]) directly in step 2. -
Page 23: Editing
Editing Make sure the unit is in the standby mode. Press [AUTO/PROGRAM]. Press ≥The first item or last item is displayed. Scroll to the phone book item you want to change by using [EDIT]. Edit the name using the dialing buttons, (p. -
Page 24: Erasing
“ Phone Book Erasing Make sure the unit is in the standby mode. To erase a specific caller from the Phone book Press [AUTO/PROGRAM]. Press ≥The first item or last item is displayed. Scroll to the phone book item you want to erase by using Press [MUTE/CLEAR]. -
Page 25: Special Features
Automatic Security Code Setting Each time you place the handset on the base unit, the unit automatically selects one of more than 65,000 security codes. These codes help prevent the unauthorized use of your telephone line by another cordless telephone user. Handset Locator You can locate the handset or page the handset user with beep tones from the base unit. -
Page 26: Using The Pause Button (For Pbx Line/Long Distance Calls)
≥The first call is put on hold and you can answer the second call. ≥To return to the first caller, press ≥The call waiting service cannot be used when a parallel connected telephone is in use. ≥If this function does not operate properly, consult your telephone company for details. -
Page 27: For Assistance, Please Call: 1-800-211-Pana(7262
Optional Headset Plugging an optional headset into the handset allows a hands-free phone conversation. Please use only a Panasonic KX-TCA86 or KX-TCA92 headset. To order, call the accessories telephone number on page 2. Connecting an optional headset to the handset Open the headset jack cover, and connect an optional headset to the headset jack as shown below. -
Page 28: Wall Mounting
(2), so the tab holds the handset. Remove the wall mounting adaptor. Connect the AC adaptor. Tuck the telephone line cord inside the wall mounting adaptor, then push it in the direction of the arrow (1 and ≥The word “UP WALL” should face upward. -
Page 29: Adding Another Phone
Adding Another Phone This unit will not work during a power failure. To connect a standard telephone on the same line, use the Panasonic KX-J66 T-adaptor. To order, call the accessories telephone number on page 2. Standard Telephone... -
Page 30: Battery Replacement
Battery Replacement If “RECHARGE” and “ the battery was fully charged, replace the battery with a new Panasonic PQWBTC1461M (P-P504) battery. To order, call the accessories telephone number on page 2. Press the notch on the handset cover firmly (1) and slide it as indicated by the arrow (2). -
Page 31: Troubleshooting
Troubleshooting Problem The unit does not work. An alarm tone sounds. Static, sound cuts in/out, fades. Interference from other electrical units. The handset does not ring. The handset display is blank. You cannot program items, such as the dialing mode. For assistance, please call: 1-800-211-PANA(7262) Cause and Remedy ≥Check the settings (p. - Page 32 Caller ID box or plug the unit directly into the wall jack using the telephone line cord included in the unit. ≥Do not pause for over 60 seconds while searching.
- Page 33 To have a normal cordless phone conversation, disconnect the headset. ≥Make sure that the optional headset is connected properly (p. 27). ≥Visit our website at: http://www.panasonic.com/support ≥Contact us via the web at: http://www.panasonic.com/contactinfo ≥Call our customer call center at: 1-800-211-PANA(7262) /FLASH]...
-
Page 34: Important Safety Instructions
Important Safety Instructions When using this unit, basic safety precautions should always be followed to reduce the risk of fire, electric shock, or personal injury. 11. Read and understand all instructions. 12. Follow all warnings and instructions marked on this unit. 13. - Page 35 CAUTION: To reduce the risk of fire or injury to persons, read and follow these instructions. 1. Use only the battery(ies) specified. 2. Do not dispose of the battery(ies) in a fire. They may explode. Check with local waste management codes for special disposal instructions. 3.
-
Page 36: Fcc And Other Information
The REN is used to determine the number of devices that may be connected to a telephone line. Excessive RENs on a telephone line may result in the devices not ringing in response to an incoming call. In most but not all areas, the sum of RENs should not exceed five (5.0). - Page 37 “ WHEN PROGRAMMING EMERGENCY NUMBERS AND(OR) MAKING TEST CALLS TO EMERGENCY NUMBERS: 1) Remain on the line and briefly explain to the dispatcher the reason for the call. 2) Perform such activities in the off-peak hours, such as early morning or late evenings.
- Page 38 ≥If there is any trouble—disconnect the unit from the telephone line and connect a known working phone. If the known working phone operates properly, have your unit repaired by one of the authorized Panasonic Factory Service Centers. If the known working phone does not operate properly, consult your telephone...
-
Page 39: Specifications
Specifications ∫Base Unit Power Supply: Power Consumption: Frequency: Dimensions (H k k W k k D): Approx. 89 mm k 127 mm k 180 mm Mass (Weight): ∫Handset Power Supply: Frequency: Dimensions (H k k W k k D): Approx. 236 mm k 55 mm k 44 mm Mass (Weight): Security Codes: ∫Dialing Mode:... -
Page 40: Index
Handset Locator ... 25 Headset, optional... 27 Installation AC adaptor ... 7 Adding another phone ... 29 Battery ... 8 Telephone line cord ... 7 Language, display... 10 Location of controls ... 5, 6 Making calls ... 11 Mute... 12 PAUSE... 26 Phone book... -
Page 41: Warranty
Panasonic Consumer Electronics Company or Panasonic Sales Company (collectively referred to as “the warrantor”) will, for the length of the period indicated on the chart below, which starts with the date of original purchase (“Limited Warranty period”), at its option either (a) repair your product with new or refurbished parts, or... -
Page 42: Customer Services Directory
Personal Checks) For hearing or speech impaired TTY users, TTY : 1-866-605-1277 Service in Puerto Rico Matsushita Electric of Puerto Rico, Inc. Panasonic Sales Company Factory Servicenter: Ave. 65 de Infantería, Km. 9.5, San Gabriel Industrial Park, Carolina, Puerto Rico 00985... - Page 43 ≥Send the unit to an authorized servicenter, prepaid and adequately insured. ≥Do not send your unit to the Panasonic Consumer Electronics Company listed on the back cover or to executive or regional sales offices. These locations do not repair consumer products.
- Page 44 For hearing or speech impaired TTY users, TTY : 1-877-833-8855 Panasonic Consumer Electronics Company, Division of Matsushita Electric Corporation of America One Panasonic Way, Secaucus, New Jersey 07094 Panasonic Sales Company, Division of Matsushita Electric of Puerto Rico, Inc. Ave. 65 de Infantería, Km. 9.5, San Gabriel Industrial Park...
Need help?
Do you have a question about the KX-TC1486 and is the answer not in the manual?
Questions and answers
Какого года Выпуска