
Related Manuals for Panasonic KX-T7775


Summary of Contents for Panasonic KX-T7775
-
Page 1: Operating Instructions
® Doorphone Operating Instructions 7775 KX-T Model No. Please read before using the unit, and save for future reference. - Page 2 Notes: 1. The KX-T7775 Doorphone is not compatible with KX-TD308 and KX-T336 PBX systems. 2. The KX-T7775 Doorphone cannot be used with a metal gang-box. Accessory Order Information Replacement parts and accessories are available through your local authorized parts distributor.
- Page 3 - 340 m (AWG 24 - 1115 ft) - 500 m (AWG 22 - 1640 ft) from PBX Doorphone Card Power Supply DC +24 V Door 1 to KX-T7775 Door 1 Doorbell In Doorbell Out 130 mm x 85 mm x 51 mm (5 / "...
-
Page 4: Installation
Installation Notes: 1. A Doorphone Card must be inserted in the PBX before you can install the Doorphone. This Doorphone manual should be read in conjunction with the relevant PBX manual. 2. If in doubt when installing the Doorphone Module, consult your authorized dealer. - Page 5 DOORPHONE MODULE REAR OF UNIT DOOR CHIME SYSTEM BELL INPUT TO PBX Max 500 m (1640 ft) 22 AWG Figure 2 - Doorphone Module's Interconnects DOORPHONE POWER CARD MODULE Refer to pages 6 to 8 for pin details. MODULAR JACK Note: Polarity sensitive.
- Page 6 POWER MODULE 1 MODULAR JACK KX-TD816/KX-TD1232/ KX-TA1232 (using MODULAR KX-TD161 DP Interface) PLUG and KX-TA308/KX-TA624/ KX-T30810/KX-T61610/ UPWARDS KX-T123211 2 3 4 5 DOORPHONE NOT USED CARD PQJS1T30ZA-E MODULAR JACK Figure 4 - KX-TD816/KX-TD1232/KX-TA1232 (using KX-TD161 DP Interface) and KX-TA308/KX-TA624/KX-T30810/KX-T61610/ KX-T123211: Connection Details POWER MODULE 1 MODULAR...
-
Page 7: Connection Details
MODULAR KX-TD816/KX-TD1232/ JACK KX-TA1232 (using MODULAR KX-TD160 DP Interface) PLUG and KX-TA824/ KX-TAW848/KX-TDA50 UPWARDS DOORPHONE NOT USED CARD PQJS1T30ZA-E MODULAR JACK Figure 6 - KX-TD816/KX-TD1232/KX-TA1232 (using KX-TD160 DP interface) and KX-TA824/KX-TAW848/KX-TDA50: Connection Details POWER POWER MODULE 1 MODULE 2 MODULAR JACK MODULAR PLUG... - Page 8 KX-TDA100 / 200 NOT USED UPWARDS MODULAR PLUG MODULAR JACK POWER POWER POWER POWER MODULE MODULE MODULE MODULE Figure 7 - KX-TDA100/200: Connection Details...
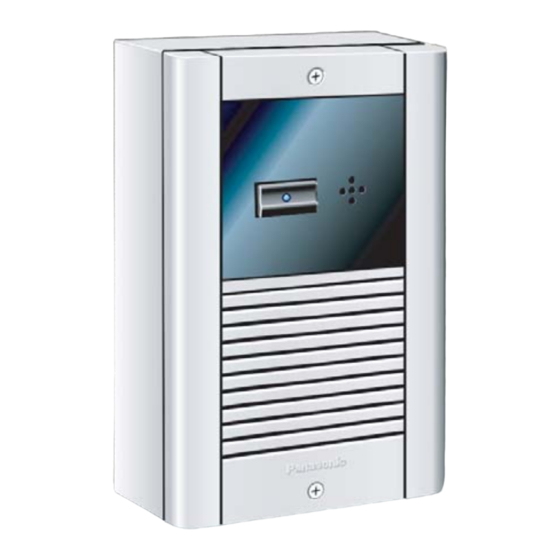
- Page 9 Installing the Panasonic KX-T7775 Doorphone The Panasonic KX-T7775 Doorphone can be surface or flush-mounted. To surface-mount the Panasonic KX-T7775 Doorphone Module: 1. Separate the Doorphone Unit into two halves. 2. Adjust the sensitivity of the Doorphone's microphone, if required (see page 11).
- Page 10 5. Feed the wires through the center of the interface bracket and connect the wires to the Doorphone Module. 6. Attach the front of the Doorphone to the bracket using the supplied 10 mm ( / ") M3 threaded screws. Note: The Doorphone can be installed directly into a wall recess without using the interface bracket.
- Page 11 Adjusting the Sensitivity of the Microphone Where there is a lot of background noise, for example, due to traffic or machinery, it may be necessary to adjust the sensitivity of the microphone. To adjust the sensitivity of the microphone: DOORPHONE MODULE Insert flat-headed REAR OF UNIT...
-
Page 12: Important Safety Instructions
Important Safety Instructions Safety Requirements When using your telephone equipment, basic safety precautions should always be followed to reduce the risk of fire, electric shock and injury to persons, including the following: Read and understand all instructions. Follow all warnings and instructions marked on the product. - Page 13 If the product has been dropped or the cabinet has been damaged. If the product exhibits a distinct change in performance. Avoid using a telephone (other than a cordless type) during an electrical storm. There may be a remote risk of electric shock from lightning.
-
Page 14: Fcc And Other Information
(2) this device must accept any interference received, including interference that may cause undesired operation. CAUTION: Any changes or modifications made to this product not expressly approved by Panasonic Communications Co. Ltd. could void the user's authority to operate the equipment. -
Page 15: Wall Mounting Template
Wall Mounting Template 1. Place this template on the wall. 2. Drill the holes, as marked. If you mount the unit on a concrete or mortar wall, fit anchor plugs (not included) into the wall with a hammer beforehand. DRILL HOLES HERE DRILL HOLE HERE IF ATTACHING FRONT OF UNIT DIRECTLY TO WALL... -
Page 16: Product Service
Ave. 65 de Infantería, Km. 9.5, San Gabriel Industrial Park, Carolina, Puerto Rico 00985 http://www.panasonic.com/consumersupport Copyright: This material is copyrighted by Panasonic Communications Co. Ltd., and may be reproduced for internal use only. All other reproduction, in whole or in part, is prohibited without the written consent of Panasonic Communications Co., Ltd.
Need help?
Do you have a question about the KX-T7775 and is the answer not in the manual?
Questions and answers