Table of Contents
Advertisement
Operating & Installation Instructions
EN
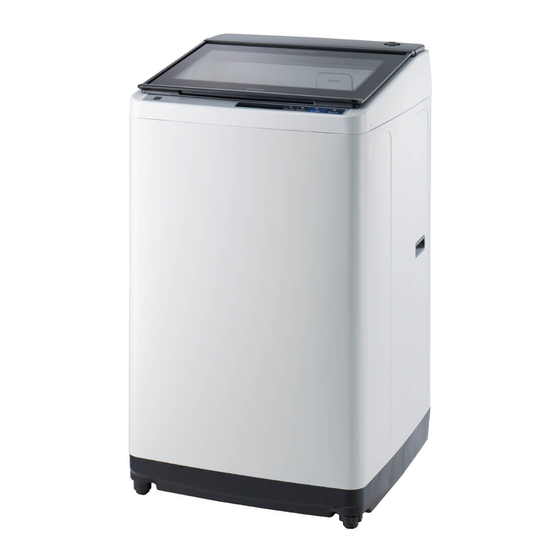
Fully Automatic Washing Machine
Model SF-140XA / 130XA / 125XA / 120XA / 110XA / 105XA / 100XA
Thank you for purchasing a Hitachi fully automatic washing machine.
■
Please read these operating & installation instructions carefully for proper
operation of the machine.
■
Please keep these operating & installation instructions for future reference.
Contents
2
3
5
6
8
9
14
21
21
23
24
25
30
30
Advertisement
Table of Contents

Related Manuals for Hitachi SF-125XA


Summary of Contents for Hitachi SF-125XA
-
Page 1: Table Of Contents
Troubleshooting Error Codes How to Install the Washing Machine Customer Service Specifi cations Thank you for purchasing a Hitachi fully automatic washing machine. ■ Please read these operating & installation instructions carefully for proper operation of the machine. ■ Please keep these operating & installation instructions for future reference. -
Page 2: Environmentally Friendly Waste Disposal
Environmentally Friendly Waste Disposal The shipping package has protected your new washing machine on its Disposing of the way to your home. All materials are ecologically harmless and recyclable. packaging Please contribute to a better environment by disposing of packaging materials in an environmentally conscious manner. -
Page 3: Safety Instructions
Safety Instructions This washing machine is designed for home use only. Before operating the washing machine, please read these safety instructions carefully. Warning Issues which could cause death or serious injury. ■ Do not dismantle, repair or modify the washing machine. General safety This could cause malfunction, fi... - Page 4 Do not wash items together with coins, pins, or stones. SF-110XA/ This may damage clothes or the washing machine, SF-120XA/ or cause a water leak. Check inside pockets before SF-125XA washing. ■ Do not press the buttons with sharp pointed objects. Liquid Load ■...
-
Page 5: Parts And Accessories
Parts and Accessories Softener Dispenser Liquid Load Balancer Detergent Dispenser Lint Filter (cassette type) Pulsator Detergent Dispenser Power Cord Powdered Detergent/ Powdered Bleach/ Liquid Detergent/ Liquid Bleach Drain Hose Lid Lock Adjustable Foot Control Panel Accessories Water Supply Hose and One-touch Joint Foot Caps Rat Guard (2 pieces) -
Page 6: Control Panel And Display
Control Panel and Display display * example of control panel Power button Press this button to switch power on and off . The washing machine automatically switches off when operations are fi nished. The washing machine also turns off automatically if it is not operated or no button is pressed for 10 minutes after the power has been turned on. - Page 7 Control Panel and Display LED Display Lights in the Delay Timer mode. Delay Timer indicator Locks the lid during the start. The lid cannot be opened while this Lid Lock indicator indicator is lit. To release the lock, press the Start/Pause button to pause operation.
-
Page 8: Before You Start Washing
Before You Start Washing ■ Remove any foreign objects (coins, safety pins, etc.). Preparation of ■ Put delicate clothes (knits, lingerie, etc.) in a net. the laundry ■ Remove large lumps of lint, mud, sand, hair, and pet hair from laundry. ■... -
Page 9: How To Use The Washing Machine
Laundry shall not exceed the lower part of the liquid load balancer (dotted line). Otherwise, laundry may jump out from the wash tub while spinning and it may cause damage. SF-100XA/ SF-105XA/ SF-110XA/ SF-120XA/ SF-125XA Liquid Load Balancer SF-130XA/ SF-140XA Press the Power button to turn on the power ■... - Page 10 How to Use the Washing Machine Put detergent into the Detergent Dispenser and close the Lid ■ Open the Detergent Dispenser, add the appropriate amount of detergent, and then close the Detergent Dispenser. ■ The amount of detergent is based on a single 35-gram scoop of powder detergent. Since the required amount of detergent varies depending on the type of detergent, follow the instructions on the package of detergent.
- Page 11 How to Use the Washing Machine Program ends ■ The alarm sounds when a program ends. The alarm can be deactivated or the sound can be changed in 2 types if the Water Level button is pressed for at least 3 seconds. Melody Mono No alarm...
- Page 12 How to Use the Washing Machine 1. Prepare the laundry. How to use ■ Fold large items, such as quilts or blankets, as follows. the Blanket They should not be taller than 30 cm after they are folded. program 30 cm About 30 cm If it exceeds 30 cm, use a laundry net, which is sold separately.
- Page 13 How to Use the Washing Machine ■ How to use Use this program separately from other washing programs. (Do not put laundry into the tub.) the Tub Dry 1. Press the Power button to turn on the power. program 2. Select the Tub Dry program. 3.
-
Page 14: List Of Programs
List of Programs : Default settings : Changeable settings (via corresponding button) Program Fuzzy Powerful Delicate 140XA 14 kg 7 kg 130XA 13 kg 6.5 kg 125XA 12.5 kg 6.25 kg Maximum 120XA 12 kg 6 kg load 110XA 11 kg 5.5 kg 105XA 10.5 kg... - Page 15 List of Programs : Default settings : Changeable settings (via corresponding button) Soak Program Speedy 1 hrs 3 hrs 5 hrs 140XA 7 kg 11.2 kg 130XA 6.5 kg 10.4 kg 125XA 6.25 kg 10 kg Maximum 120XA 6 kg 9.6 kg load 110XA...
- Page 16 List of Programs : Default settings : Changeable settings (via corresponding button) Program Water Save Blanket 140XA 14 kg 3 kg 130XA 13 kg 3 kg 125XA 12.5 kg 3 kg Maximum 120XA 12 kg 3 kg load 110XA 11 kg 3 kg 105XA 10.5 kg...
- Page 17 Amount of detergent is indicated according to following table as a guide. Load (guide) Water Level Detergent (guide) Amount of detergent (SF-140XA) 8~14 kg 75~90 L (SF-130XA) 8~13 kg 75~89 L (SF-125XA) 8~12.5 kg 75~89 L (SF-120XA) 8~12 kg 74~88 L 1.4~1.7 cup 49~60 g (SF-110XA) 8~11 kg 74~87 L (SF-105XA) 8~10.5 kg...
-
Page 18: Partial Operations Using The Fuzzy Program
Partial Operations Using the Fuzzy Program To not spin the To reuse the wash To customize laundry because you If you want... water and separate the wash program are worried about your laundry wrinkles Wash Rinse Spin Wash Rinse Operations Wash only Setting method... - Page 19 Partial Operations Using the Fuzzy Program If you want... To rinse only To rinse and spin To drain and spin Rinse Spin Drain Spin Operations Rinse only Setting method Turn on the power. Select the Fuzzy program. Display show Set the amount of water.
- Page 20 65 L 35 L 65 L 35 L (Auto) (Auto) (Auto) SF-140XA SF-130XA / SF-125XA SF-120XA ■ ■ ■ You can set the amount of You can set the amount of You can set the amount of water each time you press the...
-
Page 21: In Case Of Power Outage
Partial Operations Using the Fuzzy Program ■ ■ ■ You can set the wash time each You can set the number and You can set the spin time each type of rinses by pressing the time you press the Wash button time you press the Spin button Rinse button. - Page 22 Care and Maintenance 1. Pull the dispenser and tilt it upwards to remove it. Cleaning 2. Pull off the caps. the Softener 3. Use a brush or something to clean the parts. Dispenser 4. To remount, tilt the dispenser, align the rib to guide and insert it. ■...
-
Page 23: Troubleshooting
Troubleshooting Problem Possible cause ● Does not operate The power plug is not inserted in the power outlet. ● There is a power outage. ● The Delay Timer has been set. ● It is wet, even though it is There may be moisture or water left in the tub or hoses from the the fi... -
Page 24: Error Codes
Error Codes Error Description Things to check Solution code ● Water is not Is the tap open? Check the tap, water supplied supply inlet fi lter, water ● Has dirt collected in the water supply inlet pipes, and water supply fi... -
Page 25: How To Install The Washing Machine
How to Install the Washing Machine ■ Do not use a damaged power plug, doing so is dangerous. Contact a Safety repair center that is certifi ed by the manufacturer to replace the plug. precautions ■ If the outlet you are using is a 2-pin outlet, use an adapter to change from three pins to two pins. - Page 26 How to Install the Washing Machine 1. Lay the washing machine down on its back. Installing 2. Install the rat guard between outside lock and inside lock as shown the drain hose in the illustration. 3. Attach screws. 4. Pull the drain hose out of the washing machine. 5.
- Page 27 How to Install the Washing Machine Water supply hose Connecting ● to the tap ■ The optimum water pressure is 0.03 to 0.8 MPa. ■ Use a horizontal tap. Horizontal tap Extension tap Square tap Connect the water supply hose to the water supply inlet on the washing machine.
- Page 28 How to Install the Washing Machine * Water supply hose with one-touch joint 1. Loosen the top connector. Rubber seal Top connector Fixing screw Bottom connector ● If the diameter of the tap is larger than the connector ring, remove the ring.
- Page 29 How to Install the Washing Machine ■ Connecting Connect the washing machine correctly to a grounded AC power supply. the power ■ The voltage of the power supply must match the voltage rating of the washing machine. ■ Do not use extension cords or overload the power outlet by using power strips.
-
Page 30: Customer Service
Dimensions Width 590 mm x Depth 634 mm x Height 1065 mm Weight 42 kg Model SF-125XA Power supply See the rating plate on the back of the washing machine. Standard water level 89 L (maximum water level) Standard amount of water used... - Page 31 Specifi cations Model SF-100XA Power supply See the rating plate on the back of the washing machine. Standard water level 86 L (maximum water level) Standard amount of water used 166 L (Fuzzy program operation) Water pressure 0.03 to 0.8 MPa (0.3 to 8 Kgf/cm Dimensions Width 590 mm x Depth 634 mm x Height 1008 mm Weight...
- Page 32 3WPL112191...
Need help?
Do you have a question about the SF-125XA and is the answer not in the manual?
Questions and answers