Page 1
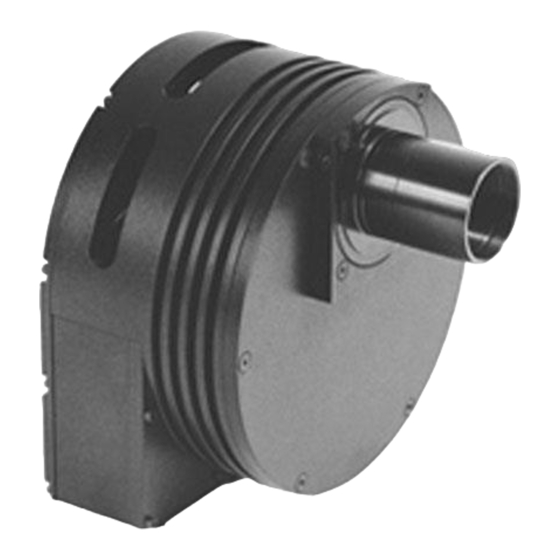
▬▬▬▬ SBIG ASTRONOMICAL INSTRUMENTS Operating Manual CCD Camera Models ST-7XE/XME, ST-8XE, ST-9XE, ST-10XE/XME and ST-2000XM/XCM With High Speed USB Interface Santa Barbara Instrument Group 147A Castilian Drive Santa Barbara, CA 93117 Phone (805) 571-7244 • Fax (805) 571-1147 Web:<www.sbig.com> • Email:<sbig@sbig.com>...
Page 2
Note: This equipment has been tested and found to comply with the limits for a Class B digital device pursuant to Part 15 of the FCC Rules. These limits are designed to provide reasonable protection against harmful interference in a residential installation. This equipment generates, uses, and can radiate radio frequency energy and if not installed and used in accordance with the instructions, may cause harmful interference to radio communications.
Section 1 - Introduction Introduction ........................3 1.1. Getting Started........................4 1.2. Installing the USB Drivers for the First Time............... 4 1.2.1. Installing the CCDOps and the Driver Checker ........5 1.2.2.1. Add New Hardware Wizard for Windows XP Users ......6 1.2.2.2.
Page 4
Regenerating the Desiccant ..................71 Appendix C - Capturing a Good Flat Field .............. 72 C.1. Technique ........................72 Appendix D - Use and Maintenance of the Cooling Booster ....... 73 Appendix E – Third Party Vendors Supporting SBIG Products......75 Page 2...
SBIG CCD cameras offer convenience, high sensitivity, and advanced image processing techniques that film just can't match. While CCDs will probably never replace film in its large format, CCDs allow a wide range of scientific measurements and have established a whole new field of amateur astronomy that is growing by leaps and bounds.
Installing the USB Drivers for the First Time If you are installing an SBIG USB camera for the first time use this section to walk you through the driver installation process. To operate the camera you must first install camera control software onto your computer or laptop.
4. Towards the end of the Driver Checker installation the installer will run the utility. This utility checks to make sure you have the latest version of the SBIG camera drivers installed on your system. When the SBIGDriverChecker utility is run you’ll see a dialog like: If you have previously installed CCDOPS you’ll see some entries in the table.
A. If you have an internet connection, Click on the Download button then follow the instructions to download the current drivers from SBIG’s Servers. If you don’t have an internet connection on this machine then make sure you have downloaded the latest Driver Checker Installer from SBIG’s web site, copied it to this machine and run it.
Page 9
3. As shown below, click the “Search for the best driver…” radio button then check the “Include this location…” checkbox then click the Browse button. You will see the Browse for Folder dialog shown below: Navigate through the directory structure of you hard drive to the: My Computer\C:\Program Files\SBIG\Driver Checker\SBIG Drivers Page 7...
Page 10
“+” next to My Computer, then click the “+” next to C:, etc. Finally click on the SBIG Drivers folder to select it (it will turn blue as shown below) then click OK. You’ll then be back in the Found New Hardware Wizard. Click the Next button.
Page 11
4. Windows will show the dialog below while it is copying the driver: 5. You may be presented with the dialog below warning you the SBIG USB Loader driver has not passed the Windows Logo testing procedure. At this point click the Continue Anyway button.
Page 12
6. Windows will continue installing the driver as shown in the dialog below: 7. Windows will finish installing the SBIG USB Loader driver as shown in the dialog below Hit the Finish button. At this point the Camera’s Fan and LED should come on.
Page 13
Section 1 - Introduction 8. Again you will be presented with the Found New Hardware wizard for the SBIG USB Camera driver as shown in the dialog below. Repeat steps 3 through 7 for this driver just like you did before.
Section 1 - Introduction 1.2.2.2. Add New Hardware Wizard for Window 95/98/Me Users 1. With the camera disconnected from the computer, plug in the power to the camera and if your power supply has a power switch turn on the power to the camera. 2.
Page 16
Section 1 - Introduction Uncheck all the options except “Specify a location” as shown below then click the Browse button Page 14...
Page 17
For example scroll to the top and click the “+” next to My Computer, then click the “+” next to C:, etc.: Click on the SBIG Drivers folder until it is highlighted as shown above then click the OK button. This will get you back to the dialog shown above in step 4 but with the location filled out.
Page 18
Windows will spin for a while and then present you with the dialog below. Click the Finish button and you’re done. The SBIG cameras actually use two drivers and after you click Finish the system will automatically install the second driver. At this point the Fan and LED should come on in the camera.
Page 19
Manager tab of the System Control Panel. Click the “View devices by type” button and expand the “Universal Serial Bus controllers” section by clicking the “+” to the left. You should see something like the dialog below where we have highlighted the SBIG USB Camera in red outline:...
Section 1 - Introduction 1.2.2.3. Add New Hardware Wizard for Windows 2000 Users 1. With the camera disconnected from the computer, plug in the power to the camera and if your power supply has a power switch turn on the power to the camera. Plug the camera into the computer with the supplied USB cable.
Page 21
Section 1 - Introduction 3. Click the “Search for suitable driver…” radio button as shown below: then click the Next button. Uncheck all the options other than “Specify a location” as shown below: then click the Next button. Page 19...
Page 22
“+” next to My Computer, then click the “+” next to C:, etc. Click on the SBIG Drivers folder to highlight it then Click OK in the Find File dialog then click OK back at the New Hardware Wizard.
Page 23
Windows will spin for a while, then present you with the dialog below. Click the Finish button and you’re done. The SBIG cameras actually use two drivers and after you click Finish the system will automatically install the second driver.
Process the image (refer to Section 3.8). You can use the SBIG Test Lens to take indoor test exposures and get familiar with the camera operation. Also, if you happened to have purchased a camera lens adapter for your CCD Camera...
Page 25
Section 1 - Introduction Camera lens daytime exposure guidelines: • Close the F stop all the way to F/16 or F/22. • Set the focus based upon the object and the markings on the lens. • Take a short (<1 second) exposure with the Grab command. •...
Film has the advantages of a much larger format, color, and independence of the wall plug (the SBIG family of cameras can be battery operated in conjunction with a laptop computer, though, using a power inverter). After some use you will...
2.2.1. Full Frame and Frame Transfer / Interline CCDs In the ST-7XE, ST-8XE, ST-9XE, ST-10XE and ST-10XME, the CCD is read out electronically by shifting each row of pixels into a readout register at the Y=0 position of the CCD (shown in Figure 2.1), and then shifting the row out through an amplifier at the X=0 position.
Page 29
Section 2 - Introduction to CCD Cameras Figure 2.2 - CCD System Block Diagram As you can see from Figure 2.2, the ST-7XE, ST-8XE, ST-9XE, ST-10XE, ST-10XME and ST- 2000XM are completely self-contained. Unlike our previous products, the ST-7XE, ST-8XE, ST- 9XE, ST-10XE, ST-10XME and ST-2000XM contain all the electronics in the optical head.
Page 30
Section 2 - Introduction to CCD Cameras Table 2.1 below lists some interesting aspects of the CCDs used in the various SBIG cameras. Array Number of Camera Dimensions Pixels Pixel Sizes TC211 Tracking CCD TC211 2.6 x 2.6 mm 192 x 164 13.75 x 16 µ...
CCD by the sky background typically limits the exposure time. At 0 °C the dark current in the ST-7XE, ST-8XE and ST-10XE, high-resolution mode, is only 60 electrons per minute! The ST-9XE, with bigger pixels, has roughly 8 times this amount of dark current due largely to the larger pixel area but also due to the inherent higher bulk dark current in the devices.
This is called double correlated sampling. It produces more accurate data at the expense of slightly longer read out times (two measurements are made instead of one). The ST-7XE, ST-8XE, ST-9XE, ST-10XE, ST-10XME and ST-2000XM utilize double correlated sampling to produce the lowest possible readout noise. At 10e...
The pixel size of the detector in the ST-10XE is 6.8 x 6.8 microns (1 micron = 0.001mm, 0.04 thousandths of an inch). In the ST-7XE and ST-8XE it is 9 x 9 microns, in the ST-9XE it's 20 x 20 microns and in the ST-2000XM it is 7.4 x 7.4 microns.
ST-9XE or for cameras with smaller pixels in binned mode. For cameras with smaller pixels imaging in high resolution mode such as the ST-7XE, ST-8XE, ST-10XE, ST-10XME and ST-2000XM, SBIG is proud to make self-guiding available to the amateur, making those long exposures required by the small pixel geometry easy to achieve! 2.5.
The first and most obvious appearance of a CCD image is that it is produced in shades of gray, rather than color. The CCD chip used in SBIG cameras itself does not discriminate color and the pixel values that the electronics read out to a digital file are only numbers proportional to the...
Page 36
CCD. An object is then exposed using a red filter. The wheel is commanded to insert the green filter in place, and another image taken. Finally a blue image is taken. When all three images have been saved, they may be merged into a single color image using SBIG or third party color software.
3.2. Attaching the Camera to the Telescope ST-7XE, ST-8XE, ST-9XE, ST-10XE, ST-10XME and ST-2000XM cameras are similar in configuration. The CCD head attaches to the telescope by slipping it into the eyepiece holder or attaching it via t-threads. A fifteen-foot cable runs from the head to the host computer's USB port.
Once the COM link has been established you may need to set the camera's setpoint temperature in the Camera Setup command. The ST-7XE, ST-8XE, ST-9XE, ST-10XE, ST-10XME and ST- 2000XM power up regulating to whatever temperature the CCD is at, which in this case will be the ambient temperature.
Page 39
Resolution Saturation Counts High Res ~20,000 for ST-7XE/8XE ABG Cameras, ~40,000 for ST-7XE/8XE Non ABG cameras, ~50,000 for ST-10XE Camera ~65,000 for ST-9XE/2000XM Cameras Med/Low Res ~65,000 for ST-7/8/9/10/2000 Table 3.2 - Saturation Values...
At f/6 the depth of focus is only 0.005 inch, so focus is critical. An adapter may be necessary to allow the eyepiece to be held at the proper focus position. SBIG sells extenders for this purpose. 3.5.
3.9. Advanced Capabilities The following sections describe some of the advanced features of SBIG cameras. While you may not use these features the first night, they are available and a brief description of them is in order for your future reference.
3.9.3. Track and Accumulate An automatic Track and Accumulate mode (SBIG patented) is available in CCDOPS which simplifies image acquisition for the typical amateur with an accurate modern drive. These drives, employing PEC or PPEC technology and accurate gears, only need adjustment every 30 to 120 seconds.
CCD during a move. The unit will self guide on much fainter stars. Tests at SBIG indicate that the probability of finding a usable guide star on the tracking CCD is about 95% at F/6.3, in regions of the sky away from the Milky Way.
Page 44
If your Blue filter has a strong IR leak (quite common) then your color images will look Blue. For this reason, SBIG incorporates an IR blocking filter stack with the three color band filters.
4.1. System Components The ST-7XE, ST-8XE, ST-9XE, ST-10XE, ST-10XME and ST-2000XM CCD cameras consist of four major components: the CCD Sensors and Preamplifier, the Readout/Clocking Electronics, the Microcontroller, and the power supply. All the electronics are packaged in the optical head in these cameras with an external desktop power supply.
Telescope port (see Appendix A for specific pin outs, etc.). The TIC-78 plugs into the 9-pin port on the ST-7XE, ST-8XE, ST-9XE, ST-10XE, ST-10XME and ST-2000XM, and a standard phone cable, which we supply, connects the adapter to the telescope drive. Note: phone cables come in a few variations.
Page 47
Section 4 – Camera Hardware In our older camera models and in the optional relay adapter accessory, each of the relays has a Common, a Normally Open, and a Normally Closed contact. For example, when the relay is inactivated there is a connection between the Common and the Normally Closed contact.
4.5. Modular Family of CCD Cameras With the introduction of the ST-6 CCD Camera in 1992 SBIG started a line of high quality, low noise, modular CCD cameras. The ST-7E, ST-8E and ST-9E were a second family of modular CCD cameras. The ST-10E allowed for upgrades to a faster USB interface and larger tracking CCD.
Page 49
Software developers can produce one package for the many users across the model line instead of different packages for each of the cameras. While the SBIG cameras have many similarities, there are also important differences between the products. Table 4.2 below highlights the differences from a system's standpoint:...
Page 50
CCDs cost more money and drive the system costs up. They are harder to cool, require more memory to store images, take longer to readout, etc. With typical PC and Macintosh computer graphics resolutions, the CCDs used in the SBIG cameras offer a good trade off between cost and resolution, matching the computer's capabilities well.
Page 51
S/N of 30 on the noiseless camera. It is also important to note that with the SBIG CCD cameras the noise due to the sky background will exceed the readout noise in 15 to 60 seconds on the typical amateur telescopes.
From these numbers you can deduce that the popular C8, an 8" f/10 telescope will nicely frame many popular objects with the ST-7XE whereas a much shorter system (f/3, perhaps achieved with a focal reducer) will frame the same objects for the tracking CCD. Another point to bear in mind is that, except for planetary images, you'll rarely take images where the pixel size in seconds of arc is down near the seeing limit.
4.7 Battery Operation The ST-7XE, ST-8XE, ST-9XE, ST-10XE, ST-10XME and ST-2000XM can be operated off of a 12 volt car or marine battery using a the optional 12V power supply or using a power inverter.
With the self guiding feature of the ST-7XE, ST-8XE, ST-9XE, ST-10XE, ST-10XME and ST-2000XM, one can take long integrations while the internal tracking CCD guides the telescope.
The Camera Setup command allows you to select the resolution mode you wish to use for taking and displaying images. The ST-7XE, ST-8XE, ST-9XE, ST-10XE, ST-10XME and ST- 2000XM cameras have High, Medium, Low and Auto modes. The High Resolution mode is the best for displaying the greatest detail since it utilizes the maximum number of pixels for your particular camera.
Section 5 – Advanced Imaging Techniques with short exposure times. In Auto Resolution Mode, the camera and software will always use High Resolution for all imaging and display functions except when you are in Full Frame Focus Mode. It will then automatically switch to Low Resolution Mode. If you further select Planet Mode for focusing, the camera will switch back to High Resolution on the selected box area.
IMAGE files using the corresponding COMBINED-FLAT image. At SBIG we have adopted the following naming convention for our various image and related files. If it helps you organize your files please feel free to adopt it or any method you feel helps...
Page 59
Section 5 – Advanced Imaging Techniques CCD autoguiders alleviate you from having to stare down the eyepiece for hours at a time while guiding astrophotographs. They are not the end-all, cure-all approach to telescope mechanical problems, though. You still need a good polar alignment and a rigid mount between the guide scope and the main scope or you need to use an off-axis guider, with all its inherent difficulties.
SBIG. To operate the camera with water circulation using the optional pump available from SBIG, start with the camera at the same level as the water reservoir. Connect all the hoses, and make sure the water return goes back into the reservoir. Push the ¼ inch internal diameter (ID) hoses onto the nipples on the back of the camera so they seal.
The AO-7 is the world's only Adaptive Optics accessory for the amateur CCD market and it works only with the self guided feature of the ST-7XE, 8XE, 9XE, 10XE, ST-10XME and ST- 2000XM. The AO-7 is essentially an electromechanical driven diagonal mirror that goes between the camera and the telescope.
There are a host of image processing software packages capable of reading and processing FITS and TIFF files and many packages will read and process native SBIG image formats as well. In addition to commercial software, a number of web sites offer public domain and shareware programs.
Page 64
Section 6 – Accessories for your CCD Camera Technical Notes regarding the camera command protocol which we will make available upon request. Page 62...
If you are using your camera as an autoguider for film photography and are noticing unacceptable guiding errors, please check the following before calling SBIG: 1. Can you move the telescope using the Move command? This is an indicator as to whether or not you are properly connected to your drive system via the relay cable from the CPU.
Page 66
Section 8 – Glossary following suggestions. The easiest method of finding objects is to use a reticule eyepiece, if the object is bright enough to see. Pull the CCD optical head from the eyepiece holder and insert a 12-20mm eyepiece, focusing the eyepiece by sliding it in and out of the eyepiece holder, not by adjusting the telescope's focus mechanism.
Astrometry - Astrometry is the study of stellar positions with respect to a given coordinate system. Autoguider - All SBIG CCD cameras have auto guiding or "Star Tracker" functions. This is accomplished by using the telescope drive motors to force a guide star to stay precisely centered on a single pixel of the CCD array.
Page 68
Photometry - Photometry is the study of stellar magnitudes at a given wavelength or bandpass. Pixel Size - The smallest resolution element of a CCD camera is the CCD pixel. The pixel sizes for each of the SBIG cameras are as follows: Camera...
Page 69
Doing so decreases the effective resolution but speeds up the download time of the image. Maximum resolution is determined by the size of the individual CCD pixel. The ST-7XE, 8XE, 9XE, 10XE, ST-10XME and ST-2000XM can run in High, Medium, Low and Auto resolution modes.
Page 70
CCDOPS can save image files in this format but it can not read them. Track and Accumulate - The Track and Accumulate function is a SBIG patented feature of CCDOPS that allows the user to automatically co-register and co-add (including dark frame subtraction) a series of images of an object.
Appendix A - Connector Pinouts Appendix A - Connector and Cables A.1. Connector Pinouts for the AO7/CFW8/SCOPE port: Pin Number Function Chassis Ground CFW-8 Pulse/AO-7 Data Out Plus X (Active Low Open Drain) Plus Y (Active Low Open Drain) Signal Ground Minus X (Active Low Open Drain) Minus Y (Active LowOpen Drain) +12 Volts Out (100mA max shared with I2C AUX)
Many of the newer telescopes have a phone-jack connector on the drive corrector for connecting directly to the ST-7XE, 8XE, 9XE, 10XE, ST-10XME and ST-2000XM Camera's Telescope Port. These include the Celestron Ultima, Losmandy CG11 and Meade LX-200. You can interface these telescopes to the Telescope port with our TIC-78 (Tracking Interface Cable), or you can make your own cable.
B.1. Cleaning the CCD and the Window The design of SBIG cameras allows for cleaning of the CCD. The optical heads are not evacuated and are quite easy to open and clean. When opening the CCD chamber, one should be very careful not to damage the structures contained inside.
Appendix C – Capturing a Good Flat Field Appendix C - Capturing a Good Flat Field This appendix describes how to take a good flat field. A good flat field is essential for displaying features little brighter than the sky background. The flat field corrects for pixel non-uniformity, vignetting, dust spots (affectionately called dust doughnuts), and stray light variations.
Appendix D – Use and Maintenance of the Cooling Booster Appendix D - Use and Maintenance of the Cooling Booster The cooling booster was an option or included accessory for the parallel versions of the ST-7E, ST-8E, ST-9E, ST-10E and ST-10XME. When a parallel camera with this accessory is upgraded to the USB version, the cooling booster is left in place instead of changing to the new cooling design.
Page 76
Appendix D – Use and Maintenance of the Cooling Booster the current temperature. This 3 degree temperature margin will enable the ST-7/8 to regulate the temperature accurately. To operate the camera with water cooling, the procedure is the same except that the water flow must be established before mounting the camera to the telescope, since the water pumps have limited pressure capability.
Appendix E – Third Party Vendors Supporting SBIG Products Appendix E – Third Party Vendors Supporting SBIG Products Company / Author Product Notes CCDSoftV5, Camera control, Image Software Bisque 912 12th Street Golden, CO 80401-1114 USA TheSky, Processing, Astrometry, Sales: (800) 843-7599...
Page 78
SBIG does not endorse or support any particular company, product or service by virtue of mentioning them in this section. SBIG is not responsible for the use of any product or service mentioned in this section that is not manufactured or made by SBIG.
Need help?
Do you have a question about the ST-7XE and is the answer not in the manual?
Questions and answers