MrCool Olympus Series Installation & Owner's Manual
Single-zone (hyper heat & e-star) & multi-zone models
Hide thumbs
Also See for Olympus Series:
- Installation manual (39 pages) ,
- User manual (27 pages) ,
- Install manual (14 pages)
Table of Contents
Advertisement
Quick Links
Please read this manual carefully before installation and keep it for future reference.
Installation & Owner's
Manual
Olympus Series
Single-Zone (Hyper Heat & E-Star) & Multi-Zone Models
Due to updates and constantly improving performance, the information and instructions within this
manual are subject to change without notice. Please visit www.mrcool.com/documentation to
ensure you have the latest version of this manual.
Version Date: 10-26-22
Advertisement
Table of Contents
Troubleshooting

Related Manuals for MrCool Olympus Series


Summary of Contents for MrCool Olympus Series
- Page 1 Single-Zone (Hyper Heat & E-Star) & Multi-Zone Models Due to updates and constantly improving performance, the information and instructions within this manual are subject to change without notice. Please visit www.mrcool.com/documentation to ensure you have the latest version of this manual.
-
Page 2: Table Of Contents
If you do not feel comfortable conducting this installation process,we recommend you retain the services of a qualified HVAC professional. ****Electrical work must be completed by a qualified electrical technician.**** Page 1 mrcool.com... - Page 3 Electrical and Gas Leak Checks ............... 46 Test Run ......................47 Troubleshooting ....................49 • Common issues ..........................49 • Troubleshooting ..........................50 • Wiring/piping self-correction function (Multi-zone systems ONLY) ........52 EU Disposal Guidelines ..................53 mrcool.com Page 2...
-
Page 4: Safety Precautions
1. If the unit operates abnormally (emits strange noises or a burning a smell), immediately turn off the unit and disconnect the power in order to avoid electric shock, fire, and/or injury. Call your local dealer, or MRCOOL tech support at (270) 366-0457, for further assistance. - Page 5 NEC and CEC by authorized personnel only.) 3. Contact an authorized service technician for repair or maintenance of this unit. This appliance should be installed in accordance with national wiring regulations. mrcool.com Page 4...
-
Page 6: Cautions
50 tonnes of CO equivalent, and has a leak-detection system installed, it must be checked for leaks at least every 24 months. 6. Keeping a record of all leak checks for the lifetime of the unit is strongly recommended. Page 5 mrcool.com... -
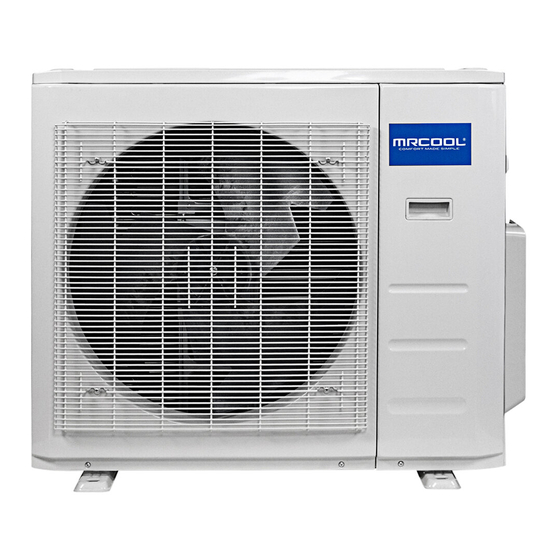
Page 7: Parts Overview
Drainage Pipe (Some Units) Power Cable (Some Units) Signal Cable Outdoor Unit Power Cable (Some Units) Louver Refrigerant Piping NOTE ON ILLUSTRATIONS Illustrations in this manual are for explanatory purposes. The actual shape of your unit may vary. mrcool.com Page 6... - Page 8 9. Remote controller holder Outdoor unit Outdoor unit 6. Drain hose, refrigerant connecting pipe 10. Drain hose, refrigerant connecting pipe 7. Connective cable 11. Connective cable 8. Stop valve 12. Stop valve 9. Fan hood 13. Fan hood Page 7 mrcool.com...
-
Page 9: Unpacking & Packing Instructions
(drain water from indoor unit) 2. Drain hose 3. Air outlet 4. Air inlet 5. Air-in grill 6. Display panel 7. Remote controller Outdoor unit 8. Refrigerant connecting pipe 9. Connective cable 10. Stop valve 11. Fan hood mrcool.com Page 8... -
Page 10: Indoor Unit Display
Active Clean feature is turned on. will display when 46.4°F (8°C) heating mode is turned on (some units). will display when ECO mode is activated (some units). will display when wireless control is activated (some units). Page 9 mrcool.com... -
Page 11: Accessories
Please read this manual carefully before installation and keep it for future reference. Owner’s Manual Installation & Owner’s Manual E-Star™ DIY Series For more details visit www.MrCool.com Remote Control Please read this manual carefully before installation and keep it for future reference. Remote Control User Manual... - Page 12 Note: Illustrations are for explanatory purposes only - The actual shape and size may vary. *Pipe size may differ from appliance to appliance. To meet different pipe size requirements, sometimes a transfer connector is needed so the pipes can be properly connected to the unit. Page 11 mrcool.com...
-
Page 13: Operating Instructions
4. Press the MANUAL CONTROL BUTTON a second time to activate the FORCED COOLING FUNCTION. Manual control 5. Press the MANUAL CONTROL BUTTON a third button time to turn the unit off. 6. Close the front panel. Fig 2.1 mrcool.com Page 12... -
Page 14: Airflow Directional Control
NOTE: The open angle of the vertical louver should not be set too small when using COOL or HEAT mode, as it will restrict airflow and reduce performance of the unit. Horizontal Louver Range Fig. 2.4 Page 13 mrcool.com... -
Page 15: How The A/C & Heat Pump Work
• Limit energy usage (run time) using the TIMER helps keep the heat in closed. function and SLEEP/ECO mode if applicable. • Regularly inspect and clean the air filters. mrcool.com Page 14... -
Page 16: Operation Mode Selection
This feature uses a sensor in the indoor unit to detect movement. While in cooling mode, if it senses there is no one in the room for a period of 30 minutes, it will automatically lower frequency to save energy. The system will automatically resume operation when movement is detected. Page 15 mrcool.com... -
Page 17: Care & Maintenance
7. Once the main filter has dried, clip the small air freshening vacuum. filters back into the main filter. Fig. 3.1 8. Reinstall the main filter into the top of the indoor unit. mrcool.com Page 16 mrcool.com... -
Page 18: Preparation For Extended Non-Operation
Any repairs to the unit should be performed following: by an authorized dealer or a licensed service provider. Clean all filters Turn on FAN mode until unit dries out completely Turn off the unit and Remove batteries disconnect the power from remote control Page 17 mrcool.com... -
Page 19: Installation Diagram & Line Set Specifications
NOTE: The installation of this system must be performed in accordance with the requirements of local and national standards. These could be different based on the region it is being installed in. Page 18 mrcool.com... -
Page 20: Single-Zone Line Set Specifications
North America is 24K Condenser 25 ft (7.5 m). The refrigerant piping should Indoor unit 82.02 ft (25 m) be a minimum 9.84 ft (3 m) to minimize excessive noise & vibration. Fig. 4.2 Page 19 mrcool.com... -
Page 21: Multi-Zone Line Set Specifications
16.5 ft (5 m). The standard pipe length in North America is 25 ft (7.5 m). The refrigerant piping should be a minimum Indoor unit 9.84 ft (3 m) to minimize excessive noise & vibration. Fig. 4.3 mrcool.com Page 20... -
Page 22: Multi-Zone Air Handler Compatibility Chart
NOTE: It is critical during selection of the outdoor unit that you select a capacity for the entire application area and select each indoor unit capacity based on the size of the zone it will cover. Page 21 mrcool.com... -
Page 23: Indoor Unit Installation
Drill Wall Hole Connect Piping Connect Wiring (not applicable for some & Drain Hose locations in North America) Wrap Piping and Cable (not applicable for some locations in North America) Prepare Drain Hose STEP Mount Indoor Unit mrcool.com Page 22... -
Page 24: Selecting An Installation Location
8.7 in (22 cm). If the piping and cables are connected with the front panel removed, the minimum clearance should be 4.3 in (11 cm). Page 23 mrcool.com... -
Page 25: Attach Mounting Plate To Wall
1.9 in (50 mm) 2.8 in (70 mm) removed. Should it become broken, 44.8 in (1140 mm) inch be sure to clean up any liquid that RECOMMEND has leaked from it. Fig. 5.3 mrcool.com Page 24... -
Page 26: Drill Wall Hole For Connective Piping
Fig. 5.6 below for more details. hole Fig. 5.4 NOTE: If the system requires gas piping that has diameter of 5/8 in (16 mm) or greater, the wall hole size should be 3.54 in (90 mm). Fig. 5.6 Page 25 mrcool.com... -
Page 27: Hook Indoor Unit To Mounting Plate
Pull the panel upwards mounting plate. to release the buckles and remove it from the air handler. Fig. 5.8 mrcool.com Page 26... -
Page 28: Connect Drain Hose & Refrigerant Piping
To prevent unwanted leaks you DO NOT create a water trap. must plug the unused drain hole DO NOT put the end of the drain hose in with the rubber plug provided. water or a container that will collect water. Page 27 mrcool.com... - Page 29 BEFORE PERFORMING ANY ELECTRICAL WORK, TURN OFF ALL POWER TO THE SYSTEM. 208-230V ~ Models Single Zone Outdoor Unit Indoor Unit see Outdoor Unit Installation for Multi-Zone L1 L2 L1 L2 L1 L2 S Power Supply Fig. 5.11a Fig. 5.11b mrcool.com Page 28...
-
Page 30: Connect Signal Cable & Power Cables
• If the chassis or drain hose ever need to be Minimum Circuit Ampacity (MCA) indicated on removed from the unit, please remove the the nameplate of the unit. rat baffle first. Page 29 mrcool.com... -
Page 31: Wrap Piping & Cables
8. Close the wire cover and reinstall the plastic panel on the back of the unit. NOTE ABOUT WIRING The wiring connection process may differ slightly depending upon the unit or the region it is being installed in. mrcool.com Page 30... -
Page 32: Mount Indoor Unit
Continue pushing down until the unit snaps onto the hooks along the bottom of the mounting plate. 4. Again, check that the unit is firmly mounted by applying slight pressure to the left and right-hand sides of the unit. Page 31 mrcool.com... -
Page 33: Outdoor Unit Installation
Outdoor Unit Installation Installation Summary - Outdoor Unit L(L1) N(L2) Install the outdoor unit Connect the refrigerant pipes Connect the wires Perform a test run Evacuate the refrigeration system mrcool.com Page 32... -
Page 34: Selecting An Installation Location
In a location that exposes the unit to large amounts of forced water. Protected from prolonged periods of exposure to direct sunlight or rain If installed in an area where snowfall is expected, take appropriate measures to prevent ice buildup and coil damage. Page 33 mrcool.com... -
Page 35: Install Drain Joint
DRAINAGE IN COLD CLIMATES In cold climates, make sure that the drain pipe is as vertical as possible to ensure swift water drainage. If water drains too slowly, it can cause the pipe to freeze and flood the unit. mrcool.com Page 34... -
Page 36: Anchor Outdoor Unit
Outdoor Unit Installation Step 3: Anchor Outdoor Unit 7. If the feet of the outdoor unit have rubber pads already installed, and you’re using a MRCOOL ® The outdoor unit can be anchored to the ground or wall-mounted bracket, remove them before to a wall-mounted bracket using M-10 bolts. - Page 37 (946 mm x 810 mm x 410 mm) (673 mm) (403 mm) MULTI5-48HP230B 37.48 in x 52.48 in x 16.34 in 25.20 in 15.90 in (952 mm x 1333 mm x 415 mm) (640 mm) (404 mm) mrcool.com Page 36...
-
Page 38: Connect Power & Signal Cables
10 minutes before touching roughly 1.57 in (40 mm) of the wires inside. any electrical components. b. Strip the insulation from the ends of the wires. c. Using a wire crimper, crimp u-type lugs on the ends of the wires. Page 37 mrcool.com... - Page 39 8. Reinstall the electrical wiring cover onto the side block of the unit, using the screws you previously removed. Connecting cable Conduit panel Wire Cover Please select the appropriate hole according to the diameter of the wire. mrcool.com Page 38...
-
Page 40: Multi-Zone Wiring Diagrams
This is in an effort to prevent interference that can sometimes occur between units. Fig. 6.8 5-Zone System Fig. 6.9 Page 39 mrcool.com... -
Page 41: Refrigerant Piping Connections
2. Using a pipe cutter, cut the pipe a little longer than the measured distance. 3. Ensure the pipe is cut at a perfect 90° angle. Refer to Fig. 7.1 for correct and incorrect examples. Fig. 7.1 mrcool.com Page 40... -
Page 42: Remove Burrs
4. Remove the PVC tape from both ends of the pipe when you’re ready to flare the pipe. 8. Remove the flaring tool and the flare form from the pipe. Inspect the end of the pipe for cracks and that it has been flared evenly. Page 41 mrcool.com... -
Page 43: Connect Pipes
(49~59 N•m) (16.2~16.5 mm) Ø 0.63 in 42.04~52.37 ft•lb 0.76~0.78 in R 0.4~0.8 (16 mm) (57~71 N•m) (19.2~19.7 mm) Ø 0.75 in 49.42~74.49 ft•lb 0.91~0.93 in (19 mm) (67~101 N•m) (23.2~23.7 mm) Units: inch (millimeter), foot/pounds (newton meters) mrcool.com Page 42... - Page 44 7. Repeat steps 3-6 for the remaining pipe. NOTE: If installing a multi-zone system, repeat the entire process for each air handler being installed until they are all connected to the condenser. Page 43 mrcool.com...
-
Page 45: Air Evacuation & Adding Refrigerant
Keep the high pressure side closed. Air Handler 4. Turn on the vacuum pump to evacuate the system. Connection Valves 5. Run the vacuum for at least 15 minutes, or until the Fig. 8.2 compound gauge reads -76 cmHG (-10 Pa). mrcool.com Page 44... -
Page 46: Adding Additional Refrigerant
For R290 refrigerant unit, the total amount of refrigerant to be charged is no more than: 387g (<=9000 Btu/h), 447g (>9000 Btu/h and <=12000 Btu/h), 547g (>12000 Btu/h and <=18000 Btu/h), 632g (>18000 Btu/h and <=24000 Btu/h). Page 45 mrcool.com... -
Page 47: Electrical And Gas Leak Checks
WARNING – ELECTRICAL SHOCK RISK condenser be sure to check all of the indoor and outdoor unit connection points and piping ALL WIRING MUST BE INSTALLED BY A for leaks. LICENSED ELECTRICIAN AND COMPLY WITH LOCAL, STATE, AND NATIONAL ELECTRICAL CODES. mrcool.com Page 46... -
Page 48: Test Run
Take time during the Test Run to Troubleshooting section of this manual before contacting technical support. double check that all refrigerant pipe connection points do not have leaks. Refer to the Electrical & Gas Leak Checks section for instructions. Page 47 mrcool.com... - Page 49 (270) 366-0457. Also, if you can spare a few minutes today, and leave a review of your new MRCOOL ® product on the partner site where you purchased it, it would really mean a lot to us.
-
Page 50: Troubleshooting
• Press ON/OFF button on remote control to restart operation. NOTE: If problem persists, contact a local dealer or your nearest customer service center. Be sure to provide them with a detailed description of the unit malfunction as well as the model number of your unit. Page 49 mrcool.com... -
Page 51: Troubleshooting
Incompressible gas or moisture has Evacuate and recharge the system and stops entered the system. with refrigerant. frequently The compressor is broken. Replace the compressor. The voltage is too high or too low. Install a manostat to regulate the voltage. mrcool.com Page 50... - Page 52 • EH(xx), EL(xx), EC(xx) • PH(xx), PL(xx), PC(xx) NOTE: If the problem you are experiencing persists after the checks and diagnostics listed in this chapter are completed, turn off the unit immediately and contact MRCOOL or an authorized ® service center.
-
Page 53: Wiring/Piping Self-Correction Function (Multi-Zone Systems Only)
6. After 5 to 10 minutes, if the system has corrected itself, the “CE” will disappear from the display. If the system did not correct itself, then the system will have to be shut down and the piping/wiring will need to be re-checked against the manual to find the wiring corrections that will need to be made. mrcool.com Page 52... -
Page 54: Eu Disposal Guidelines
• Sell the appliance to certified scrap metal dealers. Special notice Disposing of this appliance in the forest or other natural surroundings endangers your health and is bad for the environment. Hazardous substances may leak into the ground water and enter the food chain. Page 53 mrcool.com... - Page 55 Single-Zone (Hyper Heat & E-Star) & Multi-Zone Models Due to updates and constantly improving performance, the information and instructions within this manual are subject to change without notice. Please visit www.mrcool.com/documentation to ensure you have the latest version of this manual.
Need help?
Do you have a question about the Olympus Series and is the answer not in the manual?
Questions and answers