Table of Contents
Advertisement
Quick Links
Advertisement
Table of Contents

Related Manuals for Fondital PROCIDA AWS XB4


Summary of Contents for Fondital PROCIDA AWS XB4
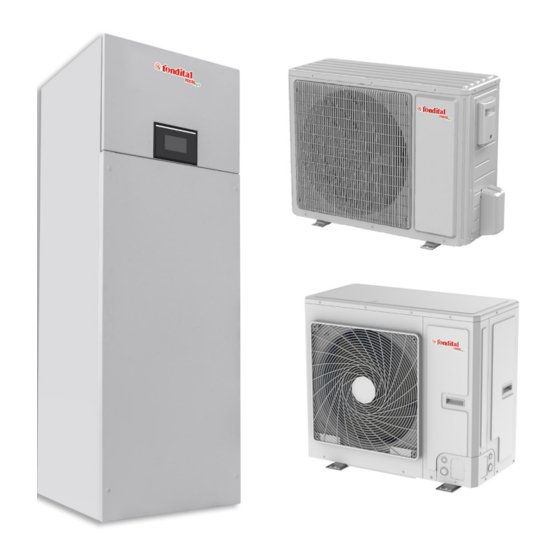
- Page 1 XB4 - XB6 - XB8 - XB10 INSTALLATION MANUAL SPLIT AIR/ WATER HEAT PUMP Translation original instructions (in Italian) Thank you for choosing a heat pump by Fondital. Carefully read this Manual before using the unit and keep it for future reference.
- Page 2 For users Thank you for choosing a product by Fondital. In order to use the product correctly, please carefully read this instruction manual before installation and use. To achieve the intended operation of the air conditioner, please follow the recommendations below for the proper installation and use of the product: 1.
-
Page 3: Table Of Contents
Diagram of the operating principle ..........HEATING AND COOLING AND DHW WITH CIRCUIT BREAKER . - Page 4 Safety warnings (to be strictly adhered to) WARNING: failure to follow these instructions could result in serious damage to the unit or injury to persons. NOTE: failure to follow these instructions could result in minor or moderate damage to the unit or injury to persons. This sign indicates that the product must not be operated.
- Page 5 WARNING In the event of anomalies, such as a smell of smoke, immediately switch off the unit and contact a service centre. If the anomaly persists, the unit may be damaged and an electric shock or fire may occur. Do not operate the unit with wet hands. Non-compliance could result in an electric shock hazard.
- Page 6 Before cleaning the unit, disconnect it from the mains. Non-compliance could result in risk of an electric shock or damage to prop- erty. The power supply must adopt a special circuit with a residual current circuit breaker and must have sufficient capacity. The user may not replace the power cable socket without the manufacturer's prior consent.
- Page 7 Do not climb on the unit or place objects on it. This could create a falling hazard for people and objects. Do not obstruct the air inlet and outlet areas of the unit. Obstructions could reduce efficiency or cause the unit to shut down or create a fire hazard.
- Page 8 WARNING Do not use any means other than those recommended by the manufacturer to speed up the defrosting process or for cleaning. If a repair is necessary, contact the nearest authorised service centre. Repairs carried out by unqualified personnel could be dangerous. The appliance must be stored in a room free of continuously operating ignition sources (e.g.
- Page 9 A special refrigerant circulates in the system to obtain the function of air conditioner. The refrigerant used is R32 fluoride, which undergoes a special cleaning treatment. The refrigerant is flammable and odourless. It also implies risk of explosion under certain conditions.
- Page 10 Maximum and minimum water temperatures Function Minimum water temperature Maximum water temperature Cooling 7°C 25°C Central heating 20°C 60°C Water heating 40°C 80°C Maximum and minimum water pressure values Function Minimum water pressure Maximum water pressure Cooling Central heating 0.05 MPa 0.25 MPa Water heating Maximum and minimum water pressure values at inlet.
-
Page 11: Diagram Of The Operating Principle
1. Diagram of the operating principle Diagram of the operating principle... -
Page 12: Heating And Cooling And Dhw With Circuit Breaker
2. HEATING AND COOLING AND DHW WITH CIRCUIT BREAKER HEATING AND COOLING AND DHW WITH CIRCUIT BREAKER... - Page 13 (**) (**) Extra accessory (***) Not included in extra Fondital accessories The diagram is purely indicative and for descriptive purposes. The system must be designed and validated by a qualified thermal-engineering firm. HEATING AND COOLING AND DHW WITH CIRCUIT BREAKER...
-
Page 14: Unit Operating Principle
3. Unit operating principle The air/water heat pump with DC inverter consists of an outdoor unit, an indoor unit and a storage tank with internal fan coil. Functions: (1) Cooling; (2) Heat; (3) Hot Water; (4) Cool + Hot Water; (5) Heat + Hot Water;... - Page 15 Quiet mode: silent mode is available for cooling, heating and water heating functions. In Quiet mode, the outdoor unit reduces the operating noise through automatic control. Disinfection: in this mode, the water heating system can be disinfected. When you activate the disinfection function and set the cor- responding time, the function is started.
-
Page 16: Name
4. Name The table below refers to the commercial designation identifying the outdoor unit and the indoor unit with the same power rating and power supply. PROCIDA Description Options Product name PROCIDA Type of external source A = air CH system fluid type W = water Heat pump type S = split... -
Page 17: Installation Example
5. Installation example SCENARIO 1: Connection of an underfloor coil and a fan coil for heating and cooling Outdoor unit Indoor unit Underfloor coil Symbol Description Shut-off valve Remote ambient thermostat (provided on site) By-pass valve (provided on site) Two-way valve (provided on site) High-temperature line Low-temperature line Notes... -
Page 18: Key Components
6. Key components Indoor unit PROCIDA ITU 4, PROCIDA ITU 6, PROCIDA ITU 8, PROCIDA ITU 10, External Expansion vessel Air inlet 3-way valve Safety valve. Water pump Plate heat exchanger Internal (view from top) Note: air inlet cover must be opened during installation. Optional electric heater Storage tank electric heater Key components... -
Page 19: Outdoor Unit
Refer to the table below for details on matching optional electric heater with the storage tank electric heater. Optional electric heater Storage tank electric heater PROCIDA ITU 4 1,5+1,5KW PROCIDA ITU 6 PROCIDA ITU 8 3+3KW PROCIDA ITU 10 Outdoor unit PROCIDA AWS 4 (O), PROCIDA AWS 6 (O) External Control unit... -
Page 20: Guidelines For Outdoor Unit Installation
Control unit DC fan motor Compressor Internal 7. Guidelines for outdoor unit installation Instructions for the installation 1. Unit must be installed according to applicable national and local safety regulations. 2. Installation quality directly affects the normal operation of the air conditioner. Do not install it on your own. Contact the dealer for after-sales service. - Page 21 7.2.2 Outdoor unit external dimensions PROCIDA AWS 4 (O), PROCIDA AWS 6 (O) PROCIDA AWS 8 (O), PROCIDA AWS 10 (O) Guidelines for outdoor unit installation...
- Page 22 Description Unit: millimetres Name Notes Service valve - liquid side PROCIDA AWS 4 (O), PROCIDA AWS 6 (O) Service valve - gas side PROCIDA AWS 8 (O), PROCIDA AWS 10 (O) Handle Used to cover or uncover the front housing Air outlet grille 7.2.3 Space required for installation...
-
Page 23: Indoor Unit Installation
8. Indoor unit installation Choosing the position for indoor unit installation • Avoid direct sunlight. • Ensure that the suspension rod, ceiling and building structure are strong enough to support the weight of the air conditioner. • The exhaust pipe is easy to connect. •... -
Page 24: Indoor Unit External Dimensions
Indoor unit external dimensions Description Unit: millimetres Description Threaded fitting Flow water 1” BSP male Return water 1” BSP male Drinking water 1” BSP male 1” BSP male Gas side pipe PROCIDA ITU 4, PROCIDA ITU 6 Liquid side pipe PROCIDA ITU 8, PROCIDA ITU 10 Precautions for indoor unit installation •... -
Page 25: Water Volume And Pump Capacity
Drinking water Ambient heating return water Hot gas pipe Liquid pipe Ambient heating flow water Water volume and pump capacity All-in-one P = Static pressure at external outlet Q = Water flow rate Note The above curve shows the maximum external static pressure. The water pump has a variable frequency. During operation, the water pump controls outlet according to actual load. -
Page 26: Water Volume And Pressure In The Expansion Tank
Water volume and pressure in the expansion tank P = Preset pressure in the expansion tank (bar) V = Total maximum water volume (litres) Notes • The expansion tank has a capacity of 10 litres and is pre-pressurised to 1 bar; •... -
Page 27: Selecting The Expansion Tank
• Example 1: the indoor unit is installed 5 m below the outdoor unit and the total water volume is 100 litres. With reference to the above figure, it is not necessary to adjust expansion tank pressure. • Example 2: the indoor unit is installed at the highest point of the hydraulic system and the total water volume is 350 litres. »... -
Page 28: Piping Connection
9. Piping connection Connecting the outlet pipe for indoor unit and outdoor unit 1. Align the copper pipe taper end with the centre of the threaded joint. Tighten the flare nuts by hand. 2. Tighten the flare nuts using the torque wrench until hearing it click. 3. - Page 29 Model Pipe size Length A Height B Additional refrig- erant (Diameter: Φ) Liquid Standard Max. Standard Max. PROCIDA ITU 4 1/2” 1/4” 16g/m PROCIDA ITU 6 1/2” 1/4” 16g/m PROCIDA ITU 8 1/2” 1/4” 16g/m PROCIDA ITU 10 1/2” 1/4” 16g/m Notes •...
-
Page 30: Remote Ambient Temperature Sensor
Remote ambient temperature sensor Front side Rear side Remote ambient temperature sensor 1.5 metres Doors Remote ambient temperature sensor Electric box Notes • The distance between the indoor unit and the remote ambient temperature sensor must be lower than 15 m, because of the length of the remote sensor connection cable;... -
Page 31: Thermostat
Thermostat Thermostat installation procedure is similar to the one for the remote ambient temperature sensor. HEAT COOL L (220AC) Thermostat Thermostat connection 1. Remove the indoor unit front cover and open the electric box; 2. Identify thermostat power specifications: if it is 220 V, identify terminal board XT3 as NO.9~12; 3. -
Page 32: Way Valve
WARNING • The NO valve (normally open) must be connected to wire (OFF) and to wire (N) to obtain that it closes in cooling mode. • The NC valve (normally closed) must be connected to wire (ON) and to wire (N) to obtain that it closes in cooling mode. •... -
Page 33: Door Control Unit
Phase 3. Setting the wired control If necessary, select "With" for “Other thermal” parameter within COMMISSION → FUNCTION, then set (outdoor) temperature switch and control logic (1/2/3) Door control unit If a door control function is available, install as follows: Door control unit Refrigerant filling and draining 1. -
Page 34: Collecting Refrigerant
With trap Without trap WARNING When filling is interrupted or as soon as it is completed, inspect the unit again without starting the compressor. NOTE Do not use a mix of refrigerant vapour and air or oxygen to pressurise because there is a risk of explosion. Collecting refrigerant To transfer or dispose of the outdoor/indoor units, drain the system according to the procedure below, so that the refrigerant is not released into the atmosphere. -
Page 35: Unit Handling
Unit handling • When installing or handling the unit, avoid ingress of any other substance than refrigerant in the piping and bleed any residual air. • The presence of other substances or air in the piping increases system pressure, which may result in compressor damage. •... - Page 36 Marked ID Introduction AC-L Phase wire of power cable Neutral wire of power cable Ground Storage tank electric heater Electric heater 1 Electric heater 2 220VAC aux. thermal unit Reserved Reserved Reserved The two-way valve 1 is normally open The two-way valve 1 is normally closed Reserved Reserved Reserved...
- Page 37 Marked ID Introduction AC-L Phase wire of power input Neutral wire of power input Ground HEAT-B Bottom band heater HEAT-C Compressor band heater 2WAY Reserved 4WAY 4-way valve coil OFAN DC motor LPS-C Low pressure switch for cooling LPS-H Low pressure switch for heating High pressure switch High pressure sensor Electronic expansion valve - coil 1...
- Page 38 PROCIDA ITU 8, PROCIDA ITU 10 Marked ID Introduction AC-L Phase wire of power cable Neutral wire of power cable Ground Storage tank electric heater Electric heater 1 Electric heater 2 220VAC aux. thermal unit Reserved Reserved Reserved The two-way valve 1 is normally open The two-way valve 1 is normally closed Reserved Reserved...
- Page 39 Marked ID Introduction CN15 Temperature sensor 20 K (refrigerant liquid line) CN16 Temperature sensor 20 K (refrigerant vapour line) CN16 Temperature sensor 10 K (outlet water for optional electric heater) CN16 Reserved Storage tank temperature sensor Remote ambient temperature sensor Reserved Reserved Reserved...
- Page 40 Marked ID Introduction AC-L Phase wire of power cable Neutral wire of power cable PWR1 Reserved Fuse 4-way valve VA-1 Chassis electric heater HEAT Electric heater DC-MOTORO Reserved DC-MOTORO1 Fan motor EXV 1 EXV 2 T_SENSOR2 1, 2: ambient; 3, 4: discharge; 5, 6: suction T_SENSOR1 1, 2: Economizer inlet;...
-
Page 41: Electrical Connections
19.2 Electrical connections 19.2.1 Connecting principle General principles • The wires, equipment and connectors provided for use on site must comply with regulations and design technical requirements. • On site electrical connections can only be performed by qualified electricians. • Disconnect the system from the mains before starting any connection. •... - Page 42 • The above diameters for the power cables have been determined on the assumption that the distance between the distribution cabinet and the unit is less than 75 m. If the cables are between 75 and 150 m apart, the diameter of the power cable must be increased by one degree.
- Page 43 19.2.2 Wiring diagram The connection diagram affixed to the unit always applies. Wiring diagram: indoor unit PROCIDA ITU 4, PROCIDA ITU 6, PROCIDA ITU 8, PROCIDA ITU 10 Layout of electrical components trunking trunking Wiring diagram...
- Page 44 CODE DESCRIPTION Main board - only for RT6 Indoor unit main board Interface communication board Optional electric heater 1 Optional electric heater 2 Storage tank electric heater Thermostat 1 Thermostat 2 Thermostat 3 AC contactor 1 Optional electric heater AC contactor 2 Optional electric heater Storage tank electric heater AC contactor PUMP Indoor unit pump...
- Page 45 Wiring diagram: outdoor unit PROCIDA AWS 4 (O), PROCIDA AWS 6 (O) Layout of electrical components The ground wire is available for motor having an iron housing, while it is not available for motor having a plastic housing Wiring diagram...
- Page 46 CODE DESCRIPTION Indoor unit main board Outdoor unit main board Communication interface board COMP1 Compressor Compressor band heater Bottom band heater EKV1 Main electronic expansion valve coil EKV2 Aux. electronic expansion valve coil High pressure switch L1-L6 Magnetic ring Low pressure switch for heating Low pressure switch for cooling DC motor Economizer inlet T sensor...
- Page 47 PROCIDA AWS 8 (O), PROCIDA AWS 10 (O) Layout of electrical components The ground wire is available for motor having an iron housing, while it is not available for motor having a plastic housing Wiring diagram...
- Page 48 CODE DESCRIPTION Indoor unit main board Outdoor unit main board Drive board Communication interface board Filter board COMP1 Compressor Compressor band heater Bottom band heater EKV1 Main electronic expansion valve coil EKV2 Aux. electronic expansion valve coil High pressure switch L1-L5 Magnetic ring Low pressure switch for heating...
-
Page 49: Commissioning
19.2.3 Terminal board PROCIDA ITU 4, PROCIDA ITU 6, PROCIDA ITU 8, PROCIDA ITU 10 XT3 terminal board Thermostat Pump control signal (OUT) Door control unit XT1 terminal board XT2 terminal board Electric power supply Aux. thermal unit Two-way valve 1 Commissioning 20.1 Checks before start-up To ensure safety for users and the unit, the system must undergo a functional inspection before testing. - Page 50 Check that the necessary diagrams are available: wiring diagram, control diagram, piping design, etc. □ Ensure that the unit installation is sufficiently stable and that there is enough room for operating and repairing □ Check refrigerant pressure in every unit and check for leaks. □...
-
Page 51: Operation Test
20.2 Operation test The operation test is preliminarily performed to make sure that the unit can operate normally. If the unit can not operate normally, identify and rectify the problems so as to obtain a satisfying test result. Before starting the operation test, ensure that all test items gave the required results. -
Page 52: Operation And Routine Maintenance
This is why, after installing the storage tank, it is recommended to set it to "With”. In case of failure to comply, Fondital shall not be liable for any malfunction. • Do not switch the unit on and off too frequently and close the manual valve of the hydraulic system when the unit is used by the users. - Page 53 Malfunctions Causes Possible solutions Power supply issue. The phase sequence is reversed. The connection cable is disconnected. Check and rectify. The compressor does not start Identify the causes and perform any nec- Main board malfunction. essary repair. Compressor malfunction. Replace compressor. Fan retaining bolt is loose.
-
Page 54: Recovery
21.1 Recovery When draining refrigerant from a system for maintenance or disposal purposes, it is recommended to remove the refrigerant in safety conditions. If refrigerant is transferred to cylinders, only use cylinders suitable for recovering refrigerant. Make sure to have a suitable number of cylinders to store all system refrigerant. -
Page 55: Safety Notes
21.3 Safety notes Check for the presence of refrigerant: the technician must inspect the area using a suitable refrigerant detector, before and while servicing, so as to be aware of the presence of a potentially toxic or flammable environment. Make sure that the leak detector used is suitable for all refrigerants that may be used, i.e. - Page 56 Installing the storage tank safety valve: Storage tank pressure will gradually increase while heating. A safety valve is hence re- quired to allow draining some water and releasing pressure. If the valve is not fitted or is improperly installed, the storage tank will expand and get deformed, damage or create a hazard for personal safety.
-
Page 57: Precautions Before Seasonal Use
21.4 Precautions before seasonal use • Ensure that air inlets and outlets of indoor and outdoor units are not clogged. • Ensure that grounding connection is safe. • In case of restarting after a long period of inactivity, switch on the unit 8 hours before operation should start so as to allow preheat- ing of the external compressor. - Page 58 REGULATION (EU) No. 517/2014 - F-GAS The unit contains R32, a fluorinated greenhouse gas having a global warming potential (GWP) = 675. Do not release R32 into the environment. Model PROCIDA AWS XB4 1 kg = 0.675 tons of CO equivalent PROCIDA AWS XB6 1 kg = 0.675 tons of CO...
- Page 59 Page left intentionally blank...
- Page 60 Fax +39 0365 878 304 e-mail: info@fondital.it www.fondital.com The manufacturer reserves the right to modify his/her products as deemed necessary, without alter- ing the basic characteristics of the products themselves. Uff. Pubblicità Fondital IST 03 J 049 - 01 | Luglio 2022 (07/2022)
Need help?
Do you have a question about the PROCIDA AWS XB4 and is the answer not in the manual?
Questions and answers