Advertisement
Quick Links
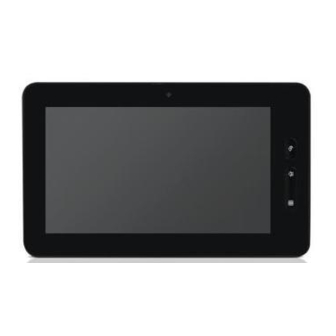
YARVIK TAB250 INSTRUCTION MANUAL
User's Guide
Thanks:
Dear User
Thank you for purchasing our product.
These operational guidelines for the user, to ensure you a quick and convenient to
use, read the instructions carefully before use.
Note:
* This product is a high precision electronic products, do not disassemble.
* Avoid strong beat, the collision of the product.
* Avoid using this product the following conditions: high and low temperature,
moisture, dust, magnetic fields strong and long-term exposure to sunlight.
* Please use a wet cotton cloth wrung gently wipe the product shell, do not use other
chemical cleaning solution. This product should not be dripping or splashing water,
so should not be placed near the product category, such as glass filled with a liquid
items.
* Too long, use the headphone volume is too large may cause permanent hearing
damage.
* Do not cross the road, driving motor vehicle or bicycle use headphones to avoid
traffic accidents.
* Please only use permitted batteries, chargers and accessories, use any other type
of products would violate the warranty regulations and may be dangerous.
* Please follow the relevant local environmental regulations to deal with obsolete
machines and accessories.
* This product is in the course of any questions, please contact your local dealer or
directly with the company's customer service center.
* For those because the product is damaged, repair or other causes of memory loss
wipe coating, the Company assumes no responsibility, please follow the user manual
for standard operation, and timely backups.
Package contents:
1 x 7" Tablet
1 x 5V 2A DC charge adapter
1 x Mini USB cable
1 x USB host cable
1 x Instruction manual
1 x Quick installation guide
1
Advertisement

Subscribe to Our Youtube Channel
Related Manuals for Yarvik TAB250


Summary of Contents for Yarvik TAB250
- Page 1 YARVIK TAB250 INSTRUCTION MANUAL User's Guide Thanks: Dear User Thank you for purchasing our product. These operational guidelines for the user, to ensure you a quick and convenient to use, read the instructions carefully before use. Note: * This product is a high precision electronic products, do not disassemble.
- Page 2 Startup and shutdown * Boot: Press and hold the power button, the system will enter the startup process, as follows: Boot Logo startup … System has been started, are entering the Android system:...
- Page 3 The system enters the default home interface. *Shutdown: Press the power button, pop-up device options, select Shut Down, as follows: Click OK, you can safely shut down. *Sleep: the machine under normal operating conditions, Short press the power button, Into hibernation, Now, Screen will close. Short press the power button again, Be able to resume normal mode.
- Page 4 Desktop: System after the completion of normal start, Desktop can see Android2.3(The figure) The default desktop by the: Status Bar, Quick Search Bar, Main menu labels and a number of shortcut icons form. The status bar to display the current system of network status, Battery, Time information.
- Page 5 In the main menu, the system can be set to run existing applications, install a new application, start the touch calibration, music player, video player, web browsing, games and other operations. System Settings: Click the main menu interface in the "Settings" icon, you can open the system settings interface, as shown below:...
- Page 6 Select the appropriate operation of the relevant items, such as: * Wireless and network * Sound and display * Date and time settings * About Device *Date and time settings: Set interface options "time and date settings options" to enter the date and time settings interface: Can choose to automatical: use the Network Time.
- Page 7 Select "Settings." If you enter the number of legitimate, then the operation is successful, the system will set the option to use the new. *Screen brightness: In the setup interface choose "sound and display settings" to enter the sound and display settings interface, scroll down section, select "Brightness", there are interface:...
- Page 8 *Standby screen: Standby screen: the screen automatically locks the delay before. In the setup interface choose "sound and display settings" to enter the sound and display settings interface, scroll down section, select the "standby screen" interface appears, as follows: Note: In the video, the screen auto-standby function does not. *Wi-Fi Wireless Connection: Click the main menu "Settings"...
- Page 9 In the "Wi-Fi settings" interface (above), click on the Wi-Fi column also can open and close the Wi-Fi feature, click on the "Network Notice" lists the tablet’s search to the wireless router, click the search name will pop up settings window, please follow the prompts to complete the Wi-Fi network links.
- Page 10 According to the above method to connected Wi-Fi, As shown below: *HDMI This product supports HDMI output to HDMI compatible HDTV’s, beamers, displays etc.
- Page 11 Using the HDMI cable to connect an HDMI input tablet and equipment. In the "Settings" / "Display" / "Output Settings" / “Output mode” select “HDMI” output mode, to set the system output to HDMI. If you choose HDMI output, under “HDMI settings” you can set the "Resolution" for the output format.
- Page 12 Install, uninstall, run the application *Installation: Android install the application there are a variety of ways, such as through USB install, install third-party program aid. Here we introduce assisted by Appinstaller to install. 1.Click the Settings and enter to Applications. As shown below: 2.
- Page 13 !"#$#%&!&'#()**+,"&)$$#-.!/%0,!1! In the main menu, The first entry, system default NAND FLASH as search directory. The system start scanning all the available APKs on the MicroSD card.
- Page 14 6. Select all the available apps to install. *Uninstall applications: You can use the appropriate third-party software management tools or applications that use the Android comes with management software Select "Settings" / "Application" / "Management Applications", select the appropriate application has been installed, to view program information, the uninstall program and other operations.
- Page 15 Touch Calibration When you first start the system by default called touch calibration procedures. Users can also in the main menu, select "touch calibration", enter the touch calibration procedures. Follow the prompts to complete the calibration operation, if successful touch calibration, the system prompts and automatically exit the touch calibration interface.
- Page 16 Music: Click the main menu in the "music" icon, you can enter the music player interface. Here lists the system default user data area of all audio files. As shown below: We can spread through the USB audio files synchronized manner, or by inserting the MicroSD card with audio files were audio files, you can also download the audio files via the network.
- Page 17 and other interfaces. Select song to play. Video: In the main menu click on “ES File Explorer”. In the file explorer you can browse to the folder location where your video files are stored, where, if placed, “tflash” is the MicroSD card.
- Page 18 Photo Browse: Click the main menu in the "Gallery" into the "Gallery" the main interface, there will list all the picture files and video files. As shown below: Select a picture file, enter the picture playback interface, as shown below. Can select "Zoom", "narrow"...
- Page 19 In the desktop interface, hold down the Menu button, pop-up menu option, select the "wallpaper", the pop-up "Choose wallpaper source" selection box: Have the following options: Select "Wallpaper Gallery": You can select the system provides a static picture as wallpaper. Select "Current Wallpaper": You can select the system provides 3D wallpaper.
- Page 20 Enter the above dialog box, click” Wallpaper” setting, Have the following options: Select "Wallpaper Gallery": You can select the system provides a static picture as wallpaper. Select "Current Wallpaper": You can select the system provides 3D wallpaper. Select "Photo": You can select the system provides as static wallpaper. Recording: Click the main menu in the "recorder"...
- Page 21 Note: when inserting MicroSD card recording, audio file will be saved on the MicroSD card. Select "Record" button recording, recording is completed, select "Stop" button. At this point you can select the "Play" button plays the sound just recorded. Select "Use this record"...
- Page 22 E-mail client: In the main menu, click "Email" icon to enter the e-mail client. You need to be connected to the internet in order to use the email client. The first entry will ask to configure the account information. As shown below: Fill in your emailaddress and your email account password.
- Page 23 Here we are using a POP3 account type. Appears to accept the server after setting the interface as follows: You need to enter all the information as provided by your email provider. The credentials shown in the screenshots are for reference only.
- Page 24 If the settings are correct, you will enter the following interface: Select "Next", you can enter the account information to customize the interface:...
- Page 25 In the "Your Name" enter the bar you want to show the name of outgoing mail, enter here: Rocky Then click "Finish" button to enter the mail interface. It will automatically load the e- mail, mailing list below shows: Select a column can view the messages, you can view the column inside a "reply", "delete", "Open attachment"...
- Page 26 External devices: *USB connection: The tablet can use its USB port for a connection with the PC or as a USB device. The default connection method is the synchronous mode. Can drag the status bar pulled down, there are interface: "USB is connected": said external memory (SD card).
- Page 27 Plug and Play connection method: Keyboard Mouse Support plug and play USB mouse, keyboard equipment Using USB host on the YARVIK TAB250 Restore defaults If you want to restore the factory defaults and delete all other data, please press Menu/System Settings/...
-
Page 28: Factory Reset
Factory Reset... - Page 31 Disclaimer: The screenshots of application icons used in this manual may differ from the actual applications icons on the tablet. Get the most out of your Yarvik Tablet...
- Page 32 All Apps are downloaded at user’s own risk. Please note: Due to licensing regulations on Android based mobile devices, the Yarvik Tablet is able to access the official Android Market Place, but you will not be able to download apps.
Need help?
Do you have a question about the TAB250 and is the answer not in the manual?
Questions and answers