Table of Contents
Advertisement
Quick Links
Advertisement
Table of Contents

Related Manuals for DTG-C X2


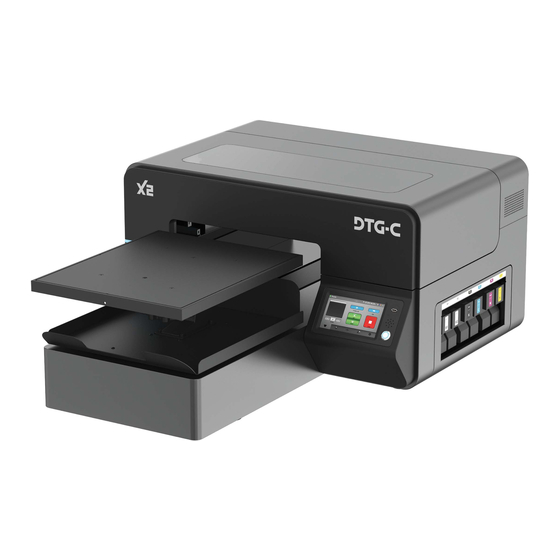
Summary of Contents for DTG-C X2
- Page 1 INSTALLATION AND TRAINING...
-
Page 2: Printer Operation
GRAPHIC INSTALLATION IMPORTANT SUBSTRATES PRINTER NEED TO KNOWS SPECIFICATIONS AND START UP OPERATION AND TURBORIP PRETREATING ENVIRONMENT SOFTWARE SPECIFICATIONS TRAINING OUTLINE WWW.DTGCONNECTION.COM... -
Page 3: Installation
INSTALLATION FIRST THINGS FIRST: Put together waste ink tank & set bottle securely on the ground Insert CMYK ink into printer Shake W1 & W2 for 50 seconds before plugging into printer Connect power cord & switch back ... - Page 4 WWW.DTGCONNECTION.COM...
- Page 5 ▪ This will help you It is recommended you replace ▪ the X2 the printer MUST run the understand how your print your ink carts at 5% to avoid the auto maintenance to avoid issues. heads are firing and will...
-
Page 6: Environment Specifications
ENVIRONMENT SPECIFICATIONS Temperature (inks) 50˚F to 90˚F (10˚C to 32˚C). Humidity Range: 45% to 80% RH Humidifiers must be EVAPORATIVE (no vapors) WWW.DTGCONNECTION.COM... - Page 7 SUBSTRATES DTG uses aqueous (water-based ▪ ink) and works best with cotton fabrics. The quality of the garment can ▪ affect the outcome of your print! For BEST results, we ▪ recommend 100% Combed Ringspun Cotton Its always recommend to test the ▪...
- Page 8 PRETREATING (DARK GARMENTS) Pretreat is a liquid primer that is ▪ necessary for the white ink to adhere onto a colored garment. You MUST use pretreat if you are ▪ using white ink on your print Pretreatment can be hand sprayed or ▪...
- Page 9 PRETREATING (LIGHT GARMENTS) Pretreating light garments using CMYK inks is optional You need to use a treatment dedicated for lights only, dark treatment will not work for CMYK without white ink You can achieve brighter, sharper prints using a light pretreatment Light treatment works with white ...
- Page 10 GRAPHIC SPECIFICATIONS True to size 300 dpi resolution Transparent background Create images in RGB Cropped to exact size of graphic (no dead space) Save/Export as .png If you have black in going onto a black shirt, omit the ...
- Page 11 TURBORIP Images MUST be placed into ▪ TurboRIP before sending the job via Wi-Fi, Ethernet to the printer. You CANNOT just plug an ▪ image onto a USB directly into printer TurboRIP is NOT a graphics ▪ program. WWW.DTGCONNECTION.COM...
- Page 12 PLACING AN IMAGE You can drag and drop an image into the white grid area of TURBORIP go to FILE – PLACE IMAGE – then open the image you want to insert into the program WWW.DTGCONNECTION.COM...
- Page 13 Printer ▪ Model X2 File : File saves to PC then transfer to USB ▪ Model X2: Send job via Ethernet Resolution (Quality Modes) ▪ 4 pass (Speed) 8 pass (Fine) ▪ 16 pass (Superfine) ▪ Platen Ability to change the platen templates to match what you ▪...
- Page 14 Background Gives you capability to remove solid background off a ▪ graphic. Take the eyedropper tool and select the color you want to remove then move the Color Tolerance slider up to 10 to remove it cleanly. ▪ Doesn’t work with all backgrounds, best to do it beforehand in graphics program White Ink Settings ▪...
-
Page 15: Operation Display
Operation Display 1. Status bar Press/Drag down the status bar to open the status screen menu. 2. Machine status There are 4 possib le colors. Green: The printer is fully functional. Yellow: The printer is fullyfunctional, but there is a warning on the status screen. Red: The printer is in an error state where printing and auto maintenance are not functional, which may lead to damage of the printer. -
Page 16: Status Display
Status Display 1. Status details Displays the printer status in detail and shows any warnings or errors. 2. Ink status Displays the current ink percentage levels in each installed cartridge. Each ink appears as their respective colors. Cleaner cartridges are displayed as clear. If no cartridge is installed, X and NC appear. -
Page 17: Maintenance Screen
Maintenance Screen 1. [NOZZLE CHECK] Prints a nozzle check pattern result. It is recommended that this is performed daily to monitor the printer. 2. [AUTO HEAD CLEAN] Performs head cleaning automatically using systems components. 3. [REGULAR MAINTENANCE] Allows the carriage to be released. The front cover can be opened in order to manually clean the print heads (during maintenance or troubleshooting) and the... -
Page 18: Settings Tab
Settings Tab 1. [INK PATH CONTROL] Performs the ink path control. If you press this button, you can flush the printer. 2. [OPTION] You can change the following settings via the Option screen. -Set IP Address -Drying Time -White Amount Adjustment 3. -
Page 19: How To Perform A Nozzle Check
How to Perform a Nozzle Check WWW.DTGCONNECTION.COM... -
Page 20: Auto Head Cleaning
Auto Head Cleaning WWW.DTGCONNECTION.COM... -
Page 21: Adjusting Table Height
Adjusting Table Height Adjust the height of the platen by turning the height adjustment knob under the platen. -To lower the platen, turn the height adjustment knob clockwise -To lift the platen, turn the height adjustment knob counterclockwise. Important! If the garment is not flat, the platen height will not be set properly and will not print properly. - Page 22 Press the [SET] button to send platen in with Keep turning the height adjustment knob until flattened garment loaded the following screen appears If there is a problem with the height, the Press the [SET] button to send platen in with screen below will appear and prompt you to flattened garment loaded turn the height adjustment knob...
- Page 23 PRINTING - BEST PRACTICES Always press the shirt 5-10 seconds before printing. This will remove the moisture and lay down all fibers on the shirt. Be sure not to touch the area where the print will go after you press. If you do, the fibers of the shirt will stick back up. Lay the shirt on the platen with the collar on closest edge to you.
- Page 24 THANK YOU! HTTPS://WWW.YOUTUBE.COM/@DTGCONNECTION2584...
Need help?
Do you have a question about the X2 and is the answer not in the manual?
Questions and answers