
Related Manuals for mecalac AS 1600


Summary of Contents for mecalac AS 1600
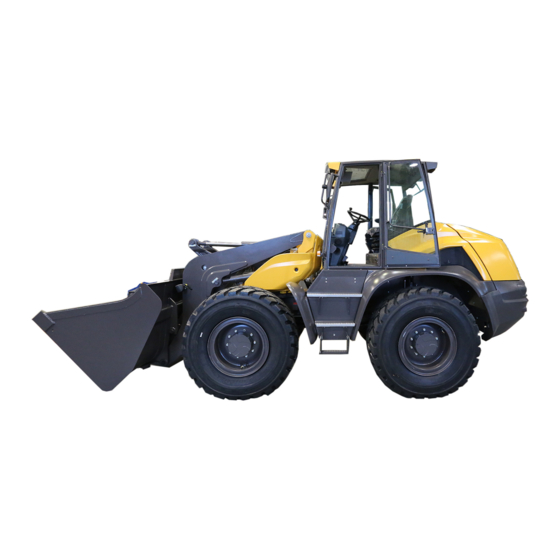
- Page 1 AS 1600 Swing loader FIN: Valid from W09S15001GBA08812... Service manual Status: 28.04.2016...
- Page 2 AS 1600. Suggestions and ...regarding this documentation or the wheel loader can be sent to the above- comments mentioned address. Most recent amend- 28.04.2016 ment AS 1600 Service manual 28.04.2016 23133693 0 SERIES GB...
-
Page 3: Table Of Contents
Contents 1 Notes for the Reader......................5 1.1 Validity ........................1.2 Illustrations ......................... 1.3 Accentuated text......................1.3.1 Pictograms ....................1.3.2 Safety Note....................1.3.3 Safety instructions ..................1.3.4 Warning notes ..................1.3.5 Guideline ....................2 Description ..........................9 2.1 Parts of the wheel loader.................... 2.2 Front section...................... - Page 4 Support valve ..................96 4 Circuit diagrams........................97 5 Annex ........................... 99 5.1 Spare Parts ......................99 5.1.1 Filter .......................99 5.1.2 Consumables ..................101 5.2 Deutz error messages ....................101 AS 1600 Service manual 28.04.2016 23133693 0 SERIES GB...
-
Page 5: Notes For The Reader
Meaning Further useful information. Conditions that must be fulfilled in order to perform an action Tools or material required in order to perform an action. AS 1600 Service manual 28.04.2016 23133693 0 SERIES GB... -
Page 6: Safety Note
Second step of a safety instruction. The result of this step. The safety instruction is complete, the goal of the of a safety instruction has been achieved. AS 1600 Service manual 28.04.2016 23133693 0 SERIES GB... -
Page 7: Warning Notes
Setting values Second step in a sequence of operations. The result of this step. The operation is complete, the goal has been achieved. AS 1600 Service manual 28.04.2016 23133693 0 SERIES GB... - Page 8 Accentuated text Notes for the Reader AS 1600 Service manual 28.04.2016 23133693 0 SERIES GB...
-
Page 9: Description
Overview - Parts of the wheel loader Designation Function Front section See Chapter "Front section" (Page 10). Cab - interior See Chapter "Cab - interior" (Page 11). AS 1600 Service manual 28.04.2016 23133693 0 SERIES GB... -
Page 10: Front Section
(via the medium) that markedly reduce the period of use of the hydraulic hose. manually-operated hydraulic tools, for • example portable shears in scrap yards. AS 1600 Service manual 28.04.2016 23133693 0 SERIES GB... -
Page 11: Cab - Interior
2.3.2.1 Overview The function of the display is expanded in the new AS 1600 series. In the new compo- nent, CAN bus messages are displayed in addition to the familiar operating parame- ters. As a rule, these are error messages from the vehicle control system. The actual meaning of the error messages is described in Chapter “Error messages“. - Page 12 Engine speed control by M-Drive or accelerator. Rear window is activated. Unlocking of the quick-change device. Boom suspension is activated. A fault is present on the engine or wheel loader. AS 1600 Service manual 28.04.2016 23133693 0 SERIES GB...
- Page 13 Proceeds to the I (See page 16: Information) sub-menu. NFORMATION Proceeds to the S – H (See page 18: Settings - Hydrau- ETTINGS YDRAULICS lics) sub-menu. AS 1600 Service manual 28.04.2016 23133693 0 SERIES GB...
- Page 14 Cab - interior Description 2.3.2.3 Settings - Display Settings - Display AS 1600 Service manual 28.04.2016 23133693 0 SERIES GB...
- Page 15 Cab - interior Description 2.3.2.4 Engine and vehicle messages Engine and vehicle messages AS 1600 Service manual 28.04.2016 23133693 0 SERIES GB...
- Page 16 Cab - interior Description 2.3.2.5 Information Information AS 1600 Service manual 28.04.2016 23133693 0 SERIES GB...
- Page 17 Air filter differential pressure Engine revolutions Revolutions per minute [rpm] On-board voltage Volt [V] Ash loading - diesel particulate filter Percent [%] Fuel consumption Litres per hour [i/h AS 1600 Service manual 28.04.2016 23133693 0 SERIES GB...
- Page 18 Cab - interior Description 2.3.2.6 Settings - Hydraulics Settings - Hydraulics AS 1600 Service manual 28.04.2016 23133693 0 SERIES GB...
-
Page 19: Central Electrical System
The diagnostic unit is connected to the vehicle vehicle control system control system diagnosis interface. Further infor- mation regarding the diagnostic unit can be found in Section: "Diagnostic unit" (Page 20). AS 1600 Service manual 28.04.2016 23133693 0 SERIES GB... -
Page 20: Diagnostic Unit
Messages from the vehicle control system are generated as "M-messages (Mecalac)". As is the case with engine messages, they are shown in the display (only if active). AS 1600 Service manual 28.04.2016 23133693 0 SERIES GB... - Page 21 Check Valve Y01A, check Circuit 1009 M021 Traction motor 2 error Check Valve Y01B, check Circuit 1036 M022 Cluth valve error Check Valve Y05, check Circuit 1044 AS 1600 Service manual 28.04.2016 23133693 0 SERIES GB...
- Page 22 Cab - interior Description AS 1600 Service manual 28.04.2016 23133693 0 SERIES GB...
-
Page 23: Service Tasks
Checking the front axle oil level Location of the bolts on the front axle No. Designation Filler plug Oil level plug Drain plug Drain plug Drain plug AS 1600 Service manual 28.04.2016 23133693 0 SERIES GB... - Page 24 Carry out the following steps: Place an oil drip tray beneath the front axle. The oil drip tray prevents the gearbox oil from penetrating the subsoil. AS 1600 Service manual 28.04.2016 23133693 0 SERIES GB...
- Page 25 Using an Allen key, secure the oil level plug. Dispose of the gearbox oil that has been collected, according to the local statutory provisions, Done. AS 1600 Service manual 28.04.2016 23133693 0 SERIES GB...
-
Page 26: Checking The Rear Axle Oil Level
Checking the rear axle oil level Location of the bolts on the rear axle No. Designation Filler plug Oil level plug Drain plug Drain plug Drain plug AS 1600 Service manual 28.04.2016 23133693 0 SERIES GB... - Page 27 Carry out the following steps: Place an oil drip tray beneath the rear axle. The oil drip tray prevents the gearbox oil from penetrating the subsoil. AS 1600 Service manual 28.04.2016 23133693 0 SERIES GB...
- Page 28 Using an Allen key, secure the oil level plug. Dispose of the gearbox oil that has been collected, according to the local statutory provisions, Done. AS 1600 Service manual 28.04.2016 23133693 0 SERIES GB...
-
Page 29: Checking The Planetary Gear Oil Level
Dispose of the used gearbox oil according to the local statutory provisions, Catch the draining gearbox oil in a suitable container. Prevent the gearbox oil from entering the soil. AS 1600 Service manual 28.04.2016 23133693 0 SERIES GB... - Page 30 Using an Allen key, secure the oil level plug. Dispose of the gearbox oil that has been collected, according to the local statutory provisions, Done. AS 1600 Service manual 28.04.2016 23133693 0 SERIES GB...
-
Page 31: Checking The Transfer Case Oil Level
Location of the inspection and oil filler plug - at the front, in the direction of travel. Location of the inspection and oil filler plug - at the rear, in the direction of travel. AS 1600 Service manual 28.04.2016 23133693 0 SERIES GB... - Page 32 Dispose of the used gearbox oil according to the local statutory provisions, Catch the draining gearbox oil in a suitable container. Prevent the gearbox oil from entering the soil. AS 1600 Service manual 28.04.2016 23133693 0 SERIES GB...
- Page 33 Using an Allen key, secure the oil level plug. Dispose of the gearbox oil that has been collected, according to the local statutory provisions, Done. AS 1600 Service manual 28.04.2016 23133693 0 SERIES GB...
- Page 34 Using an Allen key, secure the oil level plug. Dispose of the gearbox oil that has been collected, according to the local statutory provisions, Done. Done. AS 1600 Service manual 28.04.2016 23133693 0 SERIES GB...
-
Page 35: Checking The Electrical Functions And Connections
Exchange damaged hydraulic hoses immediately. Done. Info The recommended replacement intervals for the hydraulic hoses to be found in Chapter: “Description“ > “Hydraulic hoses“ (Page 10). AS 1600 Service manual 28.04.2016 23133693 0 SERIES GB... -
Page 36: Repair Work
The tyre of the wheel loader is large and heavy. You can be crushed if it tips over! Always wear protective gloves! Always wear safety shoes! Always work carefully! Always carry out a wheel change with two persons! AS 1600 Service manual 28.04.2016 23133693 0 SERIES GB... - Page 37 Position a suitable base beneath the jack below the jacking points of the axle of the wheel to be changed. Place the safety blocks centrally on the upper end of the jack. AS 1600 Service manual 28.04.2016 23133693 0 SERIES GB...
- Page 38 Screw in the ten wheel nuts on the wheel loader. Only fasten the wheel nuts finger-tight. Loosen the jack. Remove the jack, the base and the safety blocks. AS 1600 Service manual 28.04.2016 23133693 0 SERIES GB...
- Page 39 The wheel has been mounted. Done. Info After approximately ten hours of operation, re-tighten the wheel nuts of the wheel that has been changed. AS 1600 Service manual 28.04.2016 23133693 0 SERIES GB...
-
Page 40: Changing The Air-Conditioner V-Belt
Fixing and tensioning screws Location of the fixing and tensioning screws - view of the installation cover Location of the fixing screws - view of the engine compartment AS 1600 Service manual 28.04.2016 23133693 0 SERIES GB... - Page 41 Always wear protective gloves! Always work carefully! Carry out the following steps: Using the ratchet, loosen the four fixing screws of the installation cover. AS 1600 Service manual 28.04.2016 23133693 0 SERIES GB...
- Page 42 Loosen the tensioning screw with the aid of an Allen key. Loosen the belt tensioning screw with the aid of a ratchet. Loosen the tensioning screw with the aid of an Allen key. AS 1600 Service manual 28.04.2016 23133693 0 SERIES GB...
- Page 43 Repair work Service tasks Remove the air-conditioner V-belt. Done. AS 1600 Service manual 28.04.2016 23133693 0 SERIES GB...
- Page 44 The engine bay of the wheel loader is very cramped. You can be cut and crushed when performing maintenance tasks! Always wear protective gloves! Always work carefully! Carry out the following steps: Fit the air-conditioner V-belt. AS 1600 Service manual 28.04.2016 23133693 0 SERIES GB...
- Page 45 Tighten the tensioning screw with the aid of an Allen key. Tension the V-belt by means of the belt tensioning screw. Tighten the fixing screw with the aid of an Allen key. AS 1600 Service manual 28.04.2016 23133693 0 SERIES GB...
- Page 46 Tighten the fixing screw with the aid of an Allen key. Install the installation cover with the aid of the four fixing screws. Done. AS 1600 Service manual 28.04.2016 23133693 0 SERIES GB...
-
Page 47: Changing The Alternator/Water Pump V-Belt
Location of the fixing screw - view of the engine compartment Location of the fixing screw - view of the engine compartment Location of the fixing screw - view of the engine compartment AS 1600 Service manual 28.04.2016 23133693 0 SERIES GB... - Page 48 Repair work Service tasks Location of the belt tensioning screw - view of the engine compartment AS 1600 Service manual 28.04.2016 23133693 0 SERIES GB...
- Page 49 Always wear protective gloves! Always work carefully! Carry out the following steps: Loosen the tensioning screw with the aid of an Allen key. AS 1600 Service manual 28.04.2016 23133693 0 SERIES GB...
- Page 50 Loosen the tensioning screw with the aid of an Allen key. Loosen the tensioning screw with the aid of an Allen key. Loosen the belt tensioning screw with the aid of a ratchet. AS 1600 Service manual 28.04.2016 23133693 0 SERIES GB...
- Page 51 Repair work Service tasks Remove the alternator/water pump V-belt. Done. AS 1600 Service manual 28.04.2016 23133693 0 SERIES GB...
- Page 52 The engine bay of the wheel loader is very cramped. You can be cut and crushed when performing maintenance tasks! Always wear protective gloves! Always work carefully! Carry out the following steps: Install the alternator/water pump V-belt. AS 1600 Service manual 28.04.2016 23133693 0 SERIES GB...
- Page 53 Tension the V-belt by means of the belt tensioning screw. Tighten the tensioning screw with the aid of an Allen key. Tighten the tensioning screw with the aid of an Allen key. AS 1600 Service manual 28.04.2016 23133693 0 SERIES GB...
- Page 54 Repair work Service tasks Tighten the tensioning screw with the aid of an Allen key. Done. AS 1600 Service manual 28.04.2016 23133693 0 SERIES GB...
-
Page 55: Changing The Fuel Pre-Filter
Dispose of the diesel fuel according to the local statutory provisions, Catch the draining diesel fuel in a suitable container. Prevent the diesel fuel from entering the soil. AS 1600 Service manual 28.04.2016 23133693 0 SERIES GB... - Page 56 Place the strap of the strap wrench around the fuel pre-filter. Loosen the fuel pre-filter with the aid of the strap wrench. Carefully pull the fuel pre-filter from the mounting. AS 1600 Service manual 28.04.2016 23133693 0 SERIES GB...
- Page 57 The fuel system is bled piece by piece. The fuel pressure required for operation is built up. The fuel system has been bled. Done. AS 1600 Service manual 28.04.2016 23133693 0 SERIES GB...
-
Page 58: Changing The Fuel Filter
Carry out the following steps: Place the strap of the strap wrench around the first fuel filter. Loosen the fuel filter with the aid of the strap wrench. AS 1600 Service manual 28.04.2016 23133693 0 SERIES GB... - Page 59 Repair work Service tasks Carefully pull the fuel filter from both the mounting. Screw the new fuel filter into the mounting. Done. AS 1600 Service manual 28.04.2016 23133693 0 SERIES GB...
-
Page 60: Changing The Hydraulic Fluid Filter
Carry out the following steps: Place the oil-absorbent mats around the hydraulic fluid reservoir. The oil-absorbent mat protect the interior of the engine bay from contamination. AS 1600 Service manual 28.04.2016 23133693 0 SERIES GB... - Page 61 Unscrew the drainage hose from the drain valve of the hydraulic fluid reservoir. Fasten the protective cap of the hydraulic fluid reservoir drain valve. The excess hydraulic fluid has been drained. AS 1600 Service manual 28.04.2016 23133693 0 SERIES GB...
- Page 62 Prevent the hydraulic fluid from entering the soil. Carry out the following steps: Using a suitable tool, loosen the cap of the hydraulic fluid reservoir. Unscrew the cap by hand. AS 1600 Service manual 28.04.2016 23133693 0 SERIES GB...
- Page 63 Screw the lid back onto the hydraulic fluid reservoir by hand. Using a suitable tool, tighten the cap on the hydraulic fluid reservoir. Remove the oil-absorbent mats. AS 1600 Service manual 28.04.2016 23133693 0 SERIES GB...
-
Page 64: Changing The Engine Oil Filter
The oil drip tray prevents the engine oil from penetrating the subsoil or entering the interior of the engine bay. Place the strap of the strap wrench around the engine oil filter. AS 1600 Service manual 28.04.2016 23133693 0 SERIES GB... - Page 65 Dispose of the engine oil that has been collected, according to the local statutory provisions, The new engine oil filter has been installed. Done. AS 1600 Service manual 28.04.2016 23133693 0 SERIES GB...
-
Page 66: Changing The Air Filter
A new air filter cartridge A new safety cartridge Remove the air Carry out the following steps: filter cartridge Open the cladding closure. Remove the cladding. AS 1600 Service manual 28.04.2016 23133693 0 SERIES GB... - Page 67 Open the three locking mechanisms of the lid. Remove the air filter cartridge. Loosen the air filter cartridge with gentle rotating movements left and right. The air filter cartridge has been removed. AS 1600 Service manual 28.04.2016 23133693 0 SERIES GB...
- Page 68 Loosen the safety cartridge with gentle rotating movements left and right. Check the interior of the filter housing for dust and dirt. If necessary, carefully clean the interior of the filter housing with a cloth. AS 1600 Service manual 28.04.2016 23133693 0 SERIES GB...
- Page 69 The safety cartridge has been exchanged. Re-install the air Carry out the following steps: filter cartridge Slide the new air filter cartridge into the holder. AS 1600 Service manual 28.04.2016 23133693 0 SERIES GB...
- Page 70 When re-installing, take care that the dust ejection valve faces downwards . Secure the three locking mechanisms of the lid. Install the cladding. The air filter cartridge has been installed. Done. AS 1600 Service manual 28.04.2016 23133693 0 SERIES GB...
-
Page 71: Changing The Consumables
Carry out the following steps: Loosen the two mounting screws of the sump guard. Remove the sump guard. Place the oil drip tray next to the wheel loader. AS 1600 Service manual 28.04.2016 23133693 0 SERIES GB... - Page 72 Unscrew the drainage hose from the engine oil drain valve. Screw the protective cap onto the engine oil drain valve. The engine oil has been drained. AS 1600 Service manual 28.04.2016 23133693 0 SERIES GB...
- Page 73 Dispose of the engine oil that has been collected according to the local statutory provisions. Using the engine oil dipstick, check the engine oil level. Top up the engine oil as required. The check is complete. Done. AS 1600 Service manual 28.04.2016 23133693 0 SERIES GB...
-
Page 74: Changing The Gearbox Oil Of The Front Axle
Changing the gearbox oil of the front axle Location of the bolts on the front axle No. Designation Filler plug Oil level plug Drain plug Drain plug Drain plug AS 1600 Service manual 28.04.2016 23133693 0 SERIES GB... - Page 75 Carry out the following steps: Place an oil drip tray beneath the front axle. The oil drip tray prevents the gearbox oil from penetrating the subsoil. AS 1600 Service manual 28.04.2016 23133693 0 SERIES GB...
- Page 76 Wait until the gearbox oil has drained completely. Using an Allen key, screw the three drain plugs back into the front axle. The gearbox oil has been drained. AS 1600 Service manual 28.04.2016 23133693 0 SERIES GB...
- Page 77 Using an Allen key, secure the oil filler plug. Dispose of the gearbox oil that has been collected, according to the local statutory provisions, The gearbox oil has been refilled. AS 1600 Service manual 28.04.2016 23133693 0 SERIES GB...
- Page 78 If necessary, clean the axle vent valve . Inspect the rear axle and the oil drain bolt for leaks. The check is complete. Done. AS 1600 Service manual 28.04.2016 23133693 0 SERIES GB...
-
Page 79: Changing The Gearbox Oil Of The Rear Axle
Changing the gearbox oil of the rear axle Location of the bolts on the front axle No. Designation Filler plug Oil level plug Drain plug Drain plug Drain plug AS 1600 Service manual 28.04.2016 23133693 0 SERIES GB... - Page 80 Carry out the following steps: Place an oil drip tray beneath the rear axle. The oil drip tray prevents the gearbox oil from penetrating the subsoil. AS 1600 Service manual 28.04.2016 23133693 0 SERIES GB...
- Page 81 Wait until the gearbox oil has drained completely. Using an Allen key, screw the three drain plugs back into the rear axle. The gearbox oil has been drained. AS 1600 Service manual 28.04.2016 23133693 0 SERIES GB...
- Page 82 Using an Allen key, secure the oil filler plug. Dispose of the gearbox oil that has been collected, according to the local statutory provisions, The gearbox oil has been refilled. AS 1600 Service manual 28.04.2016 23133693 0 SERIES GB...
- Page 83 If necessary, clean the axle vent valve . Inspect the rear axle and the oil drain bolt for leaks. The check is complete. Done. AS 1600 Service manual 28.04.2016 23133693 0 SERIES GB...
-
Page 84: Changing The Gearbox Oil Of The Planetary Gear
Dispose of the used gearbox oil according to the local statutory provisions, Catch the draining gearbox oil in a suitable container. Prevent the gearbox oil from entering the soil. AS 1600 Service manual 28.04.2016 23133693 0 SERIES GB... - Page 85 Wait until the gearbox oil has drained completely. Using an Allen key, fasten the oil level plug in teplanetary gear. The gearbox oil has been drained. AS 1600 Service manual 28.04.2016 23133693 0 SERIES GB...
- Page 86 Wipe off any escaping gearbox oil with a cloth . Dispose of the gearbox oil that has been collected, according to the local statutory provisions, The gearbox oil has been refilled. Done. AS 1600 Service manual 28.04.2016 23133693 0 SERIES GB...
-
Page 87: Changing The Gearbox Oil Of The Reduction Gear
Location of the bolts on the of the reduction gear No. Designation Filler and inspection plug Drain plug Location of the bolts on the of the reduction gear No. Designation Filler and inspection plug AS 1600 Service manual 28.04.2016 23133693 0 SERIES GB... - Page 88 Place an oil drip tray beneath the reduction gear. The oil drip tray prevents the gearbox oil from penetrating the subsoil. Using an Allen key, unscrew the filler and inspection plug. AS 1600 Service manual 28.04.2016 23133693 0 SERIES GB...
- Page 89 Remove the oil collection container. Dispose of the gearbox oil that has been collected, according to the local statutory provisions, The gearbox oil has been refilled. Done. AS 1600 Service manual 28.04.2016 23133693 0 SERIES GB...
-
Page 90: Topping Up The Hydraulic Fluid
Using a ratchet, screw in the screw plug for topping up the hydraulic fluid until tight. Wipe off any spilled hydraulic fluid with a cloth . Done. AS 1600 Service manual 28.04.2016 23133693 0 SERIES GB... -
Page 91: Refilling With Diesel Fuel
Place a diesel fuel collection container beneath the diesel fuel tank. The diesel fuel collection container prevents the diesel fuel from penetrating the subsoil. AS 1600 Service manual 28.04.2016 23133693 0 SERIES GB... - Page 92 Close the tank cap of the diesel fuel filling nozzle. Wipe off any spilled diesel fuel with a cloth . The diesel fuel has been topped up. Done. AS 1600 Service manual 28.04.2016 23133693 0 SERIES GB...
-
Page 93: Lubrication
Section "Support valve" (Page 96) 3.4.2 Lubrication points - front and rear axles Front and rear axles | 2 kingpin lubrication points per wheel AS 1600 Service manual 28.04.2016 23133693 0 SERIES GB... -
Page 94: Lubrication Points - Interior Of Engine Compartment
Always wear protective gloves! Always work carefully! Carry out the following steps: Lift the lift arm Secure the lift arm support. AS 1600 Service manual 28.04.2016 23133693 0 SERIES GB... - Page 95 Slowly move the lift arm completely to the right and to the left once. While moving, lubricate the turntable chain by means of a grease brush. The turntable chain has been lubricated. AS 1600 Service manual 28.04.2016 23133693 0 SERIES GB...
-
Page 96: Return
Lubrication Service tasks 3.4.5 Return Lubricate fork, return and roller 3.4.6 Support valve Support valve AS 1600 Service manual 28.04.2016 23133693 0 SERIES GB... -
Page 97: Circuit Diagrams
Circuit diagrams Circuit diagrams Circuit diagrams can be obtained from Mecalac on request. AS 1600 Service manual 28.04.2016 23133693 0 SERIES GB... - Page 98 Circuit diagrams AS 1600 Service manual 28.04.2016 23133693 0 SERIES GB...
-
Page 99: Annex
Filter set after 500 operating hours 23133676 Engine oil filter 23110650 Fuel filter 23133679 Air filter insert 4110553A Safety cartridge 4110552A Hydraulic fluid filter 23133680 O-ring 4197692A AS 1600 Service manual 28.04.2016 23133693 0 SERIES GB... - Page 100 Fuel filter 23133679 Fuel pre-filter 23133338 Round sealing ring 23124774 Air filter insert 4110553A Safety cartridge 4110552A Hydraulic fluid filter 23133680 O-ring 4197692A Breather filter 6050206 AS 1600 Service manual 28.04.2016 23133693 0 SERIES GB...
-
Page 101: Consumables
35,8 Litre 23104578 Hydraulic fluid 140,0 Litre 6761056 Lubricating grease cartridge 4117807 Coolant 19,0 Litre 23129554 Gearbox oil/transfer box oil 3,4 Litre 2320066 Deutz error messages AS 1600 Service manual 28.04.2016 23133693 0 SERIES GB... - Page 168 MECALAC Baumaschinen GmbH Am Friedrichsbrunnen 2 D-24782 Büdelsdorf Tel: +49 (0)4331 351 325 Fax: +49 (0)4331 351 491 E-Mail: info@mecalac.com Web: www.mecalac.com...
Need help?
Do you have a question about the AS 1600 and is the answer not in the manual?
Questions and answers