Advertisement
Quick Links
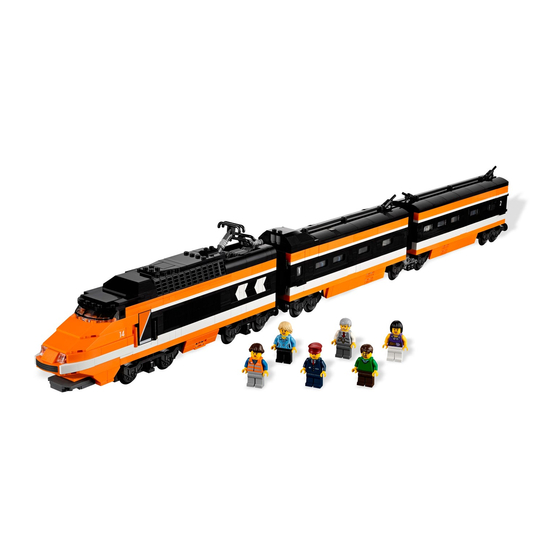
10233 Horizon Express
Welcome to text-based instructions from LEGO for the Blind. Before you start building, here are some
terms we'll be using:
Front: towards you.
Back: away from you.
Up: towards the ceiling.
Down: towards the floor.
Stud: the bump on a Lego brick. Example: A 2x1 brick has two studs on it.
Vertically: going from front to back.
Horizontally: going from left to right.
Upright: pointing up towards the ceiling, and down towards the floor.
Symmetrically: a mirror image. Example: If you place a 2x1 brick with technic connector on the
front wall at the right, connector to the front, and then place another such piece symmetrically on
the back wall, at the right, the technic connector of the second piece should point to the back,
since it will be placed symmetrically.
There are also abbreviations defined at the end of this file.
Fly down the track in the Horizon Express!
Book 1. Engine.
Book 2. passenger car.
Book 3. Cafe/dining Car
Book 1.
Make a minifigure, it's a girl with gray pants, blue shirt, striped, orange-gray vest and long braided hair.
Bag 1.
Put a 28x6 with two holes hor on the table.
Put a F 4x2 ver on the right edge, in the middle, overhanging to
the right.
Bag 2.
Put a 3x2 hor to the left, in the middle.
Put a 6x1 hor in the right back corner.
Repeat symm at the front.
Put a 6x1 ver to the left of the two PPs.
Put a 2x1 hor to the left, at the back edge.
Repeat symm at the front.
Put a 3x2 hor to the left and to the back.
Repeat symm at the back.
Advertisement

Related Manuals for LEGO Horizon Express 10233


Summary of Contents for LEGO Horizon Express 10233
- Page 1 10233 Horizon Express Welcome to text-based instructions from LEGO for the Blind. Before you start building, here are some terms we’ll be using: Front: towards you. Back: away from you. Up: towards the ceiling. Down: towards the floor. Stud: the bump on a Lego brick. Example: A 2x1 brick has two studs on it.
- Page 2 Put a 6x1 hor to the left. Repeat symm at the front. Put a 2x1 slide ver to the left and to the back, slide to the back. Repeat symm at the back. Bag 3. Put a 2x1 ver to the left. Repeat symm at the front.
- Page 3 Put a FS 2x1 with a handle hor to the back, slide to the back. Repeat symm at the back. Put a 1x1 wedge to the right, slide to the front. Repeat symm at the front. Put a F 3x1 hor at the front right corner. Put a F 12x1 hor to the left.
- Page 4 Put a 2x1 hor to the back. Repeat steps 1-4 symm at the back. Bag 8. Put a three-button corner piece on the front right corner and to the right, letter F. Skip eight columns to the left and put a 2x2 there. Put a F 2x1 ver on the left column of the PP.
- Page 5 clasp on the bottom stick and the wedge underneath the wedge already there. Install the second such part to the left, upright, hor, the clasp to the back, the wedge to the left. Repeat step 1 with the rest of the pieces (black). Put two of the new parts (black) to the left, as in steps 3-4.
- Page 6 Put the other symm at the back. Put five ridged 2x1 at the back, and five at the front, on top of other such pieces, as before. Bag 16. Put a F 2x1 hor on the front edge, skipping five columns from the left (overhanging a little to the front).
- Page 7 Repeat symm at the back. Put a F 12x1 hor on the front edge, skipping five columns from the left. Put a F 3x1 hor to the right. Put a F 8x1 hor to the right. Repeat steps 5-7 symm at the back. Lay aside. Bag 19.
- Page 8 clasp to the right, LMA. Number 5. Make the tip of the train part. Put a 2x2 slide hor on the table, the slide to the front. Put a 4x1 receiver piece hor on top and to the sides. Make two stacks of two F 1x1 pieces and put underneath the sides of the PP.
- Page 9 Put a F three-button corner piece on the table, to the left of your part, letter j. Connect it by putting another such piece, letter j, on top of the dot five and on top of the left edge of your main part. Put a S 4x1 curve hor, slide to the left, on the front edge, on the two leftmost columns and to the left.
- Page 10 upside down, the railings to the front, on the third row from the front, on the 5th-9th columns from the left (not counting the receiver). Put another such piece hor to the back, symm. Number 12. Flip right side up. Affix two stickers with the number 14 on them to the front and to the back, in the middle level, at the right end.
- Page 11 Repeat steps 2-3 symm at the back. LMA. Bag 23. Make a part. Put a F 2x2 on the table. Put a F 6x1 hor on top, at the back, overhanging to the sides. Put two F 2x1 hor under the overhanging sides.
- Page 12 Make the other one look like the braille letter f. Install D at hte back right and F at the back left. Make two more of these parts, one like the braille letter H, and one like the braille letter J. Put J in front of D and h in front of F. Number 5.
- Page 13 Put a F 4x1 ver, on the 4th column from the left, in the middle. Put a 2x1 ver to the right, in the middle. Put two minifigure heads to the back and to the front of the PP, at the back and front edges. Put a F 4x1 ver to the right, symm to the other such piece at the left.
- Page 14 Repeat symm at the right. Put a 4x2 ver to the left. Repeat symm at the left. Put a ridged 2x1 hor at the front edge, in the middle, the hor ridges to the front. Repeat symm at the back. Number 4.
- Page 15 Put a Fs 4x1 hor on top of the two left columns, overhanging to the left. Put an 8x6 end piece hor on the table, the slide to the left, and install your part as is on the second row from the back, putting the overhanging left end on the two buttons there.
- Page 16 Put a F 4x2 (white) hor on top, in the middle, overhanging to the sides. Number 2. Put a F 2x2 trapezoid ver to the left of the vertical 4x2, its right column buttons underneath the left overhanging end of the horizontal 4x2.
- Page 17 Mount two grates symm at the back. Put a F 2x1 with a handle hor on the left end of the front row, the handle to the front. Put another such piece the same way to the right. Put two more such pieces symm at the back. Put a 2x2/2x2 corner piece on the left end, the holed side upright and downward at the left and the button side on top of the four left buttons of your part.
- Page 18 to the front. Put two more hammer pieces to the front, symm. Number 4. Put two grates hor in the middle, back to front. Insert a ribbed stick into the side holes, overhanging equally to the sides. LMA. Number 5. Make two identical parts. Put a ski piece on its side, ver, the tips to the left at the front and at the back, on the table.
- Page 19 Number 3. Put a 4x2 hor on top of your part. Put a F 2x2 disk on top, in the middle. Number 4. Put a 2x1 ver on the left edge. Repeat symm at the right. Mount a 2x2/2x1 corner piece from a sep bag hor in the middle of the front edge, the side 2x2 buttons to the front.
- Page 20 Number 1. Put a F 10x4 hor on the table. Put a F 4x1 ver to the right. Number 2. Connect by purring a F 10x2 hor on top, in the middle, starting from the right. Put a FS 4x1 ver on the left edge. Put a F 2x1 hor on the front edge, on the third-fourth column from the right.
- Page 21 Install as is on top of your structure, the rightmost ladder pieces at the front and at the back to the left of the left 4x2 curved pieces at the front and at the back. Lay aside. Bag 36. Make the left end of the roof. Number 1.
- Page 22 part. Book 2. Bag 1. Put a 28x6 with two holes hor on the table. Put a FS 3x1 hor on the right end of the front edge. Repeat symm at the back. Bag 2. Go to the back edge and put a 4x1 hor to the left. Put a 6x1 hor to the left.
- Page 23 Make a part. Stack two F 1x1 pieces. Put them underneath the 2x1 hammer piece. Put a FS 1x1 on top. Put this piece sideways on the table, the curve on the left to the front. Put a 2x1/2x1 corner piece ver, the side buttons to the left, to the right of your part, and connect them.
- Page 24 Put a 1x1 to the right. Put a ridged 2x1 hor to the right, the horizontal ridge to the front. Put a 6x1 hor to the right. Put a 4x1 hor to the right. Bag 8. Put a F 3x1 hor on the left end of the back wall. Put a F 4x1 ver to the right and to the front.
- Page 25 Put a F 2x1 hor to the right. Put a FS 8x1 hor to the right. Put a F 3x1 ver to the right and to the front. Put a F 1x1 to the right, on the back wall. Bag 11. Put a FS 2x1 ver to the left and to the front, touching corners.
- Page 26 Bag 13. Make a part. Put a 1x1 on the table. Put a 1x1 with two side buttons on top, the side buttons to the front and to the back. Put a ridged 2x1 hor on top, overhanging to the left. Put a camcorder piece ver underneath the overhanging end, the ring to the bottom and the side with no buttons to the right.
- Page 27 columns from the left (to the right of the vertical shelf part already there, it should not be attached at the bottom, it should be free-standing. Bag 16. Put a FS 3x1 ver on top of the right end of the previous part and to the back to secure it.
- Page 28 Number 5. Put a F 2x1 on top of a frame. Repeat. Attach both to the left, as before. LMA. Number 6. Make a part. Put a frame hor on the table. Put a FS 1x1 on top, at the right. Put a F 1x1 to the left. Put a 1x1 with a side button on top, on its side, the side button to the top, the cornice at the right, to the top.
- Page 29 the left. Put a F 1x1 to the right. Repeat to make two. Install one by putting it on its back, the pane to the front, the button at the right and attach to your main part from the right. Put the other part the same way and attach from the left.
- Page 30 Number 1. Put a F 6x6 on the table. Put a F 2x2 disk on the right edge, at the middle. Number 2. Put a FS 2x1 ver to the front, at the right edge. Put a F 4x1 hor to the left. Repeat steps 1-2 symm at the back.
- Page 31 Repeat symm at the front. Number 7. Stack two F 3x1 pieces, the bottom one from the same bag and the top one from a sep bag. Repeat to make two. Put one hor, upside down, on the right end of the front edge. Repeat symm at the back.
- Page 32 Put a F 1x1 on top, at the right. Put a F 2x1 hor to the left. Number 7. Put a FS 3x1 hor on top of your part. Install as is at the left front corner, the clasps on the handles.
- Page 33 Install at the back, symm to the one at the front. Lay aside. Bag 22. Make a part. Put a F 8x1 hor on the table. Put a F 6x1 hor to the right. Put a F 8x1 hor to the right. Put a F 3x1 hor on top, at the left.
- Page 34 Put a FS 2x1 ver on the right column of the trapeze. Put a F 2x2 with an underneath tube hor underneath your part, at the left, the tube at the left. Lift this part by its front edge, so that it is upright, hor, the tube at the front at the left, and put this tube from the right over the back connector of your part.
- Page 35 left. Put another such piece symm at the right end. Lift this part by its back edge so that it is upright, hor, the tubes at the front, and connect to your main part by putting its right tube from the left over the back connector of your main part.
- Page 36 connectors from the left into the tubes of your main part. Number 8. Mount a FS 4x2 upright, hor, at the front right end, to the right of the other fS 4x2 already there. Repeat symm at the back. Number 9. Put a F 12x2 hor on top of your part, starting at the left, in the middle.
- Page 37 Flip this part right side up, left to right, and put a FS 6x4 with a tube ver on top. Number 5. Flip this part upside down, left to right, and install on top (of the overturned) structure, hor, the magnets to the right, at the right end, inserting the tube into the hole of the 4th column from the left, in the middle.
- Page 38 the side buttons on top and on the bottom. Repeat symm at the left. Put a F 2x1 with one button on top of a F 2x1. Repeat three times to make four. Mount on ver, the button to the right, to the front of the right half-cylinder.
- Page 39 Put the second into the second compartment from the right. Put two FS 2x2 newspapers upright, hor, in the third compartment, at the back. They are titled "The Lego News, and the headline reads, "The Best Lego Hero Ever!" Put the third suitcase to the front. Lay aside.
- Page 40 Number 5. Put a 1x1 wedge to the left, on the back edge, the slide to the back. Put a F 4x1 ver to the front. Put a S 4x2 curve hor, the slide to the back, to the left and to the back (on the left end of the back edge).
- Page 41 Install the roof as is on top of your structure, to the left of the right end of the roof already there. On the back, there is an ad for Lego Set 10226, (Sopwith Camel.) Book 3. The car. Bag 1.
- Page 42 Put a three-button corner piece at the left corner of the back edge, letter D. Put a 4x1 hor to the right, at the back edge. Put a F 2x2 disk to the front of the two left buttons of the PP. Put a F 2x2 disk to the right.
- Page 43 Repeat. Put a ribbed 2x1 hor to the right, horizontal ribs to the front. Put a 6x1 hor to the right. Put a 4x1 hor to the right. Bag 7. Put a F 8x1 hor on the left end of the back edge. Put a F 8x1 hor to the right.
- Page 44 Put a three-button corner piece on the left end of the back wall and on the overhanging column to the left, letter J. Put a FS 4x1 hor to the right, on the back edge. Put a FS 8x1 hor to the right. Put a F 2x1 hor to the right.
- Page 45 Put a FS 1x1 to the right. Put a 1x1 cylinder to the back. Insert a precious stone piece into the cylinder. Put a bottle piece to the back. Put a 2x1 slide (with the cash register markings on it) hor on the second row from the back, the second-third columns from the left).
- Page 46 Put a F 2x1 ver to the left, at the back. Put a F 2x1 ver to the front. Put a FS 4x1 ver to the left of the left edge, in the middle. Put a FS 4x1 ver to the right. Lay aside. Bag 16.
- Page 47 Repeat. LMA. Number 6. Make a part. Put a 2x1 frame hor on the table, window to the back. Put a FS 1x1 on top, at the right. Put a F 1x1 to the left. Put a 1x1 with a side button on top, on its side, the side button to the top and the toe on the right to the top.
- Page 48 Make a part. Put a F 2x1 on top of a 2x1 frame. Repeat. Lay one on its side, the window to the front, the top F 2x1 to the right, and install from the right. Repeat. LMA. Number 6. Make a part.
- Page 49 Repeat to make two. Install one hor, the lip to the right, underneath your main part, on the left end of the front edge. Repeat symm at the right. Install as is on the left end of your structure, skipping the leftmost column.
- Page 50 Bag 20. Make a part (the left back door). Number 1. Stack two F 3x1 and put hor on the table. Number 2. Put a F 2x1 with a cornice hor on top, at the left, the cornice to the front. Put a F 1x1 with a clasp hor to the right, the clasp overhanging to the right.
- Page 51 Install one hor on the front wall, starting from the left. Install the other symm at the back. Bag 22. Put a 4x1 hor on the left end of the front wall. Put a 6x1 hor to the right. Repeat twice. Put a 2x1 lip hor to the right.
- Page 52 Put a F 2x2 trapeze hor on top, the longest side to the back, the left back corner aligned with the left back corner of the F 3x2. Put a FS 2x1 ver on the right column. Put a 2x2 with an attached underside tube underneath, at the left, the tube to the left.
- Page 53 Put a grate hor to the front. Put a FS 4x2 hor to the right of the two PPS. Flip this part upside down, back to front. Put a F three-button corner piece upside down at the left end, skipping the leftmost column, letter h.
- Page 54 Put a 6x3 saddle piece hor on the table. Put another such piece hor to the back. Connect by putting a F 6x2 ver in the middle. Number 2. Put a F 2x1 hor on top, on the front edge. Skip three rows to the back and put a magnet piece there, the washer board piece curve to the front and the magnets to the back.
- Page 55 Install as is on top of your structure, at the right end, in the middle. Put a minifigure with a cup in his hand on the rightmost seat. Put another minifigure to the left. Put a minifigure of an engineer standing up at the left end at the front, facing to the front.
- Page 56 Put the Battery box in the second car. You could also connect two of this set to make an entire train. On the back is an ad for Lego Town Hall, (set 10224.) Thank you so much for building this set! Visit legofortheblind.com...
-
Page 57: Abbreviation Definitions
Abbreviation definitions: F = flat (Plate.) FS = flat smooth (tile) Slide = slope. Lip = inverted slope. Ribbed stick = Technic axle. Connector = Technic pin. Stubby or Short connector = Technic pin with stud. Long connector = elongated Technic pin. Nail = technic axle with end stop.
Need help?
Do you have a question about the Horizon Express 10233 and is the answer not in the manual?
Questions and answers