Table of Contents
Advertisement
Quick Links
Advertisement
Table of Contents

Related Manuals for Amphenol Telect nrgSMART Controller


Summary of Contents for Amphenol Telect nrgSMART Controller
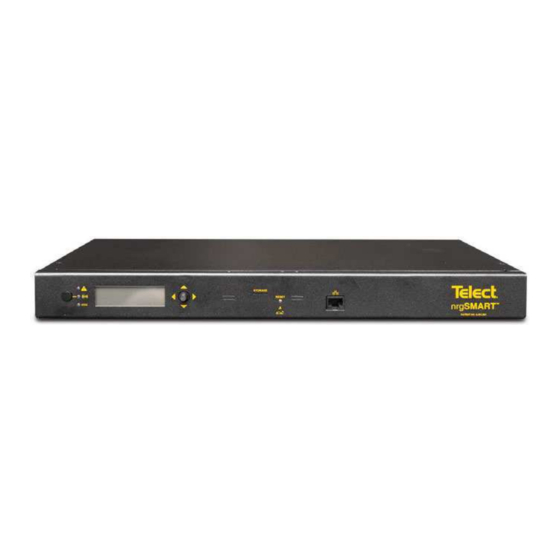
- Page 1 nrgSMART ™ Controller Configuration/User Guide...
-
Page 2: Table Of Contents
5.1 Importing CSV and Adding Equipment ............... 58 6. Supplementary Information ..................67 6.1 MIB Table ........................67 6.2 Fuse/Circuit Breaker Ratings ................67 6.3 Fuses and Circuit Breakers ................... 67 Amphenol Network Solutions nrgSMART Controller All rights reserved. 9.1.2020 v.6 509.926.6000 – amphenol-ns.com... - Page 3 Figure 33 - New Equipment Information Window/Equipment Information Screen ..... 56 Figure 34 - Equipment Power Source Screen ..............65 Figure 35 - Equipment Power Summary Screen .............. 66 Amphenol Network Solutions nrgSMART Controller All rights reserved. 9.1.2020 v.6 509.926.6000 – amphenol-ns.com...
-
Page 4: Figure 1 - Nrgbdfb Connections
Figure 1 - nrgBDFB Connections The nrgBDFB has a built-in controller that has a LAN connection port and nrgNET outputs that connect to 22 external nrgSMART panels and up to eight internal nrgBDP panels. Amphenol Network Solutions nrgSMART Controller All rights reserved. 9.1.2020 v.6... -
Page 5: Figure 2A - Nrgsmart™ Ctrl Integrated Controller Connections
CTRL integrated controllers connect to the local LAN connection port for 1:1 connectivity. When connecting to multiple panels in a 1:N setup, the rear-panel nrgNET connections are used to connect up to 30 external nrgSMART SENS panels. Amphenol Network Solutions nrgSMART Controller All rights reserved. 9.1.2020 v.6... -
Page 6: Figure 2B - Nrgsmart™ Nrgcontrol-Bt Controller Connections
The nrgCONTROL-BT connects to the local LAN connection port and nrgNET outputs connect up to 30 external nrgSMART panels. An nrgCONTROL-BT is required for legacy nrgSMART panels without CTRL integrated controllers or SENS capabilities. Amphenol Network Solutions nrgSMART Controller All rights reserved. 9.1.2020 v.6... -
Page 7: Introduction
LCD http://192.168.1.1 and press return. The controller is now connected and the nrgSMART Configuration web page will open. Figure 4 – Controller Configuration (See Figure 4) Amphenol Network Solutions nrgSMART Controller All rights reserved. 9.1.2020 v.6 509.926.6000 – amphenol-ns.com... -
Page 8: Configuration Wizard Display
Figure 8 - Equipment Tab Equipment Tab: View or modify equipment information in the Equipment Tab: Equipment, Equipment Models, Equipment Information, Equipment Power Source and Equipment Power Summary. Amphenol Network Solutions nrgSMART Controller All rights reserved. 9.1.2020 v.6 509.926.6000 – amphenol-ns.com... -
Page 9: About This Guide
Immediate access to equipment alarms can prevent unnecessary downtime. During an event, the SNMP manage promptly notifies the local technician who can then make repairs or prevent equipment damage Amphenol Network Solutions nrgSMART Controller All rights reserved. 9.1.2020 v.6... -
Page 10: Controller Tab Settings
The Controller Tab Window contains Reboot and Reset Settings buttons. Within the window are screens that allow other controller related settings to be defined or viewed. Figure 9 - Controller Tab Window Amphenol Network Solutions nrgSMART Controller All rights reserved. 9.1.2020 v.6 509.926.6000 – amphenol-ns.com... - Page 11 Resets the controller. Select Reset to Factory Defaults button to reset the controller. NOTE: Reset settings sets the controller back to factory default including the IP address. Amphenol Network Solutions nrgSMART Controller All rights reserved. 9.1.2020 v.6 509.926.6000 – amphenol-ns.com...
-
Page 12: Figure 10 - Controller Information Screen
View more or fewer screen fields. Toggle More info to expand the screen and display additional fields or Less info to hide a portion of the screen. Amphenol Network Solutions nrgSMART Controller All rights reserved. 9.1.2020 v.6 509.926.6000 – amphenol-ns.com... -
Page 13: Figure 11 - Controller Information - More Info/Less Info Screen
The date the Controller Board was manufactured. Date Displays as: mm/dd/yyyy Controller Board Part Number Read Only Text A string of characters that identify the Controller Board as a part consisting of numbers. Amphenol Network Solutions nrgSMART Controller All rights reserved. 9.1.2020 v.6 509.926.6000 – amphenol-ns.com... - Page 14 The firmware version for the Local Area Network in use by the controller. LAN Bootloader Version Read Only Text The bootloader version of the Local Area Network in use by the controller. Amphenol Network Solutions nrgSMART Controller All rights reserved. 9.1.2020 v.6 509.926.6000 – amphenol-ns.com...
-
Page 15: Figure 12 - Save/Restore Configuration Screen
NOTE: Once a file has been added it will appear below the Choose File button. Requires reboot. Amphenol Network Solutions recommends backing up your settings once the controller is configured. This will make sure your settings are saved during future firmware updates or changes... -
Page 16: Figure 13 - Measurement Settings Screen
Fuse Rating and indicates a higher than expected measurement, defined as a warning alarm. Default is: 60% From the Upper Warning drop down menu, select from: 0% to 100% in 5% increments. Amphenol Network Solutions nrgSMART Controller All rights reserved. 9.1.2020 v.6 509.926.6000 – amphenol-ns.com... - Page 17 Fuse Rating and indicates a higher than expected measurement, defined as a critical alarm. Default is: 80% From the Upper Critical drop down menu, select from: 0% to 100% in 5% increments. Amphenol Network Solutions nrgSMART Controller All rights reserved. 9.1.2020 v.6 509.926.6000 – amphenol-ns.com...
-
Page 18: Figure 14 - Lan Configuration Screen
(a total of 15 characters, including periods). Each group can be in the range of: 0 - 255. Amphenol Network Solutions nrgSMART Controller All rights reserved. 9.1.2020 v.6... - Page 19 Ping from LAN Select Button Start the pinging sequence to the remote device. Clear Ping Data Select Button Clears the ping response data Amphenol Network Solutions nrgSMART Controller All rights reserved. 9.1.2020 v.6 509.926.6000 – amphenol-ns.com...
-
Page 20: Figure 15 - Snmp Screen
Enter the IP address that will receive the SNMP Traps message. This field accepts four groups of numbers separated by periods with up to three numbers in each group (a total of 15 characters, including periods). Amphenol Network Solutions nrgSMART Controller All rights reserved. 9.1.2020 v.6... - Page 21 Description Ascending = Numbering Top Down for panels and breaker positions Panel Location Select Drop down Descending = Numbering Bottom up for panels and breaker positions Menu Amphenol Network Solutions nrgSMART Controller All rights reserved. 9.1.2020 v.6 509.926.6000 – amphenol-ns.com...
-
Page 22: Firmware Upgrade Procedure
Step 2: Wait until browser begins download of settings file and equipment list select save for both files. NOTE: This could take a few minutes if the controller has a lot of panels or settings. Amphenol Network Solutions nrgSMART Controller All rights reserved. - Page 23 You will be prompted 2 times one for config file “.NSC” and one for equipment file “.CSV”. Step 4: After settings are saved, click Choose File next to Import Firmware BNC. Step 5: Navigate to where the BNC file is located and select. Amphenol Network Solutions nrgSMART Controller All rights reserved. 9.1.2020 v.6...
- Page 24 Step 7: Firmware update will begin automatically after settings have been saved. Do not navigate away from this page while uploading. Once your browser times out wait 1-2 minutes for the controller to restart and then refresh your browser. Amphenol Network Solutions nrgSMART Controller All rights reserved. 9.1.2020 v.6...
- Page 25 Circled versions for 3.1.1 are shown. See release notes for other versions. If any of the versions do not match: First re-install firmware If they still do not match after re-install contact Amphenol Network Solutions Technical Support at 509.926.6000 Amphenol Network Solutions nrgSMART Controller All rights reserved.
- Page 26 Step 9: After firmware upload has been verified, upload your recently saved configuration file as some settings have been overwritten during the firmware upgrade process. Navigate to recently saved .NCS file. Select OK to initiate upload. Amphenol Network Solutions nrgSMART Controller All rights reserved. 9.1.2020 v.6 509.926.6000 – amphenol-ns.com...
- Page 27 Once your browser times out wait 1-2 minutes for the controller to restart and then refresh your browser. Step 10: Verify your settings. Amphenol Network Solutions nrgSMART Controller All rights reserved. 9.1.2020 v.6 509.926.6000 – amphenol-ns.com...
-
Page 28: Site Tab Settings
NOTE: When a field is updated within the Site Tab, clicking outside of the field saves the information and updates the Saved At time. Field settings are: Never: Data not saved Date/Time: mm/dd/yyyy HH:MM:SS (AM/PM) Amphenol Network Solutions nrgSMART Controller All rights reserved. 9.1.2020 v.6 509.926.6000 – amphenol-ns.com... -
Page 29: Figure 17 - Site Information Screen
The Site Name distinguishes one site from another site. Read Only Input Enter a Site Name. This field accepts up to 40 characters. Valid characters are upper/lowercase letters, numbers, symbols and spaces. Amphenol Network Solutions nrgSMART Controller All rights reserved. 9.1.2020 v.6 509.926.6000 – amphenol-ns.com... - Page 30 This field indicates coordinates in decimal degrees. Enter the GPS coordinates where this site is located. This field accepts up to 40 characters. Use numbers, comma, minus and period symbols. Amphenol Network Solutions nrgSMART Controller All rights reserved. 9.1.2020 v.6...
-
Page 31: Panels Tab Settings
The Panels Tab is comprised of the main window (Panels Tab Window) and screens that contain settings for the panels installed. Within the window are screens that allow other panel related settings to be defined or viewed. Figure 18 - Panels Tab Window Amphenol Network Solutions nrgSMART Controller All rights reserved. 9.1.2020 v.6... - Page 32 Select the Delete button to remove the selected panel and associated information from the Panels Tab. NOTE: When a panel is deleted, the rows below the panel name row (in the Panels Screen) will shift up. Amphenol Network Solutions nrgSMART Controller All rights reserved. 9.1.2020 v.6 509.926.6000 – amphenol-ns.com...
-
Page 33: Figure 19 - Bdfb And Panels Screen
(Load B) for panels in a nrgBDFB. Sort Select Button Allows Panels Screen row order to be modified. Select the Sort button to open the Sort Order Screen and modify row order. Amphenol Network Solutions nrgSMART Controller All rights reserved. 9.1.2020 v.6 509.926.6000 – amphenol-ns.com... -
Page 34: Figure 20 - Sort Order Screen
Panels Screen. Cancel Select Button Leaves the Sort Order Screen without keeping modified settings. Select the Cancel button to return to the Panels Screen without making any changes. Amphenol Network Solutions nrgSMART Controller All rights reserved. 9.1.2020 v.6 509.926.6000 – amphenol-ns.com... -
Page 35: Figure 21 - Panel Information Screen
Identifies the Feed (A or B) Associated fields (total current, voltage and fuse alarm) Voltage Read Only Text A numerical display showing the voltage reading for this Feed. Amphenol Network Solutions nrgSMART Controller All rights reserved. 9.1.2020 v.6 509.926.6000 – amphenol-ns.com... - Page 36 View more or fewer screen fields. More info / Less info Toggle More info to expand the screen to display additional fields or Less info to hide a portion of the screen. Amphenol Network Solutions nrgSMART Controller All rights reserved. 9.1.2020 v.6 509.926.6000 – amphenol-ns.com...
-
Page 37: Figure 22 - Quad System
Indicates the threshold status of the voltage coming into the Feed. Green: Normal operation. Yellow: Warning threshold reached. Orange: Critical threshold reached. Red: A blown fuse or tripped breaker. Gray: Not connected. Amphenol Network Solutions nrgSMART Controller All rights reserved. 9.1.2020 v.6 509.926.6000 – amphenol-ns.com... - Page 38 Select the Panel Name to view or modify from the Panels Screen. To rename a panel, highlight the name and enter a new name. Valid characters are upper/lowercase letters, numbers, symbols and spaces. Amphenol Network Solutions nrgSMART Controller All rights reserved. 9.1.2020 v.6...
-
Page 39: Figure 23 - Dual System
BDFB Only Figure 23 - Dual System: This figure depicts a dual master system showing the difference from the previous figure of one master system and three slaves Amphenol Network Solutions nrgSMART Controller All rights reserved. 9.1.2020 v.6 509.926.6000 – amphenol-ns.com... -
Page 40: Figure 24 - Panel Information More Info/Less Info Screen
Linked Panel Read Only Text If an Amphenol Network Solutions panel is used for the source feed the serial number of that panel will be populated, if not it will display 999999999999. Part Number Read Only... - Page 41 Displays as: mm/dd/yyyy Firmware Version Read Only Text The firmware version of the Auxiliary Card. Bootloader Version Read Only Text The bootloader version of the Auxiliary Card. Amphenol Network Solutions nrgSMART Controller All rights reserved. 9.1.2020 v.6 509.926.6000 – amphenol-ns.com...
-
Page 42: Figure 25 - Circuit Configuration Screen
NOTE: BDFB panels distribute power to monitor the alarm card through the nrgNET bus for controller communication. When applicable, the nrgNET power data displays on the first row in the Circuit Configuration Screen. Amphenol Network Solutions nrgSMART Controller All rights reserved. 9.1.2020 v.6 509.926.6000 – amphenol-ns.com... - Page 43 This light indicates the threshold level of current to the circuit on the row. Green: Normal current. Yellow: Warning threshold reached. Orange: Critical threshold reached. Red: A blown fuse or tripped breaker. Gray: Not connected. Amphenol Network Solutions nrgSMART Controller All rights reserved. 9.1.2020 v.6 509.926.6000 – amphenol-ns.com...
-
Page 44: Figure 26 - Circuit Settings Window
Never: Data not saved Date/Time: mm/dd/yyyy HH:MM:SS (AM/ PM) Back Select Button Return to the Circuit Configuration Screen. Select the Back button to return to the Circuit Configuration Screen. Amphenol Network Solutions nrgSMART Controller All rights reserved. 9.1.2020 v.6 509.926.6000 – amphenol-ns.com... -
Page 45: Figure 27 - Panels Settings Screen
Default is: Enabled From the Panel Alarms drop down menu, select Enabled to allow panel data to display. Select Disabled to prevent panel data displays. Amphenol Network Solutions nrgSMART Controller All rights reserved. 9.1.2020 v.6 509.926.6000 – amphenol-ns.com... -
Page 46: Figure 28 - Feed Alarms Screen
Threshold settings enabled during controller configuration remain operational even when this field is unchecked and the hardware will still display alarm notifications. See the State field (below) for light indicator settings. Amphenol Network Solutions nrgSMART Controller All rights reserved. 9.1.2020 v.6 509.926.6000 – amphenol-ns.com... - Page 47 Global Fuse Rating and indicates a higher than expected measurement, defined as a warning alarm. Default is: 60% From the Upper Warning drop down menu, select from: 0% to 100% in 5% increments. Amphenol Network Solutions nrgSMART Controller All rights reserved. 9.1.2020 v.6 509.926.6000 – amphenol-ns.com...
- Page 48 This light indicates the threshold level of current to the circuit on the row. Green: Normal current. Yellow: Warning threshold reached. Orange: Critical threshold reached. Red: A blown fuse or tripped breaker. Gray: Not connected. Amphenol Network Solutions nrgSMART Controller All rights reserved. 9.1.2020 v.6 509.926.6000 – amphenol-ns.com...
-
Page 49: Figure 29 - Voltage Sensors Screen And Temperature Sensors Screen
The Alarm sensor allows sensor alarms in the following fields. When this field is disabled, no threshold alarms display for the row. Amphenol Network Solutions nrgSMART Controller All rights reserved. 9.1.2020 v.6 509.926.6000 – amphenol-ns.com... - Page 50 Upper Critical is a user defined threshold that indicates a much higher than expected value. Voltage Default is: -57.00 Temperature Default is: -85.00 Enter a range to indicate the Upper Critical sensor threshold. Amphenol Network Solutions nrgSMART Controller All rights reserved. 9.1.2020 v.6 509.926.6000 – amphenol-ns.com...
-
Page 51: Figure 30 - Current Sensors Screen
Indicates if a sensor module is in the location indicated in the ID column. Default is: No When the sensor module has been added, this field defaults to Yes. Amphenol Network Solutions nrgSMART Controller All rights reserved. 9.1.2020 v.6 509.926.6000 – amphenol-ns.com... - Page 52 See Global Threshold Settings (Lower Critical, Lower Warning, Current Value, Upper Warning and Upper Critical) and the Alarm (light) fields below for indicator settings. Amphenol Network Solutions nrgSMART Controller All rights reserved. 9.1.2020 v.6 509.926.6000 – amphenol-ns.com...
- Page 53 From the Lower Critical drop down menu select a percentage of the fuse rating to indicate the lower critical sensor threshold. Select from 0% to 100% in 5% increments. Amphenol Network Solutions nrgSMART Controller All rights reserved. 9.1.2020 v.6 509.926.6000 – amphenol-ns.com...
- Page 54 This light indicates the breaker and threshold alarm status for the individual circuit. Green: Normal current. Yellow: Warning threshold reached. Orange: Critical threshold reached. Red: A blown fuse or tripped breaker. Gray: Not connected. Amphenol Network Solutions nrgSMART Controller All rights reserved. 9.1.2020 v.6 509.926.6000 – amphenol-ns.com...
-
Page 55: Equipment Tab Settings
The Equipment Tab is comprised of the main window (Equipment Tab Window) and screens that display information pertaining to associated equipment or assign equipment input labels to specific PDU circuit locations. Figure 31 - Equipment Tab Window Amphenol Network Solutions nrgSMART Controller All rights reserved. 9.1.2020 v.6... - Page 56 Equipment Name row in the Equipment Screen shift up. NOTE: This button deletes information from the Equipment Tab, not the equipment model. Amphenol Network Solutions nrgSMART Controller All rights reserved. 9.1.2020 v.6 509.926.6000 – amphenol-ns.com...
-
Page 57: Figure 32 - Equipment Models, Add Equipment And Equipment
Highlight a name to select equipment to view and monitor. When selected, the Equipment Name becomes bold and associated fields populate the screens in the Equipment Tab. Amphenol Network Solutions nrgSMART Controller All rights reserved. 9.1.2020 v.6 509.926.6000 – amphenol-ns.com... -
Page 58: Figure 33 - New Equipment Information Window/Equipment Information Screen
The Serial Number shown on the equipment. Enter the Serial Number when adding new equipment, or view or modify existing information. Valid characters are upper/lowercase letters, numbers, symbols and spaces. Amphenol Network Solutions nrgSMART Controller All rights reserved. 9.1.2020 v.6 509.926.6000 – amphenol-ns.com... - Page 59 The name of the equipment manufacturer. Manufacturer Part Number Read Only Text The part number assigned to the equipment by the manufacturer. Type Read Only Text Identifies the kind of equipment. Amphenol Network Solutions nrgSMART Controller All rights reserved. 9.1.2020 v.6 509.926.6000 – amphenol-ns.com...
-
Page 60: Importing Csv And Adding Equipment
5.1 Importing CSV and Adding Equipment No models available to add equipment. Select browse to import CSV file with equipment models you would like to add. Amphenol Network Solutions nrgSMART Controller All rights reserved. 9.1.2020 v.6 509.926.6000 – amphenol-ns.com... - Page 61 Select the CSV file you would like to import. This screen shows that you have imported your CSV file correctly and you have 13 models available. Select “Add Equipment” to install equipment attached to nrgSMART panels. Amphenol Network Solutions nrgSMART Controller All rights reserved. 9.1.2020 v.6...
- Page 62 Enter the Serial Number when adding new equipment, or view or modify existing information. Valid characters are upper/lowercase letters, numbers, symbols and spaces. Data Entered Service Input Text Insert date of when equipment was placed into service. Amphenol Network Solutions nrgSMART Controller All rights reserved. 9.1.2020 v.6 509.926.6000 – amphenol-ns.com...
- Page 63 Read Only Text Identifies the kind of equipment. Once New Equipment Information form has been filled out, select “Create” to complete. All fields in red must be completed. Amphenol Network Solutions nrgSMART Controller All rights reserved. 9.1.2020 v.6 509.926.6000 – amphenol-ns.com...
- Page 64 This screen shows newly added equipment and the populated fields associated to that hardware. Amphenol Network Solutions nrgSMART Controller All rights reserved. 9.1.2020 v.6 509.926.6000 – amphenol-ns.com...
- Page 65 This screen shows several pieces of equipment that have been added. Amphenol Network Solutions nrgSMART Controller All rights reserved. 9.1.2020 v.6 509.926.6000 – amphenol-ns.com...
- Page 66 H. Format String (10 Characters): Format of power supplies naming convention by Manufacturer (PS1 or PSM0 etc.) I. Label start index: Starting position of power supply, either 0 or 1 Definitions of CSV fields above. Amphenol Network Solutions nrgSMART Controller All rights reserved. 9.1.2020 v.6 509.926.6000 – amphenol-ns.com...
-
Page 67: Figure 34 - Equipment Power Source Screen
Indicates the overall status for the selected row. Green: Normal operation. Yellow: Warning threshold reached. Orange: Critical threshold reached. Red: A blown fuse or tripped breaker. Gray: Not connected. Amphenol Network Solutions nrgSMART Controller All rights reserved. 9.1.2020 v.6 509.926.6000 – amphenol-ns.com... - Page 68 The button selected at the top of the screen determines which unit displays. % Fuse/CB Rating (column) Read Only Text Displays the percentage of the fuse/circuit breaker in the row depending on the rating for that device. Amphenol Network Solutions nrgSMART Controller All rights reserved. 9.1.2020 v.6 509.926.6000 – amphenol-ns.com...
-
Page 69: Supplementary Information
Triple Pole 200A 134636 116669 225A 134637 115999 250A 134638 116670 117402 116671 116672 116673 118160 118161 118162 118163 100A 118159 600CBXX faceplate 600CBXX-CBK nrgXX faceplate 139875-2 Amphenol Network Solutions nrgSMART Controller All rights reserved. 9.1.2020 v.6 509.926.6000 – amphenol-ns.com... - Page 70 148038 147605 150A 148039 147606 175A 148040 147607 Triple-Pole 200A 148041 147608 225A 148042 147609 250A 148043 147610 147611 147612 147613 147614 147615 100A 147616 Faceplate 139875-2 Amphenol Network Solutions nrgSMART Controller All rights reserved. 9.1.2020 v.6 509.926.6000 – amphenol-ns.com...
- Page 71 Circuit Breaker: 40A, Slimline, STD Delay 149717 Circuit Breaker: 45A, Slimline, STD Delay 149718 Circuit Breaker: 50A, Slimline, STD Delay 149719 Circuit Breaker: 60A, Slimline, STD Delay Amphenol Network Solutions nrgSMART Controller All rights reserved. 9.1.2020 v.6 509.926.6000 – amphenol-ns.com...
- Page 72 TPA Fuse Part Number 118675 124818 118676 124819 118673 124820 118438 124821 118439 125244 118440 122734 118441 122738 118442 122739 Dummy KLM Fuse 110852 Replacement TPA Holder 146010 Amphenol Network Solutions nrgSMART Controller All rights reserved. 9.1.2020 v.6 509.926.6000 – amphenol-ns.com...
- Page 73 GMT Fuses For additional dummy fuses, order part number 132748. For GMT safety (splash/splatter) covers, order part number 116915 for GMT fuses up to 15A. Amphenol Network Solutions recommends using only UL-recognized supplementary protectors. GMT Fuse Part Number 0.18A Yellow (YEL) 130781 0.25A Violet (VIO)
Need help?
Do you have a question about the Telect nrgSMART Controller and is the answer not in the manual?
Questions and answers