Gaggenau BMP250 User Manual And Installation Instructiions
Hide thumbs
Also See for BMP250:
- Installation instructions manual (17 pages) ,
- Instruction manual (44 pages) ,
- Instruction manual (40 pages)

Related Manuals for Gaggenau BMP250


Summary of Contents for Gaggenau BMP250
- Page 1 Gaggenau en User manual and installation instructions BMP250, BMP251 Microwave Oven...
-
Page 2: Table Of Contents
en Safety 1.2 Intended use Table of contents Only a licensed professional may connect ap- pliances without plugs. Damage caused by in- correct connection is not covered under the INFORMATION FOR USE warranty. Safety .............. 2 The appliance can only be used safely if it is correctly installed according to the safety in- Preventing material damage ........ 5 structions. - Page 3 Safety en ▶ If smoke is emitted, the appliance must be ▶ Keep children at a safe distance. switched off or the plug must be pulled out If there is water in the cooking compartment and the door must be held closed in order when it is hot, this may create hot steam.
- Page 4 en Safety ▶ Never heat liquids or other food in contain- WARNING ‒ Risk of suffocation! ers that have been tightly sealed. Children may put packaging material over their heads or wrap themselves up in it and WARNING ‒ Risk of burns! suffocate. Foods with peel or skin may burst or explode ▶...
-
Page 5: Preventing Material Damage
Preventing material damage en ▶ Never use metal containers during mi- WARNING ‒ Risk of scalding! crowave-only operation. There is a possibility of delayed boiling when ▶ Only use microwave-safe cookware or use a liquid is heated. This means that the liquid the microwave in combination with a type reaches the boiling temperature without the of heating. -
Page 6: Environmental Protection And Saving Energy
en Environmental protection and saving energy Do not switch on the microwave unless there is food ▶ 2.2 Microwave inside. The only exception to this rule is when per- Follow these instructions when using the microwave. forming a short cookware test. ATTENTION! Metal touching the wall of the cooking compartment will cause sparks, which may damage the appliance or the inner door pane. -
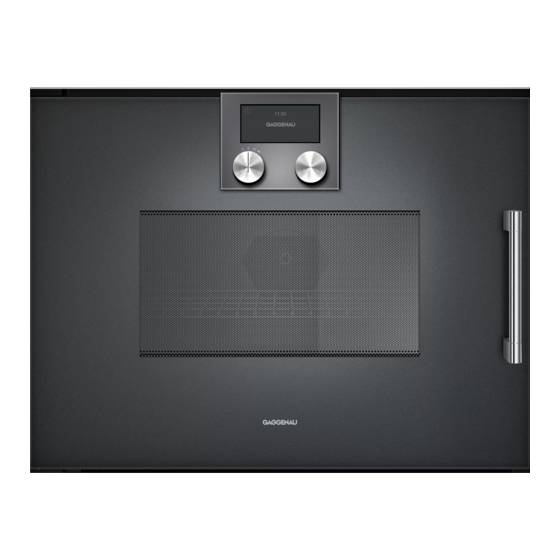
Page 7: Familiarising Yourself With Your Appliance
Familiarising yourself with your appliance en 4 Familiarising yourself with your appliance 4.1 Control panel You can use the control panel to configure all functions of your appliance and to obtain information about the operating status. Note: On certain models, specific details such as col- our and shape may differ from those pictured. - Page 8 en Familiarising yourself with your appliance 4.2 Additional Information Symbol Function Record menu Press to call up additional information. Before starting, you receive information, e.g. about the Enter a name type of heating. You can therefore check whether the current setting is suitable for the dish. Delete letters During operation, you receive information, e.g.
-
Page 9: Accessories
Different things can be displayed in standby mode. The GAGGENAU logo and the time are preset. The brightness of the display depends on the vertical viewing angle. You can change the display and the brightness at any time in the basic settings. -
Page 10: Before Using For The First Time
en Before using for the first time 6 Before using for the first time Configure the settings for initial start-up. Clean the ap- Use the rotary selector to set the month. pliance and accessories. to switch to the year setting Use the rotary selector to set the year. Press to confirm. -
Page 11: Microwave
Microwave en 8 Microwave You can use the microwave to cook, heat up, bake or 8.2 Microwave power settings defrost food very quickly. The microwave can be used This is where you can find an overview of the different on its own or in combination with a type of heating. microwave output settings and when to use them. -
Page 12: Grill
en Grill 9.1 Oven levels In oven mode, you can set different types of heating. Symbol Type of heating Temperature in °C Hot air ¡ Leave the yeast dough to prove. ¡ Defrost cream cakes. Hot air 100-250 Bake cakes, small baked goods, and pizza on the glass tray. -
Page 13: Microcombi
MicroCombi en to select and set the "Cooking time" Interrupting the operation ‒ function. To interrupt the operation, press . to select and set the "Cooking time end" ‒ Press to resume operation. function. Cancelling the operation Press to start. To stop the operation and delete the settings, turn ▶... -
Page 14: Automatic Programmes
en Automatic programmes to select "Cooking time" . 12.2 Cooking time end Use the rotary selector to set the required cooking In oven mode, you can delay the cooking time end to a time. later time. This function is not available in combination Press to confirm. - Page 15 Automatic programmes en ¡ It is not possible to set weights outside the weight range. 13.2 Resting time ¡ With many dishes, a signal tone sounds after a cer- Some dishes require a resting time in the cooking com- tain time. Turn or stir the food. partment after the programme has ended.
- Page 16 en Automatic programmes Press to confirm. 13.4 Adjusting the programme a The display switches to the programme and the If the cooking result does not meet your expectations, cooking time changes. you can adjust the programme. Press to confirm. to select the individual settings. Press to start.
-
Page 17: Individual Recipes
Individual recipes en Dish Suitable food Weight range Cookware or accessories, shelf in kg height Fresh chicken portions Chicken thigh, half chicken 0.40 – 1.60 Covered cookware Cooking compartment floor Meat loaf Meat loaf, approx. 8 cm deep 0.80 – 1.50 Uncovered cookware Cooking compartment floor Leg of lamb Leg of lamb or boneless... -
Page 18: Timer Functions
en Timer functions Press to delete a letter. 14.5 Changing a recipe Select one of the following options: You can change the settings of a recorded or pro- Press to save. ‒ grammed recipe. To cancel without saving, press . ‒ Use the function selector to select any type of heat- ing. -
Page 19: Childproof Lock
Childproof lock en 15.3 Stopwatch 15.4 Long-term timer The stopwatch only runs if you have not set any other With this function, your appliance with the Hot air type function. The stopwatch counts upwards from of heating retains a temperature of 85 °C. 0 seconds up to 90 minutes. You can keep food warm for up to 74 hours without You can use the pause function to pause the stop- having to switch the appliance on or off. - Page 20 – Date + GAGGENAU logo On: You can set multiple displays. Use – Clock + date confirm "On" and use the rotary selector to – Clock + date + GAGGENAU set the required display. logo ¡ Off Display ¡ Reduced Reduced: After a short time, the display ¡...
-
Page 21: Cleaning Aid
Cleaning aid en Symbol Basic setting Settings Explanation Temperature format ¡ °C Set the temperature format. ¡ °F Language See selection on the appliance Set the language for the text display. Note: When you change the language, the system restarts. This process takes a few seconds. - Page 22 en Cleaning and servicing For stainless steel appliance fronts, apply a thin Salt contained in new sponge cloths may damage sur- layer of the stainless steel cleaning product with a faces. soft cloth. Wash new sponge cloths thoroughly before use. ▶ You can obtain the stainless steel cleaning products You can find out which cleaning products are suitable from the after-sales service or the online shop.
- Page 23 Cleaning and servicing en Clean the door panels with a soft dish cloth and Requirement: The cooking compartment has cooled glass cleaner. down. Note: Shadows on the door panels, which look like Brownish or whitish residues can be removed with ▶ streaks, are caused by reflections made by the in- water and a soft sponge.
-
Page 24: Troubleshooting
en Troubleshooting Undo the screw from the bulb cover on the left- Insert the new halogen bulb. hand, outer side wall and remove the bulb cover. Screw the lamp cover in place. Pull out the halogen bulb. Install the appliance. Carefully slide in the appliance. ‒... -
Page 25: Disposal
Disposal en Fault Cause and troubleshooting The appliance is not working. Malfunction Switch off the fuse in the fuse box. Switch the fuse on after appox. 10 seconds. If the malfunction occurs again, call customer service. Appliance does not start. Appliance door not fully closed. Close appliance door. -
Page 26: Customer Service
en Customer Service 22 Customer Service Detailed information on the warranty period and terms 22.1 Product number (E-Nr.) and production of warranty in your country is available from our after- number (FD) sales service, your retailer or on our website. You can find the product number (E-Nr.) and the pro- If you contact Customer Service, you will require the duction number (FD) on the appliance's rating plate. - Page 27 How it works en ¡ Delicate parts such as the legs and wings of chicken or fatty outer layers of roasts can be covered with small pieces of aluminium foil. The foil must not touch the walls of the appliance. Remove the foil half-way through the defrosting time.
- Page 28 en How it works Food Weight Microwave output Duration setting 5, 6 Cakes, plain, e.g. sponge cake 750 g 1. 180 W 1. 3 mins 2. 90 W 2. 10 – 15 mins Cakes, moist, e.g. fruit flan, cheesecake 500 g 1. 180 W 1. 5 mins 2. 90 W 2.
- Page 29 How it works en Food Weight Microwave output Duration setting Fish, e.g. fillet steaks 400 g 600 W 10 – 15 mins Fish, e.g. fillet steaks 800 g 600 W 20 – 25 mins Side dishes, e.g. rice, pasta 250 g 600 W 2 – 5 mins Side dishes, e.g. rice, pasta 500 g 600 W 8 –...
- Page 30 en How it works Food Weight Microwave output Duration setting Vegetables, 1 portion 150 g 600 W 2 – 3 mins Vegetables, 2 portions 300 g 600 W 3 – 5 mins Place a spoon in the glass. Do not overheat alcoholic drinks. Check the food occasionally. Heat up baby food without the teat or lid. Always shake the food well after heating.
- Page 31 How it works en Only stir for the first time after 3 minutes. Then stir Issue again every minute until it reaches the required con- You do not want small Leave a minimum clear- sistency. baked items to stick to ance of 2 cm around The cooking time depends on the temperature of each other when baking.
- Page 32 en How it works Food Cookware Posi- Type of Temperature Duration tion crowave heating output setting Plaited loaf with 500 g flour Glass tray 160 – 170 °C 30 – 40 mins Stollen with 500 g flour Glass tray 170 – 180 °C 60 – 70 mins Pizza Glass tray 200 –...
- Page 33 How it works en Issue Issue The cake will not come ¡ Allow the cake to cool You want to prepare joints ¡ Score the rind in a out of the tin when turned for 5 - 10 minutes after with the rind on. crosswise pattern.
- Page 34 en How it works ¡ As far as possible, use pieces of food that are of ¡ Dark meat, e.g. beef, browns more quickly than equal thickness. Steaks should be at least 2 to lighter-coloured meat such as veal or pork. When 3 cm thick.
- Page 35 How it works en Food Weight Cookware Position Type of Grill setting Duration heating Neck steaks, 2 – Approx. 120 g Wire rack 1st side: Approx. 15 3 cm thick, 2 – each – 20 mins 3 pcs Glass pan 2nd side: Approx. 10 – 15 mins Grilling sausages, Approx.
- Page 36 en How it works ¡ Leave bakes and gratins to cook in the switched-off oven for a further 5 minutes. Food Weight Cookware Posi- Type of Temperat- Duration tion crowave heating output setting Bake, sweet, Uncovered cookware 0 180 W 130 – 25 – 35 e.g. quark bake with prox. 1.5 kg 150 °C...
-
Page 37: Installation Instructions
Installation instructions en Cooking with the microwave and grill Food Microwave output Duration Information setting/type of heat- Potato gratin 360 W + grill set- 30 – 35 mins Place the 22 cm diameter round Pyrex dish ting 1 on the cooking compartment floor. Cakes 180 W + 190 –... - Page 38 en Installation instructions ¡ Do not install the appliance behind a decor- 24.3 Appliance dimensions ative door or the door of a kitchen unit. You will find the dimensions of the appliance here There is a risk of overheating. ¡ Cut-out work on the units should be carried out before installing the appliance.
- Page 39 Installation instructions en An isolating switch must be integrated into the perman- 24.9 Corner installation ent electrical installation according to the installation Observe the installation dimensions and the safety regulations. clearances when installing in a corner. Identify the phase and neutral conductors in the socket.
- Page 40 en Installation instructions Screw the appliance tightly onto the unit. Remove any packaging material and adhesive film from the cooking compartment and the door. 24.11 Removing the appliance Disconnect the appliance from the power supply. Undo the fastening screws. Lift the appliance slightly and pull it out completely.
- Page 44 BSH Hausgeräte GmbH Carl-Wery-Straße 34 81739 München, GERMANY www.gaggenau.com...
Need help?
Do you have a question about the BMP250 and is the answer not in the manual?
Questions and answers