Advertisement
Quick Links
Advertisement

Related Manuals for Vulu 03

Summary of Contents for Vulu 03
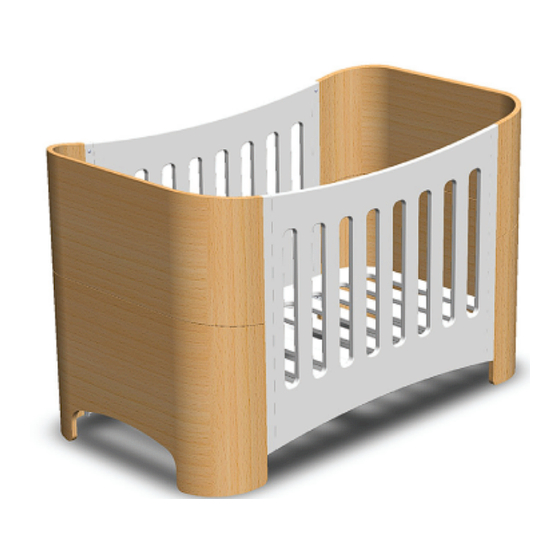
- Page 1 COT, BASSINETTE & BED SYSTEM VULU 03 INSTRUCTION & ASSEMBLY MANUAL...
- Page 2 Congratulations on purchasing your new vulu cot & bassinette system. In under an hour you should be able to assemble your new cot and it will be ready to meet your beautiful child :)
- Page 3 BASSINET WARNING Safety guidelines and instructions must always be followed before making use of this product, please retain these instructions for future reference. This Bassinet has been designed for a child up to 9kg or until the child can sit up unassisted. RECOMMENDED MATTRESS SIZE: This bassinet has been manufactured for use with a mattress which measures 500mm wide by 710mm long and 50mm in thickness.
- Page 4 WARNING Safety guidelines and instructions must always be followed before making use of this product, please retain these instructions for future reference. This product complies with product standard: AS/NZS 2172:2010 Cots for household use - Safety Requirements This cot has been designed for a child up to 25kg Do not leave your child unattended when the dropside is in the lower position RECOMMENDED MATTRESS SIZE: This cot has been manufactured for use with a mattress which measure 710mm wide by 1310mm long and 100mm in thickness.
-
Page 5: Care And Maintenance
CARE AND MAINTENANCE ALL VULU PRODUCTS HAVE ONE YEAR WARRANTY FROM THE DATE OF PURCHASE. IT IS RECOMMENDED TO REGULARLY INSPECT AND MAINTAIN MOVEMENT OF LOCKING DEVICES AND SECURITY OF ESSENTIAL COMPONENTS. REGULARLY CHECK ALL PARTS FOR WEAR AND TEAR. -
Page 6: Warranty Against Defects
WARRANTY AGAINST DEFECTS ALL LOVE N CARE/VULU PRODUCTS ARE GUARANTEED FOR TWELVE MONTHS FROM THE DATE OF PURCHASE. OUR GOODS COME WITH GUARANTEES THAT CANNOT BE EXCLUDED UNDER THE AUSTRALIAN CONSUMER LAW. YOU ARE ENTITLED TO A REPLACEMENT OR REFUND FOR A MAJOR FAILURE AND FOR COMPENSATION FOR ANY OTHER REASONABLY FORSEEABLE LOSS OR DAMAGE. - Page 7 What would you like to build? Bassinette Junior Bed PAGES 1-8 PAGES 9-18 PAGES 19-24 Bassinet Assembly Cot - Junior Bed Bassinet - Cot Assembly High Pos. (9-16) Cot Assembly Low Pos. (17-18)
- Page 8 INSTRUCTION & ASSEMBLY MANUAL Cot Base Bassinette Base Bottom Ends Bassinette (x2) Ends Rails (x2) Cot Low Position Rail Top Ends (x2) Bassinet Base Rail (x2) Side Rails (x2) (x4) Cot High Position Adapter for High Position Left set (x2) Right Set (x2) Toddler Bed Rails Cot Sides...
- Page 9 Screw (x8) Please check you have M4x16 Socket Head (x16) all assembly items M6x16 Socket Head (x12) M6x30 S ocket Head (x6) M4x40 M4x50 Screw Head (x4) M6 Bolt Vulu Cap end Allen Key Allen Key Allen Key (x16) (x8)
- Page 10 Bassinette Assembly Vulu Instruction Manual Step One Step Two Place the top shelf on the bottom shelf...
- Page 11 Bassinette Assembly Step Three Vulu Instruction Manual Place two of the main rails on the edges of the shells.
- Page 12 Bassinette Assembly Step Four Vulu Instruction Manual Repeat this step on the other side...
- Page 13 Bassinette Assembly Tools used in this step: Step Five Attach the main frame to the shells using the Allen Key (C) to attach the 8 Screws (F) on the shell. Repeat for both sides.
- Page 14 Tools used in this step: Bassinette Assembly Step Six Vulu Instruction Manual Attach the vulu cap (D) on the bottom of the main rail. You will need to use the Allen Key (B) to insert the M6 x 10 Screws (E).
- Page 15 Place the four vulu caps (D) on the top of the main rail ends. Use the Allen Key (B) with 4 screws (E) and tighten up the vulu caps.
- Page 16 Tools used in this step: Bassinette Assembly Step Eight Place the bassinet metal frame on the bottom of the main frame (N) (Between the bassinet ends on the main frame. Use Allen Key (A) to attach four (G) screws on each end then tighten.
- Page 17 Tools used in this step: Bassinette Assembly Step Nine Place the bassinet base on the top of the assembled bassinet frame. Make sure that the holes line up. Use the allen key (A) to tighten the two (H) screws.
- Page 18 Unscrew the 4 (E) Screws from the top of the main rail with the Allen Key (B). Unscrew by turning the Allen Key (B) counter clockwise. Pull the vulu caps (D) from the top of the main rails and take the screws out of the holes.
- Page 19 Tools used in this step: Bassinette to Cot Assembly Vulu Instruction Manual Step Three Step Four Remove the bassinet from the Lift the bassinet sides from the bassinet sides. bassinet frame use allen key (A) to remove the 2 (H) screws.
- Page 20 Tools used in this step: Bassinette to Cot Assembly Vulu Instruction Manual Step Five Step Six Remove the 4 (G) screws from each side You can remove the bassinet metal of the bassinet frame by using the frames from each side.
- Page 21 Cot Assembly Base In High Position Vulu Instruction Manual Follow steps 1 - 6 on how to assemble bassinet if you have not assembled the cot as a bassinet. Convert Low Rail to High Rail Step One Step Two Do not assemble the...
- Page 22 Tools used in this step: Cot Assembly Base In High Position Vulu Instruction Manual Step Three Step Four Insert the assembled high base Place the Bolts on the nuts and frame on the section between the tighten with a spanner.
- Page 23 Tools used in this step: Cot Assembly Step Five Step Six Use allen key (A) to insert (G) screws. Tighten. Repeat for both sides.
- Page 24 Tools used in this step: Cot Assembly Step Seven Step Eight Place the 4 vulu caps (D) on the top of Repeat Step 5. the 4 main end rails.
- Page 25 Tools used in this step: Cot Assembly Step Nine Step 10 Place the Base onto the top of the high frame. Insert 4 (H) screws into the base. Use the Allen Key (B) with 4 screws (E) Tighten with to attach the caps to the main frame Allen Key (A) then tighten.
- Page 26 Cot Positioning Assembly Tools used in this step: Adjust the base from high pos- low pos Vulu Instruction Manual Step Two Step One Remove the 4 (H) screws with Use the allen key (A) to remove the 4 (G) screws Allen key (A) from the cot base.
- Page 27 Tools used in this step: Cot Positioning Assembly Vulu Instruction Manual Step Three Step Four Place the cot base (J) on the top of the low frame position. Place the 4 (H) screws in the positions Insert the cot frame on the section between the located on the top of the base main rails and cot sides.
- Page 28 Unscrew the 4 (H) screws from the base of the cot using Allen Key (A). Remove the 4 vulu caps (D) from the tops Remove the base from the frame. of the main rails by using Allen Key (B) to remove the 4 (E) screws which are inserted into them.
- Page 29 Tools used in this step: Cot to Toddler Bed Assembly Vulu Instruction Manual Step Three Step Four Slide the cot sides from the main Remove the 8 (F) screws using the rails. Repeat on the other side. Allen key (C).
- Page 30 Tools used in this step: Cot to Toddler Bed Assembly Vulu Instruction Manual Step Five Step Six Remove the two (F) screws on each of the upper shelves by using the allen key (C). Remove the top shells from the bottom shells.
- Page 31 Tools used in this step: Cot to Toddler Bed Assembly Vulu Instruction Manual Step Seven Step Eight Remove the two (F) screws on each of the bottom shells by using the allen key (C). Remove the frames from the shells.
- Page 32 Tools used in this step: Cot to Toddler Bed Assembly Vulu Instruction Manual Step Nine Step Ten Insert screw (I) into the holes of the Place the toddler sides between toddler sides into the holes of the shells and the upper holes on the shell sides.
Need help?
Do you have a question about the 03 and is the answer not in the manual?
Questions and answers