Table of Contents
Advertisement
Advertisement
Table of Contents

Summary of Contents for Kaden KJR-120N
- Page 1 Wired Controller Manual KJR-120N...
- Page 2 2 | Kaden Wired Controller Manual...
-
Page 3: Table Of Contents
Delete the time scale in one day Wi-Fi operation setup 12. Fault alarms Important note Read this manual carefully before installing or operating your new air conditioning unit. Make sure to save this manual for future reference. Kaden Wired Controller Manual | 3... -
Page 4: Safety Precautions
• The specified cables shall be used in the wiring. No external force should be applied to the terminal. • This may result in damaged wiring and/or overheating which can create a fire hazard. 4 | Kaden Wired Controller Manual... -
Page 5: Accessories
4. Upon completing the wired controller connection, do not use a mega to measure the insulation as this may cause damage to the controller. 5. The connective twin shielded signal cable of the wired controller should not be longer than 20 meters. Kaden Wired Controller Manual | 5... -
Page 6: Installation Method
3. Wiring figure 2-core shielding signal wire Mainboard HA & HB Connect the terminals on the wired controller (HA ,HB), and the terminals of the indoor unit (HA ,HB). (HA and HB are not polarity sensitive). 6 | Kaden Wired Controller Manual... -
Page 7: Remove The Upper Part Of The Wired Controller
Please set the time during first operation. Batteries in the wired controller can fail during a power failure. When power is restored, if the time displayed is not correct, it means the battery is dead and requires replacing. Kaden Wired Controller Manual | 7... -
Page 8: Wiring
HA HB B. Shielded wiring Box wiring Wiring through the wall Switch 60mm Wiring hole Wall hole and wiring hole diameter of wall hole: ø20mm Putty Trap Putty Putty Trap Trap 8 | Kaden Wired Controller Manual... -
Page 9: Reattach The Upper Part Of The Wired Controller
Your wired controller may be slightly different. In this case the actual shape shall prevail. 4. Specification Input voltage Ambient temperature Ambient humidity DC 5V/DC 12V -5 – 43ºC RH40% – RH90% Kaden Wired Controller Manual | 9... -
Page 10: Features And Functions
Mode: Auto – Cool – Dry – Heat – Fan • Fan speed: Auto/Low/Med/High • Timer ON/OFF • Temp setting • Weekly timer • Follow me • Child lock • LCD display • Clock • Turbo mode • Swing (on some models) 10 | Kaden Wired Controller Manual... -
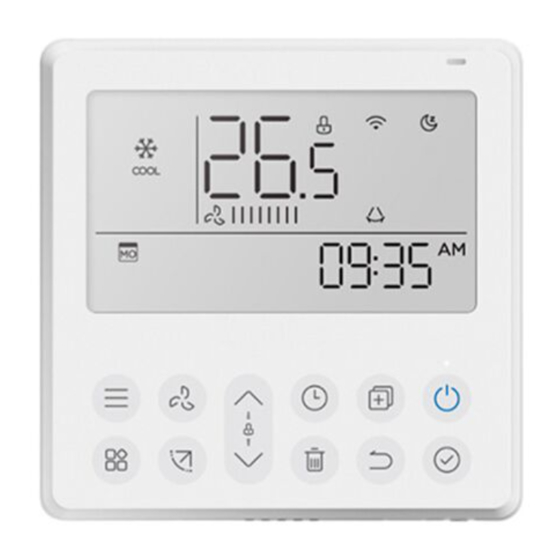
Page 11: Display Screen
Active clean display Intelligent eye display Electric heating display FAN SPEED display HORIZONTAL SWING Displays selected fan speeds: display Main unit and secondary unit display VERTICAL SWING display Secondary unit display HIGH AUTO Kaden Wired Controller Manual | 11... -
Page 12: Buttons
7. Buttons 1. Fan-speed 7. Copy 2. Mode 8. Power 3. Function 9. Confirm 4. Swing 10. Back 5. Adjust 11. Day off/delay 6. Timer 12 | Kaden Wired Controller Manual... -
Page 13: Operation
12h and 24h scale. Fan speed setting Press the FAN SPEED button to set the fan speed. (This button does not work when in Auto or Dry mode.) SPEED Kaden Wired Controller Manual | 13... -
Page 14: Room Temperature Sensor Selection
Press the buttons again for 3 seconds to deactivate the child lock function. When the swing function is activated the “ ” icon will appear. When the child lock function is activated, the icon mark appears. 14 | Kaden Wired Controller Manual... -
Page 15: Timer Functions
3. Press the button “^” or “v” to set the time. After the time is set, the timer will start or stop automatically. Example: Off timer set at 6:00PM 4. Press the CONFIRM button again to finish. CONFIRM Kaden Wired Controller Manual | 15... -
Page 16: Weekly Timer
Example: Tuesday time scale 1 Up to 4 timer settings can be saved for each day of the week. It is convenient if the WEEKLY TIMER is set according to the user’s life style. 16 | Kaden Wired Controller Manual... -
Page 17: Weekly Timer Operation
2. When you press the POWER button for 2 seconds, the air conditioner will turn off completely. BACK Note • To cancel: Follow the same procedures as those for setup. • The DAY OFF setting is cancelled automatically after the set day has passed. Kaden Wired Controller Manual | 17... -
Page 18: Delay Function
1. During weekly timer, press the CONFIRM button. CONFIRM 2. Press the button “^” or “v” to select the day to copy from. 18 | Kaden Wired Controller Manual... -
Page 19: Weekly Timer
• The time of the timer setting can be deleted by pressing the DAY OFF button. • The current setting will be restored and withdrawn automatically when there is no operation for 30 seconds. Kaden Wired Controller Manual | 19... -
Page 20: Weekly Timer Operation
LCD screen. Note The DAY OFF setting is cancelled automatically after the set day has passed. TIMER To deactivate Press the POWER button for 2 seconds to cancel the timer mode. TIMER 20 | Kaden Wired Controller Manual... -
Page 21: Copy The Setting From One Day To Another Day
5. Press the COPY button to confirm. Wi-Fi operation setup COPY For instructions on setting up Wi-Fi connectivity for your mark flashes Kaden air conditioner, please scan the QR code below, quickly or visit kadenair.com.au Example: copied the setting of Monday to Wednesday 6. -
Page 22: Fault Alarms
12. Fault alarms If the system does not properly operate, investigate according to the following procedures. Number Cause Display digital tube Error of communication between wired controller and indoor unit EH63 22 | Kaden Wired Controller Manual... - Page 23 Notes Kaden Wired Controller Manual | 23...
- Page 24 kadenair.com.au...

Need help?
Do you have a question about the KJR-120N and is the answer not in the manual?
Questions and answers