Advertisement
Quick Links
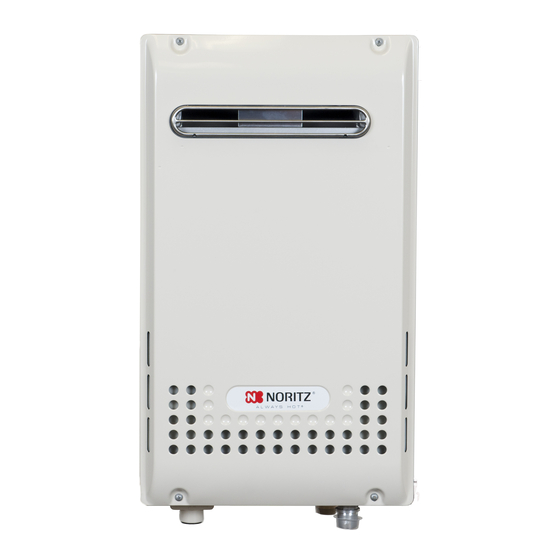
Model Include :
This instructional manual is only intended for use by a qualified service professional or authorized Noritz
Service Representative. Any unauthorized use of this manual may result in voiding the warranty.
Please contact Noritz Technical Support (866‐766‐7489) for additional support.
SKJ70VC
Rev. 05/16
Heat Exchanger Replacement
NR981-OD, NR981-DVC,NR981-SV
NC1991-OD, NC1991-DVC
NR98OD(GQ-2857WX US), NR98DVC(GQ-2857WX-FFA US)
NR98SV(GQ-2857WX-F US)
NC199OD(GQ-2857WZ US), NC199DVC(GQ-2857WZ-FFA US)
Noritz America Corporation
11160 Grace Avenue, Fountain Valley, CA 92708
Phone 866‐766‐7489 Fax 714‐241‐1196
Page 1
Advertisement

Related Manuals for Noritz NR981-OD


Summary of Contents for Noritz NR981-OD
- Page 1 Heat Exchanger Replacement Model Include : NR981-OD, NR981-DVC,NR981-SV NC1991-OD, NC1991-DVC NR98OD(GQ-2857WX US), NR98DVC(GQ-2857WX-FFA US) NR98SV(GQ-2857WX-F US) NC199OD(GQ-2857WZ US), NC199DVC(GQ-2857WZ-FFA US) This instructional manual is only intended for use by a qualified service professional or authorized Noritz Service Representative. Any unauthorized use of this manual may result in voiding the warranty. Please contact Noritz Technical Support (866‐766‐7489) for additional support. Noritz America Corporation 11160 Grace Avenue, Fountain Valley, CA 92708 Phone 866‐766‐7489 Fax 714‐241‐1196 SKJ70VC Rev. 05/16 Page 1...
- Page 2 Heat Exchanger Replacement Procedure Procedure 1. Drain the unit as shown in following procedure 1. Drain the unit as shown in following procedure Drainage using the Remote Controller Manual Draining * RC-7651M * RC-9018M Drain Plugs Each drain plug might not be visible if insulation is installed around the piping.
- Page 3 Heat Exchanger Replacement Procedure Procedure Diagram 2. Remove Front Cover (1)Disconnect electrical power to the unit (2)Turn off gas and water (3) Remove 4 screws Ex.) OD model 3. Remove Lightning Protection (1) DVC model for residential only ; Remove 2 screws that hold Mounting plate for Remote Controller, and unplug Remote Controller (2) Let Remote Controller hang outside of the unit...
-
Page 4: Cable Tie
Heat Exchanger Replacement Procedure Procedure Diagram 4. Unplug all wires that attach to the wiring harness and the body of the water heater (1) Loosen the wire anchor from left side of the case, unplug Freeze Prevention Heater (2) Unplug Thermistor - Heat Exchanger (3) Remove Cable Tie, unplug Wiring for Remote Controller (4) Unplug Freeze Prevention Heaters (4),... - Page 5 Heat Exchanger Replacement Procedure Procedure Diagram (7) Unplug wiring for Igniter (8) Loosen the wire anchor from right side of the case, unplug High Limit Switch, SV, DVC model only ; Unplug Freeze Prevention Heater (2) (9) Unplug Thermistor-Scale Detection* *The following models have "Thermistor - Scale Detection"...
- Page 6 Heat Exchanger Replacement Procedure Procedure Diagram 5. SV, DVC model only ; Remove Case Top Cover from top of the unit (1) Disconnect the venting from the unit (2)SV model only ; Remove 6 screws and remove 2 Case top Covers of the unit, SV model Gasket - Exhaust Flue and set aside.
-
Page 7: Water Flow Sensor
Heat Exchanger Replacement Procedure Procedure Diagram 7. Remove Manifold Plate (1) Remove 4 big silver screws on Manifold Plate that attach the Manifold Plate to Burner (2) Remove "C" Clamp (3) Locate inlet pipe to Manifold Plate and push up, remove the Manifold Plate 8. - Page 8 Heat Exchanger Replacement Procedure Procedure Diagram 10. Disconnect a pipe from Water Servo - Main (1) Remove "C" Clamp, disconnect a pipe from Water Servo - Main Water Servo-Main 11. Remove the assembly from Case (1) Remove 2 set screws on the bottom of Burner (2) Remove 2 set screws near the top of the case DVC model only ;...
- Page 9 Heat Exchanger Replacement Procedure Procedure Diagram 12. Replacing the gasket (1) OD model only ; Remove Gasket on the front of Exhaust Box, and reinstall Gasket onto new Exhaust Box Gasket 13. Remove CU HE (1) Remove 12 screws holding Burner to CU HE (2) Separate Burner from CU HE 14.
- Page 10 Left side The end of Insulation tube (Black) and Inlet Pipe of CU HE are lined up Keep Thermal Fuse straight Clamp Back side NR981-OD/DVC/SV NC1991-OD/DVC Back side NR98OD/SV/DVC(GQ-2857WX**) NC199OD/DVC(GQ-2857WZ**) Secure the Thermistor-Scale Detection with screw(M3×6) on CU HE NOTE ; Only tighten by a hand screwdriver (No Drills). Not need to attach the Packing (for holding Thermistor - Scale Detection) when replacement.
- Page 11 Heat Exchanger Replacement Procedure Procedure Diagram 15. Replace Gasket (1) Remove old burner Gasket and replace with new one 16. Place new O - Rings on new CU HE (1) Inlet to CU HE (2) Outlet from CU HE (3) Bypass from CU HE Page 11...
- Page 12 Heat Exchanger Replacement Procedure Procedure Diagram 17. Replace Burner, and CU HE (1) Attach 12 screws around perimeter of Burner and CU HE 18. Replace the assembly back inside the case (1) Secure 2 set screws near the top of the case DVC model only ;...
- Page 13 Heat Exchanger Replacement Procedure Procedure Diagram 19. Replace Case Top Cover on top of the unit DVC model only ; (1) Attach Case Top Cover to the unit and secure 2 screws DVC model SV model only ; SV model (1) Attach Big Case Top Cover to the unit and secure 4 screws (2) Place Gasket - Exhaust Flue on Exhaust pipe...
- Page 14 Heat Exchanger Replacement Procedure Procedure Diagram 20. Reconnect a pipe to Water Servo - Main Water Servo-Main (1) Insert a pipe to Water Servo - Main, and attach "C" Clamp 21. Reconnect two pipes to Water Servo - Bypass Water Servo-Bypass (1) Replace Water Servo - Bypass (2) Attach 2 "C"...
- Page 15 Heat Exchanger Replacement Procedure Procedure Diagram 23. Replace Manifold Plate (1) Secure the Manifold Plate to Burner with 4 big silver screws (2) Secure gas pipe of Manifold Plate to gas inlet fitting with "C" Clamp 24. Replace Tube - Metal Back Pressure Tube DVC model only ;...
- Page 16 Heat Exchanger Replacement Procedure Procedure Diagram 25. Reconnect all wires that attach to the wiring harness and the body of the unit (1) Insert Circuit Board and attach with screw (2) Plug Flame Rod and Ignition Plug (3) Plug wiring for Igniter (4) Plug High Limit Switch SV, DVC model only ;...
- Page 17 Heat Exchanger Replacement Procedure Procedure Diagram (6) Plug Freeze Prevention Heater Tie the wire anchor from left side of Case Tube DVC model only ; Don't tie the Tube with the anchor (7) Plug Themistor - Heat Exchanger (8) Plug Wiring for Remote Controller, tie Cable Tie (9) Plug Freeze Prevention Heaters (4), Water Servo - Main, - Bypass,...
- Page 18 Heat Exchanger Replacement Procedure Procedure Diagram 26. Replace Lightning Protection (1) DVC model for residential only ; replace Remote Controller, plug Remote Controller, and attach the Mounting plate for Remote Controller with screw (2) Attach Lightning Protection Plate with 2 screws (Whichever the unit is in case No.2, 3, 4) Case No.1 (DVC model for residential) Case No.2 (OD model)
- Page 19 Heat Exchanger Replacement Procedure Procedure Diagram 27. Check for water leak (1) Secure 3 drain valves (2) Turn on water inlet valve slowly (check for leaks around "C" Clamps) (3) If you get leaks, close water inlet valve Re-secure "C" Clamps of leaking points 28.
Need help?
Do you have a question about the NR981-OD and is the answer not in the manual?
Questions and answers