Table of Contents
Advertisement
Quick Links
Refrigeration Unit – electrics
Ausseer Kälte- und Edelstahltechnik GmbH
Document:
RM-Refrigeration Unit - electrics_EN
Document no.
TD-AKE-00000339
Comment:
Translated version of original document
Copyright 2021 AKE Ausseer Kälte- und Edelstahltechnik GmbH.
The contents of this publication may not be reproduced in whole or in part in any form or given to third
parties without the prior written consent of AKE GmbH. AKE GmbH reserves the right to make technical
changes as well as changes to this manual without prior notice.
All rights reserved.
REPAIR MANUAL
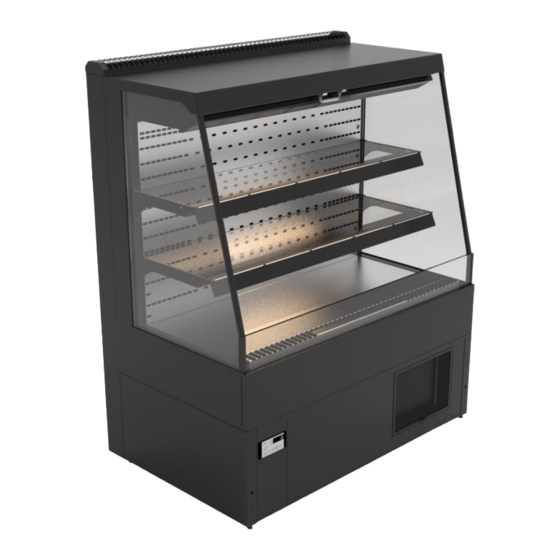
Symbolic photo
Application
2021-08
date:
Version:
21B
Language:
English
Advertisement
Table of Contents

Related Manuals for Ideal AKE Gastro A Series


Summary of Contents for Ideal AKE Gastro A Series
- Page 1 REPAIR MANUAL Refrigeration Unit – electrics Symbolic photo Ausseer Kälte- und Edelstahltechnik GmbH Application Document: RM-Refrigeration Unit - electrics_EN 2021-08 date: Document no. TD-AKE-00000339 Version: Comment: Translated version of original document Language: English Copyright 2021 AKE Ausseer Kälte- und Edelstahltechnik GmbH. The contents of this publication may not be reproduced in whole or in part in any form or given to third parties without the prior written consent of AKE GmbH.
- Page 2 REPAIR MANUAL REFRIGERATION UNIT – ELECTRICS This manual contains the repair manual for the built-in electrical components that are installed in the following products/models: Air Tower EBS SB Papilio Vario presenter Euro Praline Vitrine Switch GS Flantastic Salatbar Duo Vitrine WK / Switch WK BAK G-xx Gastro A-xx Salatbar Duo Switch...
-
Page 3: Table Of Contents
REPAIR MANUAL REFRIGERATION UNIT – ELECTRICS Table of contents General Information on this Repair Manual ..................4 Release notes .......................... 4 Information about the manufacturer ..................4 Contact information manufacturer/service ................4 Information about this Repair Manual ....................5 Safety information ........................5 2.1.1 Special safety instructions for refrigerants ................ -
Page 4: General Information On This Repair Manual
REPAIR MANUAL REFRIGERATION UNIT – ELECTRICS 1 General Information on this Repair Manual The repair manual presented here is intended for trained, authorised, qualified specialists who have the necessary competence as well as expertise to perform any repair on products of AKE Ausseer Kälte- und Edelstahltechnik GmbH. -
Page 5: Information About This Repair Manual
REPAIR MANUAL REFRIGERATION UNIT – ELECTRICS 2 Information about this Repair Manual It is important to read and understand the related operating manual including the corrections before doing any repair work. The latter must be ensured by the operator. Any safety instructions given in the operating manual are fully valid in this manual. -
Page 6: Special Safety Instructions For Refrigerants
REPAIR MANUAL REFRIGERATION UNIT – ELECTRICS 2.1.1 Special safety instructions for refrigerants Applies to all commercially available CFC/FC refrigerants, CO and cold brine, propane/isobutane. The rating plate indicates the refrigerant used in the device. AKE refers to all safety datasheets and safety instructions provided by the refrigerant manufacturer and their regulations for safe handling of the refrigerant. -
Page 7: Disposal Information
REPAIR MANUAL REFRIGERATION UNIT – ELECTRICS 2.3 Disposal information Various dangers when disposing of refrigerants Wear protective gloves and safety glasses during the disposal of refrigerants (propane, R404A, R134A etc.). Working with open flames is forbidden during the disposal of refrigerant. Dispose of the refrigerant properly and in an environmentally compatible way. -
Page 8: Repair Of Electrical Components
REPAIR MANUAL REFRIGERATION UNIT – ELECTRICS 3 Repair of electrical components All accident prevention regulations (in the country-specific version) must be observed before any work is carried out on the unit! 3.1 Disconnect from the mains Switch the unit off. Disconnect all poles of the unit from the mains, or remove the mains plug from the mains socket properly. -
Page 9: Parts Of Control Unit St501
REPAIR MANUAL REFRIGERATION UNIT – ELECTRICS Description/article Description/article Complete control unit Connecting cable, 3m, power cord Controller board ST200F ZB cable connection RJ45 Display ST521 LED transformer (not shown) Exploded view of control unit (ST200F) 3.2.2 Parts of control unit ST501 Overview of all spare parts of the control unit ST501 Description/article Description/article... -
Page 10: Condensing Unit Parts
REPAIR MANUAL REFRIGERATION UNIT – ELECTRICS 3.2.3 Condensing unit parts Overview of all spare parts of the condensing unit: Description/article Description/article 1.1.1 Fan motor 1.1.6 Compressor 1.1.2 Condenser fan 1.1.5 Capacitor 1.1.3 Power distributor for motor 1.1.9 Terminal box Graphical representation (condensing unit) Rev. -
Page 11: Repair Of The Control Unit
REPAIR MANUAL REFRIGERATION UNIT – ELECTRICS 3.3 Repair of the control unit Unplug the power cord from the connection of the controller housing. Release the unlocking clip of the connector. Remove the locating screws of the controller housing, and pull the entire control unit out of the holder. Pull the entire unit out of the holder only far enough to access the wiring of the control unit. -
Page 12: Replacement Of Controller Display
REPAIR MANUAL REFRIGERATION UNIT – ELECTRICS 3.3.1 Replacement of controller display Depending on the model/unit, a different controller display is installed in the housing. If anything is unclear, please contact your service partner. Remove the connecting cable (control line) from the display connection. Remove the locating screws of the display and remove it from the housing. -
Page 13: Repair Of The Parts On The Condensing Unit
REPAIR MANUAL REFRIGERATION UNIT – ELECTRICS 3.4 Repair of the parts on the condensing unit Depending on the model, the condensing unit is installed as a unit or with individual components, and the accessibility differs from the variant shown. Remove the retaining plate (securing) of the condensing unit, and pull the entire unit out of the lower tray support. - Page 14 REPAIR MANUAL REFRIGERATION UNIT – ELECTRICS Overview of all parts of the condensing unit: Description/article Description/article 1.1.1 Fan motor 1.1.6 Compressor 1.1.2 Condenser fan 1.1.7 Refrigerant collector 1.1.3 Power distributor for motor 1.1.8 Condenser 1.1.4 Dryer 1.1.9 Terminal box 1.1.5 Capacitor 1.1.10 Protective grating, fan...
-
Page 15: Fan Motor Repair
REPAIR MANUAL REFRIGERATION UNIT – ELECTRICS 3.4.1 Fan motor repair 3.4.1.1 Replace fan blade To replace the condenser fan, all the steps from Chapter 3.4 must be completed first. Remove all screws from the fan grille, and lift the entire fan from the condenser. Remove all screws from the fan blade and detach it from the motor mount. -
Page 16: Replace Fan Motor
REPAIR MANUAL REFRIGERATION UNIT – ELECTRICS 3.4.1.2 Replace fan motor To replace the fan motor of the condenser, all the steps from Chapter 3.4.1.1 must be completed first. Remove all screws and pull the fan motor out of the ventilation grille as shown. Remove the necessary cables of the fan motor from the terminal box. -
Page 17: Repair Of The Fan On The Evaporator Unit
REPAIR MANUAL REFRIGERATION UNIT – ELECTRICS 3.5 Repair of the fan on the evaporator unit Depending on the model, it may be necessary to disassemble components to reach the evaporator unit. The described work steps may differ from your unit. Disassemble/remove all shelves, extendible drawers, etc. -
Page 18: Evaporator Fan
REPAIR MANUAL REFRIGERATION UNIT – ELECTRICS 3.5.1 Evaporator fan Remove the connection cables of the respective defective fan from the connection terminal on the inside of the fan housing, remove the locating screws and dismantle the associated fan guard grille. Symbolic photo Inside of fan housing Fan guard grille... -
Page 19: Repair Of Temperature Sensor / Sensors
REPAIR MANUAL REFRIGERATION UNIT – ELECTRICS 3.6 Repair of temperature sensor / sensors 3.6.1 Repair of the sensors on the evaporator unit The temperature sensors are mounted on the evaporator unit in standard models. This may differ from standard units for custom designs. Please contact your service partner or the manufacturer regarding this. -
Page 20: Return Air Sensor On The Evaporator
REPAIR MANUAL REFRIGERATION UNIT – ELECTRICS 3.6.1.2 Return air sensor on the evaporator Remove the sensor from the holder on the fan housing. If necessary, remove all cable ties / fastening materials from the cable harness. Symbolic photos Remove the wiring from the control unit (circuit board), and pull the entire control cable out of the tubing. Symbolic photo Insert a new original spare part, install the cable with suitable fastening materials (cable ties) and connect it according to the valid product-specific wiring diagram. -
Page 21: Repair Of Lighting Unit
REPAIR MANUAL REFRIGERATION UNIT – ELECTRICS 3.7 Repair of lighting unit Additional electrical components are installed depending on the model. Please contact your service partner or the manufacturer regarding this. 3.7.1 Repair of LED light strips Depending on the model variant, different LED light strips may be installed. The following repair instructions may differ from the respective model. -
Page 22: Repair Of Led Transformer
REPAIR MANUAL REFRIGERATION UNIT – ELECTRICS 3.7.2 Repair of LED transformer Depending on the model, the LED transformer can be mounted in the base of the unit, in the controller housing or on the rear wall (clamp) of the unit. Contact your service partner or the manufacturer for more information. -
Page 23: Repair Of Frame Heater
REPAIR MANUAL REFRIGERATION UNIT – ELECTRICS 3.8 Repair of frame heater Depending on the model, a frame heater is installed in the base or on the clamps or rear walls of the device. Contact your service partner or the manufacturer for more information. See also see chapter 1.5 of the operating manual for the respective unit. -
Page 24: Frame Heater "Copper Pipe
REPAIR MANUAL REFRIGERATION UNIT – ELECTRICS 3.8.1.1 Frame heater "copper pipe" Pull the defective heating line out of the copper pipe. If necessary, remove all cable ties / securing straps from the cable harness. Copper pipe – frame Heater Copper pipe Symbolic representation Put the new original spare part back into position, and wire it according to the applicable product-specific wiring diagram. -
Page 25: Cleaning And Final Inspection
REPAIR MANUAL REFRIGERATION UNIT – ELECTRICS 4 Cleaning and Final Inspection Clean the unit thoroughly and remove any dirt (drilling chips, etc.). Only use suitable cleaning agents! Observe all information in the operating manual in Chapter 3.4.2. Connect all electrical connections/cables and install all other dismantled parts in reverse order. Check the device for completeness (no loose parts present).
Need help?
Do you have a question about the Gastro A Series and is the answer not in the manual?
Questions and answers