Table of Contents
Advertisement
TX-LR552_En.book Page 1 Thursday, August 5, 2004 1:07 PM
AV Receiver
TX-LR552
Instruction Manual
Thank you for purchasing an Onkyo AV Receiver.
Please read this manual thoroughly before making
connections and plugging in the unit.
Following the instructions in this manual will enable
you to obtain optimum performance and listening
enjoyment from your new AV Receiver.
Please retain this manual for future reference.
Contents
Introduction ............................... 2
Connections ............................ 15
Basic Setup ............................. 28
Basic Operation ...................... 31
Advanced Operation ............... 42
Advanced Setup ...................... 46
Components ......................... 53
Troubleshooting ...................... 57
Specifications.......................... 60
E
n
Advertisement
Table of Contents

Related Manuals for Onkyo TX-LR552


Summary of Contents for Onkyo TX-LR552
-
Page 1: Table Of Contents
TX-LR552_En.book Page 1 Thursday, August 5, 2004 1:07 PM AV Receiver TX-LR552 Instruction Manual Thank you for purchasing an Onkyo AV Receiver. Please read this manual thoroughly before making connections and plugging in the unit. Following the instructions in this manual will enable you to obtain optimum performance and listening enjoyment from your new AV Receiver. -
Page 2: Important Safety Instructions
TX-LR552_En.book Page 2 Thursday, August 5, 2004 1:07 PM WARNING: TO REDUCE THE RISK OF FIRE OR ELECTRIC SHOCK, DO NOT EXPOSE THIS APPARATUS TO RAIN OR MOISTURE. CAUTION: TO REDUCE THE RISK OF ELECTRIC SHOCK, DO NOT REMOVE COVER (OR BACK). NO USER-SERVICEABLE PARTS INSIDE. -
Page 3: Memory Backup
1. Recording Copyright —Unless it’s for personal use only, recording copyrighted material is illegal with- out the permission of the copyright holder. 2. AC Fuse —The AC fuse inside the TX-LR552 is not user-serviceable. If you cannot turn on the TX-LR552, contact your Onkyo dealer. -
Page 4: Supplied Accessories
AM loop antenna Speaker Cable Speaker cable labels * In catalogs and on packaging, the letter added to the end of the product name indicates the color of the TX-LR552. Specifications and operation are the same regardless of color. Features Amplification... - Page 5 Features... 4 Front & Rear Panels ... 6 Front Panel... 6 Display ... 7 Rear Panel ... 8 Before Using the TX-LR552 ... 9 Installing the Batteries... 9 Using the Remote Controller... 9 Remote Controller ... 10 AMP/TUNER Mode ... 10 TV Mode...
-
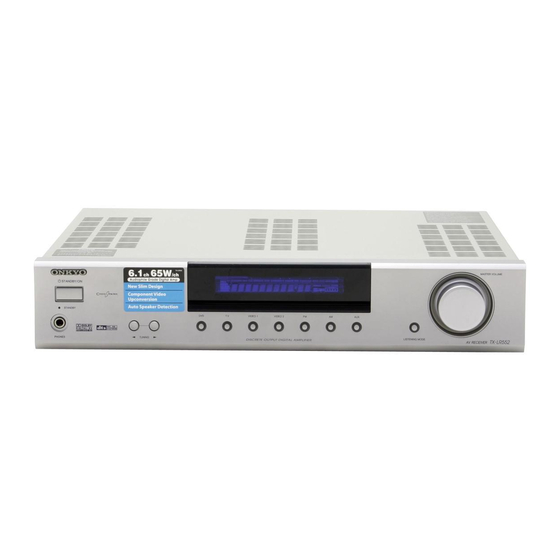
Page 6: Front & Rear Panels
Front Panel For detailed information, refer to the pages in parenthesis. STANDBY/ON button (27) This button is used to set the TX-LR552 to On or Standby. STANDBY indicator (27) This indicator lights up when the TX-LR552 is in Standby mode, and it flashes while a signal is being received from the remote controller. -
Page 7: Display
Message area This area of the display shows various information about the currently selected source. MUTING indicator (32) This indicator flashes when the TX-LR552 is muted. SLEEP indicator (33) This indicator lights up when the Sleep function has been set. -
Page 8: Rear Panel
(Remote Interactive) socket can be con- nected to the socket on another Onkyo compo- nent. The TX-LR552’s remote controller can then be used to control that component. To use must make an analog audio connection (RCA) between the TX-LR552 and the other component, even if they are connected digitally. -
Page 9: Before Using The Tx-Lr552
• Expired batteries should be removed as soon as pos- sible to prevent damage from leakage or corrosion. Using the Remote Controller To use the remote controller, point it at the TX-LR552’s remote control sensor, as shown below. Remote control sensor STANDBY indicator 30˚... -
Page 10: Remote Controller
For detailed information, refer to the pages in parenthesis. STANDBY button (27) This button is used to set the TX-LR552 to Standby. ON button (27) This button is used to turn on the TX-LR552. TONE, [–] & [+] buttons (50) These buttons are used to adjust the bass and treble. -
Page 11: Tv Mode
To select TV mode, press the REMOTE MODE [TV] button. To listen to the sound from your TV through the TX-LR552, before selecting TV mode, press the REMOTE MODE [AMP] button followed by the [TV] INPUT SELECTOR button to select your TV as the input source. -
Page 12: Dvd Mode
TX-LR552_En.book Page 12 Thursday, August 5, 2004 1:07 PM Remote Controller —Continued DVD Mode DVD mode can be used to control an Onkyo DVD player connected to the TX-LR552 via . It can also be used to control other DVD players (see page 53). - Page 13 This button is used to cancel functions and to clear entered numbers. MENU button This button is used to display a DVD’s menu. button This button sets the volume of the TX-LR552. SETUP/GUIDE button This button is used to access the DVD player’s onscreen setup menus. MUTING button This button mutes the TX-LR552.
-
Page 14: About Home Theater
Enjoying Home Theater You can use two sets of speakers with the TX-LR552: speaker set A and speaker set B. Speaker set A should be installed in your main listening room and can be used with Dolby Digital and DTS surround material. -
Page 15: Connections
Attaching the Speaker Labels The TX-LR552’s positive (+) speaker terminals are color-coded for ease of identification. (The negative (–) speaker terminals are all black.) Speaker terminal... -
Page 16: Connecting Antenna
This chapter explains how to connect the supplied indoor FM antenna and AM loop antenna and how to connect commercially available outdoor FM and AM antennas. The TX-LR552 won’t pick up any radio signals without any antenna connected, so you must connect the antenna to use the tuner. -
Page 17: Connecting The Am Loop Antenna
( ). Connect the white wire to the other terminal. Once the TX-LR552 is ready for use, you’ll need to tune into an AM radio station and adjust the position of the AM antenna to achieve the best possible reception. -
Page 18: Connecting Av Components
• Don’t connect the power cord until you’ve completed and double-checked all audio and video connections. Optical Digital Inputs The TX-LR552’s optical digital inputs have shutter-type covers that open when an optical plug is inserted and close when it’s removed. Push plugs in all the way. -
Page 19: Connecting Both Audio & Video
Connecting Both Audio & Video By connecting the audio and video outputs of your DVD player and other video components to the TX-LR552, you can select both the audio and video source simultaneously simply by selecting the appropriate input source on the TX-LR552. -
Page 20: Connecting Your Tv Or Projector
Audio Connections These connections will allow you to listen to audio from your TV via the TX-LR552. If your TV has no audio outputs, connect the TX-LR552 to your VCR and use its tuner (see page 22). Note: • Initially, the OPT 1 digital input is assigned to the TV input source. -
Page 21: Connecting Your Dvd Player
You only need to use one of the following video connec- tion methods. ■ Using Composite Video Use a composite video cable to connect the TX-LR552’s V DVD IN to the composite video output on your DVD player, as shown. -
Page 22: Connecting A Vcr For Playback
Use a multichannel analog audio cable to connect the TX-LR552’s DVD MULTI CH IN FR, FL, SL, SR, C, and SW sockets to the multichannel analog audio output on your DVD player, as shown. Alternatively, use three standard analog audio cables. -
Page 23: Connecting A D-Vhs Vcr For Playback
TX-LR552’s V VIDEO 1 OUT to a composite video input on your recording VCR. Audio Connections • Use an analog audio cable to connect the TX-LR552’s AUDIO VIDEO 1 L/R OUTs to the audio inputs on your recording VCR. This illustration shows how to connect a VCR for record- ing from a TV or another VCR. -
Page 24: Connecting Other Video Sources-Set-Top Box (Satellite, Cable, Over-The-Air), Ld Player, Etc
You only need to use one of the following video connec- tion methods. ■ Using Composite Video Use a composite video cable to connect the TX-LR552’s V VIDEO 2 IN to the composite video output on your video component, as shown. -
Page 25: Connecting A Cd Player
Use an analog audio cable to connect the TX-LR552’s AUDIO VIDEO 2 IN L/R inputs to the analog audio out- puts on your video component, as shown. -
Page 26: Connecting A Turntable
CD, MiniDisc, or DAT recorder Connecting a Turntable ■ Turntable with a Built-in Phono Preamp Use an analog audio cable to connect the TX-LR552’s AUDIO AUX IN L/R inputs to the audio outputs on your turntable, as shown. AUDIO OUTPUT ■... -
Page 27: Connecting An Onkyo Dvd Player With
Auto Power On/Standby When you start playback on the DVD player, if the TX-LR552 is in Standby, it will turn on and select the DVD player as the input source automatically. Similarly, when the TX-LR552 is set to Standby, the DVD player will also enter Standby. -
Page 28: Basic Setup
• The individual speaker levels cannot be adjusted while the TX-LR552 is muted, a pair of headphones is con- nected, or the DVD multichannel input is selected. Press the REMOTE MODE [AMP]... -
Page 29: Assigning Inputs To Input Sources
Assigning Inputs to Input Sources Digital Audio Input Setup To enjoy Dolby Digital and DTS, you must connect your DVD player to the TX-LR552 by using a digital audio connection (coaxial or optical). This section explains how to change the digital audio input socket to input source assignments. - Page 30 TX-LR552_En.book Page 30 Thursday, August 5, 2004 1:07 PM Basic Setup —Continued Component Video Input Setup This section explains how to change the component video input socket to input source assignments. You only need to change them if you connect a video component to a component video input other than the default assign- ment listed in the following table.
-
Page 31: Basic Operation
To adjust the volume, use the MASTER VOLUME control, or the remote controller’s [VOL] button. The volume can be set to MIN, 1 through 79, or MAX. The TX-LR552 is designed for home theater enjoyment. It has a wide volume range, allowing precise adjustment. Enjoy listening modes. -
Page 32: Setting The Display Brightness
DIMMER off, or normal brightness. Muting the TX-LR552 You can temporarily mute the output of the TX-LR552. Press the REMOTE MODE [AMP] button, and then press the TUNER [MUTING] button. The output is muted and the MUTING indicator flashes on the display, as... -
Page 33: Using The Sleep Timer
TX-LR552_En.book Page 33 Thursday, August 5, 2004 1:07 PM Basic Operation —Continued Using the Sleep Timer With the sleep timer you can set the TX-LR552 to auto- matically turn off after a specified period. Press the REMOTE MODE [AMP] button, and then press the... -
Page 34: Listening To The Radio
Use the remote controller’s [TUN M] button to turn AUTO on or off. Tuning with the Remote Controller In Auto Tuning mode, the TX-LR552 finds available radio stations automatically. In Manual Tuning mode, you can tune into radio stations by frequency. -
Page 35: Presetting Radio Stations
TX-LR552_En.book Page 35 Thursday, August 5, 2004 1:07 PM Basic Operation —Continued ■ Manual Tuning Mode Press the REMOTE MODE [AMP] button, then press the [TUN] INPUT SELECTOR button repeat- TUNER edly to select either AM or FM. Press the [TUN M] button repeat- edly until the AUTO indicator dis- appears from the display. -
Page 36: Deleting Presets
TX-LR552_En.book Page 36 Thursday, August 5, 2004 1:07 PM Basic Operation —Continued STANDBY INPUT TV CH T V VOL + 10 CLEAR --/--- REMOTE TONE MODE TUNER INPUT SELECTOR DIMMER SLEEP INPUT ENTER DISC EXIT GUIDE PREV DISPLAY DISPLAY MUTING PLAY MODE SP A SP B... -
Page 37: Using The Listening Modes
Using the Listening Modes With its comprehensive collection of surround and DSP listening modes, the TX-LR552 can transform your home listening room in to a movie theater or concert hall. To get the most from surround sound, it’s important that you install and configure your speakers correctly. -
Page 38: About The Listening Modes
TX-LR552_En.book Page 38 Thursday, August 5, 2004 1:07 PM Using the Listening Modes —Continued About the Listening Modes The TX-LR552’s surround indicators show which speakers are active in each listening mode. Front left Center Front right Surround Surround Surround left... - Page 39 TX-LR552_En.book Page 39 Thursday, August 5, 2004 1:07 PM Using the Listening Modes —Continued DTS-ES DTS-ES supports up to 6.1 channels. The TX-LR552 supports both DTS-ES Discrete and DTS-ES Matrix . Discrete mode is for use with DTS 6.1 material. With an additional surround-back channel, each 6.1 channel is digitally recorded for a real-...
-
Page 40: Input Signal Formats & Listening Modes
• Is the source component connected digitally? The Dolby Digital and DTS listening modes can be selected only if your DVD player is connected to the TX-LR552 with a digital audio (coaxial or optical) connection (see page 21). Dolby Digital PCM/analog 3/2.1,... -
Page 41: Dolby Digital/Dts Setting (5.1- Or 6.1-Channel Playback)
TX-LR552_En.book Page 41 Thursday, August 5, 2004 1:07 PM Using the Listening Modes —Continued Dolby Digital/DTS Setting (5.1- or 6.1-channel Playback) This setting determines if Dolby Digital and DTS mate- rial is played using 6.1-channels or 5.1-channels. This setting only applies when you’re using a surround back speaker, the Speaker Configuration Surr Back setting is set to something other than Non (page 46), and the sur- round information in the current digital input signal is 3/... -
Page 42: Advanced Operation
The name of the currently selected speaker and its volume appear on the display, as shown. Notes: • You cannot use this function while the TX-LR552 is muted. • Speakers that are set to No or Non in the Speaker Con- figuration cannot be adjusted. -
Page 43: Using The Dvd Multichannel Input
TX-LR552_En.book Page 43 Thursday, August 5, 2004 1:07 PM Advanced Operation —Continued Using the DVD Multichannel Input The DVD multichannel input is for connecting a compo- nent with individual 5.1-channel analog audio outputs, such as a DVD player or MPEG decoder. See “DVD Multichannel Connection”... -
Page 44: Displaying Source Information
TX-LR552_En.book Page 44 Thursday, August 5, 2004 1:07 PM Advanced Operation —Continued T V VOL + 10 CLEAR --/--- REMOTE TONE MODE TUNER INPUT SELECTOR DIMMER SLEEP INPUT ENTER DISC EXIT GUIDE PREV DISPLAY DISPLAY MUTING PLAY MODE SP A SP B RANDOM AUDIO... -
Page 45: Recording
You can listen to and watch the selected INPUT SELECTOR input source while recording. The TX-LR552’s MASTER VOLUME control has no effect on recording. Start recording on the AV compo- nent connected to the VIDEO 1 OUT sockets. -
Page 46: Advanced Setup
TX-LR552_En.book Page 46 Thursday, August 5, 2004 1:07 PM Advanced Setup Speaker Setup (Advanced) Speaker Configuration This section explains how to specify which speakers are connected and their sizes. For speakers with a cone diameter larger than 6-1/2 inches (16 cm), specify Lrg. -
Page 47: Crossover Frequency
TX-LR552_En.book Page 47 Thursday, August 5, 2004 1:07 PM Advanced Setup —Continued Use the Down [ ] button to select “Surr B,” and use the Left and Right [ ] buttons to ENTER select: Sml: Select if the surround back speaker is small. -
Page 48: Speaker Distance
TX-LR552_En.book Page 48 Thursday, August 5, 2004 1:07 PM Advanced Setup —Continued Speaker Distance To get the best from surround sound, it’s important that the sound from each speaker reaches the listener at the same time. To achieve this, you need to specify the dis- tance from each speaker to the listening position. -
Page 49: Input Source Audio Setup
Press the [SETUP] button. The setup menu closes. Setting the Digital Input Format Normally, the TX-LR552 detects the format of digital audio signals automatically. However, if you experience either of the following issues when playing PCM or DTS material, you may need to specify the format yourself: •... -
Page 50: Audio Adjust Functions
TX-LR552_En.book Page 50 Thursday, August 5, 2004 1:07 PM Advanced Setup —Continued Press the [SETUP] button. The setup menu closes. Notes: • Select All or DTS when playing a DTS CD or LD. If you select PCM, only noise will be heard. STANDBY INPUT TV CH... - Page 51 TX-LR552_En.book Page 51 Thursday, August 5, 2004 1:07 PM Advanced Setup —Continued Using the Other Audio Adjust Functions With the audio adjust functions you can tailor the sound to your personal taste. Before using the audio adjust functions, choose a lis- tening mode first.
- Page 52 TX-LR552_En.book Page 52 Thursday, August 5, 2004 1:07 PM Advanced Setup —Continued PL II & PL IIx Music Modes & Audio Adjust The following Panorama, Dimension, and Center Width functions can be used with only the Pro Logic II Music or Pro Logic IIx Music listening mode.
-
Page 53: Controlling Other Components
If the remote controller doesn’t work as expected, try entering the code again, or try another code. Codes for Onkyo DVD Players The remote control code you use for an Onkyo DVD player depends on whether it’s connected via lows: 5001: Use this code if you’ve connected an... -
Page 54: Remote Control Codes
5009 Integra 5001, 5002 Integra Research 5001, 5002 5023 Kenwood 5017 Magnavox 5004, 5021 Marantz 5025, 5026 Mitsubishi 5005 Onkyo 5001, 5002 Panasonic 5011, 5017, 5020 Philips 5004, 5021, 5028 Pioneer 5006 Proscan 5003 5003 Sanyo 5012 5007, 5013, 5018,... - Page 55 TX-LR552_En.book Page 55 Thursday, August 5, 2004 1:07 PM Controlling Other Components —Continued Manufacturer Control code Loewe 1014, 1040, 1055 Luxman 1004, 1006 1001, 1006, 1010, 1014, 1016, 1017, 1034 M Electronic 1035, 1053, 1062, 1063 Magnadyne 1040, 1067, 1068 Magnafon 1067 1004, 1006, 1008, 1014,...
-
Page 56: Resetting The Remote Mode Buttons
The button is reset. Notes: • The default control code for the REMOTE MODE [DVD] button is Onkyo, 5001. • The default control code for the REMOTE MODE [TV] button is Hitachi, 1071. Resetting the Remote Controller STANDBY This section explains how to reset the remote controller to its default settings. -
Page 57: Troubleshooting
TX-LR552_En.book Page 57 Thursday, August 5, 2004 1:07 PM Troubleshooting If you have any trouble using your TX-LR552, look for a solution in this section. If you can’t resolve the issue yourself, contact your Onkyo dealer. Power Can’t turn on the TX-LR552? •... - Page 58 • Make sure that the TX-LR552 is not subjected to direct sunshine or inverter-type fluorescent lights. Relocate if necessary. • If the TX-LR552 is installed in a rack or cabinet with colored-glass doors, the remote controller may not work reliably when the doors are closed.
- Page 59 five seconds, and then plug it back in again. To reset the TX-LR552 to its factory defaults, turn it on and, while holding down the [ ] TUNING button, press the [STANDBY/ON] button.
-
Page 60: Specifications
ONKYO CHINA LIMITED Units 2102-2107, Metroplaza Tower I, 223 Hing Fong Road, Kwai Chung, N.T., HONG KONG Tel: 852-2429-3118 Fax: 852-2428-9039 SN 29343748 (C) Copyright 2004 ONKYO CORPORATION Japan. All rights reserved. General Power supply: AC 120 V, 60 Hz...
Need help?
Do you have a question about the TX-LR552 and is the answer not in the manual?
Questions and answers