Advertisement
Quick Links
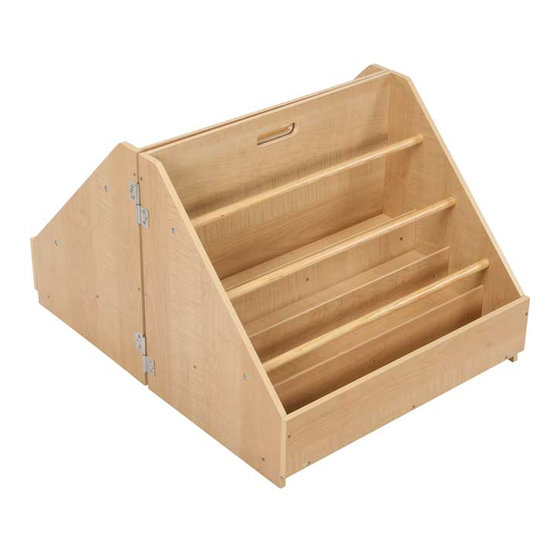
Reading Area Two-Sided Bookcase Assembly Instructions
Attach the latch Q horizontally to the right
15
side panel A with 2 short screws M.
To assemble Bookcase 2:
Repeat steps 1-13 for Bookcase 2, using side
panels C and D in place of panels A and B.
16
Attach the latch strike plate Q to the left
side panel D of Bookcase 2 using 2 short
screws M, making sure the hook side of the
strike plate faces the front.
Attach the 2 hinges K onto the right side
17
panel C of Bookcase 2 with 3 short flathead
screws N each, making sure the covered ends
of the hinges are at the top.
18
Place the bookcases back to back. Lift up
Bookcase 2 (the unit with the hinges with no
pintles) up and onto the pintles on the hinges
of Bookcase 1.
19
Secure the bookcases together by hooking the
loop edge of the latch over the hook side of
the latch strike plate.
17
K
3 screws each
C
D
covered end
K
Helping Teachers Make A Difference
®
164400 Assembly.indd 1-2
15
A
2 screws
Q
16
hook side
D
Q
2 screws
19
18
no pintle
Bookcase 2
pintle
Bookcase 1
© 2017 Really Good Stuff
1-800-366-1920 www.reallygoodstuff.com Made in China #164400
®
Reading Area Two-Sided Bookcase Assembly Instructions
Congratulations on your purchase of this Reading Area Two-Sided Bookcase. (Adult assembly required)
product includes:
This Really Good Stuff
®
A
A – Right side panel of Bookcase 1
B – Left side panel of Bookcase 1
latch holes
horizontal
C – Right side panel of Bookcase 2
D – Left side panel of Bookcase 2
E – 6 Wood rods
F – 2 Back panels
G – 2 Front panels
H – 8 Shelf bottoms (4 with large side
holes, 4 with small side holes)
I – 6 Shelf dividers
J – 2 Hinges with pintles
K – 2 Hinges
L – 8 Wood pegs
M – 4 Short round screws (for latch)
N – 12 Short flathead screws (for hinges)
O – 72 Medium screws
P – 8 Long screws (for rods)
Q – 1 Latch and strike plate
To assemble Bookcase 1:
Locate a shelf bottom H with large side holes
1
and a shelf divider I. Attach the 2 pieces
together with 3 medium screws O through the
divider panel into the shelf bottom.
2
Turn the assembled piece to the left so that
the shelf bottom H with the large hole is facing
up and to the right. Locate another shelf
bottom H with small side holes and attach it
to the assembled unit with 3 medium screws O
through the shelf divider I.
3
Turn the assembled piece to the left again so
that the shelf bottom H with the large hole is
facing down and to the left. Locate another
shelf divider I and attach it to the right side of
the assembled unit (which is a shelf bottom H
with the small hole) with 3 medium screws O
through the shelf divider I.
Helping Teachers Make A Difference
®
© 2017 Really Good Stuff
ChokeWarning_D.pdf
B
D
C
shorter distance
larger distance
between holes
between holes
latch holes
vertical
E
H
F
check hole size on sides
I
L
M
N
O
P
G
1
I
3 screws
H
large hole
2
3
3 screws
3 screws
I
H
H
H
H
large hole
small hole
small hole
All instructional guides can be found online.
1-800-366-1920 www.reallygoodstuff.com Made in China #164400
®
1
6/2/16
11:00
J
K
Q
I
9/29/17 3:44 PM
Advertisement

Related Manuals for Really Good Stuff Reading Area Two-Sided Bookcase

Summary of Contents for Really Good Stuff Reading Area Two-Sided Bookcase
- Page 1 Reading Area Two-Sided Bookcase Assembly Instructions Reading Area Two-Sided Bookcase Assembly Instructions Attach the latch Q horizontally to the right Congratulations on your purchase of this Reading Area Two-Sided Bookcase. (Adult assembly required) side panel A with 2 short screws M. product includes:...
- Page 2 Reading Area Two-Sided Bookcase Assembly Instructions Reading Area Two-Sided Bookcase Assembly Instructions Flip the assembled piece over to the right so Screw in 4 medium screws O from the outside 3 screws that that the shelf bottom H with the large of panel A: 2 screws along the right back edge hole is on the right.
Need help?
Do you have a question about the Reading Area Two-Sided Bookcase and is the answer not in the manual?
Questions and answers