Advertisement
3" Amalgam High Output UV 55W, 90W and
120W
Part No.
Description
3" Standard High
R450105
Output UV 25W
3" Standard High
R450106
Output UV 40W
3" Amalgam High
R450107
Output UV 55W
3" Amalgam High
R450108
Output UV 90W
3" Amalgam High
R450109
Output UV 120W
5" Amalgam High
R450110
Output UV 55W
5" Amalgam High
R450111
Output UV 90W
5" Amalgam High
R450112
Output UV 120W
When you receive your Pro Max UV Sterilizer open the box and familiarize yourself with the parts breakdown in line drawing at the end of the
instruction booklet.
Setup Instruction:
Pro-MAX™ Ultraviolet Sterilizer
Setup and Instructions
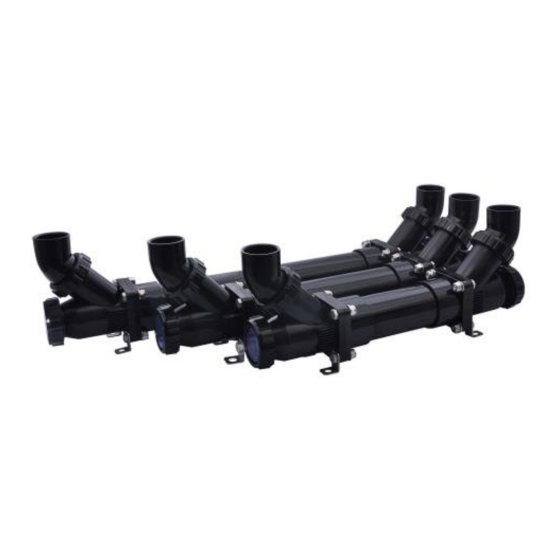
Lifegard Aquatics introduces the Pro-MAX™ UV Sterilizer, featuring a patent-pending,
flow-through design with less restrictive angled inlet and outlet ports requiring less
plumbing. This unique design enables easy installation of new or replacement systems
as it can be positioned in multiple ways to fit any tight space. Available with 3"
housing in 25, 40, 55, 90 and 120 Watt models and 5" housing in 55, 90 and 120 Watt
sizes. Each Pro-MAX™ features a High Output UV Bulb, Internal Protective Sleeve, and
UL Listed Ballast which counts down the number of days until you need to replace the
bulb. Maximum Operating Pressure 30 PSI.
5" Amalgam High Output UV 55W, 90W and
UV
Lamp
Lamp
Output
Watts
Current
Micro
Watts
25
1.2A
0.05
40
1.2A
0.125
55
1.2A
0.15
90
1.2A
0.27
120
1.2A
0.32
55
1.2A
0.15
90
1.2A
0.27
120
1.2A
0.32
The UV comes semi-assembled. You need to install the quartz sleeve (#14), the gaskets (#16 and
#19), the bulb (#17) and connect the ballast.
Remove to 2" nuts (#1) holding the
cap (#15) and UV end cap (#2) (total 4
are removed you will see the O-rings (#3). Make sure they're installed properly as seen in the
Figure
1.
Once a year these O-rings (#3, 8, 16, 19 )need year servicing by applying aquatic friendly silicone
lubricant to make sure they don't get brittle or crack.
120W
Lamp
UV-C
UVC
Life
Output
µW/cm
(Hours)
(Watts)
50
9000
7.5
125
9000
12
150
9000
16.5
270
9000
28
320
9000
37
150
9000
16.5
270
9000
28
320
9000
37
Figure 1
3" Standard High Output UV 25W and 40W
Max
Water
Max
Max Flow
Flow
Aquarium
Rate
Algae &
Size
Bacteria
1000 GPH
550 GPH
130 Gallons
2500 GPH
1200 GPH
250 Gallons
3600 GPH
2100 GPH
350 Gallons
4600 GPH
2800 GPH
650 Gallons
6000 GPH
4000 GPH
900 Gallons
4000 GPH
2100 GPH
350 Gallons
5500 GPH
2800 GPH
650 Gallons
7000 GPH
4000 GPH
900 Gallons
inlet/outlet elbows (#23), on the UV clear
individual 2" nuts on the UV). Once the parts
Max Pond
Size
2400
Gallons
4700
Gallons
6000
Gallons
11000
Gallons
14500
Gallons
6000
Gallons
11000
Gallons
14500
Gallons
Advertisement
Table of Contents

Related Manuals for Lifegard Pro-MAX

Summary of Contents for Lifegard Pro-MAX
- Page 1 25, 40, 55, 90 and 120 Watt models and 5″ housing in 55, 90 and 120 Watt sizes. Each Pro-MAX™ features a High Output UV Bulb, Internal Protective Sleeve, and UL Listed Ballast which counts down the number of days until you need to replace the bulb.
- Page 2 Look at the UV clear cap (#15). It has a tapered hole on the inside of the threads. The other end of the sterilizer is the UV end cap (#2). It has a hold on that holds the Quartz sleeve (#14) and acts as the quartz sleeve guide. When you are installing the quartz sleeve it will sit inside the UV end cap.
- Page 3 In 2021 Lifegard introduced the new add-on parts kit to your Pro Max will allow you to seal the quartz sleeve internally so when you plan to service the UV and change the UV bulb the water will not drain from the Pro Max. In addition it is a secondary seal to protect the UV bulb.
- Page 4 space. Press the tapered rubber gasket onto the quartz sleeve cap and press it in. This will make the seal on the cable and the sleeve so that moisture does not get in. Gently slide in the quartz sleeve into the UV Housing as shown in the figure below and make sure it reaches the back and of the UV end cap and sits into the guide assembly as discussed earlier.
- Page 5 Once you replace all the protective sleeves and have serviced all the O-rings you can close and seal the end caps by gently tightening the stainless steel nuts. Scan to Video Instructions link https://youtu.be/XbHxeGQmJWs Lifegard Aquatics, 8633 Sorensen Ave. Santa Fe Springs CA 90670 Phone - 562 404 4129 Email - info@lifegardaquatics.com...
- Page 6 UV CAP NUT PVC PLASTIC 3" or 5" Diameter R450236 319304 INLET/OUTLET PVC PLASTIC 3" or 5" Diameter R450237 323493 Flat Gasket for 3" Pro-MAX UV Sterilizer (Added in 2019 and later production) R450238 323509 Flat Gasket for 5" Pro-MAX UV Sterilizer (Added in 2019 and later production)
Need help?
Do you have a question about the Pro-MAX and is the answer not in the manual?
Questions and answers