Table of Contents
Advertisement
Advertisement
Table of Contents

Related Manuals for OXEFIT XS1

Summary of Contents for OXEFIT XS1
- Page 1 USER MANUAL v 2.0...
-
Page 2: Table Of Contents
THE INTERFACE 10-12 FOLDING THE DECK (OPTIONAL) HOME PAGE VIEW PROGRESS & ACTIVITY STABILIZER LEGS EXPLORE PAGE PREPARING THE XS1 FOR INACTIVITY WARRANTY LIMITED WARRANTY STABILIZER BARS QUICK START POWERING DOWN THE XS1 EXPLORE EXERCISES HOW TO OBTAIN WARRANTY SERVICE 17... -
Page 3: Introduction
XS1. It is the responsibility form. Please wear appropriate non-slip footwear. DO MINIMUM: 4’ 2” of the owner to ensure that all XS1 users are aware of NOT dismount from the device while the cables are warnings, precautions, and safety requirements. Fail- loaded. -
Page 4: Inspect Your Xs1
Familiarize yourself with all warnings on the XS1 before use. If a warning label is damaged or lost, contact OxeFit for a replacement immediately. Please read all labels before using your XS1. It is the responsibility of the owner to Contains: ensure that users are aware of all warnings and precautions before use. -
Page 5: Installation Requirements
LOCATION REQUIREMENTS REQUIREMENTS WITH THE DECK FOLDED DOWN The XS1 requires at least 4 inches of space behind the The XS1 requires a standard (120 VAC, 60 Hz), ground- unit. The entire set-up space should be at least 6’ x ed, three-pronged outlet. -
Page 6: Stowing
Unbuckle the straps at the front of the device. See Figure 3.1. Unhook both ends of the deck straps from the latches located in between the rear support beams of the XS1. See Figure 3.2. Lower the deck using the deck handle located at the end of the deck. -
Page 7: Stabilizer Legs
X S 1 U S E R M A N U A L STABILIZER LEGS Two stabilzer legs located under the deck of the XS1 will be visible once the deck is folded up. The stabilizer legs are to remain in place after installation. -
Page 8: Getting Started
(CONTINUED) (CONTINUED) with the guidelines to ensure you are safely operat- ing the equipment: Enter the 9-digit code that is on the XS1 screen. • Only one person is permitted to operate the XS1 Tap the “Get Started” button. at a time. -
Page 9: Setting Up For An Exercise
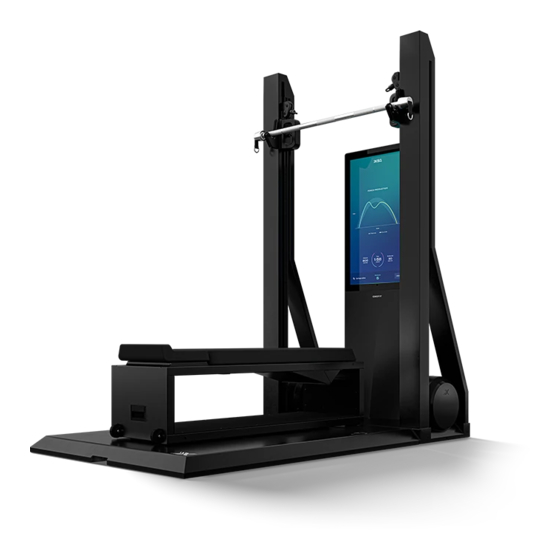
The XS1 has four connection points for connecting accessories. Two are slide connections located on the vertical positioner, each support 70 pounds of digital tension (or a combined weight of 140 pounds). The remaining two are in the deck and support a combined total of 250 pounds of resistance. See XS1 DIAGRAM on page 4. -
Page 10: Benches
Pilates. Align the center locking pin to the nearest avail- Access an array of workouts and classes on the XS1 able hole. explore page. Browse by trainer-led classes, pre- SETTING UP THE... -
Page 11: Lock Screen Mode
X S 1 U S E R M A N U A L ACTIVE STRENGTH WORKOUT SCREEN LOCK SCREEN MODE When the XS1 is powered on but inactive after two minutes, the system will enter lock screen mode. Lock screen mode will return the user to the XS1 lock END WORKOUT OR EXERCISE NAME &... -
Page 12: Active Cardio Workout Screen
END WORKOUT OR CHANGE EXERCISE/NEXT You are required to register your OxeFit account to EXERCISE use the app. If you do not have an OxeFit account, download the app and follow the on-screen instruc- tions to create an account. DOWNLOADING THE APP Download the OxeFit app to your smart device. -
Page 13: You
Upcoming Workouts rail on the Home exercises. ed, they will appear on the XS1 profile screen. page. The workout will appear on the XS1 Home screen in the Select Scheduled. My Workouts rail. REMOVE USER PROFILES Edit the date or occurrence of the scheduled... -
Page 14: Fitness Features
STRENGTH TRAINING MODES See INITIALIZATION PROCESS on page 8. exercises. Training modes maximize your strength training. There are four modes for strength training on the XS1: Overload, Chains, Burnout, and Perturbation. STALL MODE FOR BARBELL EXERCISES For pre-configured exercises, access the training... -
Page 15: Concentric Phase
CONCENTRIC PHASE Training modes maximize your cardio exercises. Working resistance will be applied for the full dura- There are three modes for cardio exercises on the XS1: Concentric phase is essentially when the muscles tion of the working interval length. -
Page 16: View Progress & Activity
XS1 unit will ensure a safe environment and Proper care and cleaning will extend the life of your Tap your user profile in the top right corner of the XS1 promote awareness of any potential issues that may re- equipment and reduce premature aging and wear. -
Page 17: Warranty
XP1 or XS1 (collectively, the “Product”). OxeFit parts and accessories) and is not transferable or serial number of your XP1 or XS1 and the dated receipt Specific exclusions apply, as described in the Limited assignable to any other party. -
Page 18: Support
If an error with your XS1 occurs, attempt to power cy- cle the device. Turn off the XS1 for at least two minutes, then turn the system back on using the power switch located at the back of the device. - Page 19 © 2022 OxeFit, Inc. All Rights Reserved.
Need help?
Do you have a question about the XS1 and is the answer not in the manual?
Questions and answers
Screen stays on all the time