Advertisement
Available languages
Available languages
Quick Links
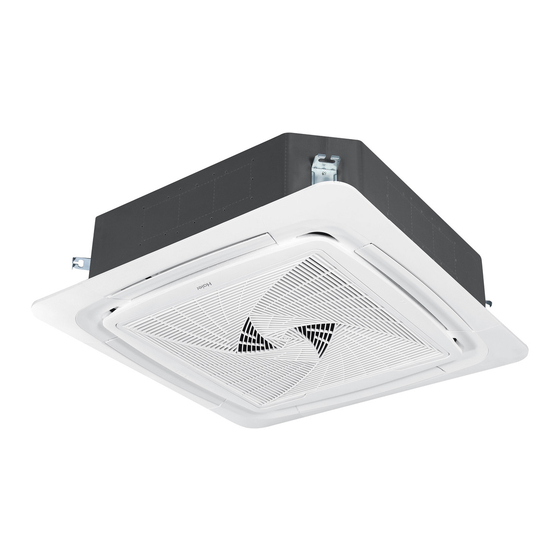
Large Cassette
Installation Instructions
Design may vary by model number.
L'aspect peut varier selon le numéro de modèle.
El diseño puede variar según el número
This installation manual is only
Ce manuel d'installation est uniquement
de model. Este manual de instalación sólo
printed in English. For French or
imprimé en anglais. Pour la version française ou
fue impreso en inglés. Para acceder a la
Spanish version, please visit
espagnole, visitez le site
versión en francés o español, por favor visite
GEAppliancesairandwater.com
GEAppliancesairandwater.com
GEAppliancesairandwater.com
31-5000516 Rev. 3 04-23 GEA
Advertisement
Chapters

Related Manuals for Haier GE APPLIANCES USYL24UCDDA


Summary of Contents for Haier GE APPLIANCES USYL24UCDDA
- Page 1 Large Cassette Installation Instructions Design may vary by model number. L’aspect peut varier selon le numéro de modèle. El diseño puede variar según el número This installation manual is only Ce manuel d’installation est uniquement de model. Este manual de instalación sólo printed in English.
- Page 2 This manual contains installation instructions for Large Cassette indoor units. 31-5000516 Rev. 3...
-
Page 3: Table Of Contents
Date of purchase Staple your proof of purchase to this manual to aid in obtaining warranty service if needed. To register your new Haier Duct Free System go to Haierductless.com/product-registration or GEAppliances.com/ductless/registration-form and input the model/serial number information on this page. To receive a 10-year compressor and parts warranty, registration is required within 60 days of installation. -
Page 4: Important Safety Information
• Any servicing must be performed by a qualified • These R-410A heat pumps systems require that individual. GE Appliances/Haier recommends factory contractors and technicians use tools, equipment and trained and service & installation contractors that meet safety standards approved for use with this refrigerant. -
Page 5: Installation Instructions
730/650/550/450 730/650/550/450 800/730/600/500 800/730/600/500 "Indoor Sound Level dB 46/44/39/37 51/50/48/46 51/50/48/46 54/51/48/46 54/51/48/46 Grill Model "PB-950KD (Haier) "PB-950KD (Haier) "PB-950KD (Haier) "PB-950KD (Haier) "PB-950KD (Haier) PB-950NB (GE)" PB-950NB (GE)" PB-950NB (GE)" PB-950NB (GE)" PB-950NB (GE)" Chassis Dimension: Height in (mm) - Page 6 • Note to installer – Be sure to leave these instructions with the owner. • Note to consumer – Keep these instructions for future reference. • Skill level – GE Appliances/Haier recommends factory trained and service & installation contractors that meet local and national code requirements for the region.
- Page 7 3/4” USYL42UCDDA • 3/8” threaded rod, washers and nuts USYL48UCDDA • R410A Refrigerant Cassette Panel Options Haier Brand GEA Brand PB-950KB PB-950NB • Panel for 3’x3’ Cassette • Panel for 3’x3’ Cassette (includes WJ01X25115 • Must order PB-950KB separately with the purchase of controller) large cassette models.
- Page 8 Installation Instructions: Introduction and Overview Fresh Air Intake Option Electrical Power The cassette has a marked area to cut out if outside Follow all local codes and regulations when installing air is desired. The piping connection should be made electrical wiring. with a 4 inch diameter pipe.
-
Page 9: Step 1 - Preparation
Installation Instructions MINIMUM CLEARANCES (Appearance may vary) This picture is for reference only. Your product may look different. 5 ft. 5 ft. 8 ft. Over Air Delivery Clearances Service and Maintenance Clearances Standard clearances for cassette air handlers require Make sure there are adequate clearances for future 5 feet of clearance in each direction. -
Page 10: Step 2 - Installation Of The Cassette Unit
Installation Instructions Step 1 - Preparation (cont) B. Threaded Rod Mounting Information: The Cassette unit should be mounted to the building structure using threaded rods. The threaded rods should have washers and nuts to allow the height and level of the cassette to be adjusted. The threaded rods and attachment brackets are field supplied items. - Page 11 Installation Instructions Step 2 - Installation of the Indoor Unit (Cont.) Prior to routing the refrigerant lines to the unit, install Remove the electrical box cover. Remove the the supplied flare nuts onto the refrigerant lines. rubber grommet and insert a 1/2 inch electrical Using an R-410 flaring tool, flare the refrigerant connector and reducing washer.
-
Page 12: Step 3 - Electrical Connections
Installation Instructions Step 2 - Installation of the Cassette Unit (cont) Installation Height Grade Installation Height ACT17CWA (Wired Controller) 1 (Default) 2.7m (8.9ft) • After backlight is lit at the wired controller off, press and 2.7 - 3.7m (8.9 - 12.1ft) hold FAN and TEMP + button for 10 seconds. -
Page 13: Limited Warranty
• unapproved condenser / air handler). Labor and related services for repair or installation of the • Component or parts are not provided by GE Appliances, a Haier Product. Company • A product purchased from an unauthorized online retailer. - Page 14 Canada. This warranty it provided by GE Appliances a Haier company, Louisville, KY 40225. ATTACHMENT 1 The “Product” is defined as Haier brand and GE Appliances brand Ductless Split Units and Side-discharge Units. The “Product” contains 2 sub-categories of goods: “Indoor and Outdoor Products” and “Selected Installation Products,” which are further defined below: “Indoor and Outdoor Products”...
- Page 15 Table des matières CONSIGNES DE SÉCURITÉ IMPORTANTES ............16 INSTRUCTIONS D’INSTALLATION .
-
Page 16: Consignes De Sécurité Importantes
CONSIGNES DE SÉCURITÉ IMPORTANTES LISEZ TOUTES LES INSTRUCTIONS AVANT D’UTILISER L’APPAREIL AVERTISSEMENT Pour votre sécurité, les renseignements dans ce manuel doivent être observés afin de minimiser le risque d’incendie, de décharge électrique ou de blessure. Si une réparation exige de pénétrer dans le système de frigorigène étanche, la réglementation fédérale impose de faire réaliser le travail par un technicien de Classe II ou détenant une certification... -
Page 17: Instructions D'installation
Instructions d’installation: Introduction et vue d’ensemble Renseignements concernant le boitier tension de secteur indépendants. réparateur. d’eau. Caractéristiques techniques de l’appareil - grande cassette (3 pi x 3 pi) Intérieur USYL24UCDDA USYL36UCDDA USYL42UCDDA USYL48UCDDA 5+Auto 5+Auto 5+Auto 5+Auto 5+Auto Raccords Flare Flare Flare Flare... - Page 18 Instructions d’installation POUR OBTENIR DE L’AIDE SUPPLÉMENTAIRE, VISITEZ HAIERAPPLIANCES.COM/DUCTLESS OU GEAPPLIANCES.COM/DUCTLESS AVANT DE COMMENCER ATTENTION Veuillez lire toutes ces instructions attentivement. IMPORTANT – • IMPORTANT – • • Note à l’installateur – instructions au propriétaire. • Note au consommateur - •...
- Page 19 • Alésoir • Pinces à dénuder Fourni avec l’appareil • Bride • Isolant Fourni par l’installateur USYL24UCDDA USYL36UCDDA • Isolant pour drain à condensat USYL42UCDDA USYL48UCDDA Options du panneau de cassettes Haier Brand GEA Brand PB-950KB PB-950NB PB-950KD 31-5000516 Rev. 3...
- Page 20 Instructions d’installation: Introduction et vue d’ensemble Option d’admission d’air frais Alimentation électrique Ø 4 (100) Traitement du condensat REMARQUE : de traction 12 in. below 3-5 ft. 11 in. under 8.6 in. 31-5000516 Rev. 3...
-
Page 21: Étape 1 - Préparation
Instructions d’installation DÉGAGEMENTS MINIMAUX (L’aspect peut variert) 5 ft. 5 ft. 5 ft. 5 ft. 8 ft. Over 8 ft. Over Dégagements pour la circulation d’air Dégagements pour réparation et entretien Étape 1 – Préparation A. Sélection de l’emplacement: placer. REMARQUES: 31-5000516 Rev. -
Page 22: Étape 2 - Installation De L'appareil À Cassette
Instructions d’installation Étape 1 – Préparation (suite) B. Informations de montage de la tige filetée: cassette. • 8- rondelles Étape 2 - Installation de l’appareil à cassette Enfoncement de 25 mm (1 po) : 1 (25) 31-5000516 Rev. 3... - Page 23 Instructions d’installation Étape 2 - Installation of the Cassette Unit (suite.) Avec une clé dynamométrique, effectuez un couple de serrage aux adaptateurs selon les spécifications requises. (Consultez le manuel d’installation pour connaître le couple de serrage des raccords coniques) 31-5000516 Rev. 3...
-
Page 24: Étape 3 - Raccords Électriques
Instructions d’installation Étape 2 - Installation of the Cassette Unit (suite.) Niveau de hauteur Hauteur d’installation d’installation FAN et TEMP supérieur droit. TEMP + ou TEMP –. Étape 3 - Raccords électriques Raccords électriques pour les appareils intérieur et extérieur REMARQUE : central controller REMARQUE :... -
Page 25: Garantie Limitée
Garantie limitée Pour la période de : GE Appliances remplacera: COMPOSANTS EXCLUS QUELLE EST LA DATE D’ACHAT : QUI EST COUVERT : COMMENT OBTENIR UN SERVICE D’INSTALLATION OU DE RÉPARATION : ESTA GARANTÍA NO CUBRE d’une installation incorrectes. incorrect. l’installation du Produit. 31-5000516 Rev. - Page 26 Cette garantie couvre les appareils dans les cinquante (50) États des États-Unis, du district de Columbia ou du Canada Cette garantie est attribuée par GE Appliances a Haier company, Louisville, KY 40225. ANNEXE 1...
- Page 27 GARANTÍA LIMITADA ............... . . 37 Mantenimiento de Registros Gracias por adquirir este producto de Haier. Este manual de ____________________________________ instalación le ayudará...
-
Page 28: Información Importante De Seguridad
• Todo el servicio técnico deberá ser realizado por un individuo que los contratistas y técnicos usen herramientas, equipos calificado. GE Appliances/Haier recomienda contar con y estándares de seguridad aprobados para su uso con este contratistas de servicio técnico e instalación con entrenamiento refrigerante. -
Page 29: Instrucciones De Instalación
Bajo/ Silencioso) RPM Nivel de Sonido Interior en dB (Turbo/ Alto/ 46/44/39/37 51/50/48/46 51/50/48/46 54/51/48/46 54/51/48/46 Medio/ Bajo/ Silencioso) Modelo de Rejilla "PB-950KD (Haier) "PB-950KD (Haier) "PB-950KD (Haier) "PB-950KD (Haier) "PB-950KD (Haier) PB-950NB (GE)" PB-950NB (GE)" PB-950NB (GE)" PB-950NB (GE)"... - Page 30 • Nota para el Comprador – Conserve estas instrucciones para referencia futura. • Nivel de habilidad – GE Appliances/Haier recomienda contar con contratistas de servicio técnico e instalación con entrenamiento de fábrica, que cumplan con los requisitos de los códigos local y nacional para la región.
- Page 31 3/4” • Varilla roscada de 3/8, arandelas y tuercas USYL42UCDDA • Refrigerante R410A USYL48UCDDA Opciones de panel de casete Haier Brand GEA Brand PB-950KB PB-950NB • Panel para Cassette de 3’x3’ • Panel para casete de 3’x3’ (incluye controlador • Debe pedir el PB-950KB por separado con la compra...
- Page 32 Instrucciones de Instalación Opción de Entrada de Aire Fresco Corriente Eléctrica La unidad tipo cassette cuenta con un área marcada para Cumpla con todos los códigos y regulaciones locales al realizar un recorte si se desea aire exterior. La conexión de instalar el cableado eléctrico.
-
Page 33: Paso 1 - Preparación
Instrucciones de Instalación DESPEJES MÍNIMOS (El aspecto puede variar) Esta imagen sólo sirve como referencia. El aspecto de su producto podrá ser diferente. 5 ft. 5 ft. 5 ft. 5 ft. 8 ft. Over 8 ft. Over Espacios Libres de Entrada de Aire Espacios Libres para el Servicio Técnico y el Mantenimiento Los climatizadores tipo cassette requieren 5 pies de espacio... -
Page 34: Paso 2 - Instalación De La Unidad Tipo Cassette
Instrucciones de Instalación Paso 1 – Préparation (cont) B. Información sobre el Montaje de la Varilla Roscada: La unidad tipo cassette deberá ser montada sobre la estructura de la edificación usando varillas roscadas. Las varillas roscadas deberán contar con arandelas y tuercas, a fin de permitir que la altura y el nivel de la unidad tipo cassette sean ajustados. - Page 35 Instrucciones de Instalación Paso 2 - Instalación de la Unidad Tipo Cassette (Cont.) Antes de conducir las tuberías de refrigerante hasta la Retire la tapa de la caja eléctrica. Retire la arandela unidad, instale las tuercas abocardadas suministradas en aislante de goma e inserte un conector eléctrico de ½ las tuberías de refrigerante.
-
Page 36: Paso 3 - Conexiones Eléctricas
Instrucciones de Instalación Paso 2 - Instalación de la Unidad Tipo Cassette (Cont.) Configuración de la Altura de Instalación Exterior – Usando el Grado de Altura de la Altura de la Instalación QACT17A/ ACT17CWA (Controlador Cableado) Instalación • Una vez que la luz de fondo esté encendida con el controlador 1 (Por defecto) 2.7m (8.9ft) de fondo apagado, mantenga presionados los botones FAN... -
Page 37: Garantía Limitada
• Daño ocasionado por un componente o pieza usado o no • Trabajo o servicios relacionados con la reparación o instalación aprobado por GE Appliances, una Compañía de Haier (es decir: del Producto. un condensador/ climatizador usado y/o no aprobado). - Page 38 ADJUNTO 1: El “Producto” se define como Unidades Tipo Split Sin Conducto y Unidades de Descarga Lateral de la marca Haier y GE Appliances. El “Producto” contiene 2 subcategorías de productos: “Productos de Interior y de Exterior” y “Productos de Instalación Seleccionados”, que son definidos en mayor detalle a continuación: “Los Productos Interior y Exterior”...
Need help?
Do you have a question about the GE APPLIANCES USYL24UCDDA and is the answer not in the manual?
Questions and answers