
Related Manuals for Caltta PH600


Summary of Contents for Caltta PH600
- Page 1 PH600 Radio MAINTENANCE MANUAL (Level1) V1.0 All rights reserved. No spreading abroad without permission of Caltta...
- Page 3 The copyright of this document belongs to Caltta Technologies Co.,Ltd. Text contains proprietary information owned by Caltta Technologies Co.,Ltd., without the written permission of Caltta Technologies Co.,Ltd., any unit or individual shall not use or leak any document and pictures, this document contains tables, picture, data and other information.
-
Page 4: Table Of Contents
4.5 Components..........................32 5 Hardware Pictures..........................33 5.1 Front of Main PCB........................33 5.2 Back of Main PCB........................34 6 Troubleshooting Maintenance Flow....................35 6.1 Structural Part Failure.........................35 6.2 Battery Failure..........................36 6.3 No Power On..........................37 All rights reserved. No spreading abroad without permission of Caltta. - Page 5 6.8 Side Key Failure.......................... 42 6.9 Keypad Failure..........................43 6.10 Accessory Failure........................44 6.11 TF Missing..........................45 7 Check After Maintenance........................46 7.1 Check Latest Firmware Version and Device Information.............46 7.2 Function Check..........................46 All rights reserved. No spreading abroad without permission of Caltta.
-
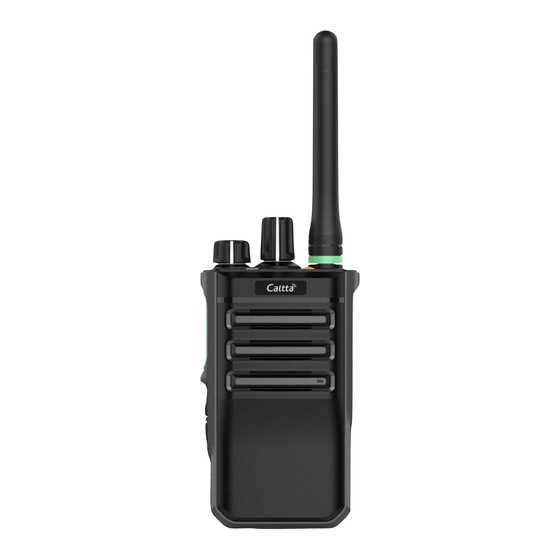
Page 7: Overview
This picture is for reference only, please refer to the actual product. 1.2 Standard Package Item Quantity (PCS) PH600 Radio Unit Battery Power Adapter Quick Start Guide Antenna Belt Clip Charger All rights reserved. No spreading abroad without permission of Caltta. -
Page 8: Specification
65 dB (ETSI) 70 dB (TIA603D) Spurious Rejection 70 dB (ETSI) 80dB(TIA603D) Blocking or Desensitization 84dB(ETSI) Co-channel -12~0 dB @12.5KHz/-8~0 dB @20/25KHz Rejection Hum and Noise -40 dB@12.5KHz /-43 dB@20KHz /-45 dB@25KHz All rights reserved. No spreading abroad without permission of Caltta. - Page 9 GJB 150A-2009 and MIL-STD-810 C/D/E/F/G BeiDou/GPS Accuracy specs are for long-term tracking (95th percentile values>5satellites visible at nominal -130 dBm signal strength) TTFF (Time To First <60s Fix) - Cold Start All rights reserved. No spreading abroad without permission of Caltta.
-
Page 10: Function Test
For other items that cannot be detected in steps (1) to (4), please refer to the radio user manual. If a fault is found in one step, the subsequent detection steps are suspended as the radio is treated faulty. All rights reserved. No spreading abroad without permission of Caltta. -
Page 11: Check Firmware Version And Device Information
3. Prepare the data cable (Type: AP340). Connect its USB port to your computer USB port, connect the other side to your radio accessory interface port and fasten it. AP340 Data Cable: All rights reserved. No spreading abroad without permission of Caltta. -
Page 12: Upgrade Procedure
1) Click to open the upgrade software, choose the language according to your requirement (Cn for Chines, En for English); 2) Double click setup.exe in the chosen language folder; 3) Click Next in the below interface; All rights reserved. No spreading abroad without permission of Caltta. - Page 13 PH600 Radio Maintenance Manual 4) Select ‘I accept’ and click Next in the below interface; All rights reserved. No spreading abroad without permission of Caltta.
- Page 14 PH600 Radio Maintenance Manual 5) Select Complete and click Next if you use the default installation path; Select Custom and click Next if you choose your own installation path; All rights reserved. No spreading abroad without permission of Caltta.
- Page 15 PH600 Radio Maintenance Manual Click Change to modify the installation path, then click Next; All rights reserved. No spreading abroad without permission of Caltta.
- Page 16 PH600 Radio Maintenance Manual 6) Click Install to confirm installation. All rights reserved. No spreading abroad without permission of Caltta.
- Page 17 3) The radio enters into the flash burn mode, press the PTT button and TK button (on the top) at the same time, and rotate the volume knob to power on the radio, the radio enters into the upgrade mode; All rights reserved. No spreading abroad without permission of Caltta.
- Page 18 4) After the upgrade software detects the USB port and displays it, you can select the corresponding USB port and click to upgrade. 5) You can choose Chinese or English language, and choose if preserve the current setting data when upgrade the radio. All rights reserved. No spreading abroad without permission of Caltta.
- Page 19 Don’t power off the radio during the upgrade. If upgrade fails, please repeat the upgrade procedure. 8) Reboot the radio after upgrade to check if the firmware is the target version. All rights reserved. No spreading abroad without permission of Caltta.
-
Page 20: Cps Software
PH600 Radio Maintenance Manual 3.3 CPS Software 1. CPS Software Installation Procedure 1) Start installation, double click to install; 2) Click Next following the prompt. 3) Select ‘I Accept’ and click Next. All rights reserved. No spreading abroad without permission of Caltta. - Page 21 PH600 Radio Maintenance Manual 4) Select Complete and click Next if you use the default installation path. All rights reserved. No spreading abroad without permission of Caltta.
- Page 22 PH600 Radio Maintenance Manual Select Custom and click Next if you choose your own installation path. Click Change to modify the installation path, then click Next. All rights reserved. No spreading abroad without permission of Caltta.
- Page 23 PH600 Radio Maintenance Manual 5) Click Install to confirm installation. All rights reserved. No spreading abroad without permission of Caltta.
- Page 24 Precondition: The radio is power on in user mode. 1) Connect the radio with data cable, and connect data cable USB port to the computer, click CPS read to display the following interface; All rights reserved. No spreading abroad without permission of Caltta.
- Page 25 Precondition: The radio database version and type code are consistent with the database version and type code of the data currently edited by the CPS software. The radio is power on in user All rights reserved. No spreading abroad without permission of Caltta.
- Page 26 2) Connect the radio with data cable, and connect data cable USB port to the computer, click CPS write to display the following interface; 3) Click OK to continue, the radio displays writing and the CPS interface displays as below; All rights reserved. No spreading abroad without permission of Caltta.
- Page 27 PH600 Radio Maintenance Manual 4) The radio automatically reboots after about 10 seconds. The CPS will indicate write success as below. 5) Click OK to complete CPS write. All rights reserved. No spreading abroad without permission of Caltta.
-
Page 28: Radio Disassemble Demonstration
PH600 Radio Maintenance Manual 4 Radio Disassemble Demonstration 4.1 Tools Item Anti-static Glove Anti-static Wrist Strap Tweezers Sockets Screwdriver (Cross Screwdriver, Slotted Screwdriver, T6 Torx Screwdriver) Soldering Iron All rights reserved. No spreading abroad without permission of Caltta. -
Page 29: Procedure
Side Key Remove the Remove the speaker 4.3 Disassemble Steps Note: The following steps apply to PH600/DH610 Radio. 1. Rotate the volume knob count-clockwise to power off the radio; All rights reserved. No spreading abroad without permission of Caltta. - Page 30 2. Remove the two back cover/clip screws with cross screwdriver to remove the clip; 3. Remove the screw of accessory interface cover with slotted screwdriver to remove the accessory interface cover; 4. Push the battery lock to remove the battery; All rights reserved. No spreading abroad without permission of Caltta.
- Page 31 PH600 Radio Maintenance Manual 5. Rotate the antenna count-clockwise to remove it; 6. Pull out the volume knob and coding knob; All rights reserved. No spreading abroad without permission of Caltta.
- Page 32 7. Use the sockets to remove the antenna nut and switch nuts; 8. Use the T6 torx screwdriver to remove the screws of aluminum cover component to take out the aluminum cover component; All rights reserved. No spreading abroad without permission of Caltta.
- Page 33 10. Take out the FPC of accessory interface (A) and the FPC of keypad (B), be careful the obstruction of accessory interface board FPC and connector, pay attention to pull them out slowly not to break them with too much force. All rights reserved. No spreading abroad without permission of Caltta.
- Page 34 11. Remove the six screws of main PCB with the cross screwdriver; 12. Lift the main PCB up obliquely to remove the LCD FPC (A), and take out the main PCB. All rights reserved. No spreading abroad without permission of Caltta.
- Page 35 13. Use the slotted screwdriver to open the buckles at the arrows to push out the PTT button (A), rubber (B), holder (C), side key (D and E), holder (F). The holder (C) and the rubber (D/E) can be separated directly. All rights reserved. No spreading abroad without permission of Caltta.
- Page 36 PH600 Radio Maintenance Manual 14. To dismantle the speaker, remove the white sealing (A) around the speaker, and use the screwdriver to take it out. All rights reserved. No spreading abroad without permission of Caltta.
-
Page 37: Assemble Steps
PCB. The red wire is soldered to the positive electrode and the black wire is soldered to the negative electrode. Do not burn the radio and the cover during soldering. All rights reserved. No spreading abroad without permission of Caltta. -
Page 38: Components
4.5 Components Item Item Clip PTT Button Cover Battery Side Key Rubber Aluminum Cover PTT Rubber Coding Knob Screw Volume Knob Main PCB Antenna Front Cover Switch Nut Accessory Interface Cover All rights reserved. No spreading abroad without permission of Caltta. -
Page 39: Hardware Pictures
PH600 Radio Maintenance Manual 5 Hardware Pictures 5.1 Front of Main PCB Item Emergency Button Vibrator Bluetooth IC (none for low configuration) All rights reserved. No spreading abroad without permission of Caltta. -
Page 40: Back Of Main Pcb
5.2 Back of Main PCB Item Main Antenna Connector Emergency Button Channel Knob Power&Volume Knob Side Key Interface (Connected to FPC and including PTT, GND, Up and Down from top to bottom) Battery Connector All rights reserved. No spreading abroad without permission of Caltta. -
Page 41: Troubleshooting Maintenance Flow
MIC Soldering Point Option Board FPC Plug 6 Troubleshooting Maintenance Flow 6.1 Structural Part Failure For the failure of radio structural parts, please refer to 4.3 Disassemble Steps for replacement. All rights reserved. No spreading abroad without permission of Caltta. -
Page 42: Battery Failure
6.2 Battery Failure Start Battery Failure Can the battery Replace be charged? battery Charge the battery for one hour Can the radio power on and work normally with the battery? All rights reserved. No spreading abroad without permission of Caltta. -
Page 43: No Power On
Start No Power On Is the battery Replace normal? battery Is the battery Repair the battery connector connector normal? Are the power Replace knob and main the main PCB normal? All rights reserved. No spreading abroad without permission of Caltta. -
Page 44: Radio Freeze Or Power Off Automatically
PH600 Radio Maintenance Manual 6.4 Radio Freeze or Power Off Automatically Start Radio freeze after power on or power off automatically Is the battery Replace normal? battery Replace the main PCB All rights reserved. No spreading abroad without permission of Caltta. -
Page 45: Charge Failure
Are the charger Replace charger and power adaptor or power adaptor normal? Is the battery Replace charging pole battery corroded or dirty? Replace the battery if corroded or clean it if dirty All rights reserved. No spreading abroad without permission of Caltta. -
Page 46: No Voice (Mic) Failure
No voice (MIC) failure Is the MIC hole Clean or dirty and blocked? replace the front cover Is the MIC of main Replace the PCB normal? material Replace the main PCB All rights reserved. No spreading abroad without permission of Caltta. -
Page 47: No Sound (Speaker) Failure
6.7 No Sound (Speaker) Failure Start No Sound (Speaker) failure Reset the Is the volume setting normal? volume Replace the Are the speaker material or and soldering re-solder normal? Replace the main PCB All rights reserved. No spreading abroad without permission of Caltta. -
Page 48: Side Key Failure
Is the main PCB Side Key metal Key metal dome dome collapsed? Is the contact of Clean or replace Side Key FPC the Side Key FPC corroded or dirty? Replace the main PCB All rights reserved. No spreading abroad without permission of Caltta. -
Page 49: Keypad Failure
Are the front cover Replace the front keypad and the cover keypad or FPC FPC normal? Is the keypad FPC Repair the keypad plug normal? FPC plug Replace the main PCB All rights reserved. No spreading abroad without permission of Caltta. -
Page 50: Accessory Failure
FPC broken? Is the accessory Repair the interface plug of the accessory main PCB normal? Especially pay attention interface plug to the contacts of plug. Replace the main PCB All rights reserved. No spreading abroad without permission of Caltta. -
Page 51: Tf Missing
Re-upgrade radio firmware to version support the support TF card TF card? Repair the TF Is the TF card slot of main PCB card slot broken? Replace the main PCB All rights reserved. No spreading abroad without permission of Caltta. -
Page 52: Check After Maintenance
6. Turn coding knob to adjust radio frequency and set work mode to the same as another normal radio, and make a voice call test to check if the call can be sent, received, and if the voice is normal. 7. Finish checking. All rights reserved. No spreading abroad without permission of Caltta.