Table of Contents
Advertisement
Quick Links
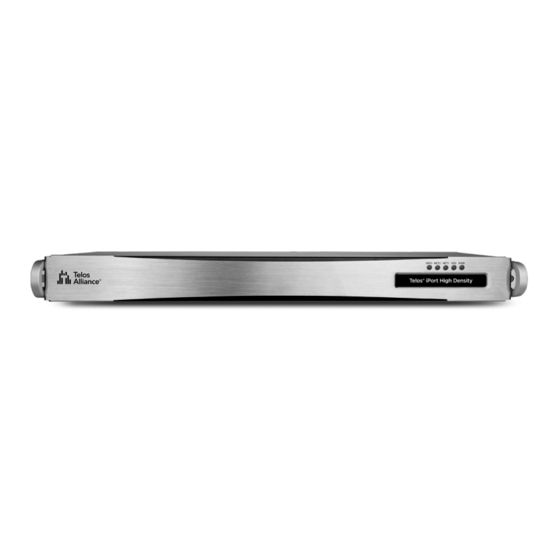
Telos iPort High Density
iPort High Density
Telos iPort High Density is a networked multi-codec gateway that enables the transport of multiple channels
of stereo audio across any QoS-enabled IP network, including T1 and T3 connections and private WANs
with MPLS – perfect for large-scale distribution of audio to single or multiple locations.
iPort High Density is the workhorse of codecs, configurable with up to 64 bi-directional MPEG codecs.
Optionally, you can add aptX® encoding to any codec or use Linear PCM audio. iPort HD connects to Axia®
IP-Audio networks using a single ethernet cable for all I/O or can be used as a standalone multiple-stream
codec.
Coding algorithms include AAC, AAC-LD, HE-AAC (plus v2), MP2, MP3, optional aptX® Enhanced, or
Linear PCM. Bit rates range from 24 to 320 kbps for MPEG codecs, plus standard fixed rates for aptX, 24 bit
48k for Linear PCM. iPort High Density offers dual, parallel-path end-to-end streaming for ultra-reliability
and redundancy. Up to 20 unidirectional GPIO contact closures per codec are available in several modes to
allow considerable control flexibility. End-to-end GPIO is supported for each codec. An optional unique
Content Dealy feature allows independent local storage and scheduled delayed playout of any coded audio
channels.
Important - Content Delay requires additional installed hardware and a separate license for
activation. The base model iPort High Density does NOT include this hardware.
Quick Start Guide
Getting Started
Registration
We know you're anxious to mount your new Telos iPort High Density and get it running, but please take a
moment to register your product online to activate the warranty and ensure you will get quality support
should you have questions regarding installation, operation, or troubleshooting. Visit
http://telosalliance.com/product-registration/
to register.
Advertisement
Table of Contents

Related Manuals for Telos Alliance iPort High Density

Summary of Contents for Telos Alliance iPort High Density
- Page 1 Getting Started Registration We know you're anxious to mount your new Telos iPort High Density and get it running, but please take a moment to register your product online to activate the warranty and ensure you will get quality support should you have questions regarding installation, operation, or troubleshooting.
- Page 2 Hardware Installation The 1RU iPort High Density hardware mounts in a standard 19-inch rack with supplied rack rails. The rear of the unit must be supported. To prevent damage, if the supplied rack rails are not used, a supporting shelf is recommended.
-
Page 3: Initial Configuration
Important - The NET 2 (the Livewire LAN) connection requires a 1000BT full-duplex connection. For the initial setup, you can connect iPort High Density to your switch or temporarily connect it directly to a PC using a standard Ethernet cable (a cross-over cable is not required). - Page 4 User Manual. Connecting to the Web Interface iPort High Density can be remotely accessed from a web browser on any PC on the network. 1. Connect the iPort High Density to your network using NET 2. 2. From a computer connected to the same network, point your browser to the iPort by entering the unit’s IP address (http://192.168.2.100).
- Page 5 Completing Network Configuration From the left side menu, choose Network under the Configuration heading. The current settings for the Livewire (LAN) and WAN interfaces are displayed. Configuring the Livewire (LAN) Interface (1) Set the Network address Set the Netmask Note that the Livewire interface does not require or support a Gateway or DNS. Configuring the WAN Interface (2) Set Network Address A Set Netmask A...
-
Page 6: Notices And Cautions
Livewire (LAN) and WAN interface configuration Adding Feature Licenses iPort High Density comes with eight codecs pre-licensed. No additional steps are required if you did not purchase additional options. To add additional licenses, please refer to the User Manual. Additional licenses may include additional codecs, aptX encoding options, or Content Delay features. - Page 7 The instrument power supply incorporates an internal fuse. Hazardous voltages may still be present on some of the primary parts even when the fuse has blown. If fuse replacement is required, replace the fuse only with the same type and value for continued protection against fire WARNING: The product’s power cord is the primary disconnect device.
- Page 8 WARNUNG: Das Gerätenetzkabel ist die Haupttrennvorrichtung. Die Steckdose sollte sich in der Nähe des Gerätes befinden und leicht zugänglich sein. Das Gerät sollte nicht so angeordnet sein, dass der Zugang zum Netzkabel beeinträchtigt ist. Wird das Gerät in ein Rack eingebaut, sollte eine leicht zugängliche Sicherheitstrennvorrichtung in den Rack-Aufbau mit einbezogen werden.
- Page 9 FEEDBACK We welcome feedback on any aspect of iPort High Density, or this manual. In the past, many good ideas from users have made their way into software revisions or new products. Please contact us with your comments.
- Page 10 The Telos website has a variety of information that may be useful for product selection and support. The URL is www.TelosAlliance.com REGISTER YOUR PRODUCT Did you know that all Telos Alliance products come with a 5-Year Warranty? Take a moment to activate your coverage online at http://telosalliance.com/product-registration/ Telos Systems 1241 Superior Avenue E.
- Page 11 MPEG or Linear PCM mode. You can license additional codecs up to a maximum of 64, as well as add Enhanced aptX™ encoding. iPort High Density connects to your existing Livewire® Network using a single ethernet cable (CAT-6 recommended) for all I/O. It can also pair with...
- Page 12 Network Configuration Host Name This is the Linux host name that is used for device identification, for example, when system logs are being sent to an external machine. These should be unique for each device in your network. If you have more than one iPort, you will want to change this from the default ‘iPort’...
- Page 13 With iPort High Density, you may configure two IP addresses (A and B) on the same WAN port or each of the WAN and LAN ports for enhanced redundancy. The WAN port may be set to any needed value for compatibility with the network to which it’s connected.
-
Page 14: Changing Passcodes
Adjusting Leap Seconds From time to time, the leap seconds file needs to be updated. This is particularly important if your iPort uses the optional Content Delay feature where accurate playback time is needed. A leap second is a one-second adjustment that is occasionally applied to Coordinated Universal Time (UTC), to accommodate the difference between precise time (as measured by atomic clocks) and imprecise observed solar time. - Page 15 Backup and Restore of the iPort High Density system configuration is done on the Backup & Restore webpage Backup - Saves your settings to an XML file on your computer. Restore - Click Choose File, browse for and locate the XML file backup, then click Restore.
-
Page 16: What's Next
You also learned how to set up your unit's configuration files. Since the main function of iPort High Density is sending high-quality audio from point A to point B, we'll next discuss how to do that with the MPEG or optional aptX® Enhanced encoders. -
Page 17: Audio Transport
If you already have a Livewire-based installation, the iPort High Density is a simple and low-cost way to extend it over a wide-area IP network. Connect the local network to one of the iPort jacks and the WAN to the other, make some configuration choices, and you are ready to go. - Page 18 High Density uses state-of-the-art MPEG codec technology to conserve network bandwidth while preserving excellent audio quality. Codec Types The following tables list the codec types in iPort High Density, along with their related bitrates, sample rates, and input samples per channel: MP3 Codecs...
- Page 19 40 Kbps 24 kHz 2304 48 Kbps 24 kHz 2304 56 Kbps 24 kHz 2304 64.Kbps 24 kHz 2304 80 Kbps 24 kHz 2304 96 Kbps 32 kHz 3458 (3456) 112 Kbps 48 kHz 2304 128 Kbps 48 kHz 2304 160 Kbps 48 kHz 2304...
- Page 20 Codec/Mode Bitrate Sample Rate Input Samples per Channel MP2 Stereo/Dual 64 kbps 48 kHz 2304 mono 96 kbps 48 kHz 2304 112 kbps 48 kHz 2304 128 kbps 48 kHz 2304 160 kbps 48 kHz 2304 192 kbps 48 kHz 2304 256 kbps 48 kHz...
- Page 21 56 kbps 32 kHz 3072 64 kbps 32 kHz 3072 80 kbps 48 kHz 2048 96 kbps 48 kHz 2048 112 kbps 48 kHz 2048 128 kbps 48 kHz 2048 160 kbps 48 kHz 2048 192 kbps 48 kHz 2048 256 kbps 48 kHz 2048...
- Page 22 112 kbps 48 kHz 128 kbps 48 kHz 160 kbps 48 kHz 192 kbps 48 kHz 256 kbps 48 kHz 320 kbps 48 kHz AAC-LD Mono 32 kbps 32 kHz 40 kbps 32 kHz 48 kbps 32 kHz 56 kbps 48 kHz 64 kbps 48 kHz...
- Page 23 80 kbps 48 kHz 2048 96 kbps 48 kHz 2048 AAC-HE Mono 24 kbps 48 kHz 2048 28 kbps 48 kHz 2048 32 kbps 48 kHz 2048 40 kbps 48 kHz 2048 48 kbps 48 kHz 2048 56 kbps 48 kHz 2048 AAC-HE-V2 Codecs Input Samples...
-
Page 24: Getting Started
PLUS. If you will be using your iPort High Density within a facility that is already Livewire-equipped, the xNode will not be required. Just connect the Livewire port of iPort High Density to an open Ethernet port in the Livewire... -
Page 25: Codec Configuration
system (1 Gig port required). Livewire sources can be from any Axia product including xNodes, consoles, or PC software drivers. Remember, however, there must be at least one hardware Livewire xNode in the system to provide the required clock signal to the network. If you already have a Livewire network, you like already have this covered. - Page 26 Codec Receive Ports The base port numbers for both UDP and TCP determine the receive port number assigned to the corresponding function of the first codec channel. Port numbers for other codec channels are incremented by one per channel automatically. Note that if multiple WAN paths are used the A and B paths MUST have different base ports defined.
- Page 27 Use the Encoder Type dropdown to select the method of MPEG encoding you wish to use. Along with several options for AAC, MP3 and MP2 encoding, you can also choose linear (uncompressed) audio or GPIO only. If the optional Enhanced aptX is licensed, you can choose options for Enhanced 16-bit and 24- bit encoding.
- Page 28 Select the Protocol Type and specify an IP Address and Port for the receiver. Note the port used on the receiver is determined by the Global Options from the previous section. The Protocol type may be UDP, TCP, or multicast. There are tradeoffs in this choice that are only fully understood with knowledge of this aspect of IP networks.
- Page 29 The Buffering drop-down box lets you choose how much buffer is applied to the received streams. A lower value gives a lower delay but depends upon the network to have low jitter. A range of values allows experimentation to find the optimum for your network conditions. One procedure is to try successively lower values until you hear audio interruptions.
- Page 30 formatting - nothing proprietary or special. Theoretically, it should work with other manufacturers codecs, but we cannot make any guarantees. We recommend you do some experimentation on your own before committing to an equipment purchase or broadcast of a major event. Does Zephyr iPort PLUS conform to the ITU N/ACIP specification? No, it does not.
-
Page 31: What's Next
Using GPIO & Data with iPort High Density As multiple audio signals are encoded in iPort High Density and distributed over a WAN or other network, their associated GPIO information needs to travel with them. Zephyr iPort PLUS makes this happen by embedding GPIO events in the coded audio stream. -
Page 32: Gpio Operation Modes
If you're still having difficulties, remember that Telos Alliance 24/7 tech support is just a phone call away. Audio and control functions aren't the only things running around the data stream. There are “associated data channels,”... -
Page 33: Virtual Endpoint
LWRP – LiveWire Routing Protocol GPIO - General Purpose Input-Output GPI – General Purpose Input GPO – General Purpose Output LWCH – LiveWire CHannel number Virtual Endpoint The virtual endpoint mode serves for forwarding the GPIO events between clients (PC applications, Axia consoles) connected on the local side of the Zephyr iPort PLUS, and the codec link. - Page 34 Transit Point The Transit Point mode serves for forwarding GPIO events between a GPIO node connected on the local side of the Zephyr iPort PLUS, and the codec link. The transit point mode differs from the endpoint mode by the following: Zephyr iPort PLUS - encoder: On the hardware GPIO node connection it acts as a client, not server Zephyr iPort PLUS - decoder: The snake is not terminated in iPort, therefore GPI events received from the codec link are forwarded to client connections...
-
Page 35: Controller Emulation
I/O Emulation In this mode, iPort emulates local presence of a physically remote I/O device, e.g. GPIO node. In brief, this mode is "symmetric" to the controller emulation mode in the following way: Use of console messages for command and response are swapped - encoder is listening to command and decoder is issuing response. -
Page 36: Using Optional Content Delay
th A i t d D t Ch Configuring the Data Channels Zephyr iPort PLUS provides three unidirectional user data channels per each audio direction. These are provided typically to transport metadata (artist, song title, album and related info) associated with each audio stream. -
Page 37: Content Delay Configuration
Content Delay is not a field-installable option. The factory must install it at the time you place your order. To verify that your iPort HD does indeed contain Content Delay, go to the License Management page. Feature licensing status is shown at the top of this page. Make sure that Content Delay is marked Active (not Inactive as shown in this example). - Page 38 Maximum expected bitrate per stream (kbps) The maximum expected bitrate per stream setting is used to calculate the total program storage time of the Content Delay feature based on the installed physical storage space. It shows maximum storage space, current free storage space, and currently configured storage time from all codecs. In this example, based on a stream rate of 192 kbps, there is a total storage time of 1044 hours, 30 minutes.
-
Page 39: Ssd Housekeeping
space is available to any codec. SSD Housekeeping If you want to check up on the Solid State Drive's health, make repairs, or format the drive, go to the bottom of the Logging page and click on the Storage Maintenance button. Streaming When used with an appropriate SHOUTcast distribution server, Zephyr iPort PLUS can be used as a simple and reliable encoder for Internet or internal audio distribution. -
Page 40: Configuring Zephyr Iport Plus For Streaming
The diagram above shows a simple set-up for streaming. A Livewire xNode AoIP interface provides live audio input, which connects directly to the Livewire Ethernet jack on the iPort. The iPort’s WAN jack connects to a network (typically the Internet via your router) that leads to a remotely located streaming server. -
Page 41: Using The Integrated Shoutcast Stream Server
Press the Options button to access the codec detail configuration. Enter the encoder type, bitrate, and other parameters. Select ‘TCP’ as the protocol (used for the iPort to server link). Click the box Enable SHOUTcast protocol, and enter a password that will be used by the server to authenticate the stream. -
Page 42: Mpeg License & Music Copyright
Source name – Used for the stream directory listings. Homepage for the stream - Enter the stream's web address. Genre – Enter the format of your stream or station here, for example rock, country or urban. SHOUTcast will display this information in the metadata field. IRC –... -
Page 43: Vmix And Vmode
Recording Industry Association of America provides quite a bit of information on copyright law as it applies to webcasting, and both ASCAP and BMI have created license agreements that they are willing to grant to webcasters that they believe conform to the provisions of the new copyright rules for webcasting. For additional information on the statutory license and other aspects of webcasting, please visit the following sites: The U.S. - Page 44 Using these, you can combine multiple Livewire audio channels into a single summed channel, which can then be sent to a receiving Zephyr iPort PLUS. The various VMix outputs described above are sources that can feed your Livewire network and they can be manipulated in the same manner as any other audio source.
- Page 45 VMix Submixer Controls In most cases, the VMix Subs are the only channels you will need to enable, since each Sub has its own direct output. Only enable Submixes you intend to actively use; active submixes without any activity clutter up your network with empty streams.
-
Page 46: Some Vmix Examples
In most cases only the Submix output itself needs a unique channel number, but if you so desire, each VMix input can also be sent back to the network as a unique source, post the ON/OFF and gain stage of the VMix. Some users find this useful for constructing “cascaded”... -
Page 47: Manipulating Streams With Vmode
GPIO control of your VMIX with Pathfinder Imagine that you have a night jock that should monitor all four radio stations in your cluster. To help make sure this actually happens, you could send all four off-air signals as sources into a VMix submixer, and take the output of that submix to a monitor. - Page 48 To change the configuration, select the far right “Configure…” button. SDP file: If the input stream to the VMode is an AES67 stream, an SDP file may be supplied and uploaded using the “Choose File” and “Import” buttons. SDP document: Alternatively, the textual content of an SDP file may be copied and pasted in to this box and applied by clicking “Import”...
- Page 49 Default start port for SIP audio is 16384 Valid range for RTP stream protocol is from 16384 to 65535 SIP URI protocol supports ports from 1 to 65534 (CPSIP Stack does not allow port 65535) Default SIP port is 5060 Mode: The manipulation within the matrix is referred to as rouging and is configured by selecting a Mode from the list.
-
Page 50: What's Next
arranged in 4 fixed pairs – [1,2], [3,4], etc. When a “combine” option is selected on a Vmode instance, it takes input channels from the two inputs (designated A and B) of its pair, as indicated in the name of the option. -
Page 51: Diagnostics And Stream Statistics
VMix and VMode are two of the features that make Zephyr iPort PLUS an even more versatile product. We've explained the fundamentals of each, and given you some examples of what to do with them. Hopefully, we've also brought out your inner hacker, and you'll develop something that solves an issue that is unique to your installation. - Page 52 Additionally, if you purchased the Content Delay option, there is a Storage Maintenance section where you can check up on the health of the solid state drive, scan, format storage, and delete unwanted audio content. SNMP Configuration SNMP (Simple Network Management Protocol), enables a management workstation or another SNMP client application on the same LAN to communicate directly with Zephyr iPort PLUS, and for the iPort to initiate an alarm on the network.
- Page 53 1.3.6.1.4.1.42463.1.11 = “2.0.0a” On the other hand, if the Zephyr iPort PLUS MIB is uploaded to the SNMP client, it will display: active software version = “2.0.0a” Note that with the current firmware version, Zephyr iPort PLUS does not make its MIB file available for downloading.
- Page 54 -11- sync state change: (var sync state) -10- link state: Integer {fdx(1), unplugged(2), hdx(3)} -11- sync state: Integer {locked(1), not locked(2), no sync signal(3)} -12- link speed: Integer {100Mbs(1), 1Gbs(2)} -13- link load in: Integer -14- link load out: Integer -10- codecs -11- cdNumber: Integer -12- cdTable...
-
Page 55: Stream Statistics
-11- decoder -10- operational state: Integer {on(1), off(2)} -11- WAN receive state: Integer {ok(1), lost(2) -12- LW audio state: Integer {ok(1), lost(2)} The Zephyr iPort PLUS SNMP extension agent requires Windows SNMP feature to be installed. To install this feature, navigate to Start, Control Panel, Programs and Features and select Turn Windows features on or off. - Page 56 the Clear Counters button. If you would like a hard copy you can save the page as an HTML document, or What's Next? If you've read this manual straight through from Chapter 1, congratulations, you made it to the end. You have learned just about everything there is to know about this subject, and are hereby awarded a Ph.D.
- Page 57 1. Connect a VGA monitor to the VGA port on the rear of the iPort HD (F) 2. Connect a USB keyboard to any USB port (C) The Basic Setup console is displayed on the monitor. Set or change the NET 1 (WAN) address Use the UP and DOWN arrow keys to move between fields.
- Page 58 Set or change the NET 1 (LAN) address 1. Using the keyboard, select item 2, NET 2 (LAN) settings from the menu and press Enter. 2. Select item 2, Configure network settings and press Enter. 3. Using the keyboard, set the IP and Netmask. (Gateway and DNS not supported on LAN.) 4.
-
Page 59: Specifications And Warranty
Similarly, use this menu to set (or Reset) the web UI Password. If you got here from the Quick Start Guide, click here to go back to Connecting to the Web UI Specifications and Warranty Specifications Audio Zephyr iPort PLUS has no native audio I/O, operating on streams provided by attached Livewire audio devices. -
Page 60: Telos Alliance Limited Warranty
TLS Corp. and its affiliated companies, collectively doing business as The Telos Alliance (hereinafter “Telos”). With the exception of software-only items, the Products are warranted to be free from defects in material and workmanship for a period of two (2) years from the date of receipt of such Product by the end-user (such date of receipt the “Receipt Date”). - Page 61 all of our Products. Telos products are to be used with registered protective interface devices which satisfy regulatory requirements in their country of use This Warranty is void if the associated equipment was purchased or otherwise obtained through sales channels not authorized by Telos. EXCEPT FOR THE ABOVE-STATED EXPRESS WARRANTY, TELOS MAKES NO WARRANTIES, EXPRESS OR IMPLIED (INCLUDING IMPLIED WARRANTIES OF MERCHANTABILITY AND FITNESS FOR A PARTICULAR PURPOSE).
- Page 62 Telos as an evaluation charge. If repairs are required, the $500 fee will be applied to the total cost of the repair. To activate your product warranty, visit http://www.telosalliance.com/product-registration...
Need help?
Do you have a question about the iPort High Density and is the answer not in the manual?
Questions and answers