Advertisement
SAFETY INSTRUCTIONS
IMPORTANT SAFEGUARDS
THIS APPLIANCE IS FOR HOUSEHOLD USE ONLY.

When using electrical appliances especially when children are present, basic safety precautions should always be followed to reduce the risk of fire, electric shock, and/or injury to persons, including the following:
- This appliance is intended for indoor home use only.
- Never use any accessories or parts from other manufactures. Your warranty will become invalid if such accessories or parts have been used.
- Wash all removable parts with a mild cleanser before the first use.
- Check that your home power supply corresponds with this appliance's intended voltage.
- Place this appliance on a stable, heat resistant surface. Make sure not to place near or on a heat source such as gas or electric burner or oven.
- Short power cords are attached to this item to prevent entanglement and tripping hazards. Extension cords with corresponding voltage, electrical rating and grounding wires can be used. Care should be taken so that any exposed cord is not hanging down from a counter or table where it can be pulled on or tripped over by any child or adult.
- Before using this appliance inspect the plug and cord line for cuts and/or abrasion marks if they are found. Do not use this appliance and contact our authorized customer service representative.
- Insert the plug by grasping it firmly and guiding it into your home's grounded electric outlet. Disconnect by grasping the plug and removing it from your home's grounded electric outlet. Never wrap the cord tightly around the appliance during use or storage as this can cause the wire to fray and break.
- During initial use, you may notice some smoke and or a slight odor. This is normal and should quickly dissipate. It should not reoccur after the appliance has been used a f ew more times.
- This appliance should be used only by persons who are capable of understanding the user manual or are supervised by those who have adequate understanding of the appliances' features, their use and the operating instructions. Children must be supervised and should not be left alone with appliances during their operation.
- During use appliances should not be left unattended.
- Care should be taken not to move appliances that are in use.
- Do not move appliances that are full of food or liquid whether hot or cold.
- Appliances can emit heat or steam when in use therefore care should be taken not to block inlets or outlets.
- Appliance exteriors are designed to be cool to the touch. Portions do get HOT during use. Burns can result from touching heating elements, air vents and removable baskets or containers and - if any part is designed to be handled do so with care.
- Do not use this appliance near an open flame or flammable materials.
- Do not fill this appliance with oil. Oil can be used in small quantities to assist with air frying. This will help make food crispier.
- Do not leave uncooked ingredients in this pot for more than a short period of time. Raw meat, poultry, fish, fruits or vegetables can spoil.
- Use protective gloves or utensils to remove hot food from this appliance.
- Unplug the appliance when you have finished cooking.
- Before cleaning, make sure that the pot is turned off, unplugged, cooled to room temperature and all pressure has been released.
- Do not clean the appliance until the unit is cool.
- Do not immerse complete appliance in water or a dishwasher for cleaning.
- Clean with a non-abrasive cleaner, soft pad or cloth.
- Store unit in a cool, dry location.
- In case of any electric emergency such as a fire call 911.
Take a minute to unwrap your appliance. Remove any packaging or labels that may interfere with the use of your appliance. Locate your instruction manual. For your safety and the continued enjoyment of this product, read all the directions carefully and store this manual in a safe place for future reference.

This appliance has a polarized plug (one blade is wider than the other). To reduce the risk of electric shock, this plug is intended to fit into a polarized outlet only one way. If the plug does not fit fully into the outlet, reverse the plug. If it still does not fit, contact a qualified electrician. Do not attempt to modify the plug in any way.
SHORT CORD INSTRUCTIONS
A short power supply cord is provided to reduce the hazards resulting from entanglement or tripping over a longer cord. Longer detachable power-supply cords or extension cords are available and may be used if care is exercised in their use. If a longer detachable power-supply extension cord is used:
- The marked electrical rating of the cord set or extension cord should be at least as great as the electrical rating of the appliance, and:
- The cord should be arranged so that it will not drape over the countertop or tabletop where it can be pulled on by children or tripped over unintentionally.
LINE CORD SAFETY TIPS
- Never pull or yank on cord or the appliance.
- To insert plug, grasp it firmly and guide it into outlet.
- To disconnect appliance, grasp plug and remove it from outlet.
- Before each use, inspect the line cord for cuts and/or abrasion marks. If any are found, this indicates that the appliance should be serviced and the line cord replaced. Please return it to an authorized service representative.
- Never wrap the cord tightly around the appliance, as this could place undue stress on the cord where it enters the appliance and cause it to fray and break.
DO NOT OPERATE APPLIANCE IF THE LINE CORD SHOWS ANY DAMAGE OR IF APPLIANCE WORKS INTERMITTENTLY OR STOPS WORKING ENTIRELY.

To ensure continued protection against risk of electric shock, connect to properly grounded outlets only.

During the first few minutes of initial use, you may notice smoke and/or a slight odor. This is normal and should quickly disappear. It will not recur after appliance has been used a few more times.
This appliance is not intended for use by persons (including children) with reduced physical, sensory or mental capabilities, or lack of experience and knowledge, unless they have been given supervision or instruction concerning use of the appliance by a person responsible for their safety.
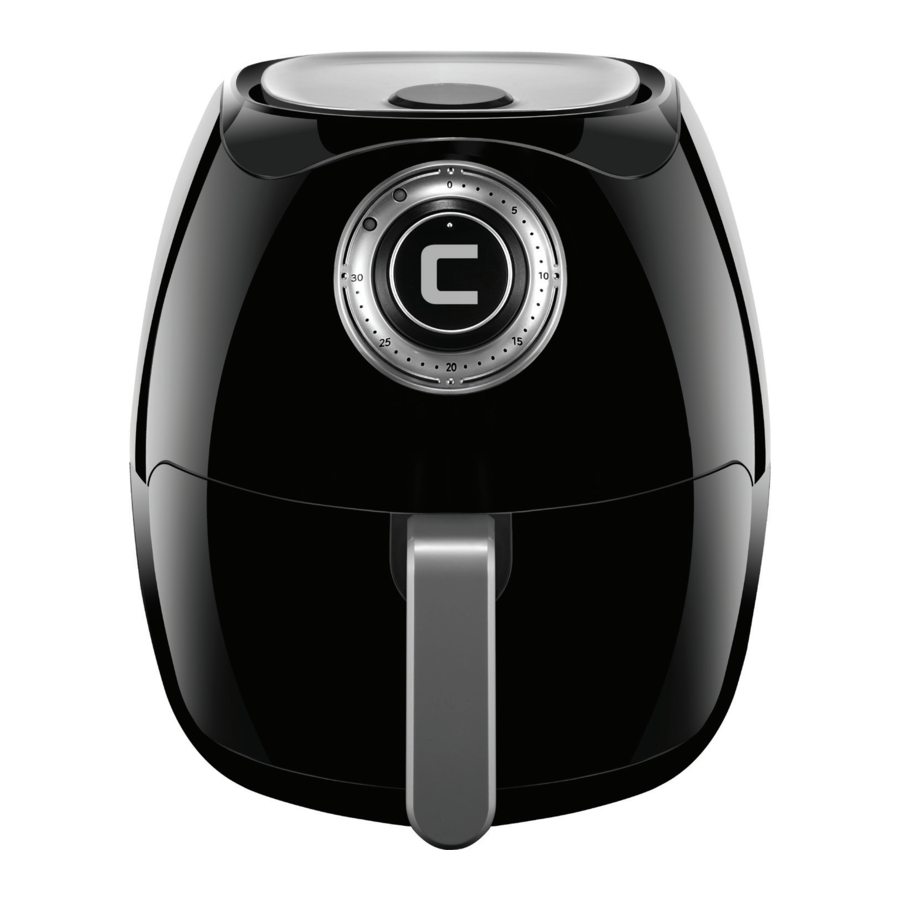
Features

- TEMPERATURE CONTROL KNOB
- HEATING LIGHT
- POWER ON LIGHT
- TIMER CONTROL KNOB
- FRYER BASKET
- BASKET TRAY
- BASKET HANDLE
Operating Instructions
BEFORE FIRST USE
- Remove all packaging materials.
- Remove stickers from unit before use. Do not remove the rating label from underneath the unit.
- Thoroughly clean the fryer basket and tank with soap, hot water and a non-abrasive sponge. Wipe the inside and outside of the appliance with a damp cloth and allow to dry before using.
NOTE: Fryer basket and tank are dishwasher safe. - This is a healthy electric oil free fryer that works on hot air. Do not fill the basket with oil or frying fat.
HOW TO USE
To assemble the fryer basket and tray, lower the basket tray until it firmly clicks into place inside the tank.
- Place appliance on a flat, stable surface.
![]()
- Connect the power plug to a grounded wall electrical socket.
![]()
- Carefully pull fryer basket out of the fryer.
![]()
- Place the ingredients into the basket.
![]()
- Slide the tank back into the air fryer.
![]()
NOTE: Do not fill the basket more than indicated in your recipe or in the table as this can adversely affect the cooking result. - Turn the temperature control knob to the recommended temperature for your recipe.
![]()
- Turn the timer control knob to the required preparation time.
![]()
NOTE: Add 3 minutes of preparation time when the appliance is cold. If not preheated, some ingredients may require shaking halfway through preparation time. You can also preheat the appliance without food for approx. 4 minutes. - Pull the fryer basket out of the appliance and shake or turn using a fork (or tongs). Then put the fryer basket back into the air fryer.
![]()
- After the bell rings, pull out the tank and and check if the ingredients are ready. If not ready, simply slide the tank back in and reset the timer.
![]()


Please see table below for tips on how to be prepare different foods.
NOTE: This table is only a guide and does noit contain exact recipes.
NOTE: Use extreme caution while handling hot food in fryer basket and tank.
Excess oil will drip into tank when preparing greasy foods.
| Type | Min to Max Amount | Time (mins) | Temp (°F) | Shake | Cooking Tip |
| Thin Frozen Fries | 100-400g | 9-16 | 390 | Yes | |
| Thick Frozen Fries | 100-400g | 11-20 | 390 | Yes | |
| Home-made Fries | 100-400g | 16-20 | 390 | Yes | Add 1/2 tablespoon of oil |
| Home-made Potato Wedges | 100-400g | 18-22 | 360 | Yes | Add 1/2 tablespoon of oil |
| Home-made | 100-350g | 12-18 | 360 | Yes | Add 1/2 tablespoon of oil |
| Potato Cubes Rösti | 250g | 15-18 | 360 | Yes | |
| Potato Gratin | 400g | 15-18 | 390 | Yes | |
| Steak | 100-400g | 8-12 | 360 | No | |
| Pork Chops | 100-400g | 10-14 | 360 | No | |
| Hamburger | 100-400g | 7-14 | 360 | No | |
| Sausage Roll | 100-400g | 13-15 | 390 | No | |
| Drumsticks | 100-400g | 18-22 | 360 | No | |
| Chicken Breast | 100-400g | 10-15 | 360 | No | |
| Spring Rolls | 100-400g | 8-10 | 390 | Yes | Use oven-ready |
| Frozen Chicken | 100-400g | 6-10 | 390 | Yes | Use oven-ready |
| Nuggets Frozen Fish | 100-400g | 6-10 | 390 | No | Use oven-ready |
| Fingers Frozen Breaded | 100-400g | 8-10 | 360 | No | Use oven-ready |
| Cheese Snacks Stuffed | 100-400g | 10 | 320 | No | |
| Vegetables Cake | 300g | 20-25 | 320 | No | Use baking tin |
| Quiche | 400g | 20-22 | 360 | No | Use baking tin/oven dish |
| Muffins | 300g | 15-18 | 390 | No | Use baking tin |
| Sweet Snacks | 400g | 20 | 320 | No | Use baking tin/oven dish |
COOKING TIPS
- Smaller ingredients usually require a slightly shorter preparation time than larger ingredients.
- For best results of smaller foods such as fries, onion rings and chicken nuggets, remove the fryer basket halfway through preparation time and shake to mix the food around. This will help to evenly fry the food being prepared.
- Add some oil to fresh potatoes for a crispy result. Fry your ingredients in the airfryer within a few minutes after you added the oil. Do not fill basket with oil.
- Do not prepare extremely greasy ingredients such as sausages in the air fryer.
- Snacks that can be prepared in an oven can also be prepared in the air fryer.
- For French fries, use 14 ounces of fries at a time for best frying results.
- This air fryer is great for reheating food. To reheat your food, set the temperature control to 300º Fahrenheit for up to 10 minutes.
Troubleshooting Guide
| Problem | Possible Cause | Solution |
The Air Fryer does not work | The appliance is not plugged in | Insert plug into the electrical outlet |
| The timer was not set | Turn the timer knob to the desired cook time to switch on the appliance | |
| The ingredients fried with the air fryer are not done | The amount of ingredients in the basket is too large | Put smaller batches of ingredients in the basket. Smaller batches fry more evenly |
| The set temperature is too low | Turn the temperature control knob to the desired temperature setting | |
The ingredients are fried unevenly in the air fryer | Certain ingredients need to be shaken halfway through | Shake halfway through the preparation time |
| Fried snacks are not crispy when they come out of the air fryer. | The snack was meant to be prepared in a traditional deep fryer | Lightly brush some oil onto the snacks for a crisper result |
I cannot slide the basket into the appliance properly | Too many ingredients in the basket | Do not fill the basket beyond the MAX indication |
| Basket is not placed in the fryer correctly | Push the basket into the fryer until you hear a click | |
White smoke comes out from the appliance | Greasy ingredients are being prepared | Frying greasy ingredients, a large amount of oil will leak into the basket. The oil produces white smoke but does not affect the appliance or end result |
| The pan still cointains grease residues from previous use | White smoke is caused by grease heating up in the basket. Make sure the basket is cleaned properly after use | |
Fresh fries are fried unevenly in the air fryer | The right type of potato was not used | Use fresh potatoes and make sure that they stay firm during frying |
| You did not rinse the potato sticks properly before you fried them | Rinse the potato sticks properly to remove starch from the outside of the sticks | |
| Fresh fries are not crispy when they come out of the air fryer | The crispiness of the fries depends on the amount of oil and water in the fries | Make sure you dry the potato sticks properly before adding oil |
| Cut the potato sticks smaller for a crispier result | ||
| Add slightly more oil for a crisper result |
Cleaning & Maintenance
- Before cleaning, turn the Timer control knob to "0".
![]()
- Unplug the appliance and allow to cool.
Tip: After the unit has been turned off, remove the tank to help the unit to cool down quickly.
![]()
- Wipe the outside of the unit housing with a damp cloth. Do not immerse unit housing in water or rinse under running water.
![]()
- Remove the fryer basket tray and wash with soap, hot water and a non-abrasive sponge.
![]()
- Do not use abrasive cleaning materials, they may cause scratching or damage to the non-stick coating.
![]()
- Fryer basket and basket tray are dishwasher safe.
![]()
- Unit housing is NOT dishwasher safe.
![]()
Tip: If food is stuck to the basket or bottom of the tank, fill the tank with hot, soapy water and allow the basket and inside of the tank to soak for approximately 10 minutes.


To log-in to ClubChefman.com follow the below steps:

- Enter www.clubchefman.com into your web browser.
- Click on "Sign Up Now".
- Fill in the required information as prompted. NOTE: "Place of Purchase" refers to the store at which you purchased your product.
- Sign in using your User Name and Password.
CLUB CHEFMAN ACCESS CODE: 2131497

RJBRANDS.COM | CLUBCHEFMAN.COM | CHEFMAN.COM
CUSTOMER SERVICE: 888.315.6553 | customerservice@chefman.com

Documents / Resources
References
Club Chefman: Recipes, Tutorials, Community Engagement to help cook like a pro. Get engaged, Fall in love
![rjbrands.com]() Kettles, Air Fryers, Toaster Ovens, Cookware & More - Chefman
Kettles, Air Fryers, Toaster Ovens, Cookware & More - ChefmanClub Chefman: Recipes, Tutorials, Community Engagement to help cook like a pro. Get engaged, Fall in love
![chefman.com]() Kettles, Air Fryers, Toaster Ovens, Cookware & More - Chefman
Kettles, Air Fryers, Toaster Ovens, Cookware & More - Chefman
Download manual
Here you can download full pdf version of manual, it may contain additional safety instructions, warranty information, FCC rules, etc.
Advertisement


Need help?
Do you have a question about the RJ38-V2-35 and is the answer not in the manual?
Questions and answers