Table of Contents
Advertisement
Quick Links
Advertisement
Table of Contents

Related Manuals for Boss eiQEGG 18

Summary of Contents for Boss eiQEGG 18
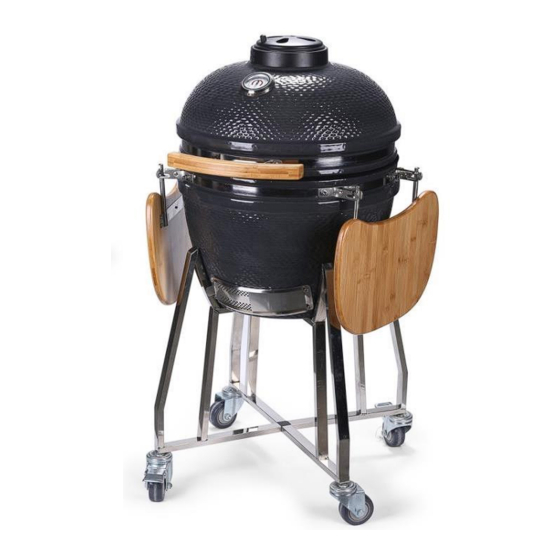
- Page 1 OWNER’S MANUAL CERAMIC KAMADO BBQ eiQEGG 18” eiQEGGXL 22”...
-
Page 2: Table Of Contents
Forged from iron, steel and solid, British values, our BBQ’s deliver a finger-licking feast. We design high-quality grills, so you can serve up a sizzling experience for your family and friends. Tongs at the ready? Then step up to the plate, Boss. CONTENTS IMPORTANT SAFETY INFORMATION... -
Page 3: Important Safety Information
Important SAFETY INFORMATION Read the following instructions carefully and make sure your BBQ is properly installed, assembled and cared for. Retain the instructions for future reference. • • The appliance is for outdoor use only and Never use the appliance for anything must not be used in enclosed areas such other than its intended use. - Page 4 • Never move the unit while in use. Allow recommended by the manual or the unit to cool completely (below 45°C) manufacturer. Any parts used must be before moving or storing. supplied by the manufacturer. • • The unit is hot while in use and will Be careful when removing food from the remain hot for a period of time after use.
-
Page 5: Parts
PARTS Part Description Frame Section Locking Castor Castor Frame Bracket Cooking grid Charcoal plate Firebox Main Body Top Vent Handle Side shelf Side Shelf Bracket Bolt Screwdriver... -
Page 6: Assembling Your Bbq
ASSEMBLING YOUR bbq 2 & 3 STEP 1 - ATTACH THE CASTORS Screw the castors (2 & 3) into the base of each of the four Frame Sections (1). These should be tightened by hand. STEP 2 - ASSEMBLE THE FRAME To assemble the frame, insert the two Frame Brackets (4) into two of the Frame Sections (1) on both the top and bottom joints. - Page 7 STEP 4 - LIFT THE main BODY ONTO THE frame Lock the wheels on the two locking Castors (2) to ensure the BBQ cannot move. To make lifting easier, before placing the Main Body (8) on to the frame remove all the accessories from within it. Place one of your hands in the bottom vent of the ceramic body and the other under the main body while lifting.
- Page 8 STEP 7 - Attach THE SIDE SHELVES Insert the hinge bars on the underside of the Side Shelves (11) into the Side Shelf Brackets (12). STEP 8 – Insert the Plate and Grid Add the Firebox (7), Charcoal Plate (6), and the Cooking Grid (5) into the Main Body (8).
-
Page 9: Lighting And Using Your Bbq
LIGHTING AND USING YOUR BBQ FIRST USE – CURING THE UNIT • Curing your ceramic BBQ is important for its long-term operation and care. Failing to follow the curing procedure could lead to damage to the unit. If it is allowed to get too hot during its first few uses, the heat could damage the felt gasket seal before it has had the chance to mature with use. - Page 10 PROBLEMS LIGHTING YOUR BBQ 1. If you have trouble lighting the BBQ, ensure that both the top and bottom vents are open. The fire needs oxygen to light. Once lit, leave the bottom vent and lid open for about 10 minutes to build a small bed of hot embers.
-
Page 11: Adjusting The Cooking Temperature
ADJUSTING THE COOKING TEMPERATURE TO COOK AT LOW TEMPERATURES 1. Light the lump charcoal according to the lighting instructions in this manual. Do not move or stoke the coals once lit. 2. Open the bottom vent fully and leave the lid open for about 10 minutes to build a small bed of hot embers. -
Page 12: Ceramic Cooking Guide
CERAMIC COOKING GUIDE IMPORTANT: It is recommended to always use heat-resistant gloves when working with hot appliances. Open Closed SLOW COOK I SMOKE (83 °C - 108 °C / 180 °F - 225 °F) TOP VENT Closed BOTTOM VENT Closed Beef brisket: 4.5 hours per kg Ribs: 3-5 hours Pulled pork: 4.5 hours per kg... -
Page 13: Cleaning And Maintenance
CLEANING AND MAINTENANCE The BBQ is self-cleaning. Heat it up to 260 ºC / 500 ºF for 30 minutes and it will scorch off all food and debris. Do not use water or any other types of cleaning product to clean the inside of your BBQ. The walls are porous and will absorb any fluids used, which could cause the BBQ to crack. -
Page 14: Specifications
41.5 47.5 Body Diameter (CM) 47.5 Weight (Kg) Fuel type Charcoal MANUFACTURER SUPPORT Customer Services 0330 390 3062 Office hours: 9AM - 5PM Monday to Friday Boss grill Unit J6, Lowfields Business Park Lowfields Way, Elland West Yorkshire, HX5 9DA...
Need help?
Do you have a question about the eiQEGG 18 and is the answer not in the manual?
Questions and answers