
Related Manuals for Verefa V60M Pro


Summary of Contents for Verefa V60M Pro
- Page 1 V60M Pro User Manual Please read the user manual carefully before use and keep it properly.
- Page 2 Welcome Welcome to use the Verefa robot vacuum cleaner. We hope you can have a pleasant experience! If you have any questions or suggestions, discover our contact information at the bottom of the device to contact us, and we can provide you with the support you need.
-
Page 3: Table Of Contents
Table of Contents 1. Safety Instructions Important Safety Instructions 2.1 What's in the Box 2. Product Overview 2.2 Product Anatomy (Including Buttons and Indicators) 3.1 Important Tips Before Use 3. Installation 3.2 Get started 4.1 Main Functions 4.2 Mopping function 4. -
Page 4: Safety Instructions
1. Safety Instructions Before using the product, follow these basic safety precautions: ・ Read everything in the manual carefully and use the product according to the instructions in the manual. ・ Keep the manual for future reference. ・ If you need to transfer the product to a third party, please attach the manual with the product. ・... - Page 5 ・ If you do not use this product for a long time, please turn off the robot after it is fully charged and put it in a cool and dry place. Charge it at least once every three months to avoid over discharge of the battery.
- Page 6 Battery and charging ・ The auto-empty base must be removed from the socket-outlet before cleaning or maintaining the appliance. WARNING: For the purposes of recharging the battery, only use the auto-empty base (model: SD01 & SD02) provided with this appliance. ・...
-
Page 7: Product Overview
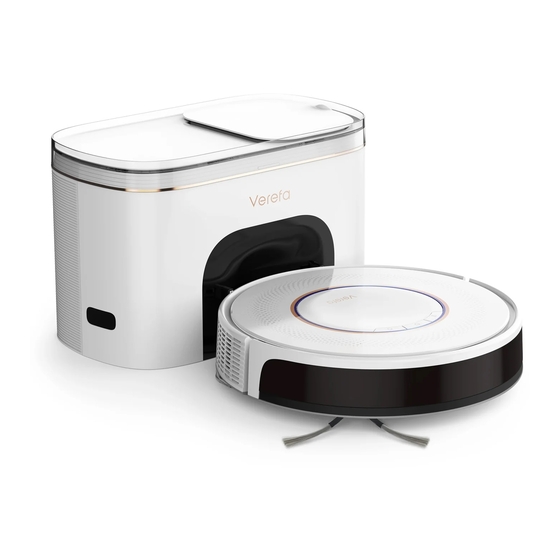
2. Product Overview 2.1 What's in the Box Robot Vacuum Side Brush (x1) Cleaning Brush Remote Control (hereinafter referred (In the dust box) to as the Robot) Mopping module Auto-Empty Charging Base Power Cable (hereinafter referred to as (Mop pad installed) the Charging Base) (with dust bag pre-installed) User Manual... - Page 8 2.2 Product Anatomy (Including Buttons and Indicators) A) Robot Vacuum Top View Button Power button - Turn On/Off : Press and hold for 3 seconds to power on or off. - Auto Cleaning : After power-on, press to start Auto Cleaning.
- Page 9 Bottom View Main sensors Front bumper sensor Infrared obstacle avoidance sensor Cliff sensor Caster wheel Side brush Optical path sensor Battery compartment Roller brush Roller brush cover Roller brush cover buckle Wheels Recharge sensor Charging contact pins Dust Box and Water Tank Combo Module Filter cover Filter cover buckle...
- Page 10 Mopping Module Slot entry Adhesive area of the Mop bracket mop bracket Mop bracket slot Adhesive surface of Mop bracket the mop pad button Mop pad B) Auto-Empty Charging Base (referred to as the Charging Base) Front View Status indicator light (in power-on state) Solid White : Connected to power, but the robot is...
- Page 11 Top View Dust bag guide rails Charging base filter Bottom View Air duct cover screws Air duct cover C) Remote control Recharge button Auto Cleaning button Control button - forward Start/Pause button Control button - right Control button - left Control button - backward Spot Cleaning button Suction level button Battery : 2 AAA Remote control batteries...
-
Page 12: Installation
3. Installation 3.1 Important Tips Before Use Prepare your home environment Before use, clear up the mess especially wires on the floor that may be wrapped around the robot. Remove items that are fragile, valuable, potentially hazardous and easy to fall. Avoid any damage to persons or property caused by being entangled, stuck, dragged or knocked over by the robot. - Page 13 2) Install side brush Click 3) Place the charging base, connect the power supply and charge the robot Connect the power cable and organize the power cables with the cable ties. Note : - Power cable on your floor may entangle the robot, resulting in power failure or jamming of the robot.
- Page 14 - To ensure better connection quality, please turn on the Bluetooth of your mobile phone. Download the app. Verefa Life - Search for the "Verefa Life" app in the app store. Then download and install it. Reset Wi-Fi. - Press and hold both buttons (...
- Page 15 Add a device. - Open the app and follow the prompts to register or log in your account. - Go to the home page of the app. Tap "+" in the upper right corner of the page to enter the “Add Device”...
-
Page 16: Operating Instructions
4. Operating Instructions 4.1 Main functions ◉ Turn on/off - Press and hold the power button for 3 seconds to turn on the robot. The power indicator lights up. Press and hold the power button for 3 seconds again, and the robot will turn off. Note : - The robot cannot be turned off... - Page 17 ◉ Recharge - Automatic mode: When the cleaning is completed or the battery is low during auto cleaning, the robot will automatically return to the charging base to charge. - Manual mode : When the cleaning is paused, press the recharge button to start recharge, or enable it in the app.
-
Page 18: Mopping Function
◉ Auto-Empty dirt - Auto emptying : - After cleaning, the robot will return to the charging base, and the robot will automatically empty the dust box according to the emptying frequency set in the app. - The emptying frequency can be adjusted in the app. - Manual emptying : - When the robot is connected to the charging base, you can press the recharge button of the robot or remote control to start manual emptying. - Page 19 Install the mop pad - Wet the mop pad and wring it out until it does not drip. Place the mop bracket on the reverse side, insert the mop pad along the mop bracket slot, and stick it firmly. Install the mopping module - Push the mopping module with the mop pad installed in parallel along the back of the Robot Vacuum, and install it in place when a "click"...
-
Page 20: Network Functions
- When finishing mopping the floor, charging or not using, please remove the mopping module and clean the mop pad in time, and pour out the water in the water tank to avoid odor or mildew. Note: - Please use the mopping function when someone is looking after. - Don't allow wet mopping modules staying in a certain area for a long time to avoid excessive moisture damage to the ground. -
Page 21: Other Functions
◉ Mobile client functions - You can remotely control your robot through the mobile application. - With the app, you can access more features such as schedule cleaning, find the robot, review the status and cleaning records. - For specific Wi-Fi setup instructions, refer to "Installation > Connect to mobile client" in this manual. - Page 22 ◉ Magnetic boundary strip (sold separately) - With the magnetic boundary strip, the robot Magnetic boundary strip can identify and avoid entering a specific area. For example, place the magnetic boundary strip in front of the door to prevent the robot from entering a room, or place the boundary strip around any pet drinking basin, toy area or complex wires to prevent the robot from crossing in.
-
Page 23: Routine Maintenance
5. Maintenance and Troubleshooting 5.1 Routine maintenance Please turn off and unplug the power cable before cleaning and maintaining the product. For best performance, refer to the following table for routine maintenance. Parts Maintenance frequency Replacement frequency Dust box Monthly Filter Weekly Every 3 months... - Page 24 Note : - Be sure to dry the filter of the dust box thoroughly before use, so as to ensure normal operation and service life. - Do not put the incomplete dust box into the robot, so as to avoid mistakenly triggering the cleaning, which will block the air duct of the robot or damage the fan.
- Page 25 3) Clean the mopping module Press the mopping module buttons to take out the mopping module. Remove the mop pad from the mop bracket. Wash the mop pad and hang it to dry. 4) Clean roller brush and roller brush cover Press and hold the roller brush cover buckles on both sides inward, and take out the roller brush cover and roller brush.
- Page 26 5) Clean side brush Pull out the side brush. Clean the side brush with a cleaning brush and install it back. 6) Clean casters wheel Caster body Caster axle Pry out the caster axle and pull out the caster body with a small screwdriver and other tools.
- Page 27 8) Clean sensors, charging contact pins and charging contacts Wipe and clean the sensors with a soft dry cloth. Note : - There are sensitive electronic components inside the product. Please wipe them with a soft dry cloth when cleaning. Do not use wet rags to prevent damage caused by water. 9) Replace the dust bag of auto-empty charging base, and clean the dust collection port and filter When the dust bag is full, replace the dust bag according to the indicator light of the auto-empty charging base or the prompt of your mobile client.
- Page 28 10) Clean the air duct If the air duct is blocked, please clean it according to the following steps. Put a soft cloth on the flat surface, and then lay the auto-empty charging base back and flat. Note : - Do not turn over the auto-empty charging base to avoid damaging the top decorative ring and dust bag cover.
-
Page 29: Troubleshooting
5.2 Troubleshooting If an error occurs while the robot is working, the indicator light of the robot or the auto-empty charging base will light up in red in different states with corresponding prompt sound. Please solve it by the following table. Indicator light Voice prompt Solution... - Page 30 Error 12: Robot trapped. Please - The robot may be stuck or trapped. Please clear clear obstacles around. obstacles around the robot. - The area around the charging base may be blocked Error 13: Charging base blocked. Robot - by obstacles or dust. Please clean the area around Please clear it.
- Page 31 - Please check whether the optical flow sensor is Error F5: Optical path sensor blocked or dirty, clean it, and then try to turn off module fault. Please check and try and restart the system. restarting the system. - If the fault persists, please contact our customer Robot - service.
-
Page 32: Faqs
5.3 FAQs Problem type Solution 1) Low battery power. Please make sure that the charging base is connected to the power supply, then place the robot on the charging base and align it with the charging contacts, and the device will start automatically. Unable to turn on. - Page 33 1) Please check whether there is corresponding error prompt. Please refer to the chapter "troubleshooting". Abnormal behavior. 2) Please wipe the sensor with a soft cloth, please refer to the chapter "routine maintenance". 3) Please restart the robot. 1) Please adjust the suction level or turn off auto-boost to see if this setting leads to high noise.
-
Page 34: Basic Parameters
6. Declaration Basic Parameters Robot Vacuum and Mop Product name Robot Vacuum and Mop Model No. S103 Rated voltage 14.4V Input power supply Charging time < 6 hours Wireless connection Wi-Fi IEEE 802.11b/g/n 2.4GHz Auto-empty charging base Product name Auto-empty charging base Model SD01 Rated input... -
Page 35: Energy Saving And Battery
Energy saving and battery Holiday energy saving mode - On the charging base, press and hold the recharge button for 10 seconds until you hear the prompt tone. At this time, the holiday energy saving mode will be activated. - In the holiday energy-saving mode, network, remote control and scheduling will be turned off, and the robot will enter the low-power mode to save energy. -
Page 37: Customer Service
Customer Service Customer service If you have any questions and dissatisfaction in using the product, you can get more technical support by contacting us in the following ways. As your problem is our great concern, we will try our best to help you solve it. Sincere care, always for you →... - Page 38 Product Warranty Card User name Mailing address Email address Phone number Model No. S103 Product S/N Product purchase date ⃞ Amazon ⃞ eBay ⃞ Official website Product purchase ⃞ Taobao ⃞ Jingdong ⃞ Others, channel Repair record Repair Repair Repair Replaced Fault description date...
- Page 40 Sincere care, always for you Customer service, warranty, tutorial video, FAQs Our latest events and news, more details www.verefalife.com support@verefalife.com Room 2-077,2-078,2nd Floor,No.2 Building,No.17 Caohejing Road,Haining Economic Development Zone,Haining City, S1031100 Jiaxing City,Zhejiang Province 123.00203.004S...
- Page 41 欣奕华 123.00203.004S V60M Pro 料 号 机 型 说明书(美国英语) 名 称 版 本 日 期 20221024 封面封底157g铜版纸(不过膜) 内页80g书纸 材 质 比 例 1 : 1 145*210 mm(L*W) 尺 寸 结构设计 林旭彬 4C双面印刷 印 刷 平面设计 骑马钉 工 艺 变更记录 备...
Need help?
Do you have a question about the V60M Pro and is the answer not in the manual?
Questions and answers