Table of Contents
Advertisement
Advertisement
Table of Contents

Related Manuals for Jupiter Pana 34

Summary of Contents for Jupiter Pana 34
- Page 1 Pana 34 User Manual August 29, 2022 A-PAN-002-00, Rev. A...
- Page 2 Jupiter Systems owns the copyright for this manual. Use or reproduction of this manual in parts or entirety without the authorization of Jupiter Systems is prohibited. The contents of this manual are subject to change without notice to improve quality.
- Page 3 NEVER place items that might tempt children to climb, such as toys and remote controls, on the top of the • display or furniture on which the display is placed. • If the existing display is going to be retained and relocated, the same considerations as above should be applied. Pana 34 User Manual...
- Page 4 This page has been intentionally left blank Pana 34 User Manual...
-
Page 5: Table Of Contents
2.1 Attach the Stand, Camera and Monitor ................5 3. P 34 F HAPTER EATURES 3.1 Views of Your Pana 34 ....................9 3.1.1 Monitor Stand....................... 11 3.1.2 Camera ........................ 13 3.1.3 Buttons......................... 14 3.1.4 Connectors......................14 3.2 Specifications......................... 15 3.2.1 Screen &... - Page 6 4. P 34 O HAPTER PERATION 4.1 Pana 34 Menus/Settings....................23 4.1.1 Reset, Inputs, Presets and Overlays ..............24 4.1.2 Aspect Ratios and Color ..................25 4.1.3 Special Settings, Sound and Brightness.............. 26 4.2 Touch Screen......................... 27 4.3 Screen Interaction Modes ....................28 5.
-
Page 7: Chapter 1. Read M E First
Quick Install Guide Note: When verifying the contents of your packaging leave the Pana 34 monitor face down in the protective foam, just the way it ships. It is best to attach the dual action articulating arm while the monitor is face down and protected by the shipping foam. -
Page 8: Handling Precautions
Avoid touching the screen, except for action appropriate to using the touch features with your fingers or stylus • Avoid touching the screen when moving the Pana 34 1.3 Cleaning • Do not clean the display with alcohol, solvents, or ammonia, as these could damage the display •... -
Page 9: Unpack The Pana 34
Ensure that Product storage remains within the range of 0° C to 50° C. (32° F – 122° F) 1.7 Modifications to Product CAUTION: Any changes or modifications, including but not limited to hardware and software modifications not expressly approved by Jupiter Systems could void the user’s authority to operate the equipment. Pana 34 User Manual... -
Page 10: Disposal Of Product
The recycling of materials will help to conserve natural resources. This symbol is only valid in the European Union. If you wish to discard this product, please contact your local authorities or dealer, and ask for the correct method of disposal. Pana 34 User Manual... -
Page 11: Chapter 2. Pana 34 Installation & Setup
ETUP 2.1 Attach the Stand, Camera and Monitor Unpack the Pana 34 as described in Section 1.5, Unpack the Pana 34 on page 3, leaving the monitor face down against the shipping foam. Attach the articulating arm to the monitor while the monitor is still face down in the shipping packaging Figure 2.1: Attaching arm to monitor with correct orientation... - Page 12 WARNING! Do not grab the back of the Pana 34 monitor by the speaker enclosures! Doing so will damage the rear of the monitor. Lift the monitor out using the articulating arm. Because either side (the monitor and the base) are heavy, this method balances the weight and makes it easy to remove the whole unit without damaging the monitor.
- Page 13 Attach the privacy cap to the camera Remove the protective cap from the camera slot Attach the camera slot cover to the camera mount Align the camera connector with the connection receiver and slide the camera in Pana 34 User Manual...
- Page 14 Attach..DP Attach..USB-C Attach..audio connection Power on the Pana 34 by pressing the Power/Menu button at the right bottom of the monitor Figure 2.5: Power/Menu Button at the bottom right of the monitor Setup the Monitor The monitor is Plug and Play so you should automatically see the screen from your computer source.
-
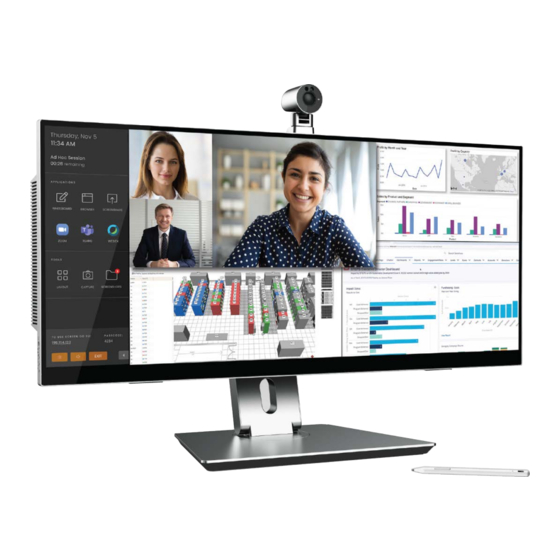
Page 15: Chapter 3. Pana 34 Features
3.1 Views of Your Pana 34 The bezel-less 21:9 monitor may be the first thing you notice with the Pana 34, but just as that design is based on human perception, there are other design decisions meant to enhance your interaction with the content you view, the content you create, or your experience with others through the window which is your monitor. - Page 16 Chapter 3: Pana 34 Features A simple look around the back of the monitor and you will notice the dual articulating arm, the speakers and the inputs. The speakers provide 24 watts. The eight element beam forming microphone array at the bottom of the monitor provides clear sound in meetings.
-
Page 17: Monitor Stand
Views of Your Pana 34 Figure 3.3: Stylus holder The dual articulating arm enhances your interaction with your content. The flexibility of the swiveling, dual articulating arm and the stylus and the Standard, Game, Movie, Text, FPS, RTS presets and special gaming response features enhance your interaction whether you are creating art with the stylus with the monitor in easel mode or strapped in your favorite gaming chair with your favorite controller. - Page 18 Chapter 3: Pana 34 Features Figure 3.4: Articulating arm up and down Figure 3.5: Swivel stand Pana 34 User Manual...
-
Page 19: Camera
Tilting the camera and screen provides the option where it appears that you are looking in the eyes of other members of a meeting. The 4K camera comes with the Pana 34 as well as Microsoft’s Hello Face authentication. Figure 3.6: Camera horizontal rotation Figure 3.7: Camera vertical tilt... -
Page 20: Buttons
3.1.3 Buttons While the Pana 34 has a lot of settings to match your visual needs, there is only one button — for power and to access the on screen touch enabled settings. All monitor settings and adjustments are via the touch screen. -
Page 21: Specifications
Response Time 1ms MPRT / 7ms with OD Driver Viewing Angle 178° H/V Panel Surface Anti-Fingerprint Language English (Default), DE, FR, SC, JS, KR Color 6500K, 9300K, Custom Preset Mode Standard, Game, Movie, Text, FPS, RTS Modes Pana 34 User Manual... - Page 22 Chapter 3: Pana 34 Features Table 3.2: Touch Specifications Item Description Type and Structure OGM Mutual Capacitive Sensor Thickness 0.7mm SDL Transmit/Receive 58/132 Active Pen Microsoft Pen Protocol 2.0 Sensor Pitch 6mm RX/TX Multi-Touch 10-Point Simultaneous Sensitivity, Accuracy, Jitter, Linearity 1mm Center / 2mm Edge (Φ7)
-
Page 23: Connector Specifications
USB hub, Touch port for HDMI and DP ports. The camera and the microphone also use this touch port • USB 3.2 Gen1 (A type) x1, USB Output or USB carrying capacity Intended for mouse and keyboard Audio Output 3.5mm x 1 Pana 34 User Manual... -
Page 24: Camera Specifications
Chapter 3: Pana 34 Features 3.2.3 Camera Specifications the Pana34 camera is a 3840 x 2160p 30 Hz CMOS sensor that is also Windows Hello compatible via IR facial recognition. Table 3.4: Camera Specifications Item Description Focus Fixed • Brightness •... -
Page 25: Pana Pen34 Active
Table 3.5: Pana Pen34 Active Specifications Item Description Type and Structure OGM Mutual Capacitive Sensor Thickness 0.7mm SDL Sensitivity 4,096 Levels of Pressure Sensitivity Active Pen Microsoft Pen Protocol 2.0 Power USB-C charge Windows HLK Certification Pana 34 User Manual... -
Page 26: Microphone & Speakers
Chapter 3: Pana 34 Features 3.2.5 Microphone & Speakers Figure 3.10: Microphone and Speakers Table 3.6: Microphone Specifications Item Description Type Digital Array 8 channel input Audio Format 1 channel 48KHz, 16Bits PCM Beamforming, Echo Cancellation, Noise Suppression, Reverberation Algorithm Support... - Page 27 Rated Frequency Response Fb 20kHz 79 SPL ± 3dB average at 315, 400, 500, 630Hz Voltage Sensitivity 87.5SPL ± 3dB average at 3150, 4000, 5000, 6300Hz Distortion 5% Maximum Normal Power 12 W Maximum Power 15 W Pana 34 User Manual...
-
Page 28: Physical & Environmental Specifications
Chapter 3: Pana 34 Features 3.2.6 Physical & Environmental Specifications Table 3.8: Physical & Environmental Specifications Item Description Physical Specifications 817.72mm x 371.77mm x59.1mm Unit Dimension 32.2 inches x14.6 inches x 2.3 inches Mounting Characteristics VESA 100 x 100 mm Net Weight (including stand) 11.8 Kg/26 pounds... - Page 29 Specifications Table 3.9: Power Consumption Item Description Maximum Power Consumption 110 W Standby Power Consumption 0.5 W Typical Power Consumption 45 W Pana 34 User Manual...
- Page 30 Chapter 3: Pana 34 Features Pana 34 User Manual...
-
Page 31: Chapter 4. Pana 34 Operation
Pana 34. 4.1 Pana 34 Menus/Settings To access the Pana 34 menus, push the Power/Menu button while the monitor is powered on. Figure 4.1: The Power/Menu button The Previous and Next icons on the bottom of the menu screens navigate among the menu screens (see Figure 4.2. -
Page 32: Reset, Inputs, Presets And Overlays
Chapter 4: Pana 34 Operation 4.1.1 Reset, Inputs, Presets and Overlays Figure 4.2: Reset, Inputs, Presets and Overlays Table 4.1: Reset, Inputs, Presets and Overlays Item Description Reset Resets monitor to factory defaults USB-C HDMI Shows which input is selected with a box around the icon: . -
Page 33: Aspect Ratios And Color
Table 5: Aspect Ratios and Color Item Description 4:3, 16:9, 21:9; the Pana 34 will select the aspect ratio based on the aspect ratio of the Aspect Ratio Modes input source. If you select a different aspect ratio it will extend or contract the image... -
Page 34: Special Settings, Sound And Brightness
Chapter 4: Pana 34 Operation 4.1.3 Special Settings, Sound and Brightness Figure 4.4: Special Settings, Sound and Brightness Table 4.1: Special Settings, Sound and Brightness Item Description Response time overdrive. Enhances response time to reduce ghosting (cloudy trails) left by... -
Page 35: Touch Screen
Touch screen interaction settings are provided by the computer operating system for Windows (Pen and Windows Ink in Device control panel) and 3rd party applications for Mac OS, Linux and even Android systems (such as TouchBase; touch-base.com/drivers). Also touch may be different depending on the user application. Pana 34 User Manual... -
Page 36: Screen Interaction Modes
Chapter 4: Pana 34 Operation 4.3 Screen Interaction Modes Just as touching the screen rather than using a mouse provides more immediacy, using the flexibility of the dual articulating arm with the touch monitor provides an enhanced user experience. Experiment with different positions and let us know which ones work best for you. -
Page 37: Chapter 5. Pana 34 Troubleshooting & Support
Your Product's display contains many individual pixels, and typically a small number of pixels do not function normally. Your display has been inspected and is in compliance with Jupiter's specifications, and any pixel non-functionality does not affect the operation or use of your Product's display. -
Page 38: Hardware Faults
Should your Jupiter Commercial LCD Monitor (“Product”) fail due to a defect in materials or workmanship under normal and proper use, during the warranty period set forth below, Jupiter Systems (" Jupiter ") will, at its option, repair or replace the Product. This limited warranty is valid only to the original retail purchaser of the Product. -
Page 39: Warranty Limitations
Damage or defects of the Product caused by the use of accessories, parts, consumable cleaning products, or service not provided or approved by Jupiter. Damage or defects of the Product or missing items to any Product sold “As Is”, “With all Faults” or similar disclaimer. -
Page 40: How Service Is Handled
In the event a replacement product is received, please use the original carton / packaging from that replacement product in returning the defective unit to Jupiter. • Jupiter shall bear the cost of out-bound shipping under this limited warranty. 5.2.1.5 Additional Warranty Service Information To obtain warranty service and additional information: •... -
Page 41: Technical Assistance
Technical Assistance 5.3 Technical Assistance If you require technical assistance, please contact Jupiter Systems' technical support team. Please provide as much information to the support team about the fault and any steps you have taken in trying to resolve the issue. - Page 42 This page has been intentionally left blank Pana 34 User Manual...
-
Page 43: Index
Camera Specifications Camera vertical tilt Certifications Cleaning Input, power and sound connections Color Inputs Color Gamut Inspecting Shipment Connecting inputs Installation Connector Specifications Installation and Setup Connectors Interface Specifications Contents of Packaging Contrast 15, 26 Language Pana 34 User Manual... - Page 44 Pana 34 User Manual Index Lift monitor from box RoHS Menus/Settings Screen Specifications Microphone Effective Distance Sound Microphone Effective Pickup Angle Speaker Distortion Microphone Specifications Speaker Fundamental Frequency Movie Speaker Maximum Power Mute Speaker Normal Power Speaker Rated Frequency Response...
- Page 45 Pana 34 User Manual Index Pana 34 User Manual...
- Page 46 This page has been intentionally left blank Pana 34 User Manual...
Need help?
Do you have a question about the Pana 34 and is the answer not in the manual?
Questions and answers