Advertisement
Quick Links
Advertisement

Related Manuals for FulTyme RV PLATFORM BIKE RACK-2 BIKE

Summary of Contents for FulTyme RV PLATFORM BIKE RACK-2 BIKE
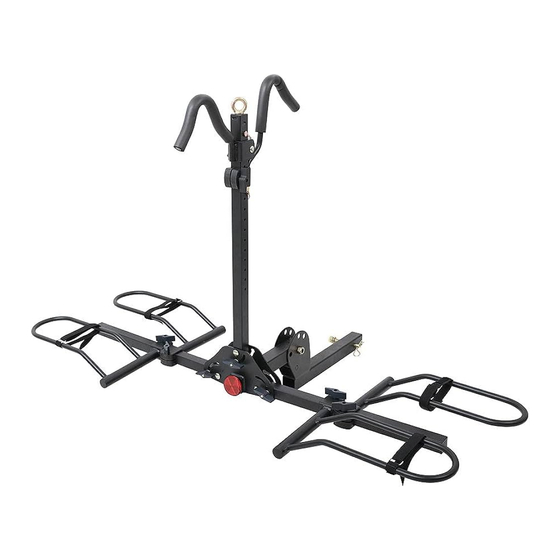
- Page 1 PLATFORM BIKE RACK-2 BIKE...
- Page 2 WARNING Read this manual thoroughly before installing and using your bike carrier. Failure to follow instructions could result in serious injury to person or property. The bicycle carrier should not be used for TOWING or any pulling purpose. The weight capacity of this carrier is 200 lbs. DO NOT exceed the rated capacity of this bike carrier.
- Page 3 Place Vertical Tube (part #9) into the Support Base Assembly by using M10 Hexagon bolt and M10 Locknut (parts #7 & STEP 2 #8). With the Vertical Tube in a vertical position, insert the 5/16" hexagon bolt (part #6), through the 5/16" flat washer (part #4), the 5/16"...
- Page 4 、 STEP 4 Slide the cradles onto the horizontal arms. Release the knob of the left and right cradle (#15 #16). The knob should be facing up and the loop end of cradle should be facing outward and upward. Insert the cradles in sequence as shown below Fig 4. After all, 4 cradles are on the horizontal arms, tighten.
-
Page 5: Mounting Instructions
STEP 6 Insert Folding Shank into 2” receiver, using Stabilizing Pin, 16 Spring Washer,16 Flat Washer, and Clip (#22, #23, #24, #13) to fix. FIG 6 Mounting Instructions Please note the cradles and J-hooks are completely adjustable and can slide on the arms. Using the vertical knobs on the tops of the cradle and the horizontal knobs on the J-hooks, twist until they are loose and the cradle or the J-hook can move along the tube. -
Page 6: Folding Instructions
Tilting Instructions DO NOT TILT TO THE RACK WHILE BIKES ARE MOUNTED For access to the rear of vehicle, remove 5/8” pin and allow the rack to tilt downward. Securely grasp the bike rack while the pin is out. FIG. 9 Folding Instructions Method 1:... - Page 7 STEP 2: Pull out the 5/8 "pin (12 #) and 3.8 hairpin (13 #), rotate the lifting rotating mechanism (10 #) by 90 ° , and then install the 5/8" pin (12 #) and 3.8 hairpin (13 #,See Fig. 11 FIG 11 Method 2: STEP 1: Loosen the 5/16"...
- Page 8 STEP 2: Pull out the 5/8 "pin (12 #) and 3.8 hairpin (13 #), rotate the rear frame part forward by 90° , and then install the 5/8" pin (12 #) and 3.8 hairpin (13 #),See Fig. 13 FIG 13...
-
Page 9: Part List
Maintaining the Bike Rack Frequently inspect the Bike Rack and hitch receiver for damage. If the Bike Rack or hitch receiver become damaged, stop using the product immediately. Frequently check to make sure all connections are tight and that all components are in good condition.
Need help?
Do you have a question about the PLATFORM BIKE RACK-2 BIKE and is the answer not in the manual?
Questions and answers