Advertisement
Quick Links
Advertisement

Summary of Contents for FulTyme RV 1300
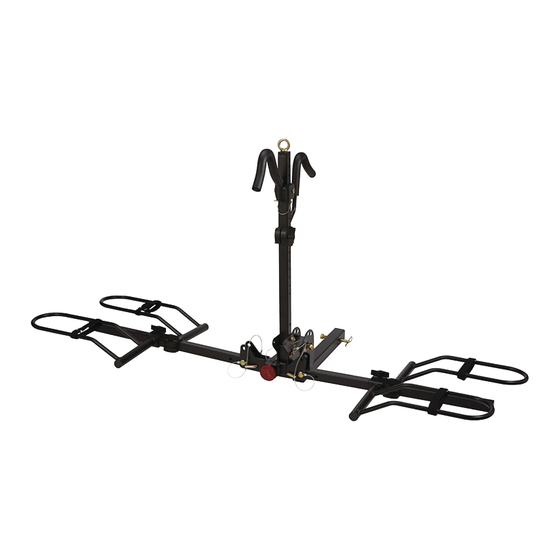
- Page 1 PLATFORM BIKE RACK-2 BIKE This data is internal to Brunswick.
- Page 2 WARNING Read this manual thoroughly before installing and using your bike carrier. Failure to follow instructions could result in serious injury to person or property. The bicycle carrier should not be used for TOWING or any pulling purpose. The weight capacity of this carrier is 200 lbs. DO NOT exceed the rated capacity of this bike carrier.
- Page 3 to lock Vertical arm (#7) . See Fig 2 FIG 2 STEP 3 Attach Folding Shank(#8) to Support Base assembly tube, using M16 BOLT (#9) , M16 LOCKNUT (#12) , pin (#10) and Clip (#11) for extra safety. See Fig 3 FIG 3 、...
- Page 4 After all 4 cradles are on the horizontal arms, tighten. FIG 4 STEP 5 Install the Long J-hook assembly (#15) and Short J-hook assembly (#16) onto the vertical arm, then tighten the eyebolt (#21) . Secure the J-hooks by using snap pin (#20) . Put the reflector (#22) in the hole of the square tube. See Fig 5 FIG 5 STEP 6 Insert folding shank into 2"...
- Page 5 FIG 6 Mounting the bikes - the cradles and J-hooks are completely adjustable and slide on the arms. Using the vertical knobs on the tops of the cradle and the horizontal knobs on the J-hooks, twist until they are loose and the cradle or the J-hook can move on the tube.
- Page 6 Once adjusted, allow the bike to properly fit into the cradle, load the bike wheels directly into the cradles and ensure they will not roll back and forth. Bring down the J-hook till it fits securely over the middle part of the frame on the bike. Remember to use the strap on the cradles to secure the wheels.
- Page 7 Folded when not in use Feature Fold Vertical arms to the horizontal position, and then fold the folding shank assembly to the vertical position. FIG 11 This data is internal to Brunswick.
- Page 8 Diagram Part List Part# Description Q'ty Part# Description Q'ty Support Base assembly M16 LOCKNUT Horizontal arm Left cradle assembly L Pin Right cradle assembly M10 CARRIAGE BOLT Long J-hook assembly M10 flat washer Short J-hook assembly M10 LOCKNUT Stabilizing Pin Vertical arm 1/2"...

Need help?
Do you have a question about the 1300 and is the answer not in the manual?
Questions and answers
Curious, what is the purpose of the "eye bolt" for that's on top of the center up right post? Thanks
The eye bolt (#21) on top of the center upright post for the FulTyme RV part number 1300 is used to tighten and secure the Long J-hook assembly (#15) and Short J-hook assembly (#16) onto the vertical arm.
This answer is automatically generated