Table of Contents
Advertisement
INSTALLATION
AND OWNER'S MANUAL
Split Air-source Heat Pump Water Heater
IMPORTANT NOTE:
Thank you very much for purchasing our product,
Before using your unit , please read this manual carefully and keep it for future reference.
If you need to consult the electronic manual, please go to this website:https://tsp.midea.com
Advertisement
Table of Contents

Related Manuals for chromagen MHW-F26WN3

Summary of Contents for chromagen MHW-F26WN3
- Page 1 INSTALLATION AND OWNER’S MANUAL Split Air-source Heat Pump Water Heater IMPORTANT NOTE: Thank you very much for purchasing our product, Before using your unit , please read this manual carefully and keep it for future reference. If you need to consult the electronic manual, please go to this website:https://tsp.midea.com...
-
Page 3: Table Of Contents
CONTENTS 1 SAFETY PRECAUTIONS GENERAL INTRODUCTION Outdoor unit Water tank Specifications BEFORE INSTALLATION Accessories Space for maintenance INSTALLATION PROCEDURE Dimension sketch and fixed way Drain hole position Pipe connection Vacuum drying Refrigerant charge ELECTRICAL CONNECTION Power supply cords 5.2 Water tank temperature sensor installation 5.3 ODU &... -
Page 4: Safety Precautions
1 SAFETY PRECAUTIONS The precautions listed here are divided into the following types.They are quite important, so be sure to follow them carefully. Meanings of DANGER, WARNING, CAUTION and NOTE symbols. INFORMATION Read these instructions carefully before installation. Keep this manual in a handy for future reference. Improper installation of equipment or accessories may result in electric shock, short-circuit, leakage, fire or other damage to the equipment. - Page 5 DANGER The operation of the thermal cut-out indicates a possibly dangerous situation. Do not reset the thermal cut-out until the water heater has been serviced by a qualified person. Failure to operate the relief valve easing gear at least once every six months may result in the water heater exploding.
- Page 6 Make certain that all electrical work is carried out by qualified personnel according to the local laws and regulations and this manual using a separate circuit. Insufficient capacity of the power supply circuit or improper electrical construction may lead to electric shocks or fire. Be sure to install a ground fault circuit interrupter according to local laws and regulations.
- Page 7 This appliance can be used by children 8 years old and above and persons with reduced physical, sensory or mental capabilities or lack of experience and knowledge if they are supervised or given instruction on using the unit in a safe manner and understand the hazards involved.
-
Page 8: General Introduction
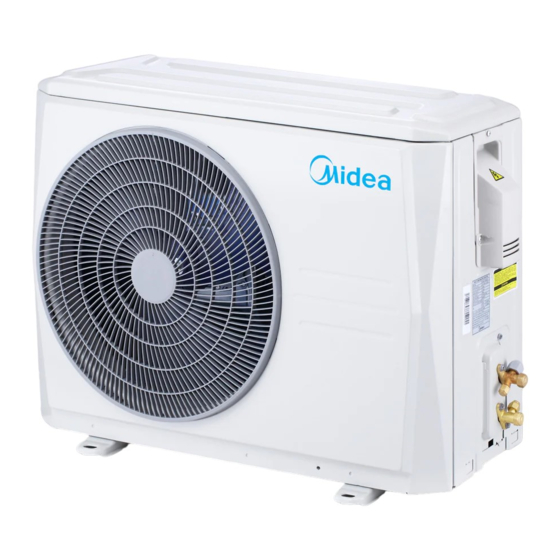
2 GENERAL INTRODUCTION Table 2-1 2.1 Outdoor unit Name Power cord enter Refrigerant gas valve Refrigerant liquid valve Air outlet Air inlet Fig. 2-1 2.2 Water tank Table 2-2 Name Magnesium rod insertion port Foam filling port Reserved port Water outlet Temperature pressure safety valve Water tank temperature sensor Handle... -
Page 9: Specifications
2.3 Specifications Table 2-3 MT-200R26E20 MT-300R26E20 odel -C MT-200R26E20 -C MT-300R26E20 odel Ambient temperature -15~46 20~60 Leaving water temperature 2600 Capacity Heating Input 1000 General Hot water yield 0.0441 / 0.0562 Liquid side mm/inch Refrigerant Gas side mm/inch piping Max. height difference Max. -
Page 10: Before Installation
3 BEFORE INSTALLATION 3.1 Accessories Table 3-1 Shape Accessory Name Qty. Purpose Installation manual Need by master unit Manual of wired controller Wired controller instructions Wired controller components Control unit and display unit status Water drainage connection For condensate water draining Outdoor unit pipe Condensate water drainage of unit bottom plate... - Page 11 Air outlet Fig 3-2 3.2.2 Water tank installation and maintenance space, see Fig 3-3 and Fig 3-4 . (Unit: mm) NOTE When the water tank is installed outdoors, the distance between the water tank and the fence is not less than 200mm. When the water tank is installed indoors, the distance between the water tank and the wall is not less than 600mm.
-
Page 12: Installation Procedure
4 INSTALLATION PROCEDURE NOTE Ask your dealer or specialized person for moving, repair, and maintenance. Install it in the place without direct sunlight and other direct heat radiations. If it can’t be avoided, please add a cover to prevent unit from direct sunlight. The ceiling is horizontal, and its structure can endure the weight of the indoor unit. -
Page 13: Drain Hole Position
4.1.2 Water tank, see Fig. 4-4, Fig. 4-5 and Table 4-2. (Unit: mm) Table 4-2 Dimension Model 1665 200L 300L 1735 Please install the water tank fixing strip as shown in the figure to ensure that the water tank is stably fixed. Fig. -
Page 14: Pipe Connection
4.3 Pipe connection 4.3.1 Unit connection sketch Unit connection sketch, please refer to Fig.4-8. Hot water outlet Gutters 9.52 6.35 Cold water inlet Outdoor unit Water tank Fig. 4-8 Gutters Icons and meanings Table 4-3 Stop valve Water mixing valve Name Water end user (bought by customers themselves) - Page 15 4.3.2 PTR valve The valve body unloading pressure is 850kPa, unloading temperature is 99℃, and the valve body opening energy value is 46kW, more details refer to certificate No:WMK26608. PT valve is tightened with a 68N.m torque wrench. Apply sealant to the first 3 turns of screw thread before installation;...
-
Page 16: Vacuum Drying
NOTE Do not let air, dust, or other impurities fall in the pipe system during installation. The connecting pipe should not be installed until the indoor and outdoor units have been fixed already. Keep the connecting pipe dry, and do not let moisture in during installation. When connecting copper pipe, please wrap it with thermal insulation material. -
Page 17: Refrigerant Charge
Table 4-5 Item Description Image Notice Connect the (low pressure side) Before performing vacuum drying, make sure hose of a pressure gauge to the that all the outdoor unit stop valves are firmly outdoor unit gas pipe stop valve. closed. 1. -
Page 18: Electrical Connection
5 ELECTRICAL CONNECTION CAUTION The heat pump should use separate power supply with rated voltage. If voltage is not stable, please use stabilized voltage supply. The external power supply to the heat pump should have ground wiring, which is linked to the ground wiring of the indoor andoutdoor unit. -
Page 19: Water Tank Temperature Sensor Installation
5.2 Water tank temperature sensor installation Connect the water tank temperature sensor wire connector to the outdoor unit T5L connector. Water tank temperature sensor T5L Fig.5-1 5.3 ODU & AUX. power connection NOTE If the water tank has the electric auxiliary heating(AUX.)function, please follow the steps below to connect the electric auxiliary heating power cord. -
Page 20: Dial Code Definitions
3.Outdoor unit power supply. Terminal block o o o Power supply E-heater Fig.5-4 1. Electric counter 2. Global overcurrent and leakage circuit breaker 3. Electric leakage circuit breaker 4. Overcurrent circuit breaker CAUTION A leakage protector must be installed on power supply box outside the unit according to the figure above. Power supply with leakage protector must be installed inside or installed in the place that can satisfy water-proof requirements. -
Page 21: Check
6 CHECK NOTE Before switching on the unit, read following recommendations: When the installation and parameter setting are completed, cover all the sheet metal of the unit well. The unit should be maintained by professionals. If the whole unit failed or in protection, the panel will display the corresponding code; when more than one failure or protection occurs, the order of failure protection will display. -
Page 22: Operations And Performances
7 OPERATIONS AND PERFORMANCES CAUTION Please cut off the manual switch power when unit fails. Do not restart until problems are solved. 1) Characteristics of water heating——3 minute protection Restart or open manual switch after the unit has been shut down within a short time. Unit will not start immediately until 3 minutes later, because of the self-protect function of the compressor. -
Page 23: Maintenance
8 MAINTENANCE 8.1 Confirmation before running 1) Make sure whether ground wire is broken or fall off. 2) Turn on power supply switch for 12 hours before running. 8.2 Troubleshooting when abnormal situation happens Before asking for serving or repairing, check the following points: Non-mechanical malfunction 1) Water oozes from safety valve pressure relief opening - When water heating, cold water will expand when heated, water oozing is normal. -
Page 24: Water Quality Limitations
NOTE Frequency of Refrigerant Leak Checks: 1) For equipment that contains fluorinated greenhouse gases in quantities of 5 tonnes of CO2 equivalent or more,but of less than 50 tonnes of CO2 equipment,at least every 12 months, or where a leakage detection system is installed, at least every 24 months. -
Page 25: Error Code Shooting Table
9 ERROR CODE SHOOTING TABLE Table 9-1 Error Code Explanation Communication error Water tank temperature sensor error (T5L) ODU heat exchanger temperature sensor error (T3) ODU ambient temperature sensor error (T4) Suction temperature sensor error (Th) Discharge temperature sensor error (Tp) Clock chip error Smart Grid signal error E-heater error (Current is less than 2A when e-heater operating) - Page 27 NOTE...
Need help?
Do you have a question about the MHW-F26WN3 and is the answer not in the manual?
Questions and answers