Chapters
Table of Contents

Related Manuals for Electrolux FMW25EMGMS


Summary of Contents for Electrolux FMW25EMGMS
- Page 1 Benutzerinformation Mikrowellenofen User Manual EN 21 FMW25EMGMS Microwave Oven Notice d'utilisation FR 38 Four à micro-ondes Istruzioni per l’uso Forno a microonde electrolux.com/register...
-
Page 2: Table Of Contents
WIR DENKEN AN SIE Vielen Dank für Ihren Kauf eines Electrolux-Geräts. Sie haben ein Produkt gewählt, das jahrzehntelange professionelle Erfahrung und Innovation mit sich bringt. Das ausgeklügelte und stilvolle Produkt wurde für Sie entwickelt. So können Sie jedes Mal, wenn Sie das Produkt verwenden, sicher sein, dass Sie großartige Ergebnisse erzielen werden. -
Page 3: Sicherheitshinweise
SICHERHEITSHINWEISE Lesen Sie vor der Montage und dem Gebrauch des Geräts zuerst die Bedienungsanleitung. Bei Verletzungen oder Schäden infolge nicht ordnungsgemäßer Montage oder Verwendung übernimmt der Hersteller keine Haftung. Bewahren Sie die Anleitung zum Nachschlagen an einem sicheren und zugänglichen Ort auf. 1.1 Sicherheit von Kindern und schutzbedürftigen Personen WARNUNG! - Page 4 Kinder dürfen keine Reinigung und Wartung des Geräts • ohne Beaufsichtigung durchführen. 1.2 Allgemeine Sicherheit Dieses Gerät ist für die Verwendung im Haushalt und • ähnliche Zwecke vorgesehen, wie z. B.: Bauernhöfe, Personalküchenbereiche in Geschäften, – Büros und anderen Arbeitsumfeldern Für Gäste in Hotels, Motels, Pensionen und anderen –...
- Page 5 gilt nicht, wenn der Hersteller Angaben zur Größe und Form der Metallbehälter, die geeignet für das Garen in der Mikrowelle sind, zur Verfügung gestellt hat. Verwenden Sie nur mikrowellengeeignete Kochutensilien. • Wenn Sie Lebensmittel in Behältern aus Kunststoff oder • Papier erwärmen, beobachten Sie das Gerät aufmerksam, da die Möglichkeit einer Entflammung besteht.
-
Page 6: Sicherheitsanweisungen
Die Mikrowelle darf nicht in einem Einbauküchenschrank • installiert werden, es sei denn, sie wurde in einem Einbauschrank getestet. Die Geräterückseite muss gegen die Wand gestellt werden. • Benutzen Sie keine scharfe Scheuermittel oder • Metallschwämmchen zum Reinigen der Glastür; sie können die Glasfläche verkratzen und zum Zersplittern der Scheibe führen. -
Page 7: Gerätebeschreibung
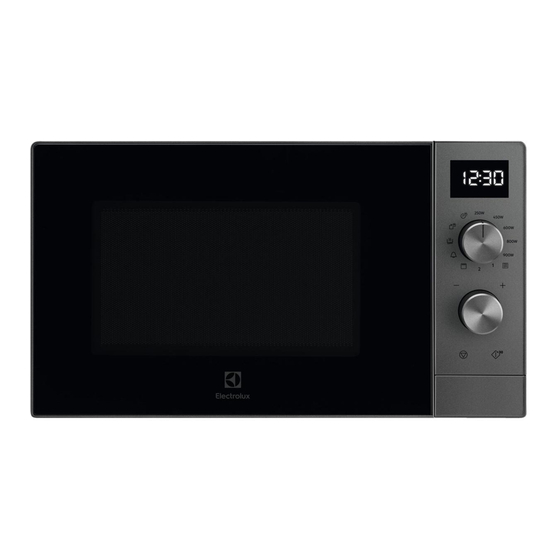
2.4 Reinigung und Pflege 2.5 Wartung • Wenden Sie sich zur Reparatur des WARNUNG! Geräts an den autorisierten Verletzungs-, Brandgefahr sowie Kundendienst. Dabei dürfen Risiko von Schäden am Gerät. ausschließlich Originalersatzteile verwendet werden. • Schalten Sie das Gerät immer aus und •... - Page 8 3.2 Bedienfeld Symbol Funktion Beschreibung — Anzeige Zeigt die Einstellungen und die aktuelle Zeit an. — Einstellknopf für die Leistung Zum Einstellen der Leistungsstufe. Einstellknopf Zum Einstellen der Garzeit oder des Gewichts. Stopp-/Löschtaste Zum Ausschalten des Geräts oder zum Lö‐ schen der Gareinstellungen.
- Page 9 Symbol Funktion Beschreibung Kombi-Kochen Starten der Kombi-Garfunktion. Grill Starten der Grillfunktion. Küchen-Timer Zählt die Zeit herunter. Niedrige Stufe Schokolade schmelzen, Butter aufweichen. Gewicht auftauen Zum Auftauen von Lebensmitteln nach Gewicht. Zeit Auftauen Zum Auftauen von Lebensmitteln nach Zeit. 3.3 Zubehör Grillrost Drehteller-Set Verwenden Sie immer das...
-
Page 10: Vor Der Ersten Verwendung
• Garen mit Dampf 4. VOR DER ERSTEN VERWENDUNG 4. Reinigen Sie den Garraum mit einem WARNUNG! feuchten, weichen Tuch und trocknen Sie Siehe Kapitel ihn sorgfältig. Sicherheitshinweise. Der Backofen kann Geruch und Rauch verströmen. Stellen Sie sicher, dass die 4.1 Entfernen der Schutzfolie Luftzirkulation im Raum ausreichend ist. - Page 11 5.1 Allgemeine Informationen zur unglasierten Böden oder kleinen Öffnungen, zum Beispiel an Griffen. Verwendung des Geräts Durch in diese Öffnungen eingedrungene • Lassen Sie die fertige Speise nach dem Feuchtigkeit kann das Kochgeschirr beim Ausschalten des Geräts einige Minuten Erhitzen Risse bekommen. stehen.
- Page 12 Kochgeschirr / Material Mikrowelle Grillen Auftauen Heiz- Kochen Nicht-ofenfestes Glas und Porzellan Glas und Glaskeramik aus ofenfestem/frostbes‐ tändigem Material (z. B. Arcoflam) Keramik , Steingut Hitzebeständiger Kunststoff bis 200 °C Pappe, Papier Frischhaltefolie Bratfolie mit mikrowellengeeignetem Ver‐ schluss Bratgeschirr aus Metall, z. B. Emaille, Gusseisen Backformen, schwarzer Lack oder siliziumbe‐...
- Page 13 5.4 Tabelle der Leistungsstufen Symbol Leistungsstufen Leistung Niedrige Stufe (Schokolade schmel‐ 90 W zen, Butter weich machen) Auftauen 130 W Niedrig 250 W Mittel 450 W Mittelhoch 600 W Hoch 800 W 900 W Combi-Kochen Combi-Kochen 1 60 % Mikrowelle, 40 % Grill (LO Grill) Combi-Kochen 2 40 % Mikrowelle, 60 % Grill...
-
Page 14: Verwendung Des Zubehörs
5.6 Grillen oder Garen im Kombi- 3. Drücken Sie , um Ihre Auswahl zu Modus bestätigen und die Mikrowelle einzuschalten. Während des Grill- oder 1. Drehen Sie den Leistungsstufen-Knopf, Kombi-Modus können Sie die um die gewünschte Funktion Leistungsstufe oder Zeit ändern. einzustellen. -
Page 15: Zusatzfunktionen
Das Dampfventil während des Kochens geschlossen halten. 7. ZUSATZFUNKTIONEN 7.1 Kindersicherung 1. Drehen Sie den Leistungsstufen-Knopf und stellen Sie ein. Die Kindersicherung verhindert einen 2. Drehen Sie den Einstellknopf im versehentlichen Betrieb der Mikrowelle. Uhrzeigersinn, um die Zeit einzustellen. Wenn die Uhr eingestellt ist, 3. - Page 16 Störung Abhilfe Die Speise ist nach Ablauf der Zeit immer noch Längere Garzeit einstellen oder höhere Leistung wählen. Be‐ nicht aufgetaut, heiß oder gegart. achten Sie, dass für die Zubereitung größerer Gargutmengen eine längere Gardauer erforderlich ist. Nach Ablauf der Gardauer ist die Speise außen Stellen Sie das nächste Mal eine niedrigere Leistung und län‐...
-
Page 17: Reinigung Und Pflege
Lebensmittel Wasser Leistung Gewicht der Zeit Standzeit (ml) Nahrung (g) (Min.) (Min.) 5 – 6 Karotten in Schei‐ 6 - 7 Baby-Karotten 9:30 – 10:30 4 - 5 Blumenkohl 5 - 6 4 – 5 Broccoli 5:30 – 6:30 Spinat 5:30 –... -
Page 18: Fehlersuche
10. FEHLERSUCHE WARNUNG! Siehe Kapitel Sicherheitshinweise. 10.1 Was tun, wenn.. Problem Mögliche Ursache Problembehebung Das Gerät funktioniert Das Gerät ist nicht an die Stromversor‐ Schließen Sie das Gerät ans Stromnetz nicht. gung angeschlossen. Das Gerät funktioniert Die Sicherung im Sicherungskasten ist Überprüfen Sie die Sicherung. -
Page 19: Montage
11. MONTAGE Steckdose angeschlossen werden, die WARNUNG! ordnungsgemäß installiert und geerdet ist. Im Siehe Kapitel Falle eines elektrischen Kurzschlusses Sicherheitshinweise. reduziert die Erdung das Risiko eines Stromschlags. 11.1 Allgemeine Informationen 11.3 Mindestabstände VORSICHT! Schließen Sie das Gerät nicht an Adapter oder Verlängerungskabel an. -
Page 20: Umwelttipps
Servicestellen Morgenstrasse 131 3018 Bern Langgasse 10 9008 St. Gallen Am Mattenhof 4a/b 6010 Kriens Schlossstrasse 1 4133 Pratteln Comercialstrasse 19 7000 Chur Ersatzteilverkauf Industriestrasse 10, 5506 die Kosten für Material, Arbeits- und Mägenwil, Tel. 0848 848 111 Reisezeit. Die Garantieleistung entfällt bei Nichtbeachtung der Gebrauchsanweisung Fachberatung/Verkauf Badenerstrasse 587, und Betriebsvorschriften, unsachgerechter... - Page 21 WE’RE THINKING OF YOU Thank you for purchasing an Electrolux appliance. You’ve chosen a product that brings with it decades of professional experience and innovation. Ingenious and stylish, it has been designed with you in mind. So whenever you use it, you can be safe in the knowledge that you’ll get great results every time.
-
Page 22: Safety Information
SAFETY INFORMATION Before the installation and use of the appliance, carefully read the supplied instructions. The manufacturer is not responsible for any injuries or damage that are the result of incorrect installation or usage. Always keep the instructions in a safe and accessible location for future reference. - Page 23 Farm houses, staff kitchen areas in shops, offices and – other working environments By clients in hotels, motels, bed and breakfast and other – residential type environments. WARNING: The appliance and its accessible parts become • hot during use. Care should be taken to avoid touching heating elements.
-
Page 24: Safety Instructions
If smoke is emitted, switch off or unplug the appliance and • keep the door closed in order to stifle any flames. Microwave heating of beverages can result in delayed • eruptive boiling. Care must be taken when handling the container. - Page 25 2.2 Electrical Connection • Before maintenance, deactivate the appliance and disconnect the mains plug from the mains socket. WARNING! • Clean regularly the appliance to prevent Risk of fire and electric shock. the deterioration of the surface material. • Do not allow food spills or cleaner residue •...
-
Page 26: Product Description
3. PRODUCT DESCRIPTION 3.1 General overview Lamp Safety interlock system Display Power setting knob Setting knob Door opener Waveguide cover Grill Turntable support 3.2 Control Panel Symbol Function Description — Display Shows the settings and current time. — Power Setting knob To set the power level. - Page 27 Symbol Function Description Stop / Clear button To deactivate the appliance or delete the cook‐ ing settings. To start the appliance or increase the cooking Start / +30 sec button time for 30 seconds at the selected power. Other symbols on the control panel Symbol Function Description...
-
Page 28: Before First Use
Grill Rack Use for: • Steam cooking Use for: • grilling food Steam Pot set For the suggested cooking table refer to "Hints and tips" chapter. 4. BEFORE FIRST USE 4.3 Preheating WARNING! Refer to Safety chapters. Preheat the empty oven before first use. 1. -
Page 29: Daily Use
• If you do not want the clock visible on If the clock is not set, the display the display, press until the display will turn off automatically 20 shows OFF. seconds after the end of the 8. Close the door. function. - Page 30 Suitable cookware and materials Cookware / Material Microwave Grilling Defrosting Heating Cooking Ovenproof glass and porcelain with no metal com‐ ponents, e. g. Pyrex, heat-proof glass Non-ovenproof glass and porcelain Glass and glass ceramic made of ovenproof/frost- proof material (e. g. Arcoflam), grill shelf Ceramic , earthenware Heat-resistant plastic up to 200 °C...
- Page 31 5.4 Power setting table Symbol Power setting Power Low stage (melting chocolate, soft‐ 90 W en butter) Defrost 130 W 250 W Medium 450 W Medium High 600 W High 800 W 900 W Combi Cooking Combi Cooking 1 60 % Microwave, 40 % Grill (LO Grill) Combi Cooking 2 40 % Microwave, 60 % Grill...
-
Page 32: Using The Accessories
6. USING THE ACCESSORIES 6.3 Inserting the steam pot set WARNING! Refer to Safety chapters. CAUTION! 6.1 Inserting the turntable set GRILL Steam pot set can not be used with the grill function. CAUTION! Do not cook food without the 1. -
Page 33: Additional Functions
7. ADDITIONAL FUNCTIONS 7.1 Child Safety Lock 1. Turn the Power Setting knob and set 2. Turn the Setting knob clockwise to set The Child Safety Lock prevents an accidental the time. operation of the microwave. 3. Press to confirm. When the clock is set, press the The Timer still works when you open the Clear button first... - Page 34 8.6 Combi Cooking All vegetables should be cooked at the full microwave power. Use Combi Cooking to keep the crispness of Add 30 - 45 ml of cold water for every 250 g certain foods. of vegetables. Halfway through the cooking time turn the Cut fresh vegetables into even sized pieces foods over and then continue cooking.
-
Page 35: Care And Cleaning
9. CARE AND CLEANING Remove food remains regularly. Make WARNING! sure to get rid of excess steam/humidity. Refer to Safety chapters. • Clean stubborn dirt with a special cleaner. • Clean all accessories regularly and let 9.1 Notes and tips on cleaning them dry. -
Page 36: Installation
We recommend that you write the data here: Model (MOD.) ........Product number (PNC) ........Serial number (S.N.) ........11. INSTALLATION that is properly installed and earthed. In the WARNING! event of an electrical short circuit, earthing Refer to Safety chapters. reduces the risk of electric shock. -
Page 37: Guarantee
GUARANTEE Customer Service Centres Point of Service Industriestrasse 10 Le Trési 6 Via Violino 11 5506 Mägenwil 1028 Préverenges 6928 Manno Morgenstrasse 131 3018 Bern Langgasse 10 9008 St. Gallen Am Mattenhof 4a/b 6010 Kriens Schlossstrasse 1 4133 Pratteln Comercialstrasse 19 7000 Chur Spare parts service Industriestrasse 10, costs of materials, labour and travel. - Page 38 NOUS PENSONS À VOUS Merci d’avoir choisi un appareil Electrolux. Vous avez choisi un produit qui bénéficie de décennies d'expérience professionnelle et d'innovation. Ingénieux et élégant, il a été pensé pour vous. C'est la raison pour laquelle vous pouvez avoir la certitude d'obtenir d'excellents résultats à...
-
Page 39: Informations De Sécurité
INFORMATIONS DE SÉCURITÉ Avant d'installer et d'utiliser cet appareil, lisez soigneusement les instructions fournies. Le fabricant ne pourra être tenu pour responsable des blessures et dégâts résultant d'une mauvaise installation ou utilisation. Conservez toujours les instructions dans un lieu sûr et accessible pour vous y référer ultérieurement. - Page 40 1.2 Sécurité générale Cet appareil est conçu pour un usage domestique et des • applications équivalentes, telles que : dans les cuisines résidentielles, dans des cuisines – réservées aux employés dans des magasins, bureaux et autres lieux de travail ; l'utilisation par les clients des hôtels, motels, des –...
- Page 41 N'utilisez que des ustensiles adaptés à une utilisation dans • un four à micro-ondes. Lorsque vous faites cuire des aliments dans des récipients • en plastique ou en papier, surveillez toujours l'appareil car ces matières peuvent s'enflammer. Cet appareil est uniquement destiné à chauffer des •...
-
Page 42: Consignes De Sécurité
N'allumez pas l'appareil lorsqu'il est vide. Les pièces • métalliques situées dans la cavité peuvent produire des arcs électriques. 2. CONSIGNES DE SÉCURITÉ 2.1 Instructions d’installation 2.3 Emploi AVERTISSEMENT! AVERTISSEMENT! L'appareil doit être installé Risque de blessures, de uniquement par un professionnel brûlures, d'électrocution ou qualifié. -
Page 43: Description De L'appareil
• Si vous utilisez un spray pour four, suivez informations sur le statut opérationnel de les consignes de sécurité figurant sur l’appareil. Elles ne sont pas destinées à l'emballage. être utilisées dans d'autres applications et ne conviennent pas à l’éclairage des 2.5 Service pièces d’un logement. - Page 44 3.2 Bandeau de commande Symbole Fonction Description — Affichage Affiche les réglages et l'heure actuelle. — Manette de réglage de la puis‐ Pour régler le niveau de puissance. sance Manette de réglage Pour régler la durée de cuisson ou le poids. Bouton Arrêter/Effacer Pour éteindre l'appareil ou supprimer les régla‐...
- Page 45 Symbole Fonction Description Cuisson combinée Pour lancer la fonction Cuisson combinée. Gril Pour activer la fonction Gril. Minuteur de cuisine Effectue un décompte de la durée. Niveau bas Faire fondre du chocolat, ramollir du beurre. Décongélation selon le poids Pour décongeler les aliments en fonction du poids. Décongélation selon la durée Pour décongeler les aliments en fonction de la du‐...
-
Page 46: Avant La Première Utilisation
• Cuisson à la vapeur 4. AVANT LA PREMIÈRE UTILISATION 3. Ouvrez la porte et laissez-le refroidir. AVERTISSEMENT! 4. Nettoyez la cavité du four avec un chiffon Reportez-vous aux chapitres doux humide et séchez soigneusement. concernant la sécurité. Une odeur et de la fumée peuvent s'échapper du four. - Page 47 • Retirez l’emballage en aluminium, les ces ouvertures et fissurer le récipient une récipients métalliques, etc. avant de fois chauffé. préparer les aliments. • Le plateau de cuisson en verre est Cuisson nécessaire au fonctionnement du four à • Si possible, faites cuire les aliments en les micro-ondes.
- Page 48 Ustensiles de cuisine / Matériaux Micro-ondes Gril Décongéla‐ Chauffe Cuisson tion Verre et vitrocéramique en matériau résistant au four/au gel (par exemple, Arcoflam), tablette de gril Céramique , grès Plastique résistant à une chaleur de 200 °C Carton, papier Film étirable Sachet de cuisson avec fermeture de sûreté...
- Page 49 5.4 Tableau des réglages de puissance Symbole Réglages de puissance Puissance Niveau bas (faire fondre du choco‐ 90 W lat, ramollir du beurre) Décongélation 130 W Faible 250 W À point 450 W Moyen élevé 600 W Élevé 800 W Max.
-
Page 50: Utilisation Des Accessoires
2. Tournez la manette de réglage pour changer la puissance ou la durée sélectionner la durée. pendant que le mode gril ou cuisson combinée est en cours. 3. Appuyez sur pour confirmer et activer le micro-ondes. Vous pouvez 6. UTILISATION DES ACCESSOIRES AVERTISSEMENT! Reportez-vous aux chapitres concernant la sécurité. -
Page 51: Fonctions Supplémentaires
Maintenez la valve de vapeur fermée pendant la cuisson. 7. FONCTIONS SUPPLÉMENTAIRES 7.1 Sécurité enfants 1. Tournez la manette de réglage de la puissance et sélectionnez La fonction Sécurité enfants permet d’éviter 2. Tournez la manette de réglage dans le une utilisation involontaire du micro-ondes. - Page 52 Problème Solution La nourriture a trop séché. Réduisez le temps de cuisson ou sélectionnez une puissance de micro-ondes plus basse. Les aliments ne sont toujours pas décongelés, Rallongez le temps de cuisson ou sélectionnez une puissance chauds ou cuits une fois la durée écoulée. plus élevée.
-
Page 53: Entretien Et Nettoyage
Aliments Eau (ml) Puissance Poids des ali‐ Durée Temps de re‐ ments (g) (min) pos (min) 5 – 6 Carottes en rondel‐ 6 - 7 Mini-carottes 9:30 -10:30 4 - 5 Chou-fleur 5 - 6 4 – 5 Brocolis 5:30 - 6:30 Épinards 5:30 - 6:30 6:30 –... -
Page 54: Dépannage
10. DÉPANNAGE AVERTISSEMENT! Reportez-vous aux chapitres concernant la sécurité. 10.1 Que faire si… Problème Cause possible Solution L’appareil ne fonctionne L’appareil n’est pas branché. Branchez l’appareil. pas. L’appareil ne fonctionne Le fusible dans la boîte à fusibles a dis‐ Vérifier le fusible. Si le fusible disjoncte pas. -
Page 55: Installation
11. INSTALLATION sur une prise correctement installée et mise AVERTISSEMENT! à la terre. En cas de court-circuit électrique, Reportez-vous aux chapitres la mise à la terre réduit le risque de choc concernant la sécurité. électrique. 11.1 Informations générales 11.3 Distances minimales ATTENTION! Ne branchez pas l’appareil à... -
Page 56: Matière De Protection De L'environnement
Points de Service Morgenstrasse 131 3018 Bern Langgasse 10 9008 St. Gallen Am Mattenhof 4a/b 6010 Kriens Schlossstrasse 1 4133 Pratteln Comercialstrasse 19 7000 Chur Points de vente de rechange frais de mains d’œuvres et de déplacement, Industriestrasse 10, 5506 Mägenwil,Tel. ainsi que les pièces de rechange. - Page 57 PENSIAMO A TE Grazie per aver acquistato un elettrodomestico Electrolux. Hai scelto un prodotto che ha alle spalle decenni di esperienza professionale e innovazione. Ingegnoso ed elegante, è stato progettato pensando a te. Quindi, in qualsiasi momento lo utilizzi, avrai la certezza di ottenere sempre i migliori risultati.
-
Page 58: Informazioni Di Sicurezza
INFORMAZIONI DI SICUREZZA Leggere attentamente le istruzioni fornite prima di installare e utilizzare l'apparecchiatura. I produttori non sono responsabili di eventuali lesioni o danni derivanti da un'installazione o un uso scorretti. Conservare sempre le istruzioni in un luogo sicuro e accessibile per poterle consultare in futuro. 1.1 Sicurezza dei bambini e delle persone vulnerabili AVVERTENZA! Rischio di soffocamento, lesioni o invalidità... - Page 59 1.2 Sicurezza generale L'apparecchiatura è destinata all'uso domestico e • applicazioni simili, come: Case di campagna, cucine di negozi, uffici e altri – ambienti di lavoro Clienti di hotel, motel, bed and breakfast e altri ambienti – residenziali. AVVERTENZA: L’elettrodomestico e le parti accessibili si •...
- Page 60 Quando si riscaldano o cuociono alimenti in recipienti di • plastica, carta, controllare il forno per evitare il rischio di incendio. L’apparecchiatura è destinata alla cottura di alimenti e • bevande. L’asciugatura di alimenti o indumenti e il riscaldamento di cuscinetti riscaldanti, pantofole, spugne, panni umidi e simili può...
-
Page 61: Istruzioni Di Sicurezza
Non accendere l’apparecchiatura quando è vuota. Le parti • metalliche all’interno della cavità possono generare scintille elettriche. 2. ISTRUZIONI DI SICUREZZA 2.1 Installazione 2.3 Utilizzo AVVERTENZA! AVVERTENZA! L’installazione Rischio di lesioni, ustioni, scosse dell'apparecchiatura deve essere elettriche o esplosioni. eseguita da personale •... -
Page 62: Descrizione Del Prodotto
• Se si utilizza uno spray per il forno, destinate a segnalare informazioni sullo seguire attentamente le istruzioni di stato operativo dell'apparecchio. Non sicurezza sulla confezione. sono destinate ad essere utilizzate in altre applicazioni e non sono adatte per 2.5 Assistenza l'illuminazione di ambienti domestici. - Page 63 3.2 Pannello dei comandi Simbolo Funzione Descrizione — Display Mostra le impostazioni e l'ora corrente. — Manopola di regolazione della Consente di impostare il livello di potenza. potenza Manopola di regolazione Per impostare il tempo di cottura o il peso. Tasto stop/annulla Per disattivare l'apparecchiatura o eliminare le impostazioni di cottura.
- Page 64 Simbolo Funzione Descrizione Cottura combinata Per avviare la funzione di cottura combinata. Grill Per avviare la funzione grill. Timer della cucina Esegue il conto alla rovescia. Livello basso Cioccolato fuso, burro ammorbidito. Scongelamento in base al peso Per scongelare il cibo a peso. Scongelamento in base al tempo Per scongelare il cibo a tempo.
-
Page 65: Prima Del Primo Utilizzo
Utilizzare per: • Cottura a vapore 4. PRIMA DEL PRIMO UTILIZZO 3. Aprire la porta e lasciar raffreddare. AVVERTENZA! 4. Pulire la cavità del forno con un panno Fare riferimento ai capitoli sulla morbido umido e asciugare sicurezza. accuratamente. Il forno può produrre un odore sgradevole e 4.1 Rimozione della pellicola fumo. - Page 66 • Prima di preparare gli alimenti, rimuovere • Il vassoio di cottura in vetro è necessario la pellicola di alluminio, i contenitori in per il funzionamento del forno a metallo, ecc. microonde. Posizionare il cibo o i liquidi al Cottura di sopra.
- Page 67 Pentole / Materiale Microonde Cottura al grill Scongela‐ Riscalda‐ Cottura mento mento Ceramica , terracotta Plastica termoresistente fino a 200 °C Cartoncino, carta Pellicola Pellicola per arrosti con chiusura sicura per mi‐ croonde Piatti per arrosto in metallo, ad es. smalto, ghisa Teglie, laccate nere o rivestite in silicone Lamiera dolci Pentole per rosolare, ad es.
- Page 68 5.4 Tabella delle impostazioni di potenza Simbolo Impostazione di potenza Potenza Livello basso (cioccolato fuso, burro 90 W ammorbidito) Scongelamento 130 W Basso 250 W Medio 450 W Medio-alta 600 W Alto 800 W Massimo 900 W Cottura combinata Cottura combinata 1 60 % microonde, 40 % grill (Griglia Bassa) Cottura combinata 2...
-
Page 69: Utilizzo Degli Accessori
mentre sono in funzione il Grill o la 3. Premere per confermare e attivare il Cottura combinata. forno a microonde. È possibile modificare l'impostazione della potenza o del tempo 6. UTILIZZO DEGLI ACCESSORI AVVERTENZA! Fare riferimento ai capitoli sulla sicurezza. 6.1 Inserimento del kit del piatto girevole ATTENZIONE! -
Page 70: Funzioni Aggiuntive
Tenere chiusa la valvola del vapore durante la cottura. 7. FUNZIONI AGGIUNTIVE 7.1 Blocco di sicurezza per bambini 7.2 Timer cucina Il blocco di sicurezza per bambini impedisce È possibile impostare al massimo 95 minuti. il funzionamento accidentale del forno a 1. - Page 71 8.2 Scongelamento 8.5 Grill Scongelare sempre l’arrosto rivolto verso il Cuocere al grill i cibi sottili mettendoli al basso. centro della griglia. Non scongelare la carne coperta, in quanto Girare la pietanza a metà del tempo potrebbe cuocerla invece che scongelarla. impostato e continuare a grigliare.
-
Page 72: Pulizia E Cura
Cibo Acqua (ml) Potenza Peso del cibo Tempo di ri‐ (min.) poso (min) 6:30 - 7:30 Patate a fette 9 -10 4:30 - 5:30 Fagiolini 5:30 - 6:30 4:30 - 5:30 Asparago 7 - 8 Salmone 4 - 5 3:30 - 4:00 Gamberetti 5:00 - 5:30 Petto di pollo... -
Page 73: Installazione
10.1 Cosa fare se... Problema Causa possibile Rimedio L’apparecchiatura non fun‐ L’apparecchiatura non è collegata alla Inserire la spina dell’apparecchiatura ziona. presa di corrente. nella presa di corrente. L’apparecchiatura non fun‐ Il fusibile nel quadro elettrico è bruciato. Controllare il fusibile. Se il fusibile si bru‐ ziona. -
Page 74: Garanzia
11.1 Informazioni generali elettrico la messa a terra riduce il rischio di scosse elettriche. ATTENZIONE! 11.3 Distanze minime Non collegare l’apparecchiatura ad adattatori o prolunghe. Ciò può causare un sovraccarico e un rischio di incendio. ATTENZIONE! L’altezza di installazione minima è... -
Page 75: Considerazioni Sull'ambiente
Servizio dopo vendita Morgenstrasse 131 3018 Bern Langgasse 10 9008 St. Gallen Am Mattenhof 4a/b 6010 Kriens Schlossstrasse 1 4133 Pratteln Comercialstrasse 19 7000 Chur Vendita pezzi di ricambio Industriestrasse garanzia o dello scontrino d’acquisto) Nella 10, 5506 Mägenwil,Tel. 0848 848 111 garanzia sono comprese le spese di manodopera, di viaggio e del materiale. - Page 76 electrolux.com...
Need help?
Do you have a question about the FMW25EMGMS and is the answer not in the manual?
Questions and answers