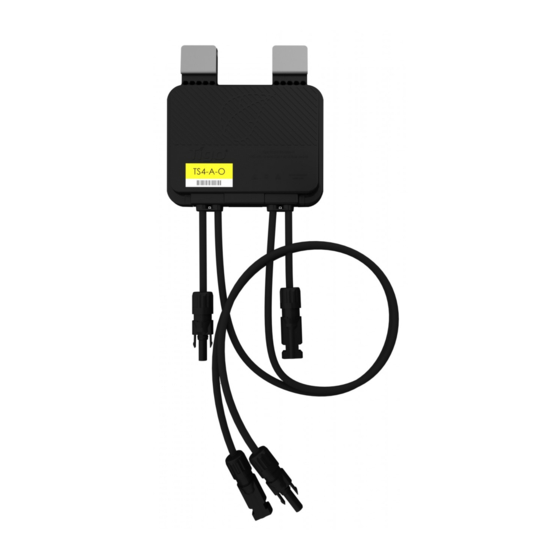
Tigo TS4-A Installation Manual
With tap and cca
Hide thumbs
Also See for TS4-A:
- Installation manual (42 pages) ,
- Installation manual (32 pages) ,
- Installation manual
Subscribe to Our Youtube Channel
Summary of Contents for Tigo TS4-A
- Page 1 TS4-A with TAP and CCA Installation Manual Visit the Tigo Energy Help Center for comprehensive videos, articles, and other resources for all Tigo products.
- Page 2 ENTIRE OBLIGATION OF TIGO. THE CONTENTS OF THIS DOCUMENT SHALL NOT BECOME PART OF, OR MODIFY ANY CONTRACT BETWEEN, THE PARTIES. In no event will Tigo be responsible to the purchaser or user in contract, in tort (including negligence), strict liability or otherwise for any special, indirect, incidental, exemplary, reliance...
-
Page 3: Table Of Contents
Contents Overview ............................1 Safety ............................2 Install TS4s ........................... 3 Install the Tigo Access Point (TAP) ....................6 Design Considerations ........................ 6 Install Procedure ........................7 Install the CCA ..........................8 Design Considerations ........................ 8 Install Procedure ........................8 LED Status Indicators ....................... -
Page 4: Overview
Connect Advanced (CCA) hot spot to communicate with inverters and the cloud. This manual explains how to install TS4-A/M/O MPLE, TAPs, and the CCA. For instructions how to install TS4-A-F/2F MPLE used with the rapid safety shutdown (RSS) transmitter, visit the Tigo... -
Page 5: Safety
Overview Safety Tigo equipment must be installed and maintained by licensed personnel in accordance with the National Electrical Code and ANSI/NFPA 70 wiring methods. In addition: • Components must operate within the technical specifications listed in their datasheets. Failure to follow instructions herein may cause equipment damage not covered by the warranty. -
Page 6: Install Ts4S
≥30mm/1.2in. Frame thickness should be 1.8mm/.07in – 2.2mm/.085in. If using frameless modules, remove the clips and bolt the TS4 directly to the PV rail with M8 bolts and torque to 10.2Nm. No additional grounding is required. TS4-A with TAP and CCA Installation Manual | www.tigoenergy.com support@tigoenergy.com... - Page 7 3. Connect the shorter TS4 input leads to the PV modules. You must connect the shorter TS4 input leads to the PV modules before connecting to neighboring TS4s. Failure to do so can damage the TS4 units. TS4-A with TAP and CCA Installation Manual | www.tigoenergy.com support@tigoenergy.com...
- Page 8 PV rapid shutdown system (PVRSS) initiator. Wait 30 seconds after a rapid shutdown activation before disconnecting DC cables. • Disconnect individual TS4-A output cables from a string before disconnecting the • TS4-A input cables from the module junction box.
-
Page 9: Install The Tigo Access Point (Tap)
TAP and GATEWAY Communication Cable Installation for details. TS4-A-O MLPE used to optimize performance only and not monitoring or module level shutdown do not require a TAP or CCA. Complete all TAP connections before powering on the CCA. Design Considerations One TAP can communicate with up to 300 TS4s when placement guidelines are followed. -
Page 10: Install Procedure
120Ω terminating resistor. 4. At the last TAP, leave the terminating resistor in the right-side terminal block. 5. Attach the TAP to the PV module frame using its metal mounting bracket. TS4-A with TAP and CCA Installation Manual | www.tigoenergy.com support@tigoenergy.com... -
Page 11: Install The Cca
Install the CCA Install the CCA A CCA and TAP enable monitoring and rapid shutdown. TS4-A-O MLPE used to optimize performance only do not require a TAP or CCA. Design Considerations A CCA should control all TS4s on all strings connected to a specific inverter or MPPT. Install the CCA near this inverter with access to AC power and the internet. - Page 12 Modbus Connected Devices (Inverters, Meters & Sensors). 4. Connect the power supply’s DC output leads to the CCA power terminals: Rail power supply: External power supply: Complete all communications connections before powering on the CCA. TS4-A with TAP and CCA Installation Manual | www.tigoenergy.com support@tigoenergy.com...
-
Page 13: Led Status Indicators
Error CCA cannot find all TS4s or cannot connect to the Tigo server. Use the Tigo Energy Intelligence (EI) app (available in the App Store or Google Play) to troubleshoot CCA issues. TS4-A with TAP and CCA Installation Manual | www.tigoenergy.com... -
Page 14: Commissioning
Commissioning Commissioning Perform system configuration and registration with a browser at https://ei.tigoenergy.com with the Tigo Energy Intelligence (EI) mobile app available in the App Store or Google Play. Final commissioning requires using the Tigo EI mobile app. Browser Mobile App •... -
Page 15: Specifications
Download comprehensive warranty information from the Tigoenergy.com Downloads (www.tigoenergy.com/downloads) page. Support If you have any questions about installing or maintaining Tigo equipment, visit the Tigo Help Center, email support@tigoenergy.com, or call: • North America (7 a.m to 6 p.m. Pacific Time): +1 408 402-0802 South America (Brazil): +55 21-991045050 •...


Need help?
Do you have a question about the TS4-A and is the answer not in the manual?
Questions and answers